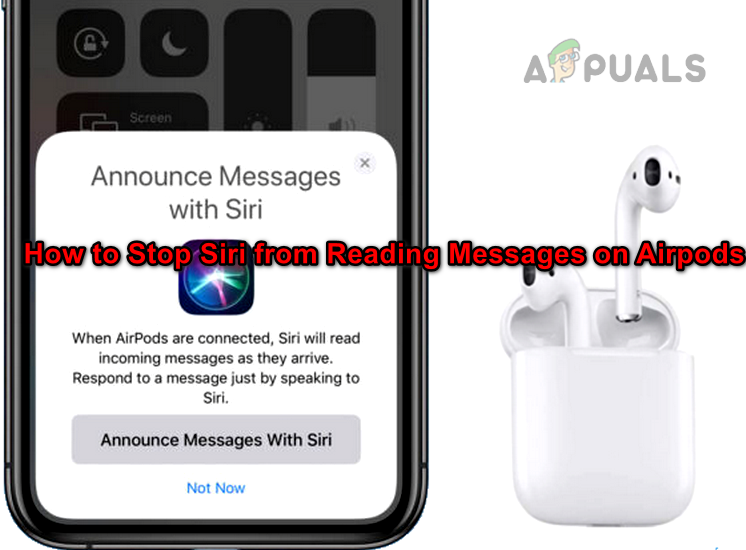
How to Stop Siri from Announcing Messages on AirPods?
 Reviewed by Muhammad Zubyan
Apple has equipped Siri with many interesting features. One such feature is reading messages when AirPods are connected to your Apple device and active. Despite its usefulness, sometimes you may not want to hear messages. For example, during a workout or listing to your favorite music. Moreover, when you are sharing your AirPods with someone, you will not want Siri to read your personal messages.
Siri can announce notifications for iMessage/messages, Reminders, calendar events, and supported third party apps (such as WhatsApp, Twitter, Snapchat, Slack, etc.). This feature is not enabled by default but you may have allowed it when pairing your AirPods. Additionally, an iOS update may also have enabled this feature.
Working Mechanism
When a new message is delivered, Siri will play a tone and then will read the sender’s name/message aloud. For a lengthy message, Siri will only announce the sender’s name and that you have got a message.
Methods to Disable Siri from Reading Messages on an iPhone/iPad
If you are one of those who want to disable reading messages or other notifications, we will guide you with the best options available. One point to remember is that you will need an iPhone with iOS 14.3 or later or iPadOS 14.3 or later, otherwise, some of the methods discussed below may not work.
There are many methods that can be used to disable Siri from reading messages but the decision to use the method is on you, depending on your requirements. Keep in mind that before reading messages, Siri announces notification, so, in many cases, editing the notification settings will do the trick.
Also, some options will be only available when your AirPods are connected to the paired device, otherwise, these options may be greyed out or not visible at all.
1. Disable Through Notifications Settings
To disable the announcement of Messages on AirPods and CarPlay:
- Go to Settings > Notifications > Siri > Announce Notifications.
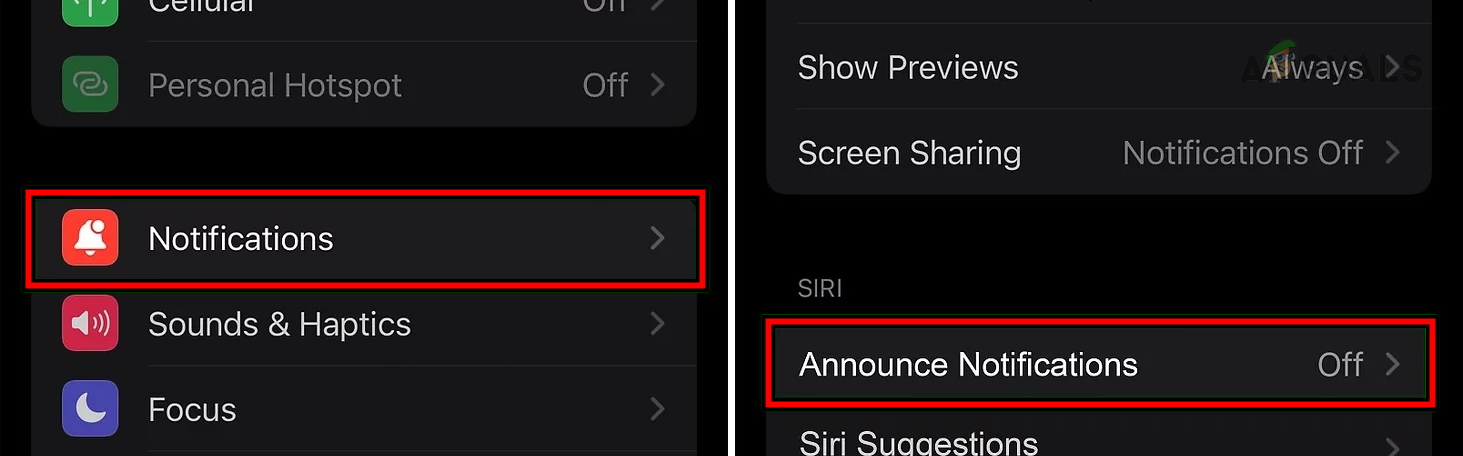
Open Announce Notifications in the iPhone Settings - Near the end of the screen, open Messages.
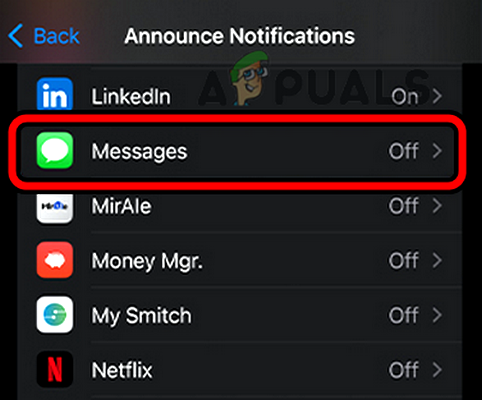
Disable Announce Notifications for Messages - Disable Announce Notifications.
To disable the announcement of Messages on AirPods only:
- Launch Settings of your iPhone and go to Notifications.
- In the Siri section, select Announce Notifications and in the Announce When Connected To section, disable Headphones.
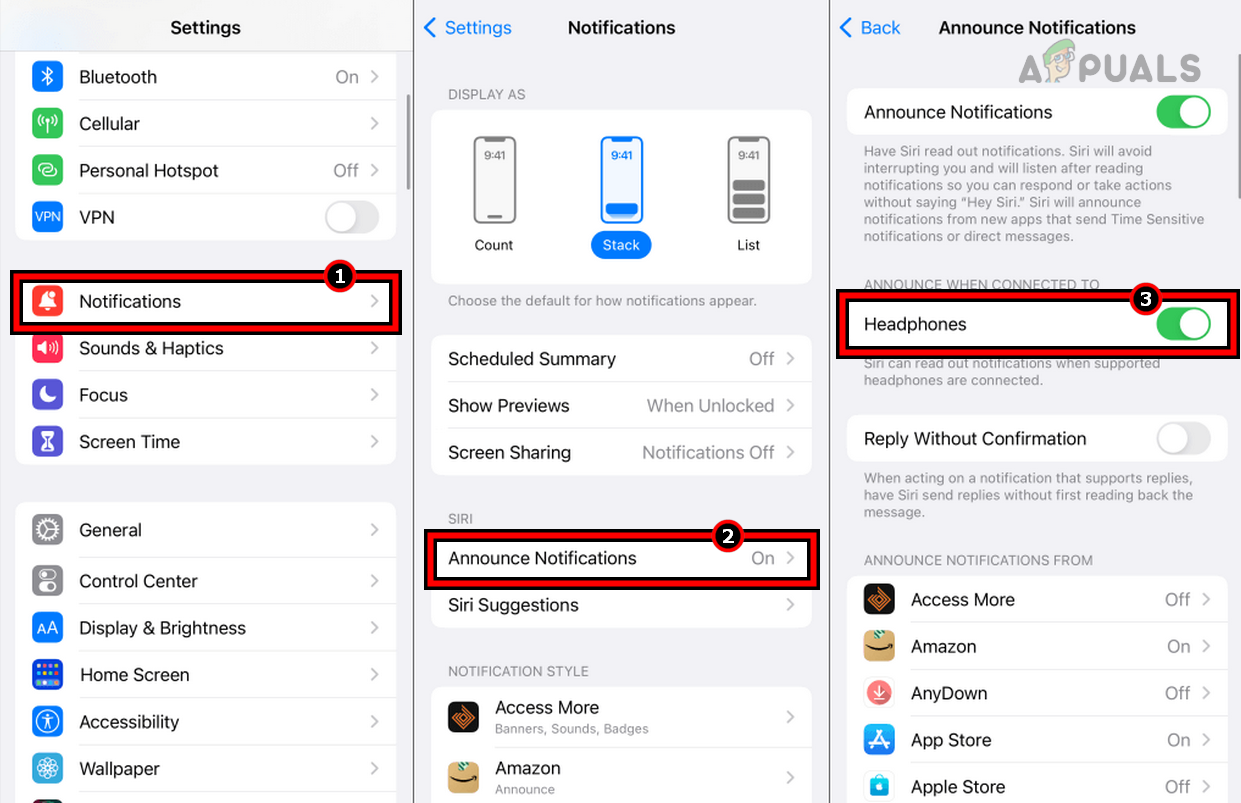
Disable Headphones in the Announce Notifications Menu
To disable Announce Notifications altogether:
- Go to Settings > Notifications > Announce Notifications.
- Disable Announce Notifications.
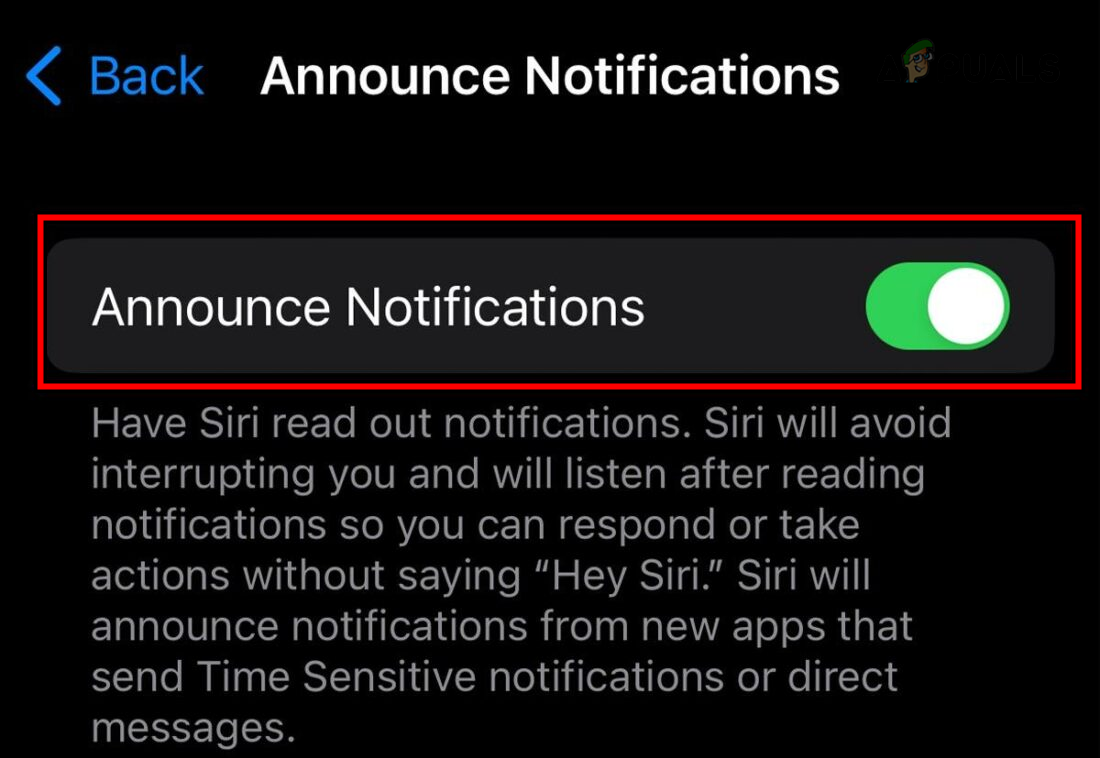
Disable Announce Notifications
2. Disable Through Siri Settings
- Launch the iPhone Settings and go to Siri & Search > Announce Notifications.
- In the Announce When Connected To section, disable Headphones.
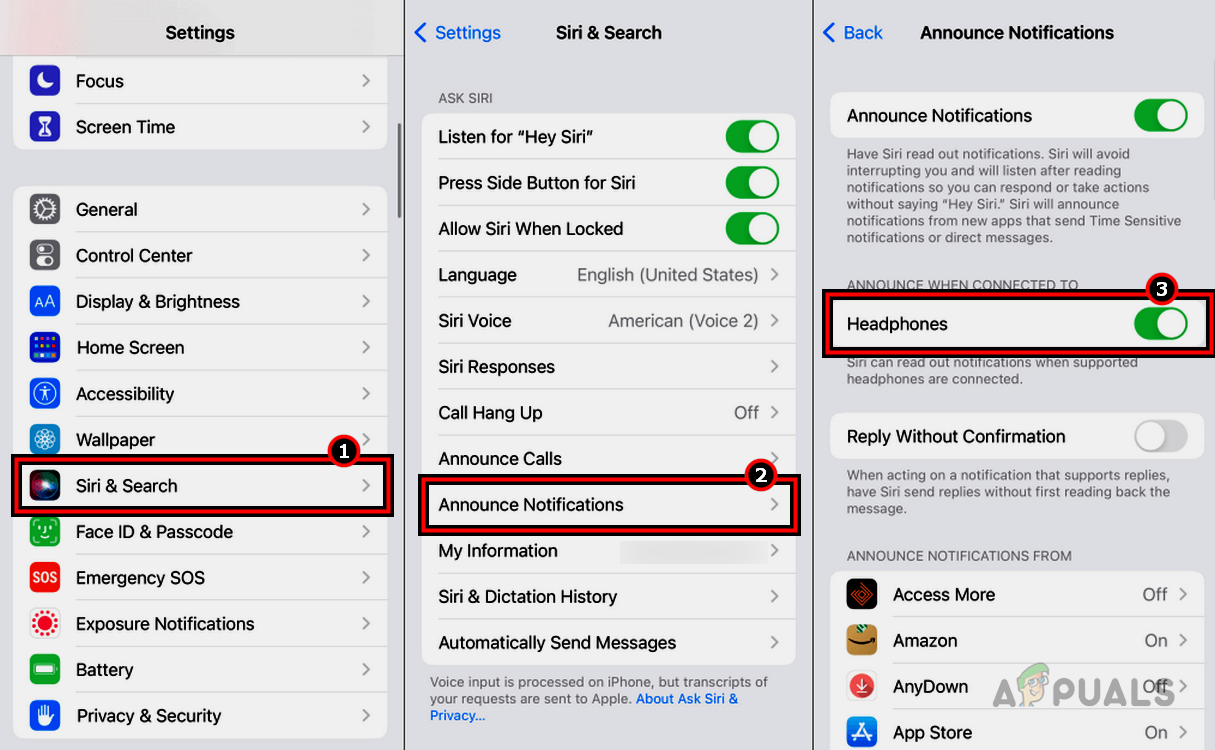
Disable Headphone in the Announce Notifications Menu of Siri & Search Settings on the iPhone
You can also completely disable announce notifications
3. Disable Through Control Center
- Swipe down on the iPhone screen to open Control Center.
- Tap on the Announce Notifications icon (red bell icon) and the notification announcement will be disabled.
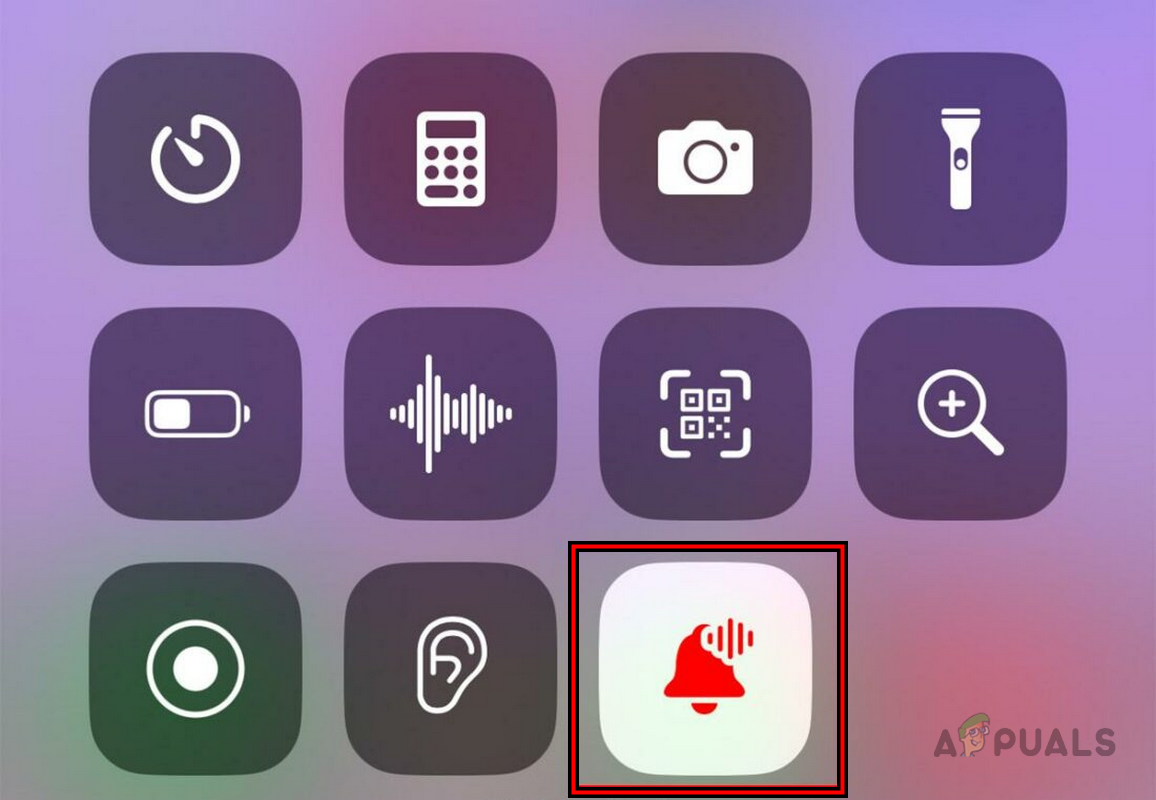
Disable Announce Notifications by Siri in the iPhone’s Control Center
This will remain disabled until enabled back by you.
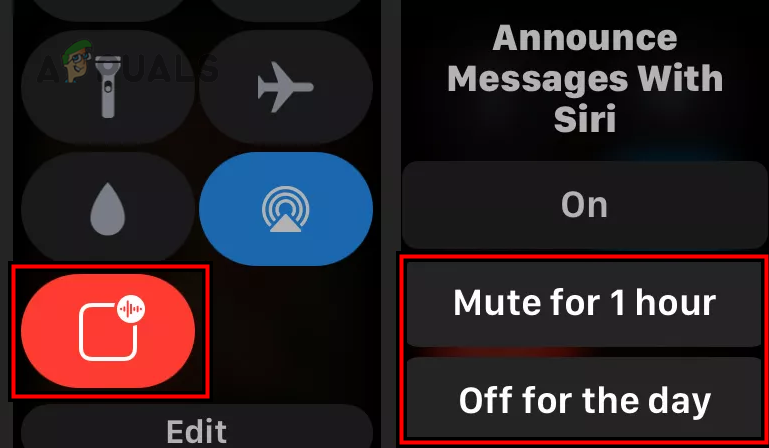
Disable For an Hour or a Day
- If you want to disable Announce Notification for an hour, open the Control Center and tap/hold the red bell icon.
- In the pop-up shown, select Mute for 1 Hour or Off for the Day.
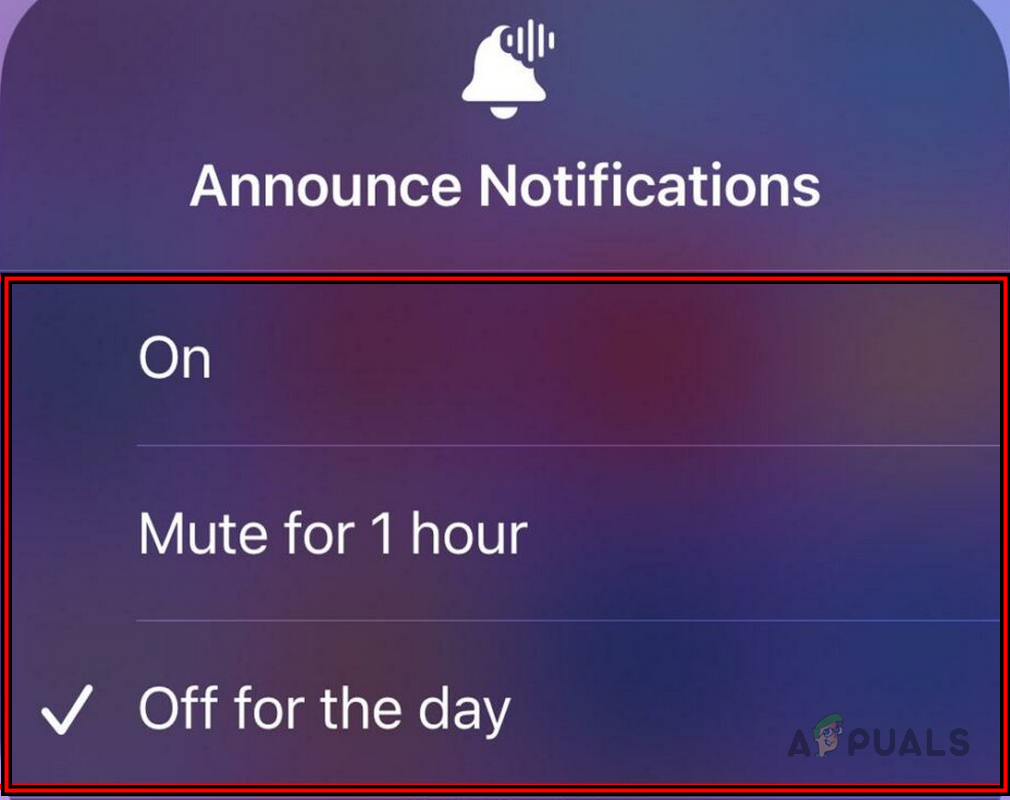
Disable Announce Notifications for an Hour or a Day
Remove Announce Notifications Tile from the Control Center
If you really do not like Announce Notifications, removing its tile from the Control Center will also disable it.
- Launch the iPhone Settings and go to Control Center.
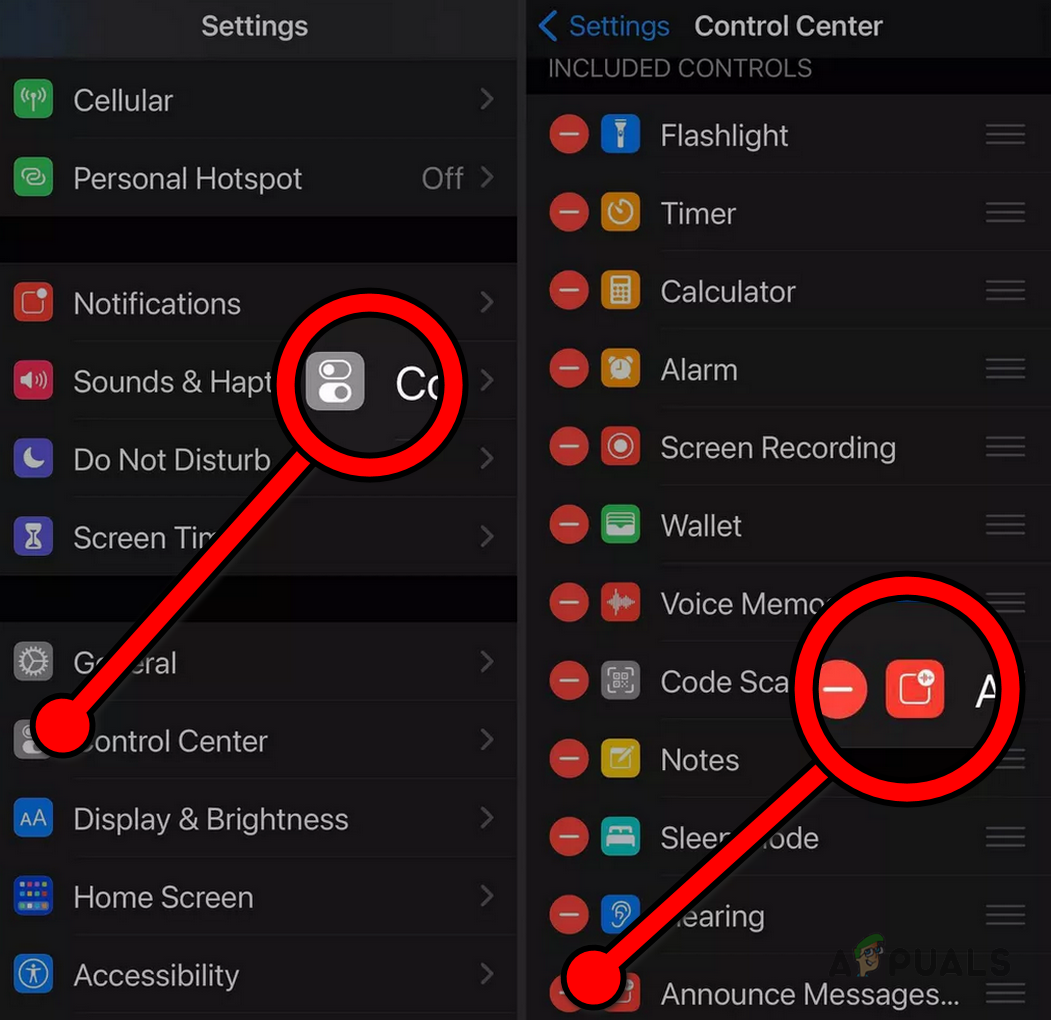
Remove Announce Messages from the Control Center - Next to Announce Messages, tap on the red minus sign.
- Enable DND: Enable Do not Disturb and Siri will stop reading messages on AirPods as well as on the device.
- Disable Siri: If you are not a Siri-person, disabling it will stop it from reading the messages on AirPods and the device.
- Take Out One AirPod: Take out one Airpod from your ears and Siri will stop reading messages.
- Stop Siri During Message Reading: If you forgot to disable Siri from reading messages and it starts reading a message, simply tap on an AirPod and Siri will stop. You can also say Stop Siri, Cancel Siri, or more fiercely, Shut Up Siri (remember she will “mind it”).
- Unpair AirPods: If you unpair your AirPods from your phone, Siri will not be able to read messages to AirPods.
Disable Siri from Reading Messages on an Apple Watch
If your iPhone or iPad is not nearby, Siri can use your Apple Watch to read messages on AirPods. No need to worry, you can disable this on the Apple Watch as well.
There is one caveat, this will only work with Apple AirPods but may not work with 3rd party AirPods.
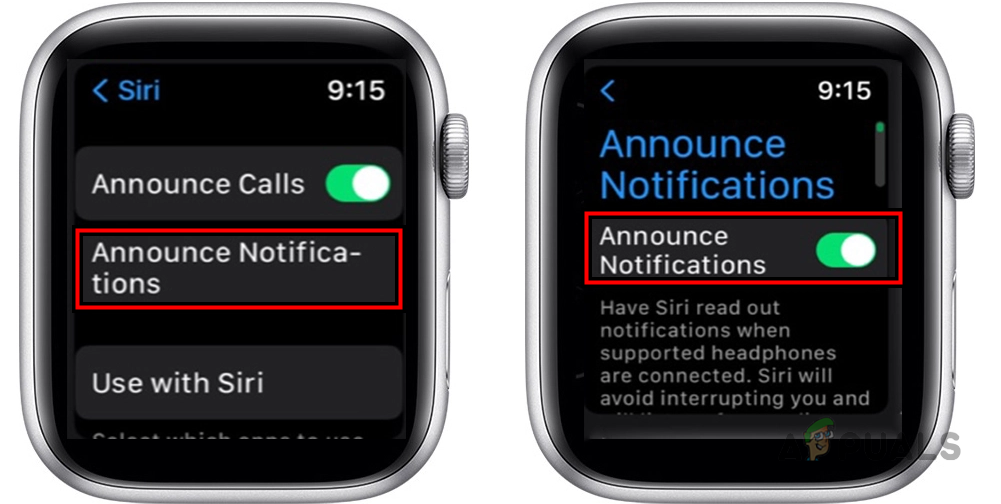
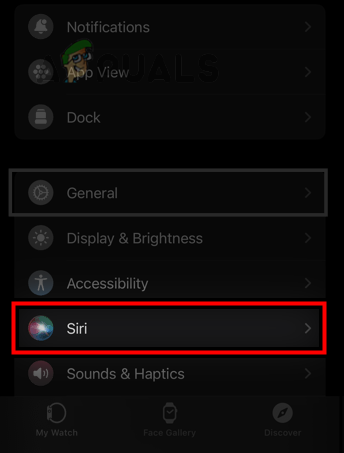
1. Through Settings
- Open Settings > Siri > Announce Notifications.
- Disable Announce Notifications.
Disable Announce Notifications on the Apple Watch
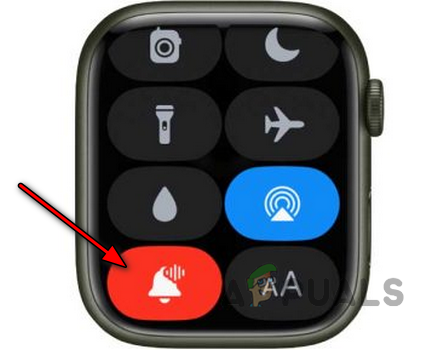
2. Through Control Center
- Swipe up on the Apple Watch screen to open the Control Center and tap on Announce Messages with Siri.
- This will disable Siri’s announcement of messages.
Disable Siri’s Announce Notifications in the Control Center of the Apple Watch
If you tap and hold the Announce Messages with the Siri icon, you will get the option of disabling the feature for an hour or a day.
3. Through The Apple Watch App
- Launch the Apple Watch app on your paired iPhone.
- Go to the My Watch tab and go to Settings > Siri > Announce Notifications.
Open Siri in the My Watch Tab of the Apple Watch App - Disable Announce Notifications.
Other methods discussed in the iPhone or iPad section, are also valid for Apple Watch such as enabling DND, disabling Siri, etc.
Customize Announce Notifications Settings Across Different Apps
As in many cases discussed above, we have disabled Notifications to stop Siri from reading messages on AirPods but you may want to get notifications for some other apps. To do so:
- Navigate to Settings > Notifications > Announce Notifications.
- Select the required app and enable or disable notifications.
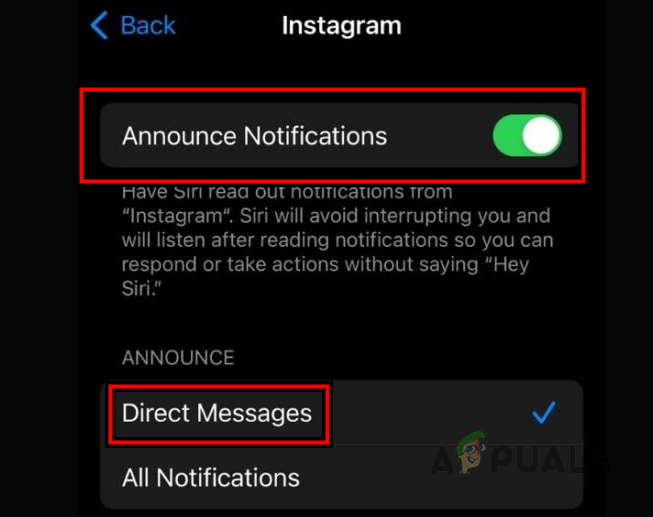
Enable Announce Notifications for Instagram and Change its Announce Type to Direct Messages
You can even customize what notifications Siri should read on AirPods. This feature is app-based i.e., it will work differently for different apps. For example, you can customize Announce Notifications for Instagram for Direct Messages only.
Re-Enable Siri to Read Messages
For an hour or day case, Siri will automatically start reading messages when the time is over. In other cases, simply follow the steps above and re-enable the feature.
Reviewed by Muhammad Zubyan