Forgot iPhone Passcode? Here Is How To Reset
If you have forgotten your iPhone password, there is still hope of getting it unlocked. The worst-case scenario is when you get your iPhone disabled by entering the wrong password six times. So, try not to enter the wrong credentials many times.
With Apple’s encryption features, it’s impossible to get inside an iPhone when you don’t know the passcode. The only way is to erase/restore your device completely and bring it back to brand-new condition. You can do so by using Recovery Mode, iTunes, and iCloud.
All of these methods involve erasing all your data including the screen passcode. However, you can recover your personal data if you were lucky enough to have made a backup before getting locked out of your iPhone.
1. Reset Passcode Via Recovery Mode
Recovery Mode erases all the data on your device, including the passcode. The method for putting your device in recovery mode varies depending on your model.
Prerequisites:
- As a very first step, power off your iPhone before proceeding.
- Connect it to a PC/Mac and open iTunes or Finder on your desktop
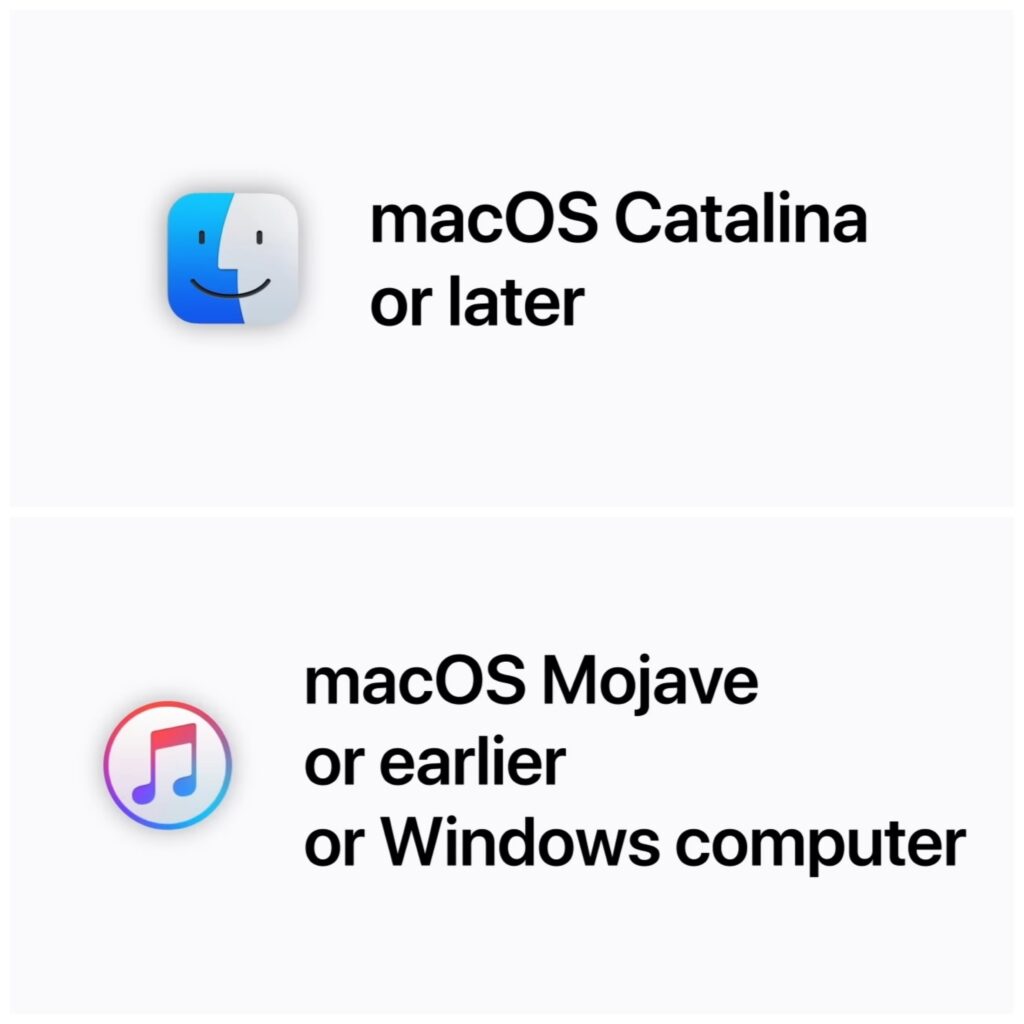
- For Windows or macOS Mojave (and earlier), open iTunes. For macOS Catalina (and above), open Finder.
- If you had iTunes/Finder already running on your desktop, relaunch the software to proceed.
- Then press and release the following button combinations rapidly.
Reset iPhone using iTunes or Finder
For iPhone 8 and newer: The following steps apply to all iPhones with the Face ID feature (iPhone 8 and later models) and second-generation iPhone SE.
- Use a lightning cable to connect your iPhone to your PC/Mac and open iTunes or Finder.
- Press and release the volume up button.
Press and quickly release the volume up button - Immediately press and release the volume down button.
Press and quickly release the volume down button. - Press and hold the power button even after you see the Apple logo.
Press and hold the power button. - Release the power button when Recovery Mode shows up on the screen.
For iPhone 7 and 7 Plus: The following method is applicable to iPhone 7, 7 Plus, and seventh-generation iPod touch.
- Connect your iPhone to a PC/Mac and open iTunes or Finder.
- Press and hold the power button and volume down button simultaneously.
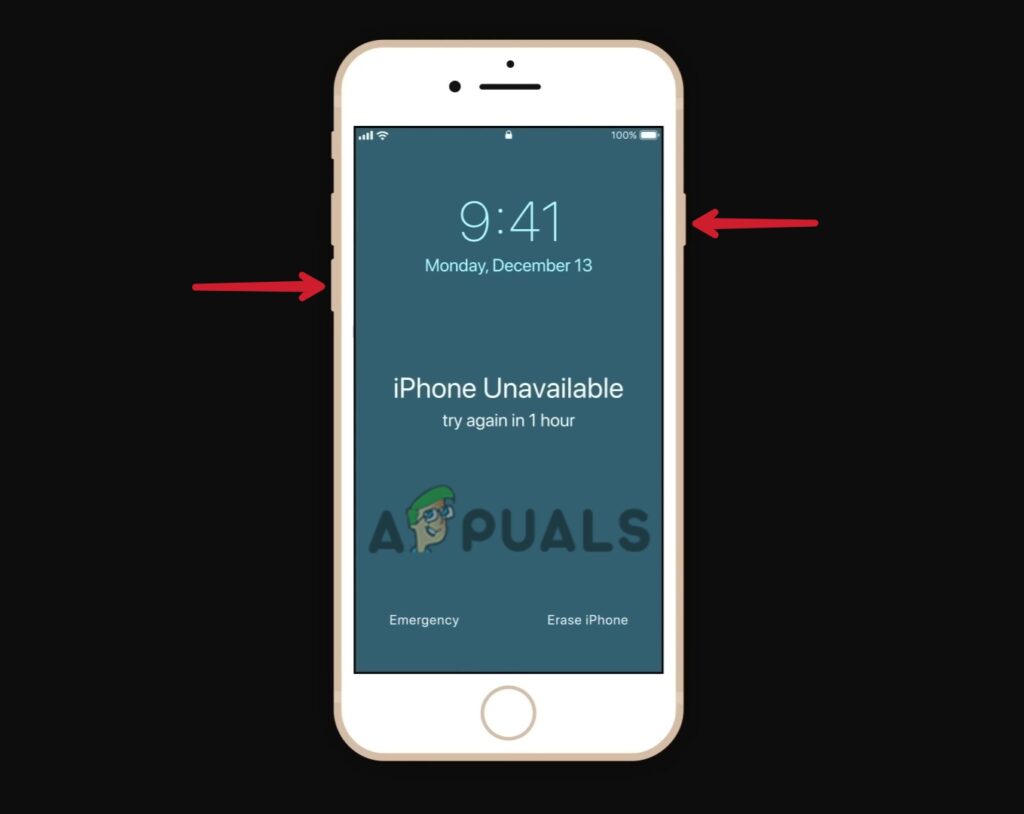
Press and hold both, the volume down button and power button at the same time - Don’t release buttons even when the Apple logo appears on the screen.
- Release the buttons when you see Recovery Mode on the screen
For iPhone 6 and earlier models: The following steps are applicable to iPhone 6 and older models, sixth-generation iPod touch and older models, and first-generation iPhone SE.
- Connect iPhone to the computer and open iTunes or Finder.
- Long press and hold the power button and home button at the same time.

Press and hold the home button and power button simultaneously - Don’t release the buttons when you use the Apple logo.
- Release the buttons once you see Recovery Mode on the screen.
Note: Right after 15 minutes, iOS automatically exists recovery mode and you’ll have to perform the above button combinations again to re-enter recovery mode.
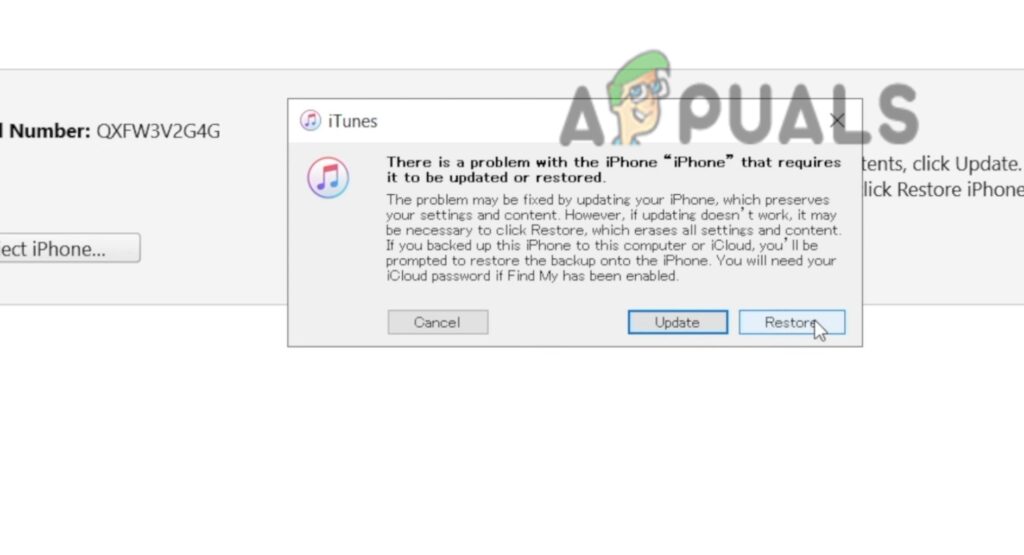
Once in the Recovery Mode, Restore your iPhone.
- Click the iPhone icon at the top left corner of your computer screen (if using iTunes). Click your phone’s name in the left sidebar (if using Finder).
- On the next screen, you’ll see two options; Update and Restore. Click Restore to reset the screen passcode.
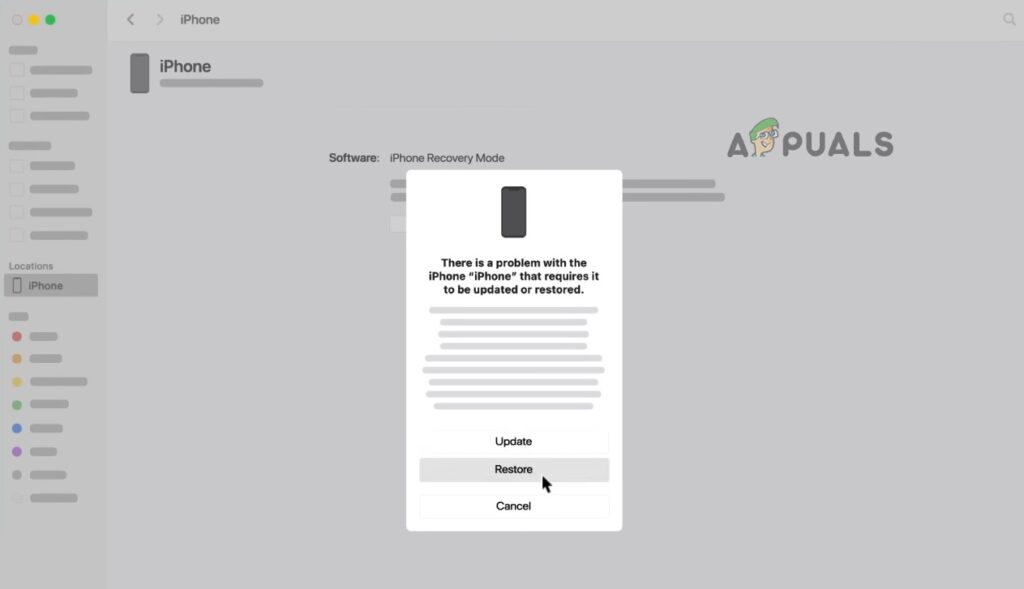
Restore iPhone with iTunes/Finder - Your iPhone will restore to its brand-new condition and iPhone will exit Recovery Mode automatically.
Note: After the Restore, all data will be lost and can not be recovered if you did not set a backup previously.
2. Reset Passcode Via iTunes
Using iTunes is the most convenient way of resetting the passcode on an iPhone. But only if you had your iPhone already synced with iTunes. This way, You can erase the device including the screen password without losing personal data. Here is how:
- Connect your iPhone to the computer.
- Open iTunes and if it asks for a passcode, put your phone into recovery mode.
- In a few moments, iTunes will start backing up your iPhone after the sync.
- Once the backup is done, hit the Restore iPhone option.
Click Restore to reset the iPhone passcode - After a successful Restore, click Restore from iTunes backup on the set-up screen.
- Now select the latest backup to restore your data.
3. Reset iPhone Via iCloud
If you have iCloud logged in to your iPhone and the Find My feature is also enabled, you can reset the passcode quite easily. Make sure your iPhone has a stable internet connection and you can access the verification code.
The two-factor authentication can make this method a bit complicated. When you log in to your iCloud through any other device, Apple sends a verification code to the phone number linked with your iCloud account. Probably, you’ll get the code on your locked iPhone.
If you did not set up two-factor authentication or you have linked another number to which you have access, you can reset the passcode for sure.
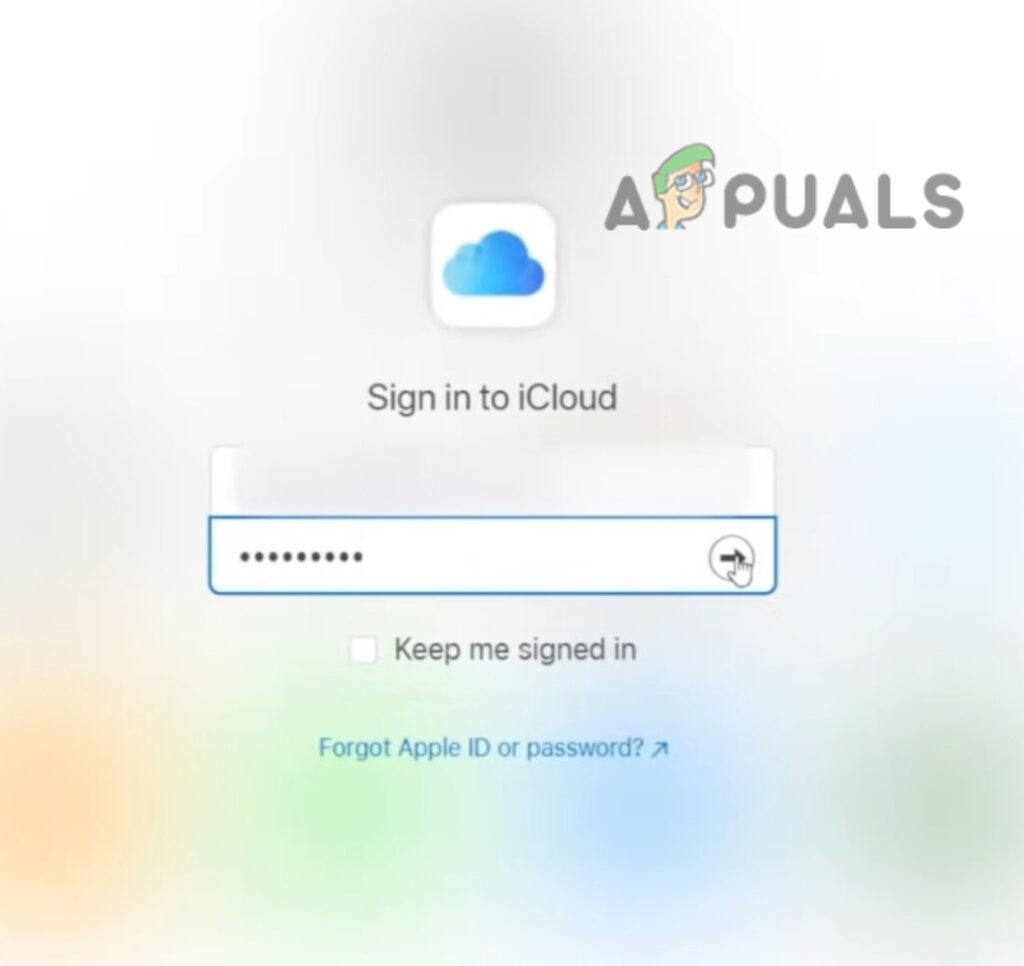
- Log in to your iCloud account on any device.
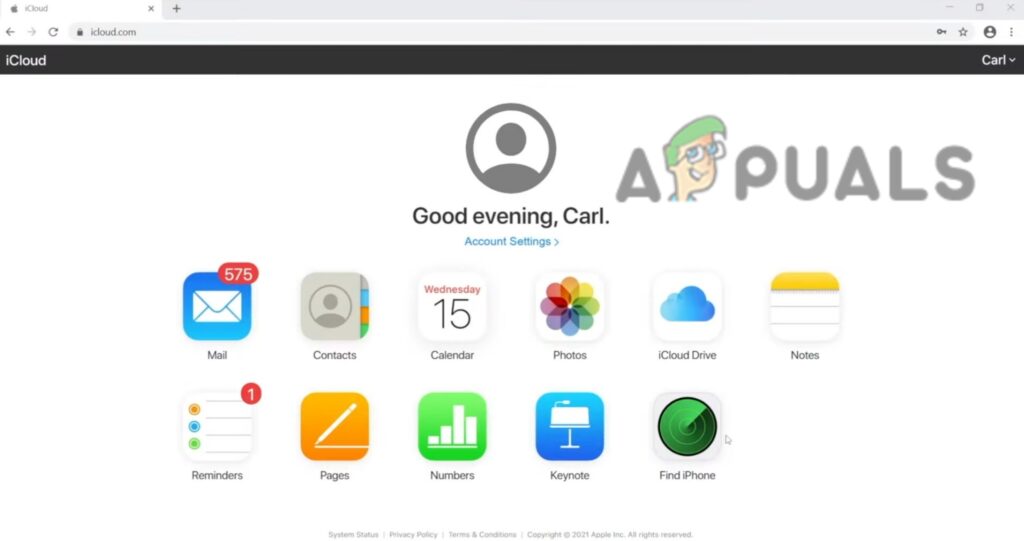
Enter your iCloud password - Go to the Find iPhone feature.
Go to Find iPhone to erase the device - Click All Devices and select your iPhone.
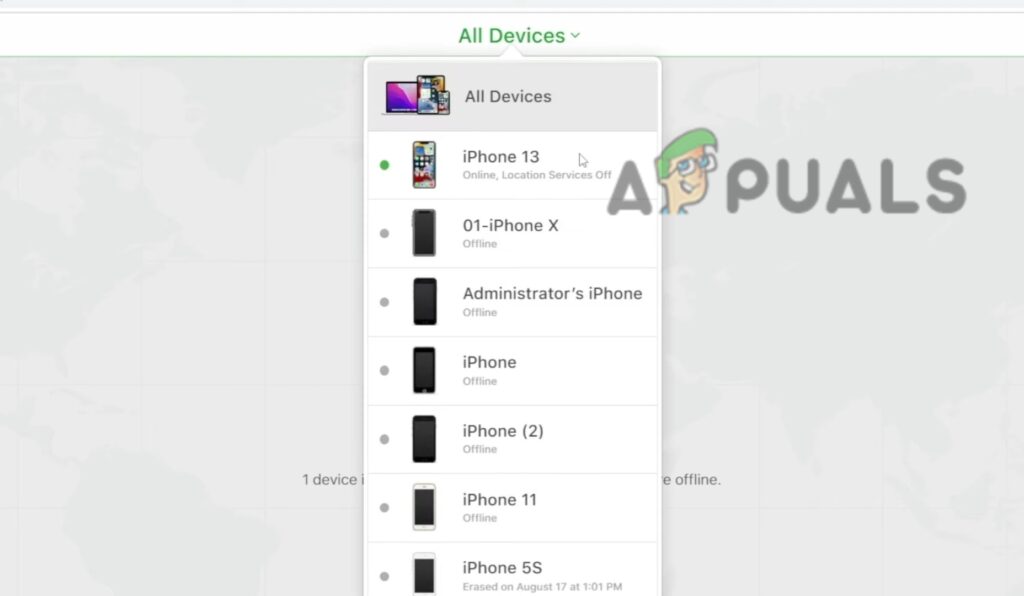
Select your iPhone to reset the passcode - Now hit the Erase iPhone option.
Enter the Apple ID password to Erase the device including the screen passcode
There you go! You have successfully eased the device including your screen passcode.
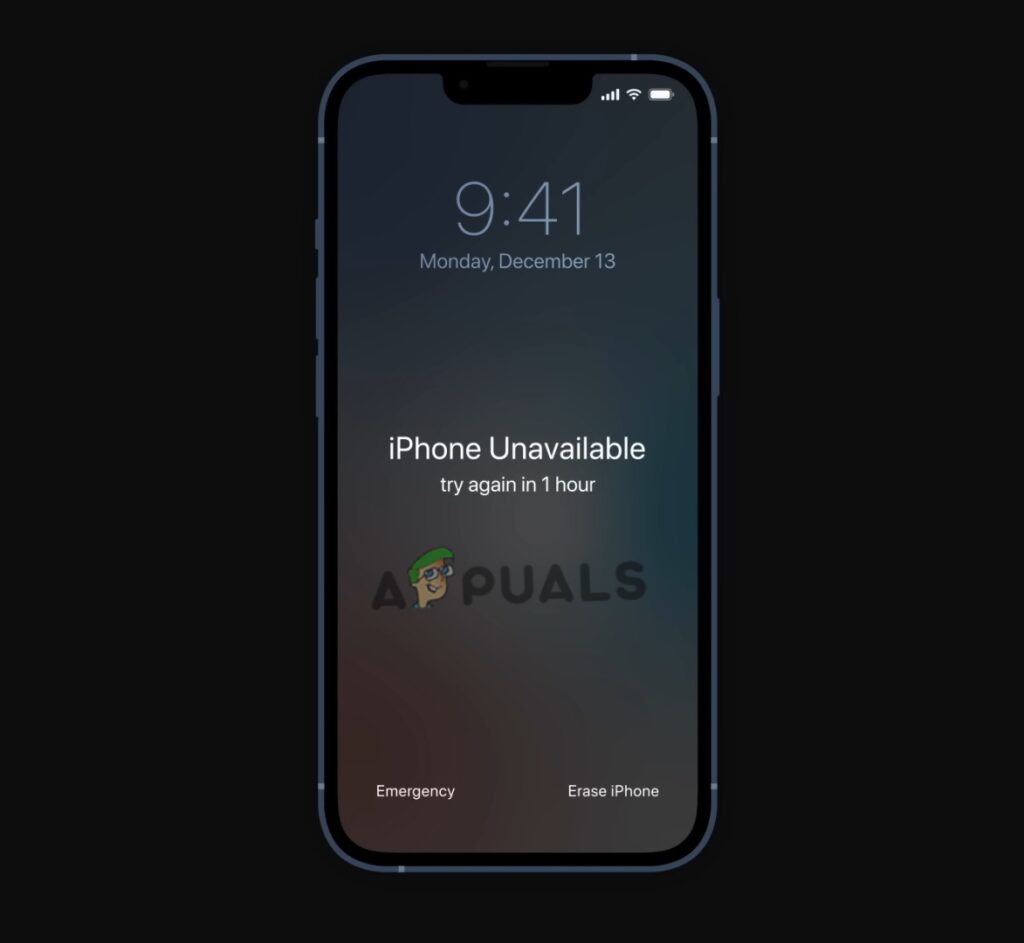
Reset Passcode When iPhone is Disabled
If you enter the wrong passcode too many times, your iPhone will be disabled. There you will see the Erase iPhone option on the screen. You can reset the passcode wirelessly using the Erase iPhone feature. Later, you can restore your data from iCloud or your computer. If you did not back up your iPhone, there is no chance of data recovery.
The following method applies to all iPhones with iOS 15 and above. Before getting started, make sure you remember your Apple ID logins and the device is connected to the internet.
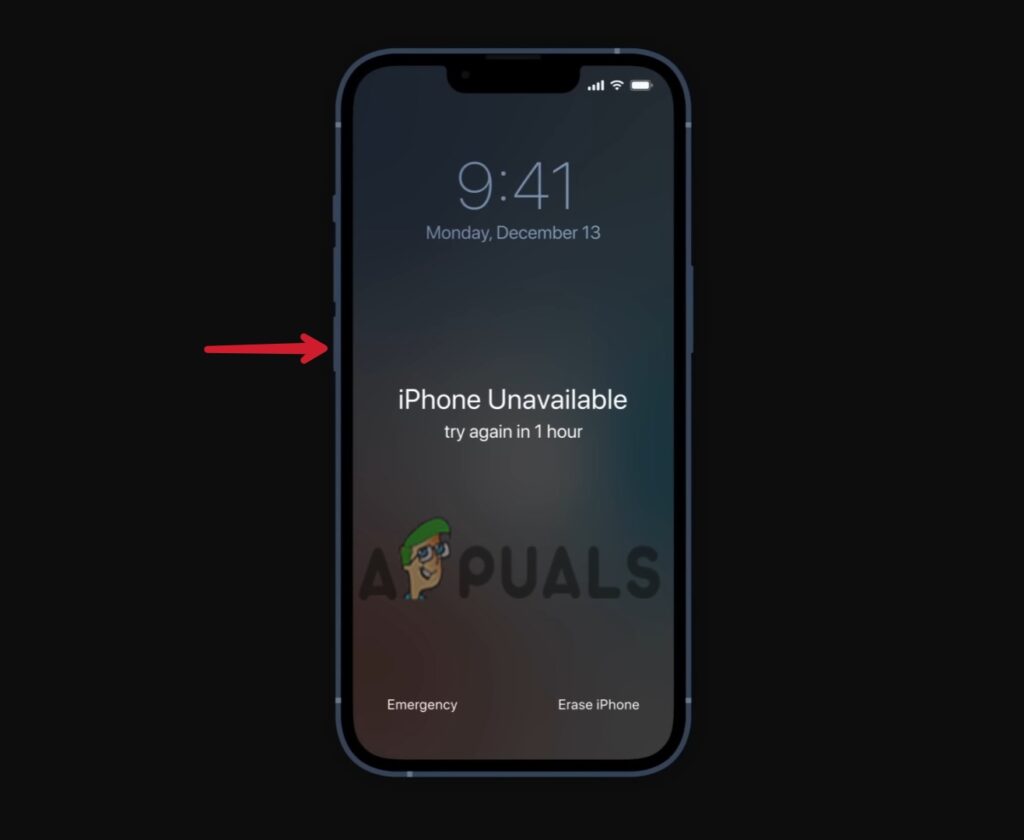
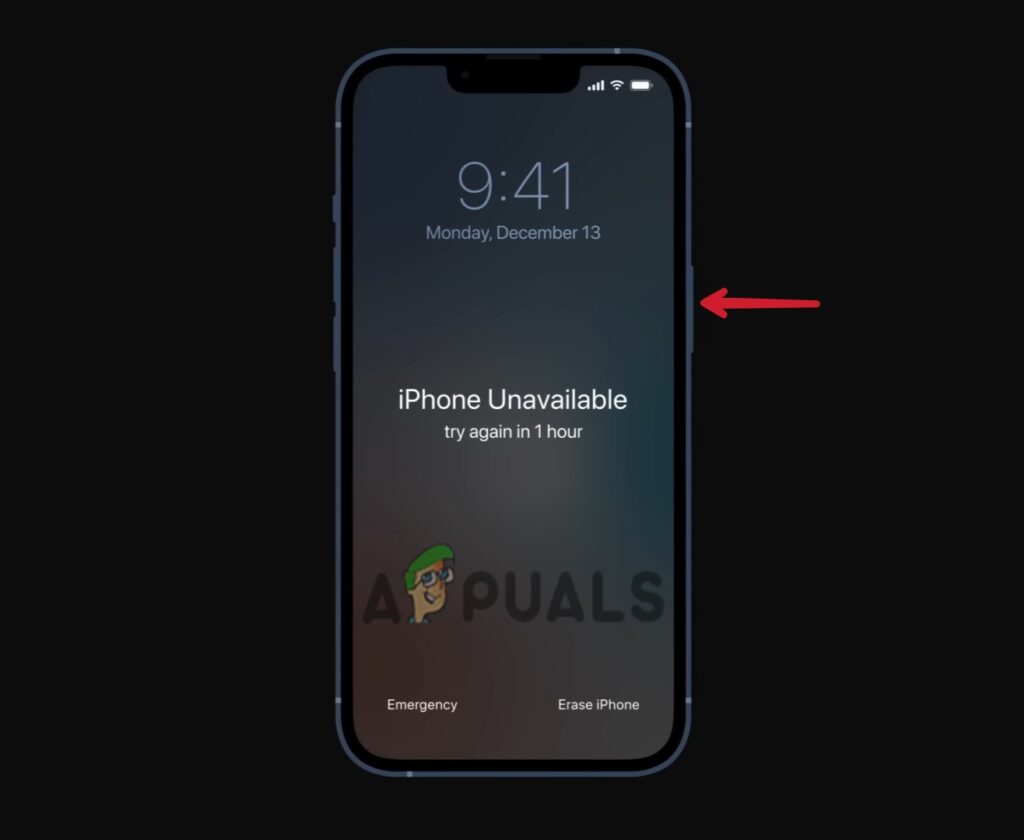
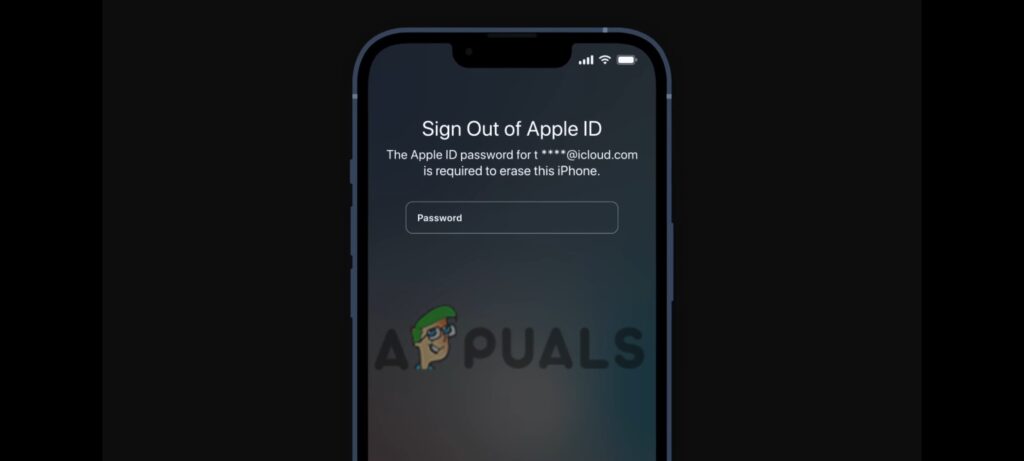
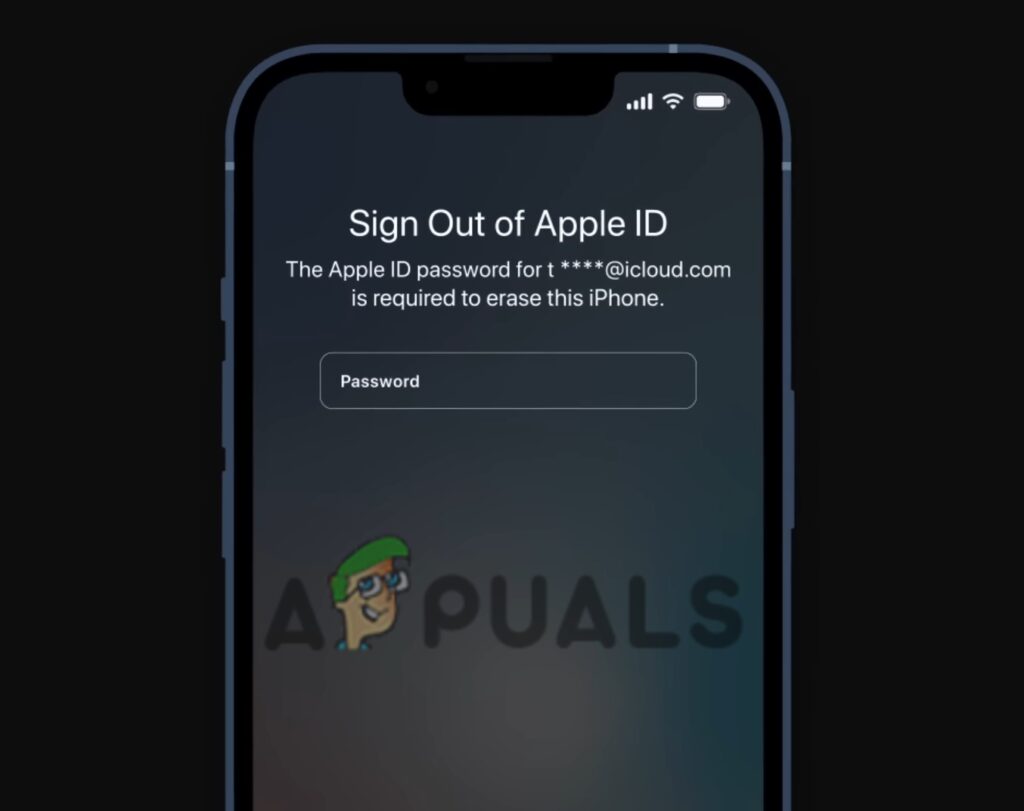
- When your iPhone is disabled, tap Erase iPhone at the bottom right corner of the screen.
Tap on the Erase iPhone option. - On the next screen, enter your Apple ID password to erase your device.
Enter the Apple ID password to Erase the device including the screen passcode - Set up your iPhone as a brand new one or restore the backup (if you have any).
What To Do After Resetting The Password?
After resetting the passcode, you can open your iPhone and set it up like when you first pulled it out of the box. Here, you have a few options to go with:
Create a new set-up: Create a brand-new setup for your iPhone if you do not want to (or are unable to) recover any data and want to start over with your iPhone.
Restore your iPhone using a backup: If you have a backup of your data on iTunes or iCloud, and wish to restore it, this is the best option.
Download the iPhone’s content again: Almost anything you have purchased from iTunes and Apple Books can be redownloaded to your device even if you did not have a backup.