How to Fix Blurry Pictures on iPhone in 5 Different Ways
 Reviewed by Huzaifa Haroon
- Common causes include being out of focus, shaky camera, motion blur, and dirty lens. Solutions involve adjusting focus, stabilizing the camera, increasing shutter speed, and cleaning the lens.
- Use online tools like PicWish, third-party apps like Adobe Lightroom, or the iPhone's Photos app. These tools can enhance sharpness and clarity, with varying degrees of effectiveness.
- Keep the lens clean, use focus mode, ensure good lighting, and consider using action modes like burst shots. Proper handling and camera settings are crucial for clear photos.
Have you ever snapped a photo from far away or while moving, only to find it all blurry? It’s common, even with the iPhone’s top-notch cameras. Sometimes, pictures don’t turn out sharp, but there’s a fix.
You can use photo editing apps to clear up those blurry shots. Today, there are plenty of these apps available that can transform blurry images into crisp ones.
In this article, we’ll guide you through different types of blurry pictures on your iPhone, show you ways to make them clear again using the iPhone’s Photos app, online tools, or third-party apps, and even share tips on avoiding blurry pictures in the future. Stick around to turn those blurry photos into memories worth keeping.
Table of Contents
Types of blurry pictures on iPhone
Before moving on, it’s necessary to understand the main types and causes of blurry iPhone images. Among the most typical are:
1. Out of focus

When you take a photo that’s not quite sharp, this happens when your camera doesn’t focus on your subject. It could be due to dim light, a smudged lens, or just low contrast. You can fix this by tapping your iPhone screen to focus where you want or using the focus lock feature to keep the camera steady on a particular spot.
2. Shaky camera

If your hands shake while snapping a picture, especially in darker settings, your photo might blur. This is because the camera needs more time to capture the image, and any movement can blur it. The trick? Hold your iPhone with both hands and use a tripod or a remote clicker to keep it stable.
3. Motion blur

This one happens when what you’re photographing moves too fast, especially in low light. The camera’s shutter stays open longer, making any movement blur. To avoid this, try speeding up the shutter (increase ISO to compensate for the low light from a high shutter speed) or use burst mode to take a bunch of shots quickly. That way, you can pick the clearest one later.
4. Dirty lens

A simple but often overlooked cause is a dirty lens. Dust or fingerprints can mess with the camera’s focus. Regularly wipe your iPhone’s lens with a microfiber cloth or a lens cleaner to keep your photos clear.
How to unblur photos on iPhone

While iPhones don’t have a built-in tool to unblur photos, you can slightly improve sharpness using the iPhone’s photo editor. For significant fixes, the best options are online tools or third-party apps. They can clear up various blurs like grainy, soft, motion, and lens blur, except for intentionally edited blurs.
1. Use an online tool to fix blurry pictures on iPhone
You can easily fix blurry photos using free online tools and do it all directly from your iPhone. Generally, we suggest being careful about uploading your iPhone photos online due to privacy concerns. But some online sites are safe and trusted for this purpose.
Recommended: PicWish
If you want to make your blurred photos look clear and new, PicWish is an image sharpener that can help refresh your old photos, making them crisp and beautiful. Here’s how to use PicWish to revive your blurred pictures:
- Visit PicWish’s unblur feature page on your favorite browser. Once there, tap “Upload Image.”
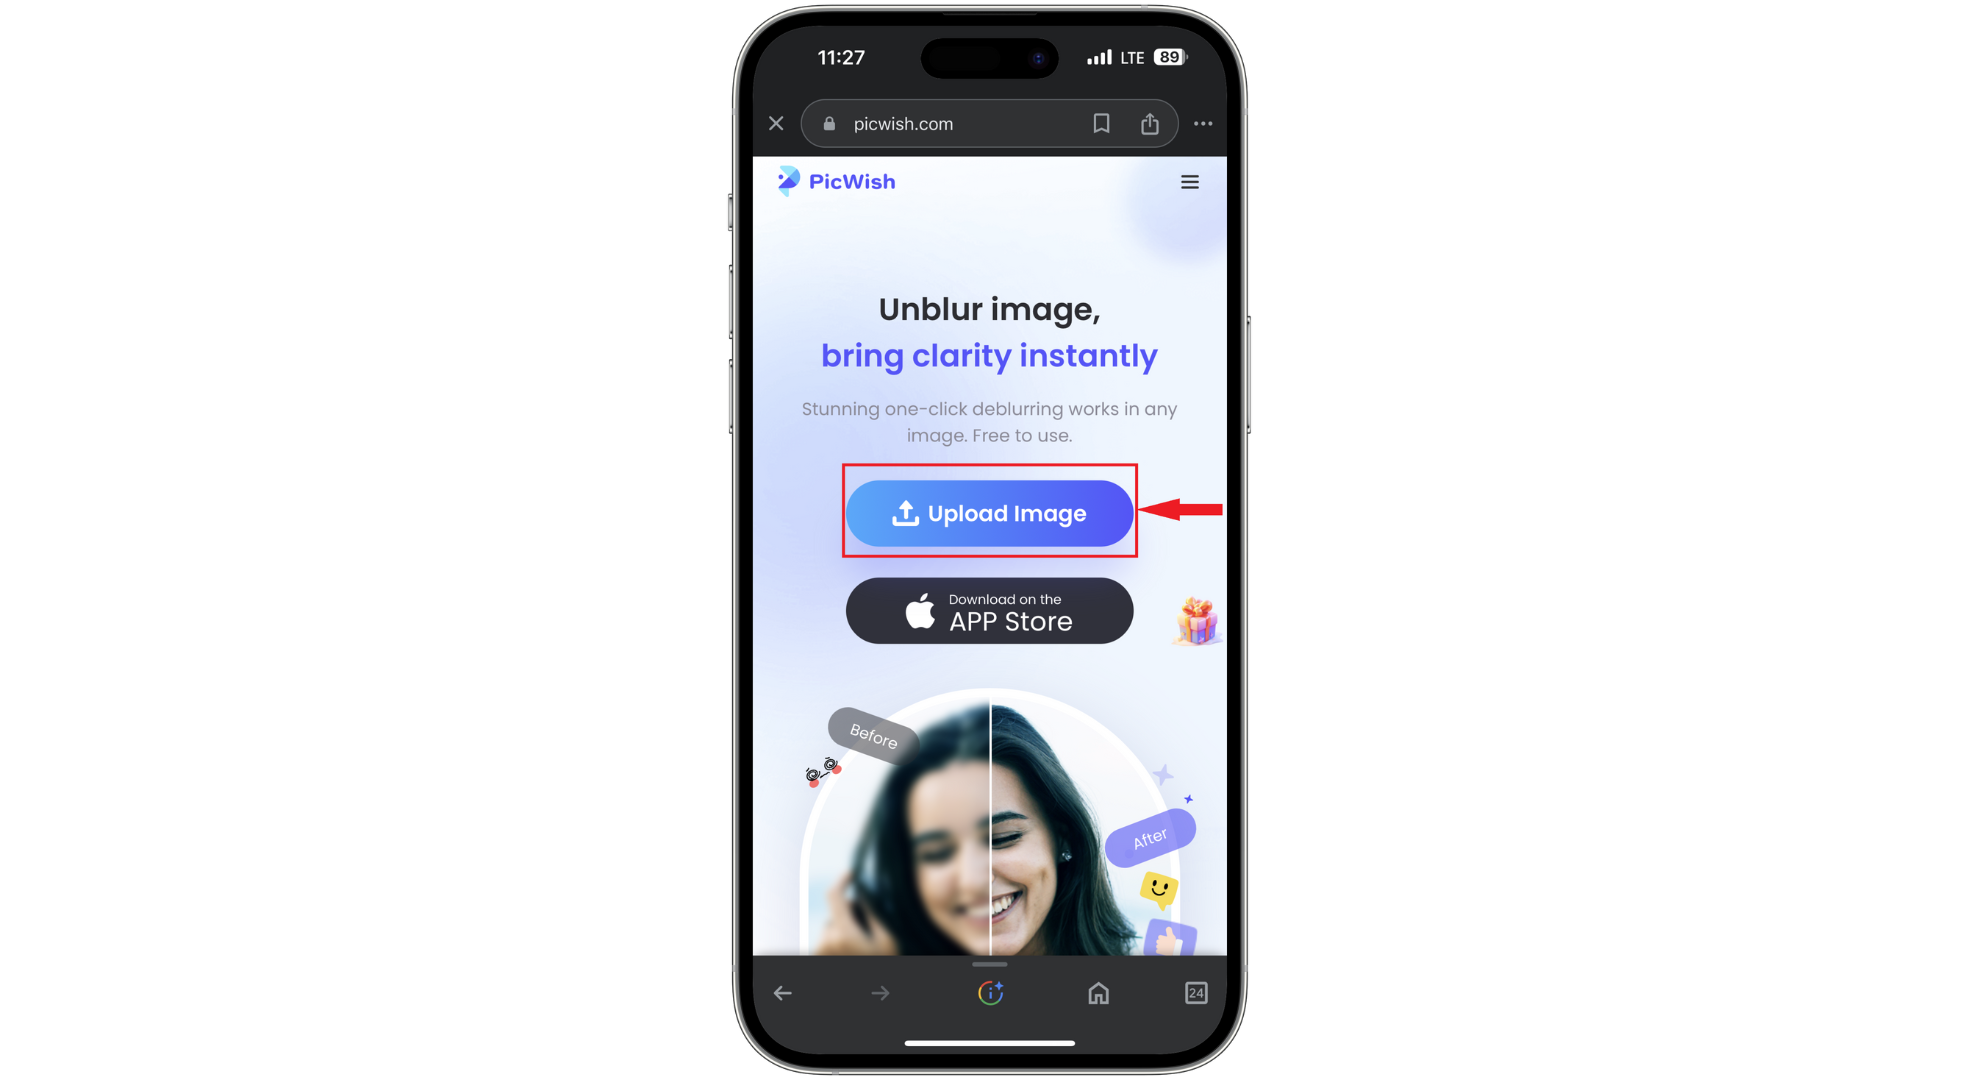
Tap on Upload Image - Follow the on-screen instructions to pick the photo you want to fix.

Pick the photo you want to fix - After selecting your photo, tap “Done” to upload it to the site.
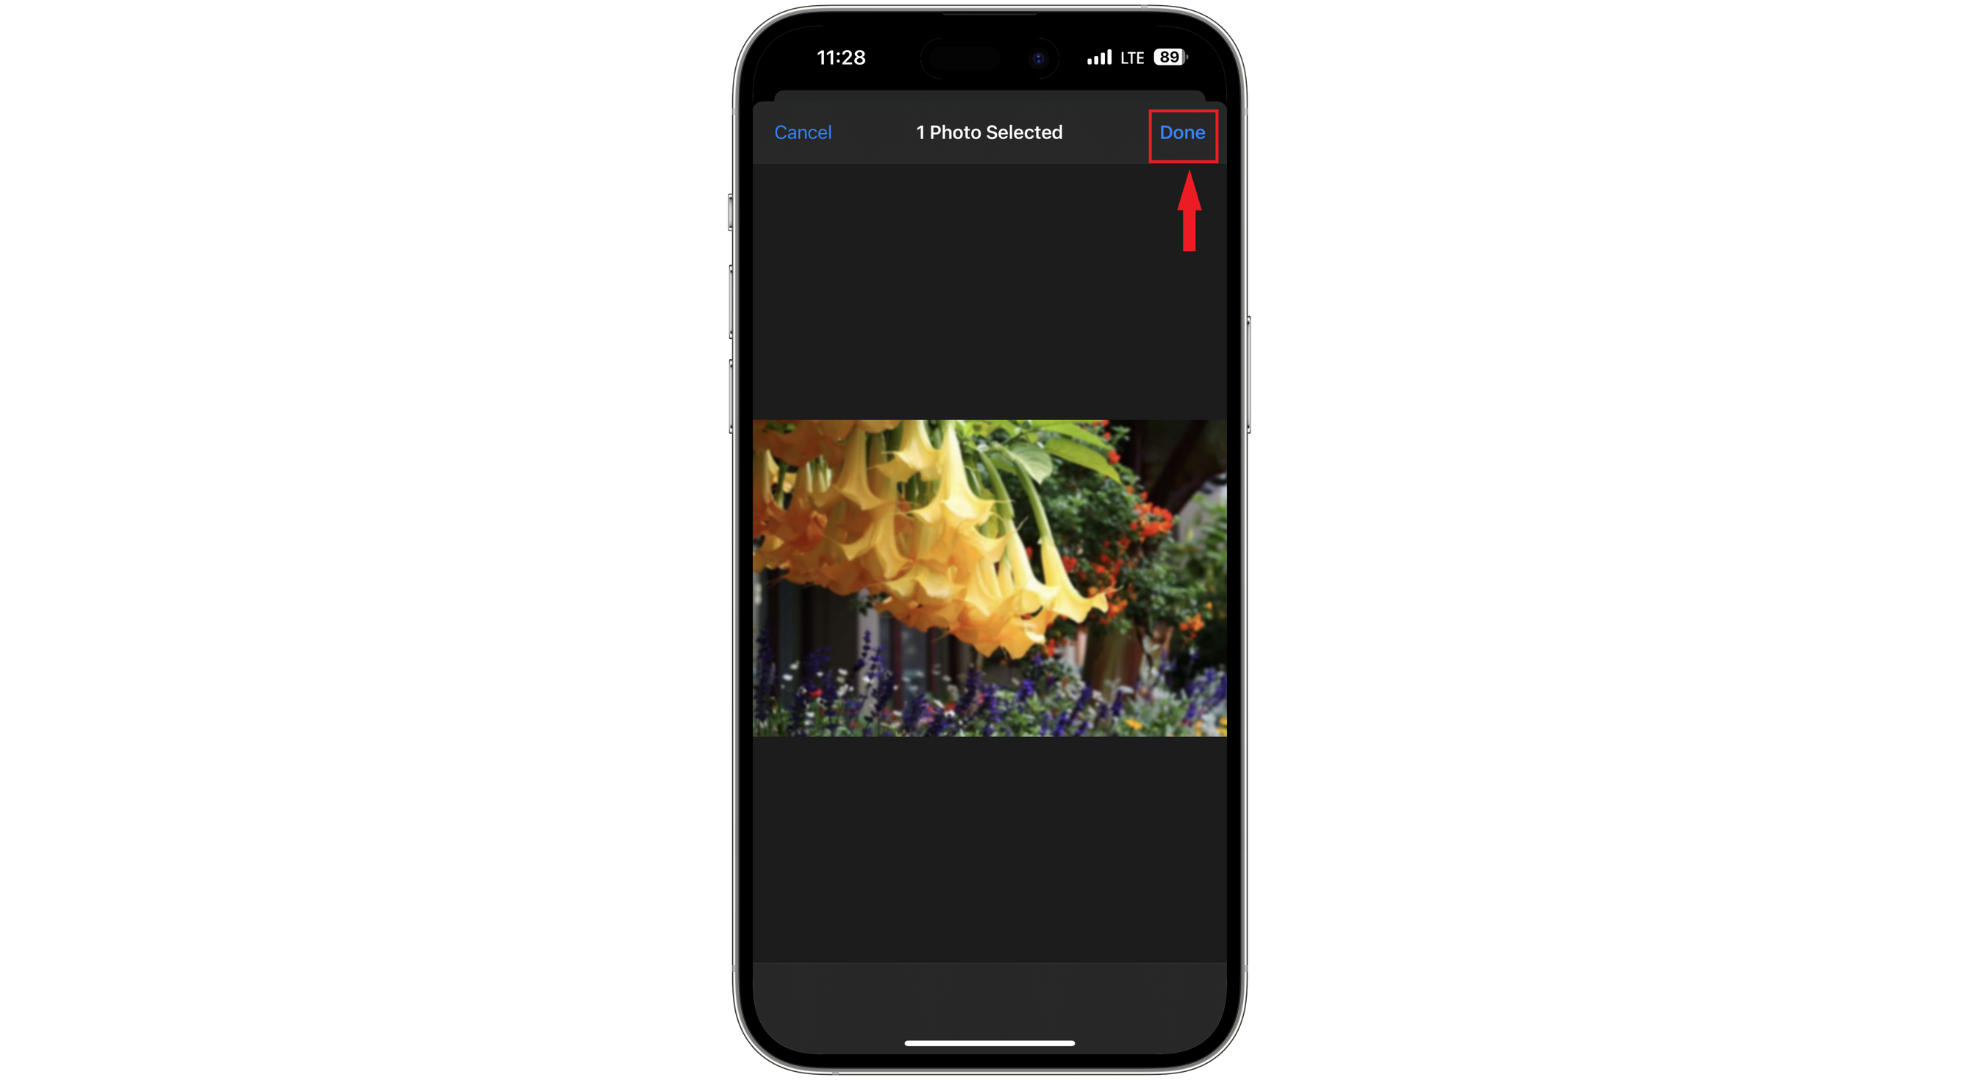
Tap Done to add the image - Wait a bit while PicWish works on sharpening and fixing your image.
Wait for the tool to do the magic - When it’s finished, tap “Download image” for your enhanced photo.
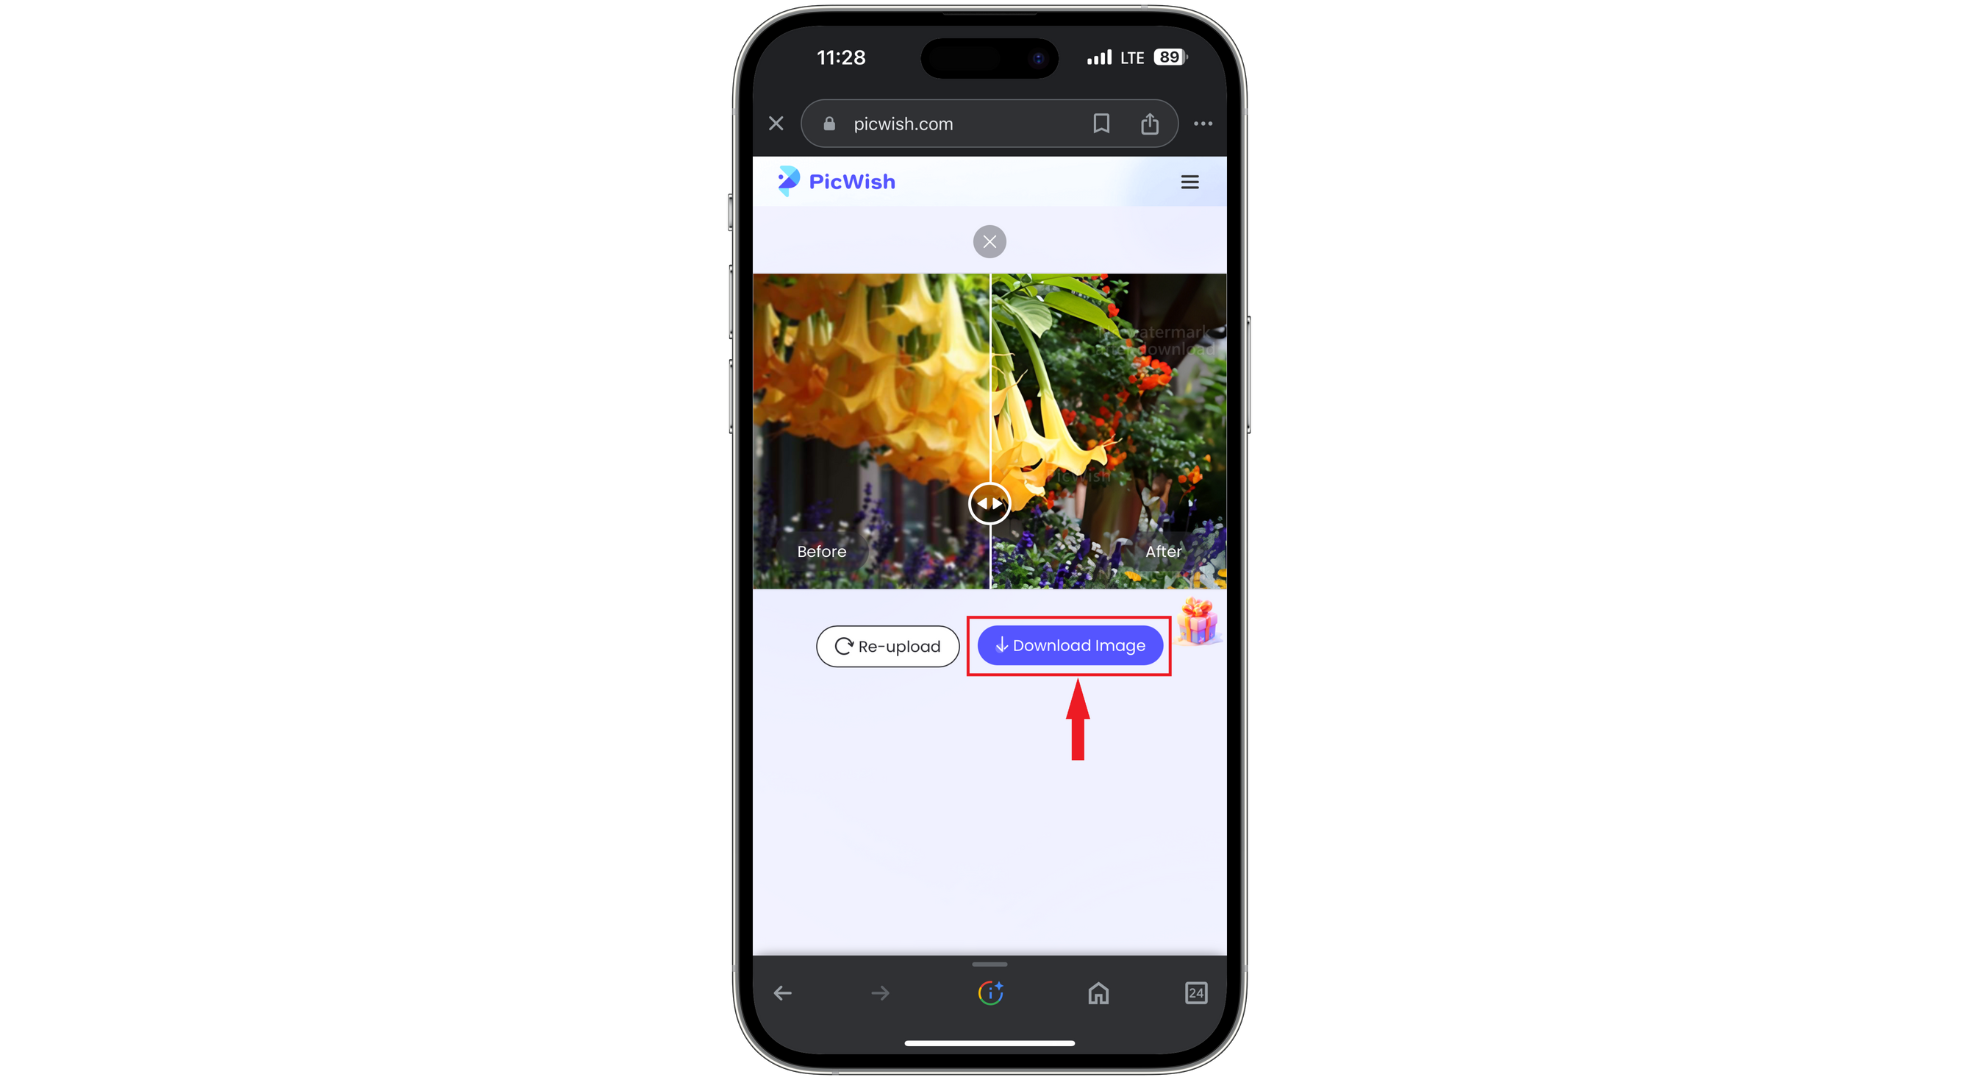
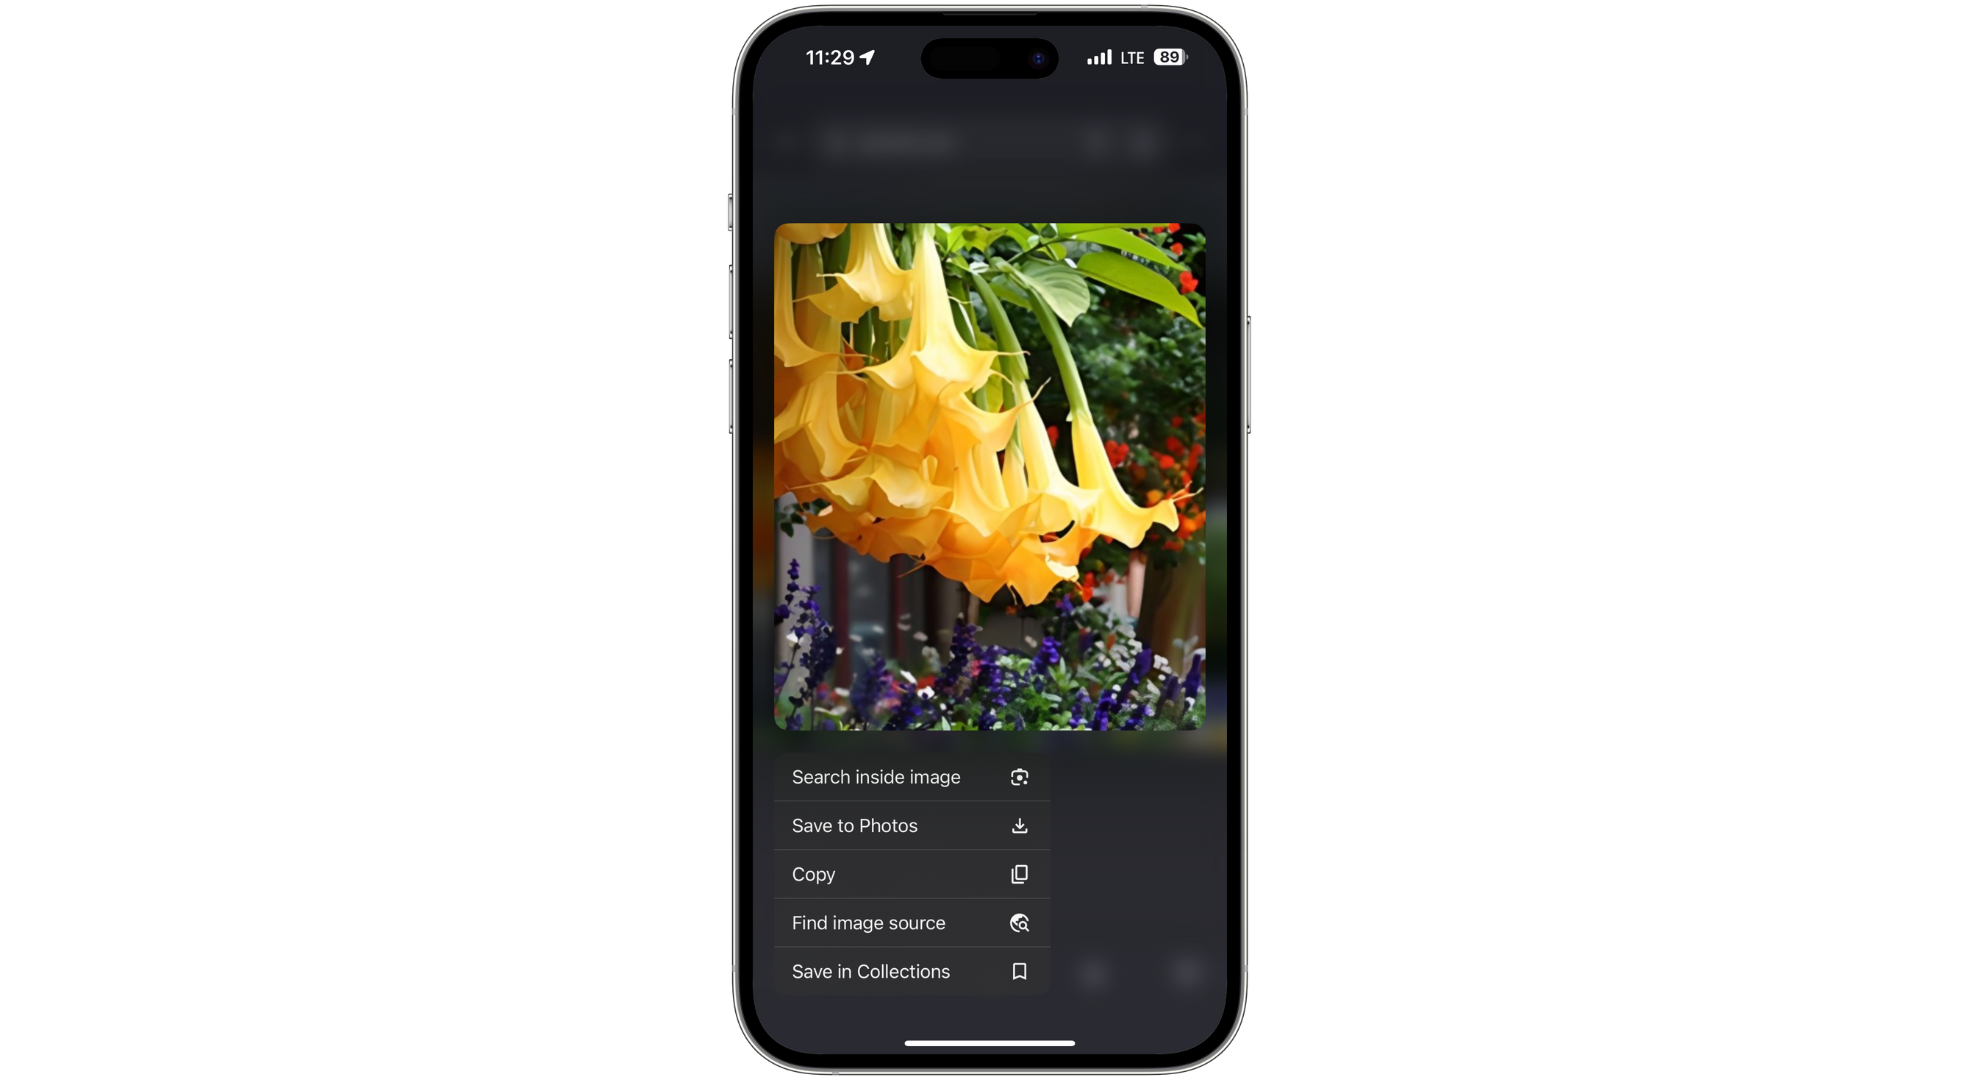
Tap Download image - Tap and hold the image and choose “Save to Photos.”
Tap Save to Photos
With these steps, PicWish helps you easily fix your blurry photos to their original glory.
↪ Other online websites to consider
You can also explore other online tools for unblurring your images, like:
1. Fotor:
Fotor is a handy online photo editor that also helps with unblurring images. Just upload your blurry picture to Fotor; its tools will make the image clearer, reducing blur and improving the details.
2. VanceAI:
VanceAI is a website that uses AI and traditional image editing techniques. Upload your blurry photos there, and VanceAI’s smart algorithms will sharpen them, resulting in clearer and more vivid images.
READ MORE: How to Generate AI Images for Free Without MidJourney ➜
2. Use third-party apps to fix blurry pictures on iPhone
When the Photos app on your iPhone isn’t enough to clear up blurry pictures, turn to third-party photo editing apps. The Apple App Store has apps designed to fix blurry or distorted images. Check out some of the best apps for fixing blurry photos on your iPhone.
Recommended: Adobe Lightroom
Adobe Lightroom for mobile is a top choice for fixing blurry pictures and all types of editing. It lets you crop, clear up marks, change colors, and adjust the brightness and intensity of your photos. Here’s how to use it to sharpen blurry pictures on your iPhone:
- Open the Adobe Lightroom app and tap the “Gallery icon” to bring in the blurry photo from your iPhone.

Tap on gallery icon - Select your photo, then tap “Add.”
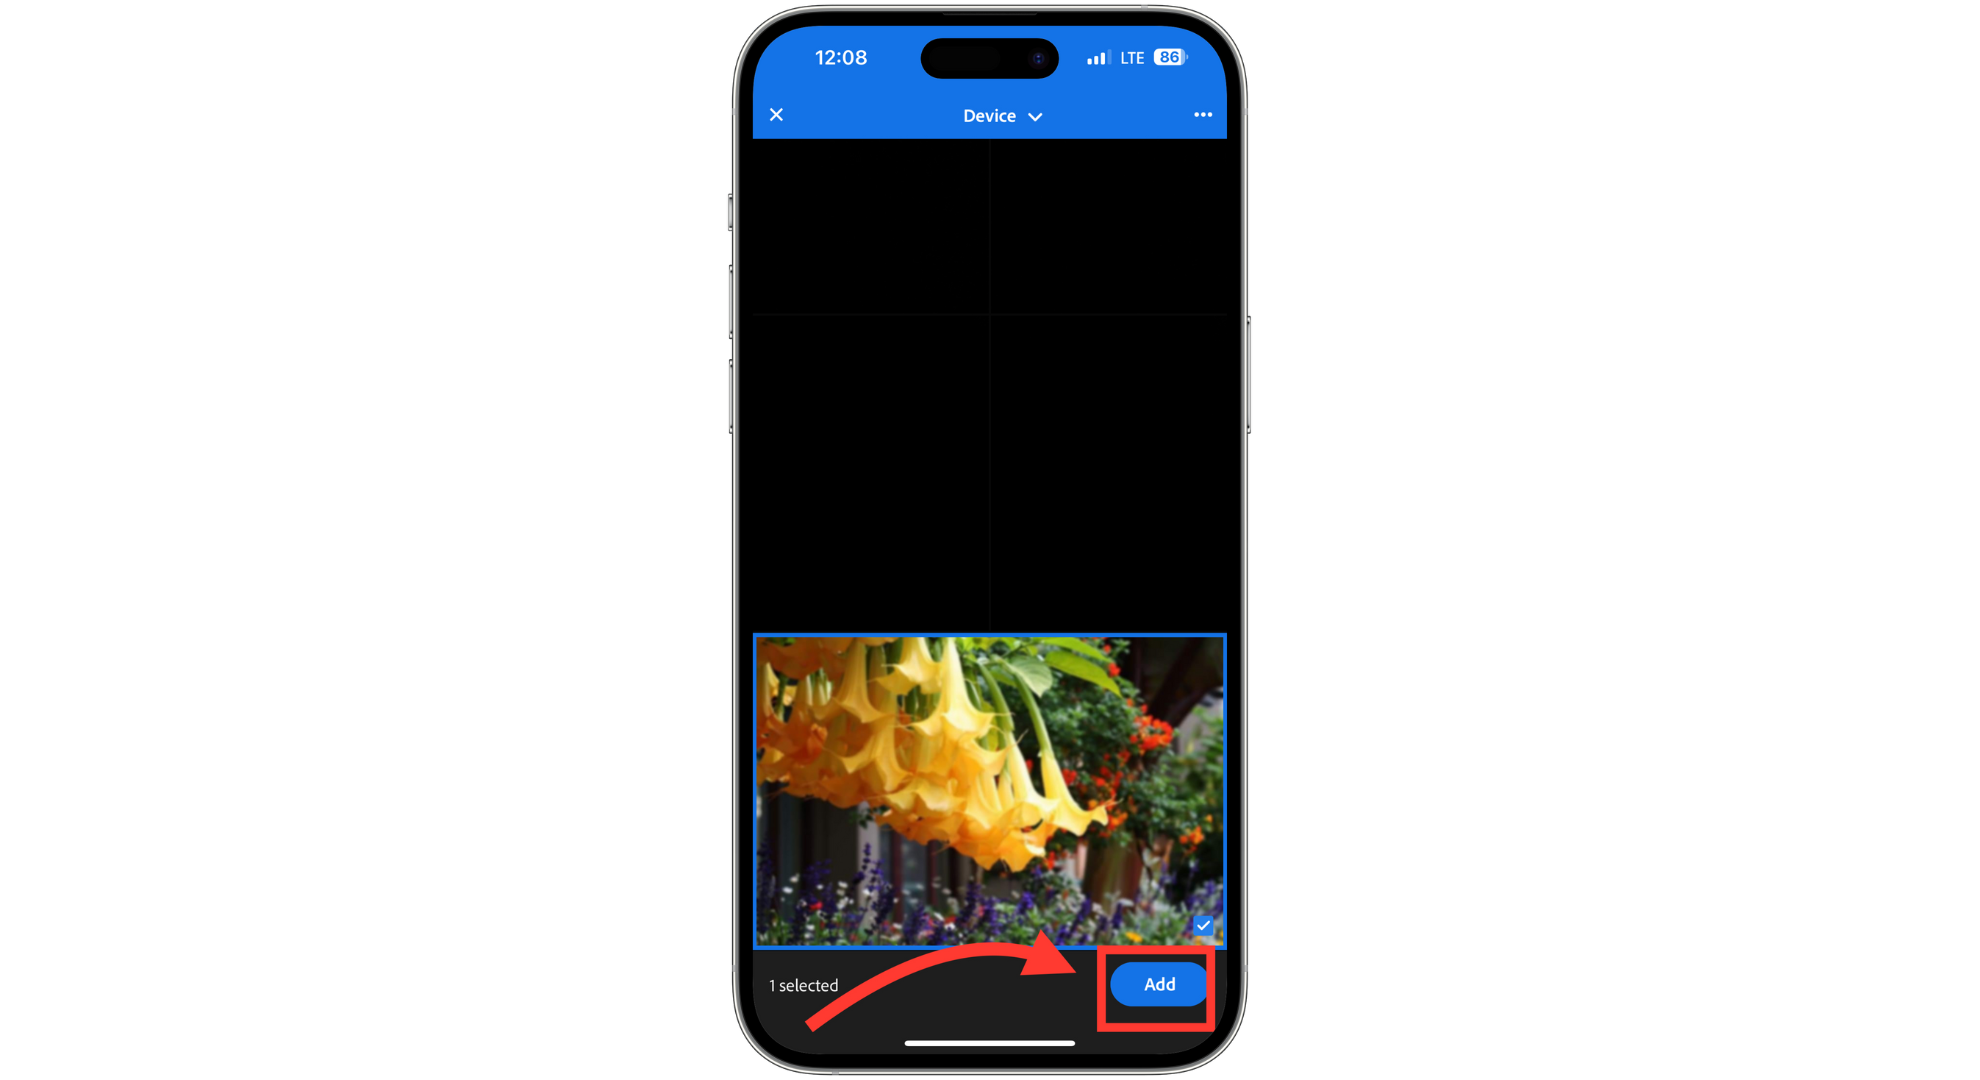
Click Add - Hit the “Edit” button at the bottom of your screen.
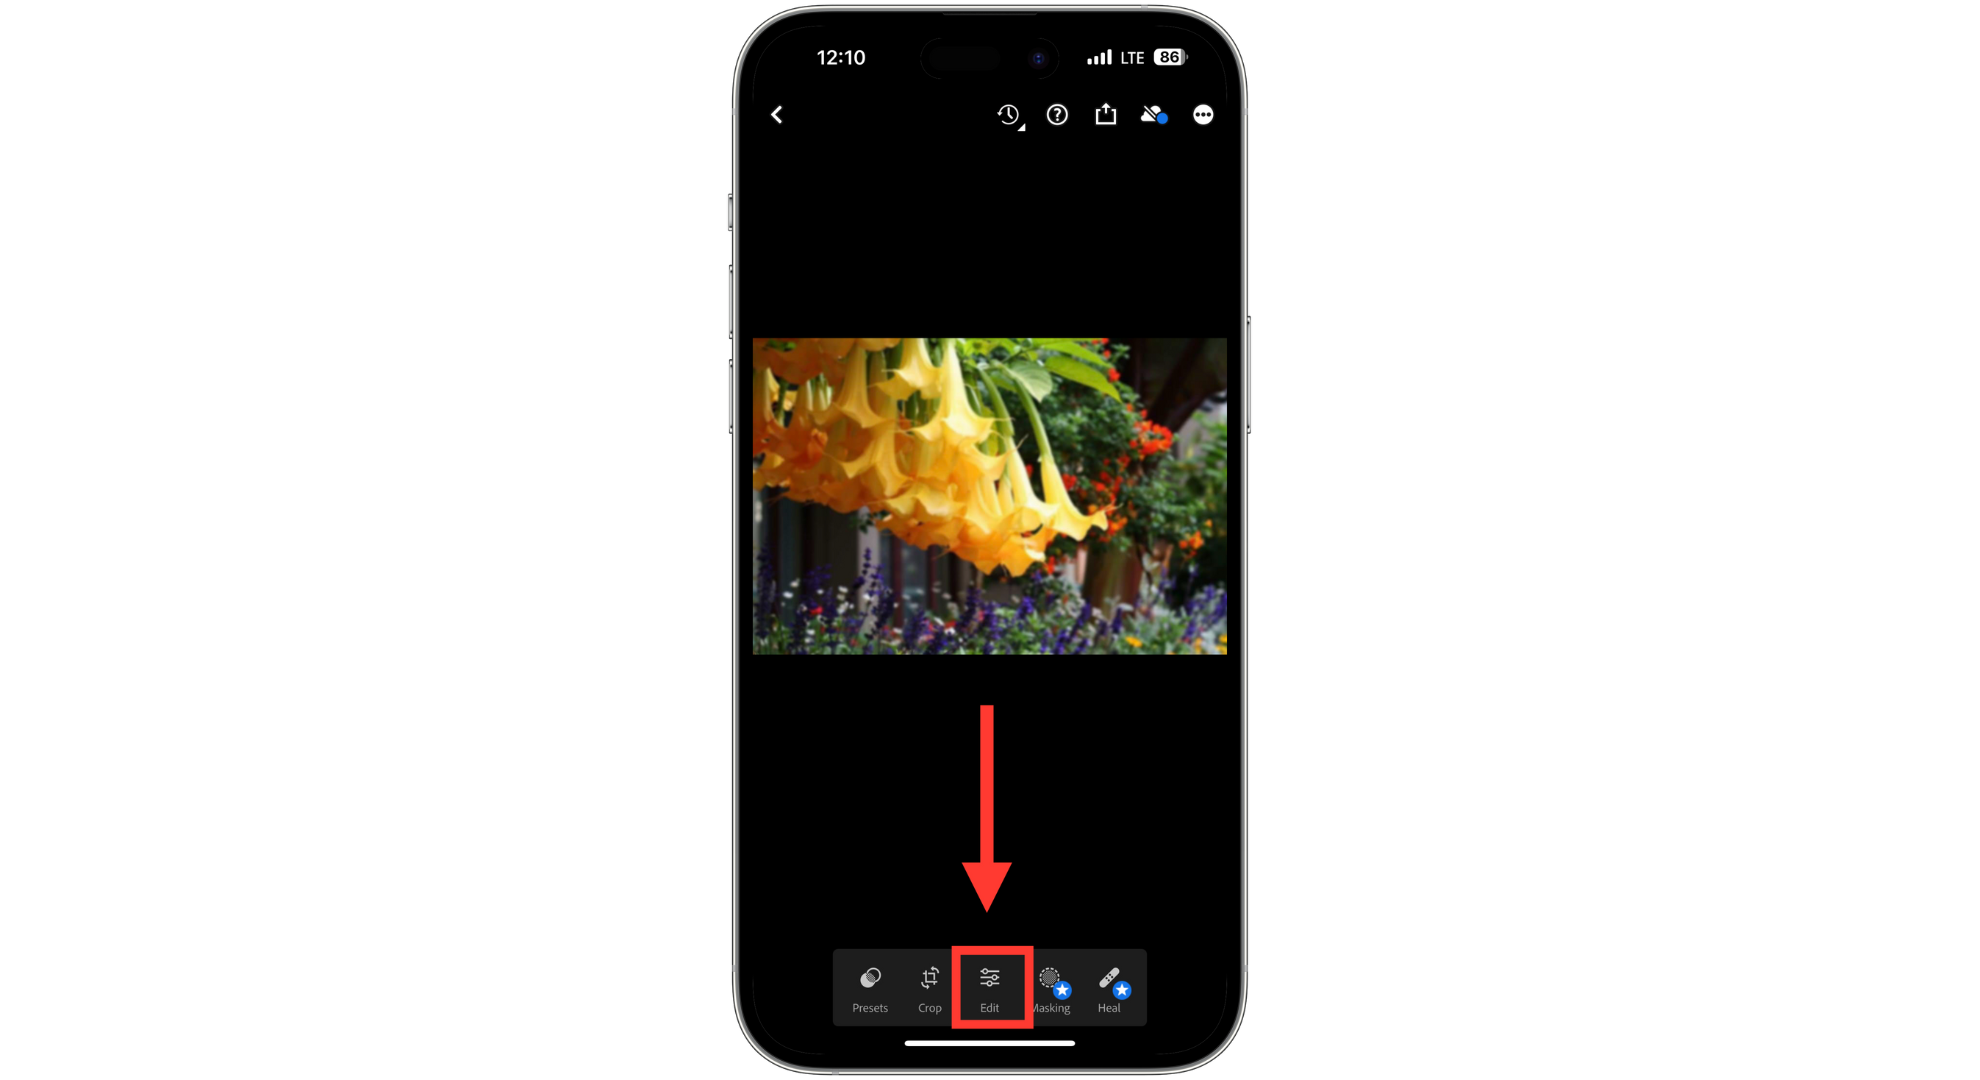
Tap on Edit - Swipe the toolbar right and tap on “Detail.”
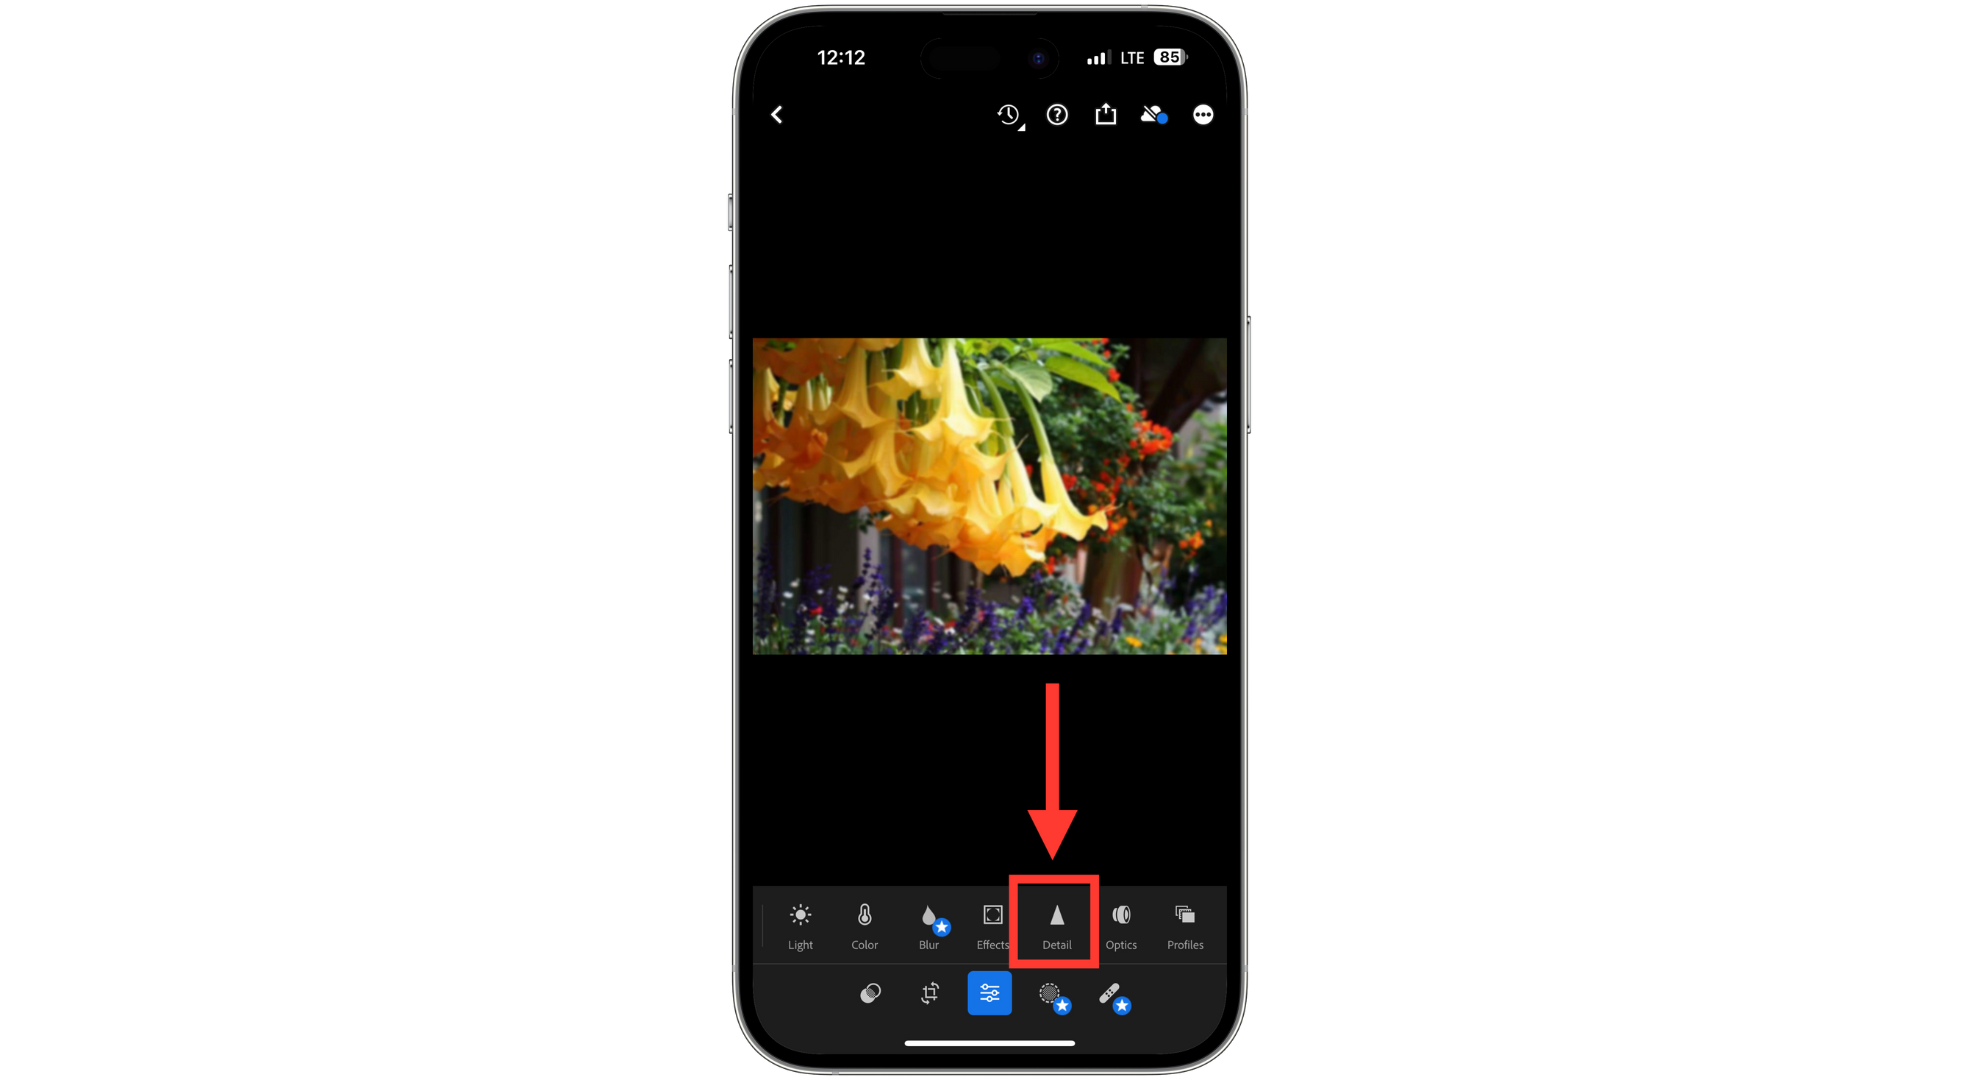
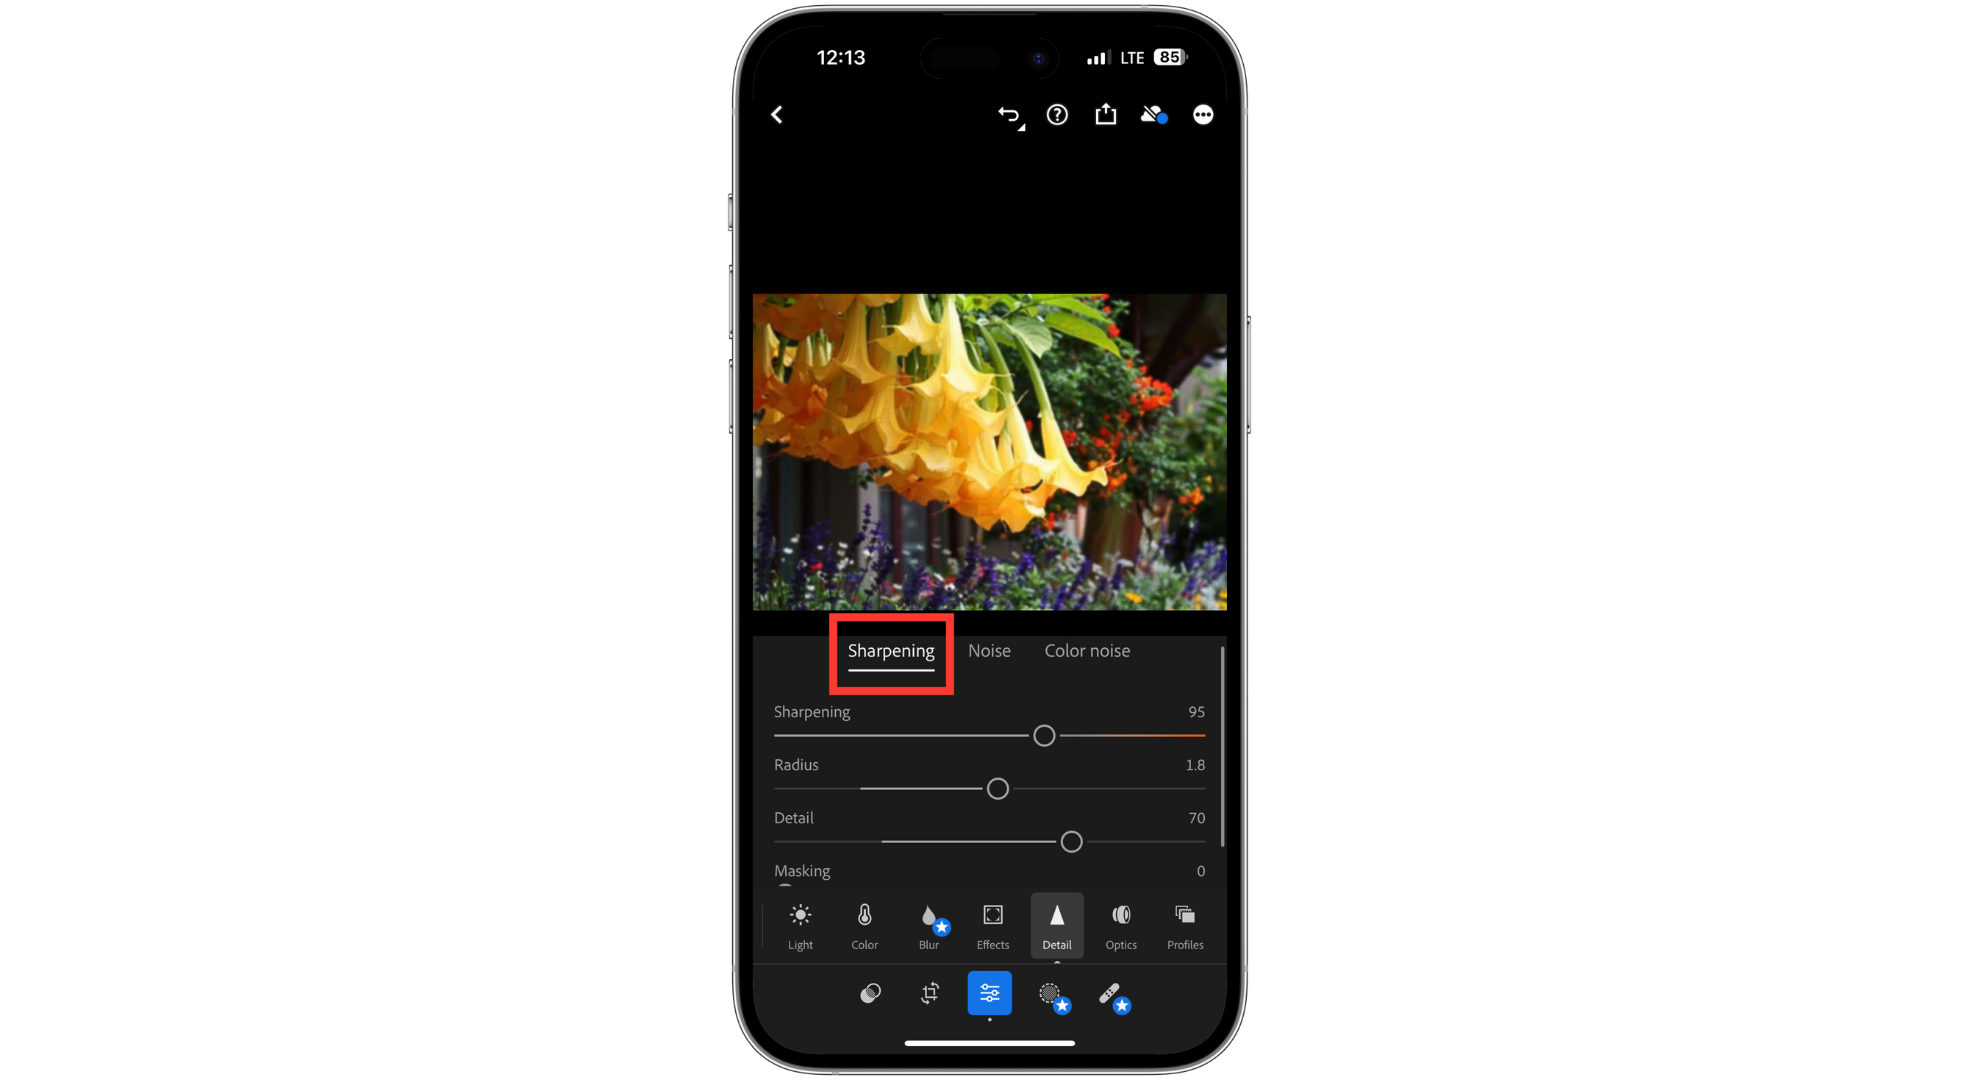
Tap on Detail - Use the sliders for Sharpening, Radius, Detail, and Masking to make your photo clearer. Feel free to adjust other settings, too, if needed.
Adjust the options as you like - After you’re done, tap the “Upload” symbol to save your sharpened image.
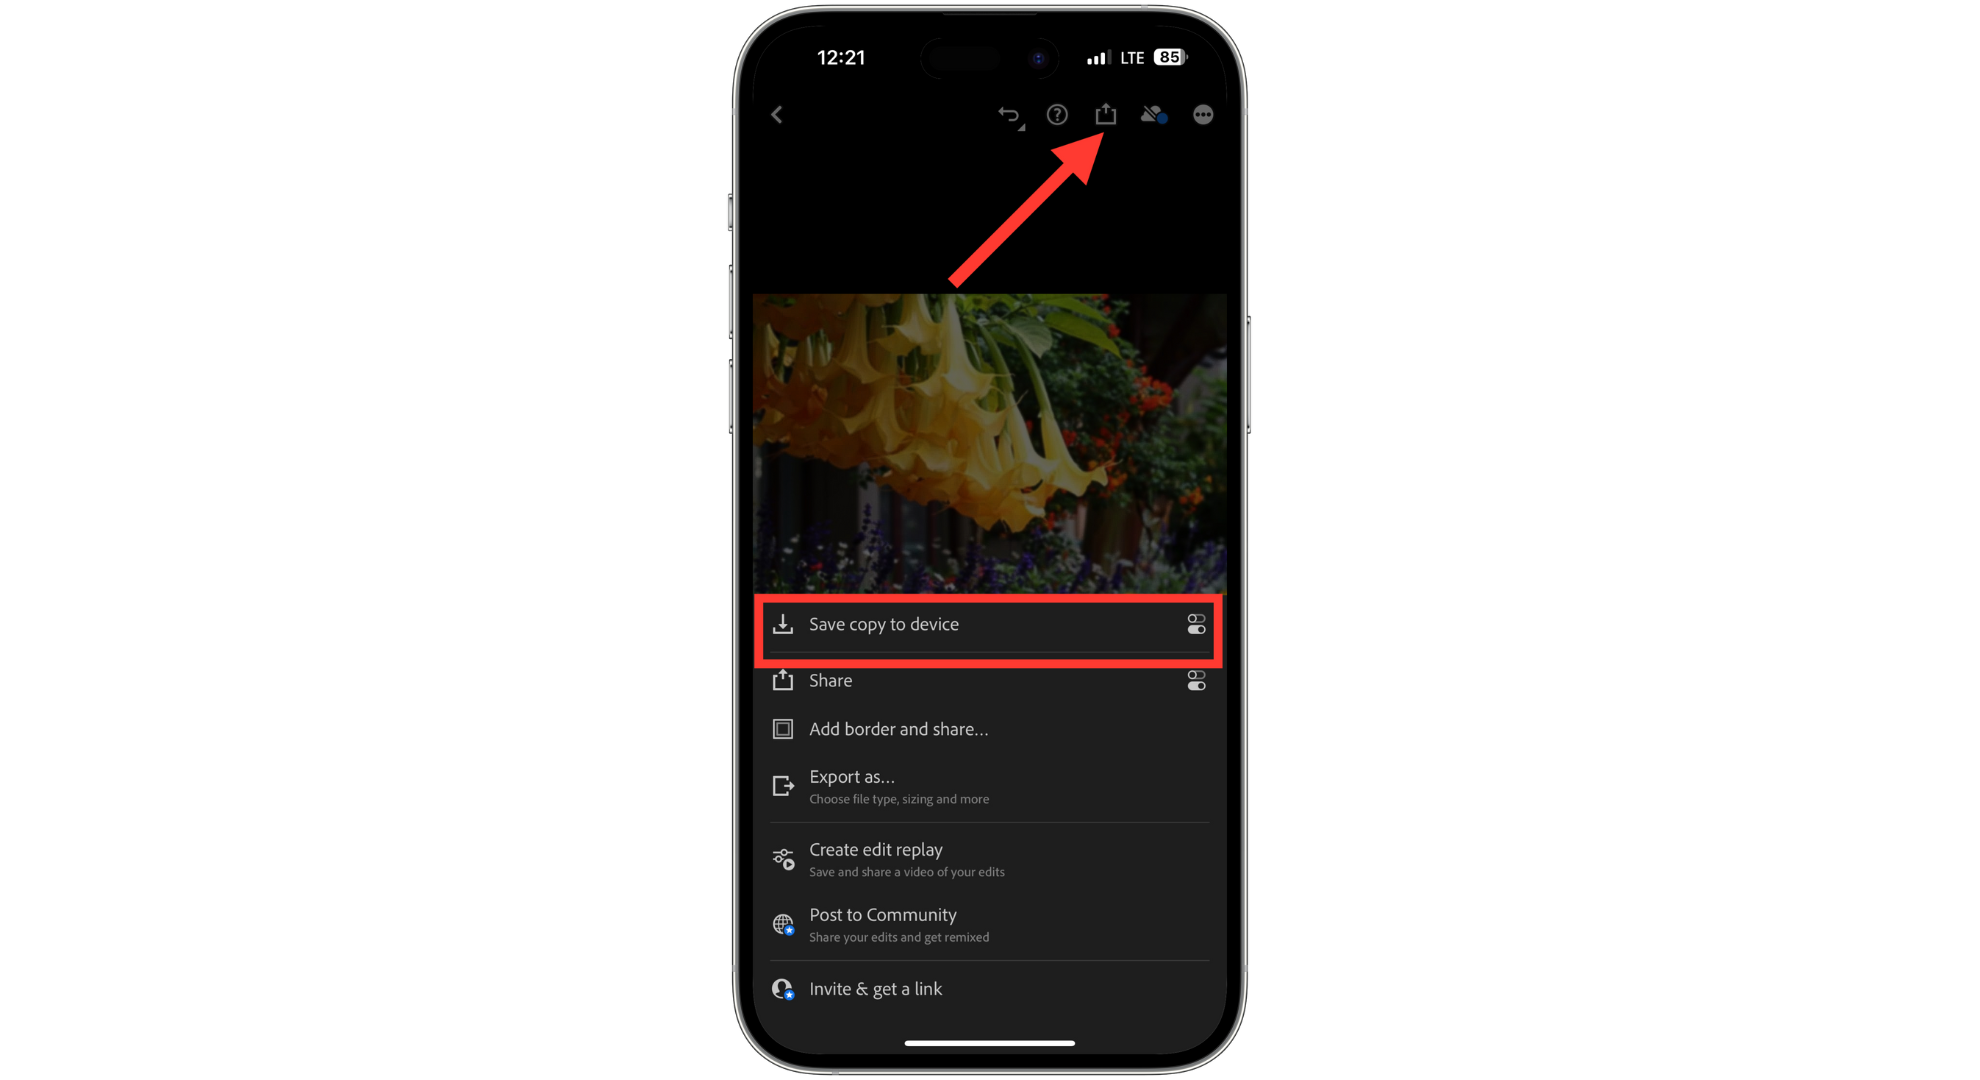
Tap upload icon
↪ Other apps you can try
Here are some other apps from third parties that you can try out:
1. Snapseed
Snapseed is an easy-to-use photo editor for the iPhone that comes with various sharpening filters you can try out to get the best results when fixing a blurry photo. To use Snapseed, open your photo in the app, go to the “Details” menu, and choose either “Sharpening” or “Structure.” These options help you sharpen the blurry parts or highlight more details in the photo.
2. VSCO
VSCO is primarily known as a photo editing app; its filters offer a more modest approach to fixing photos. This means you might find the perfect filter in VSCO that slightly sharpens your image. To unblur and enhance your photo, adjust the clarity, then sharpen the image, tweak the contrast and exposure, apply a fade effect if desired, and add grain for texture.
READ MORE: 7 of the Best Open-Source & Free Photoswhop Alternatives ➜
3. Using the Photos app on iPhone
If you have a blurry photo, you can sharpen it using the native Photos app. This app has a tool that lets you increase sharpness, making your picture clearer. This might not be as good as some online tools or apps, but it can work if you need a quick fix. Here’s how to do it:
- Open the Photos app on your iPhone, find the blurry photo, and tap “Edit” in the top-right corner.
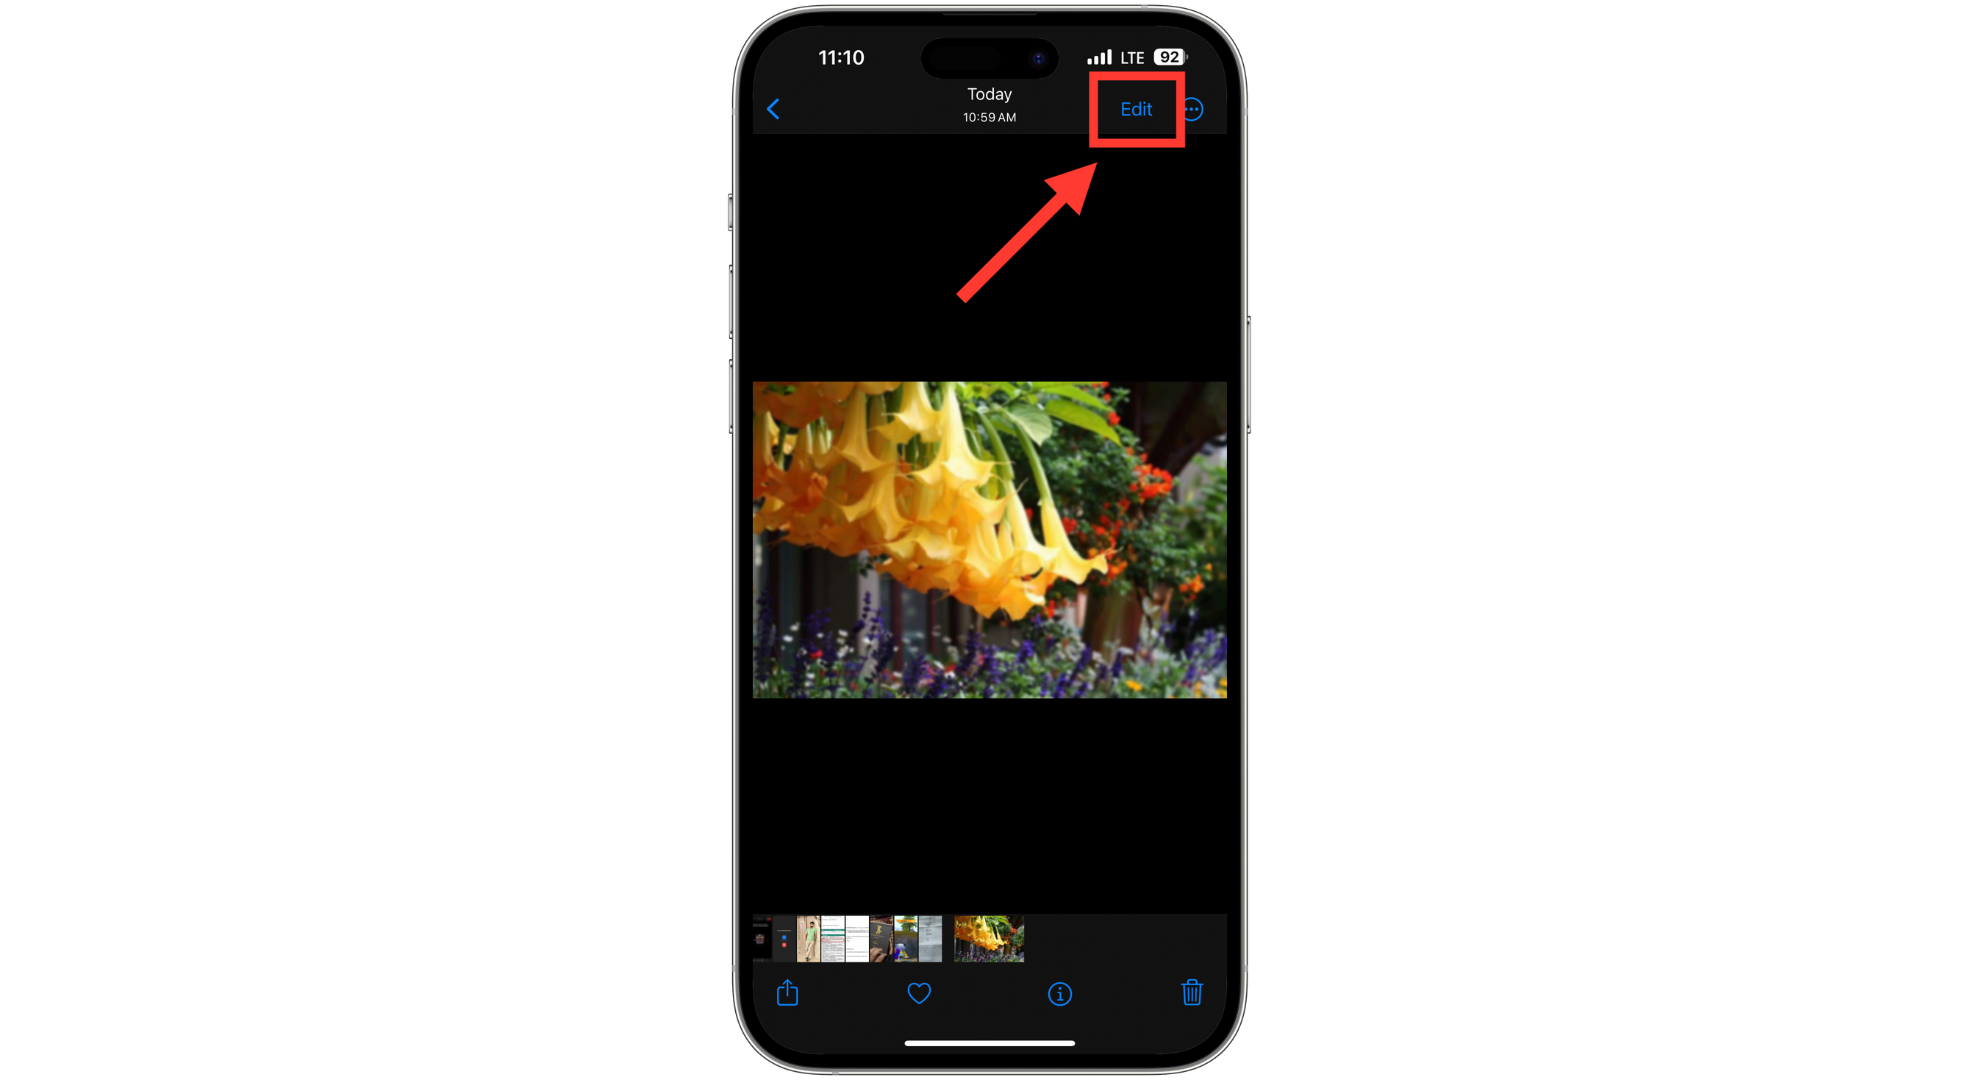
Select the image can tap Edit - Tap the “Circular icon with a + – sign” at the bottom of the editing section to use the “Adjust” tool.
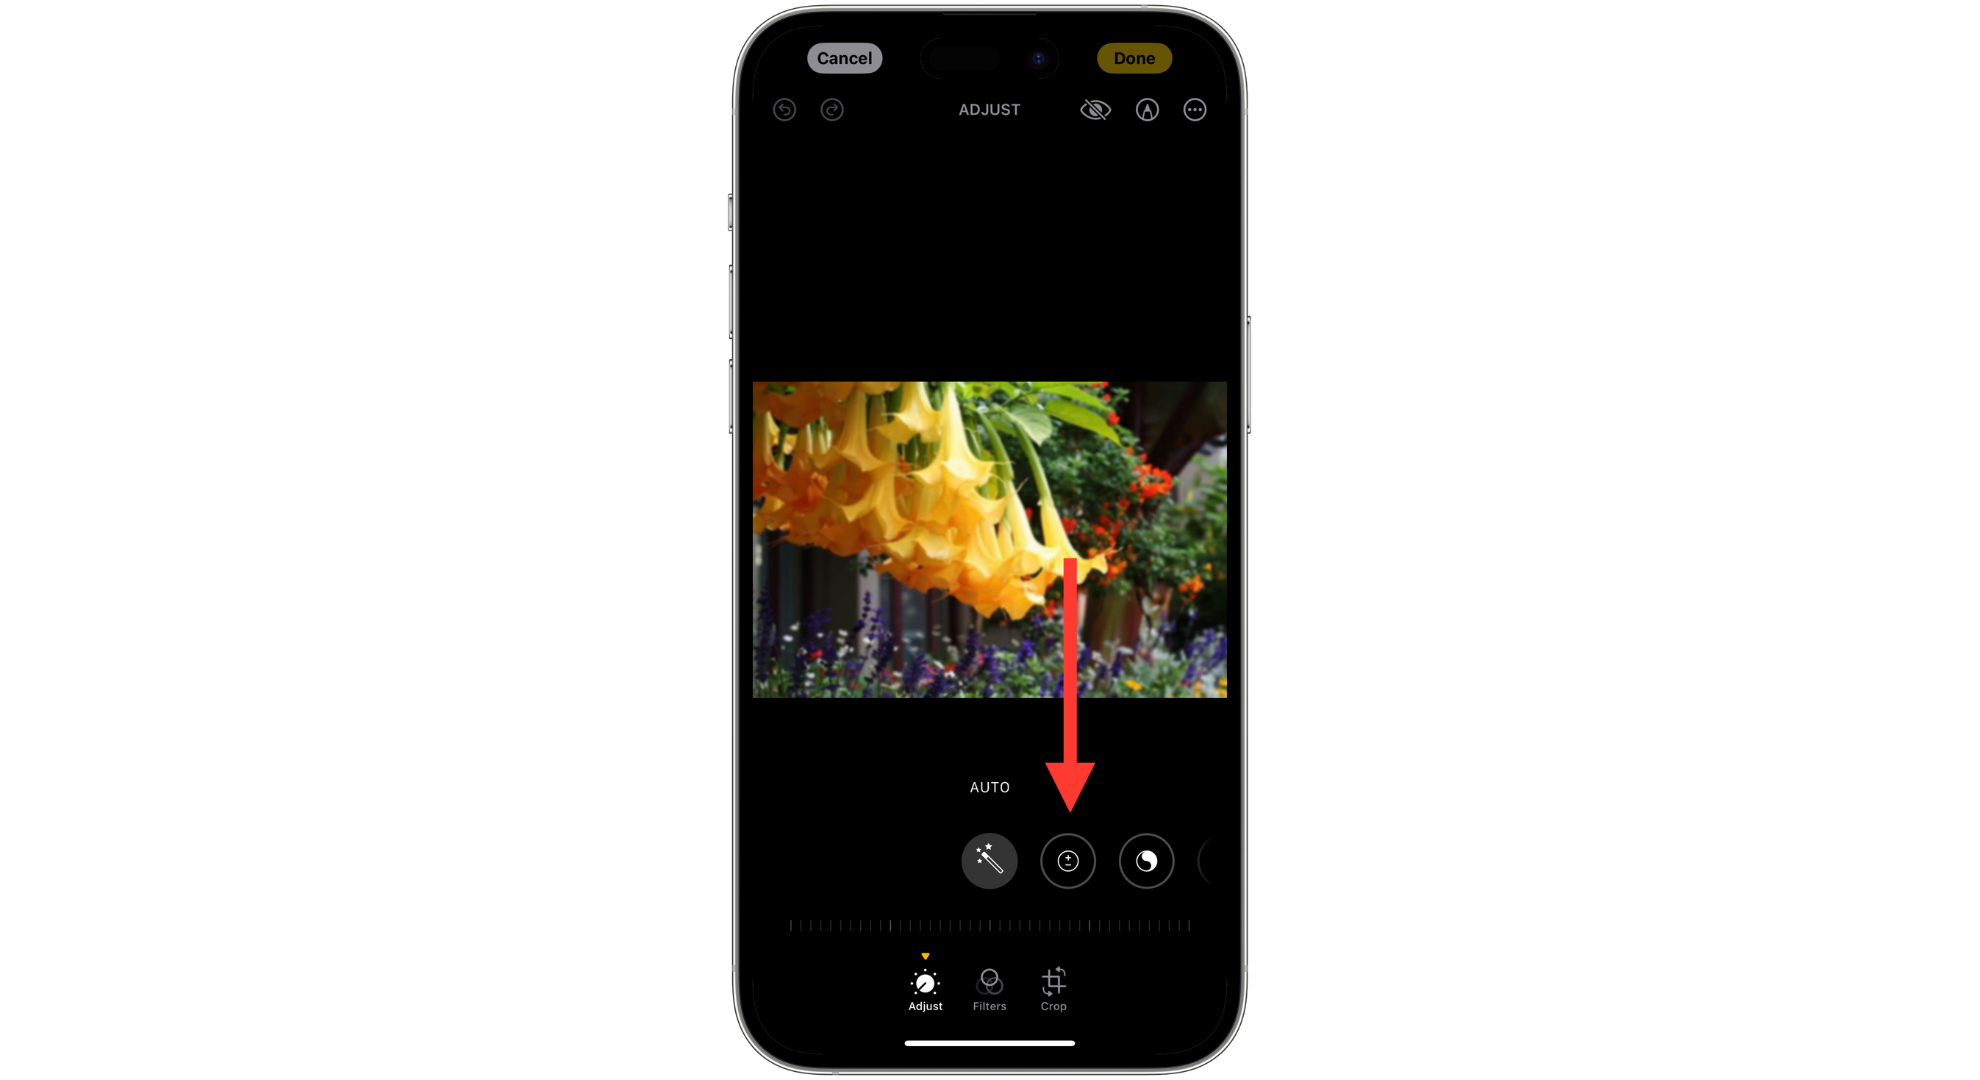
Tap on Adjust icon - Swipe left on the toolbar until you find “Sharpness” among the options. Tap on it.
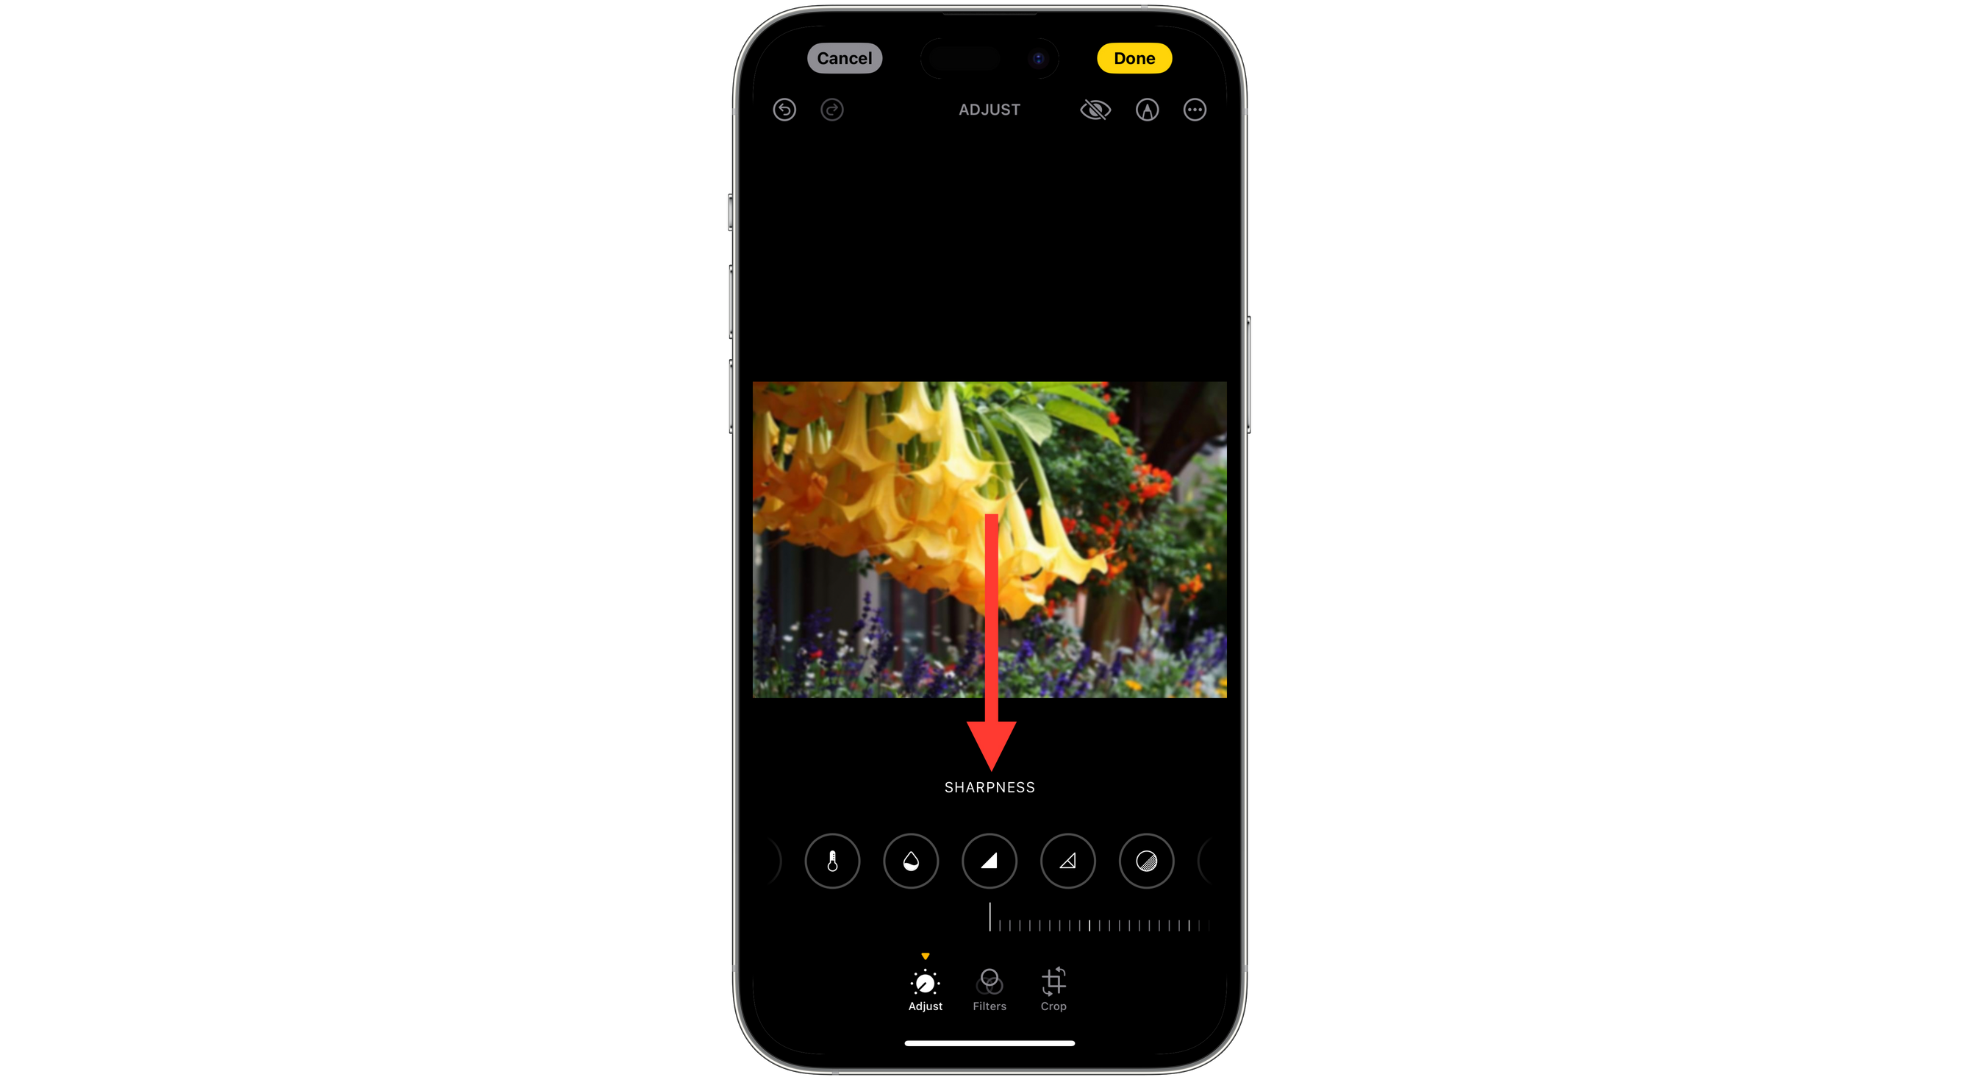
Tap on sharpness - Use the slider to adjust the sharpness to your liking.

Adjust the sharpness as you like - To further enhance the colors of images, increase the “Definition” so the picture becomes clearer.
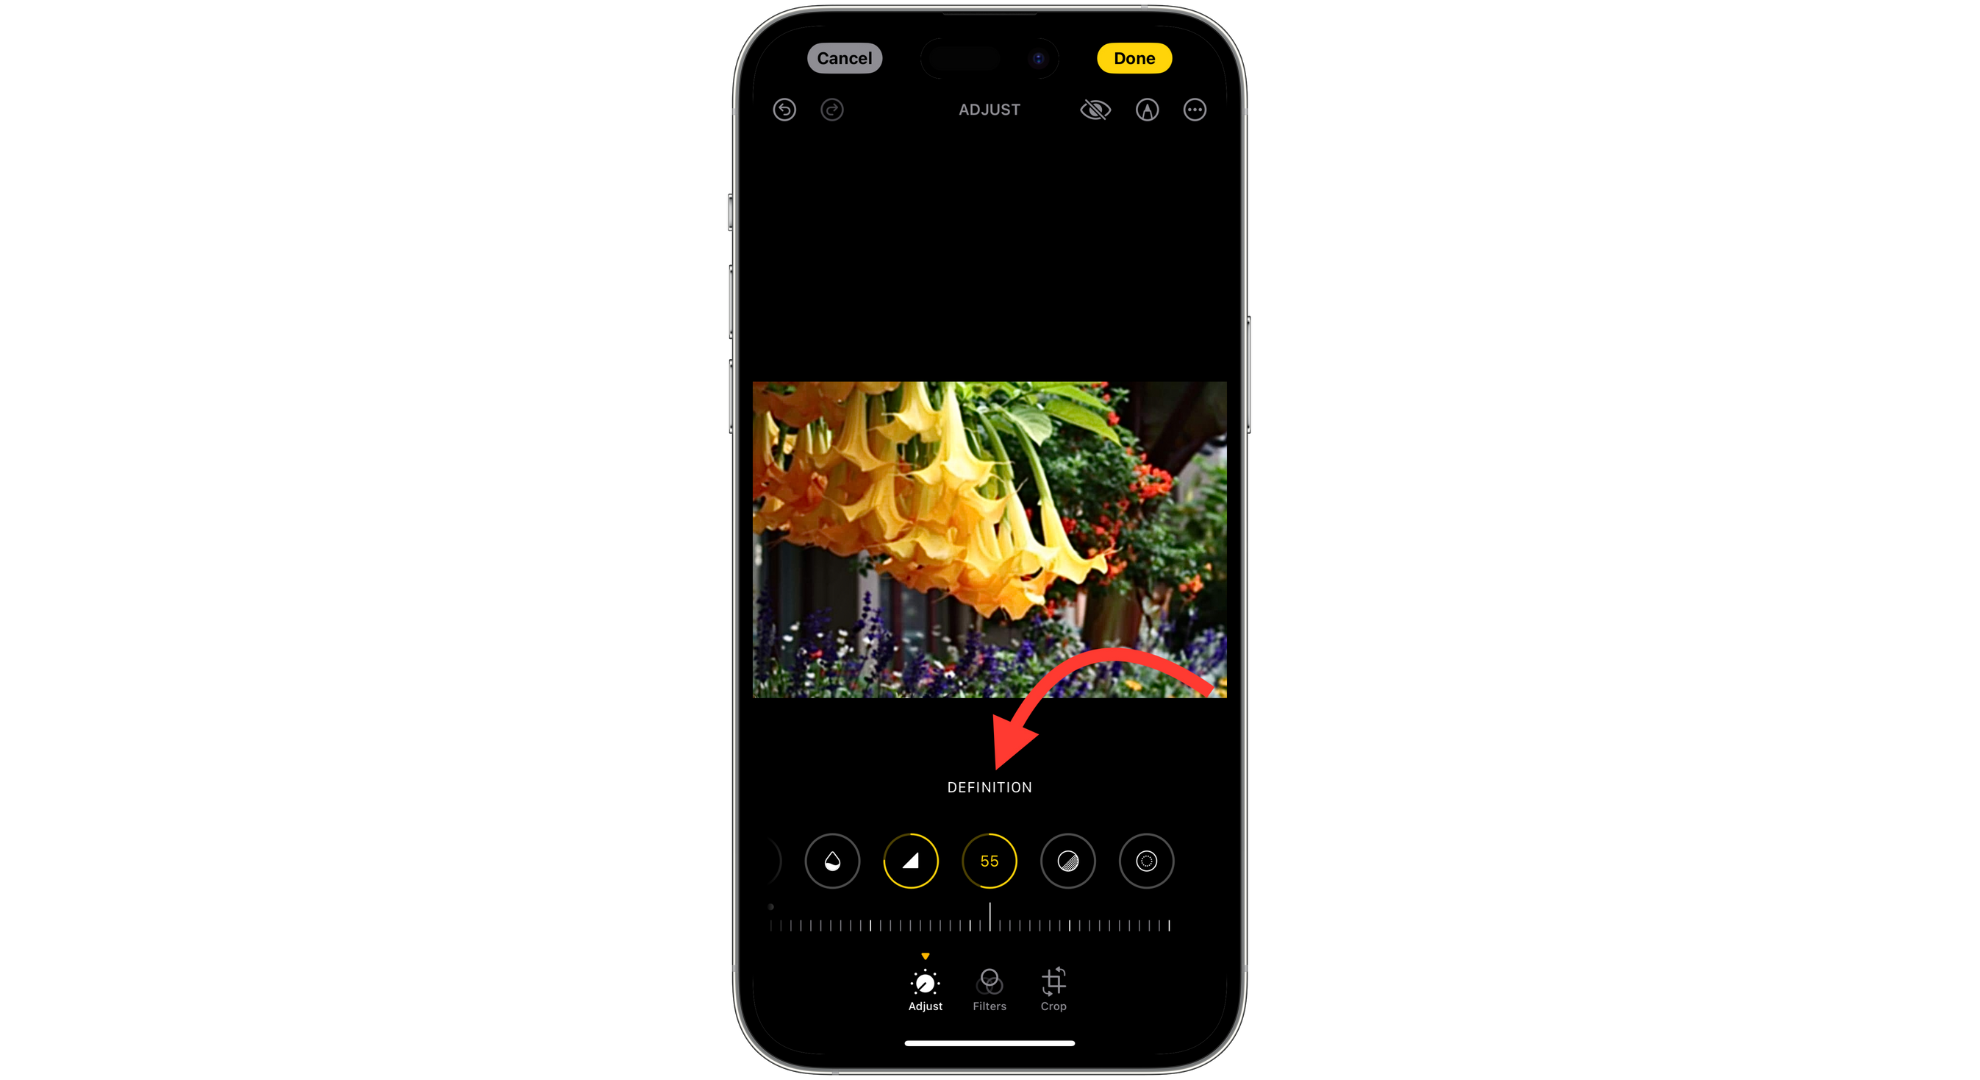
Adjust Definition settings - Once you’re happy with the look, tap “Done” to save your changes.
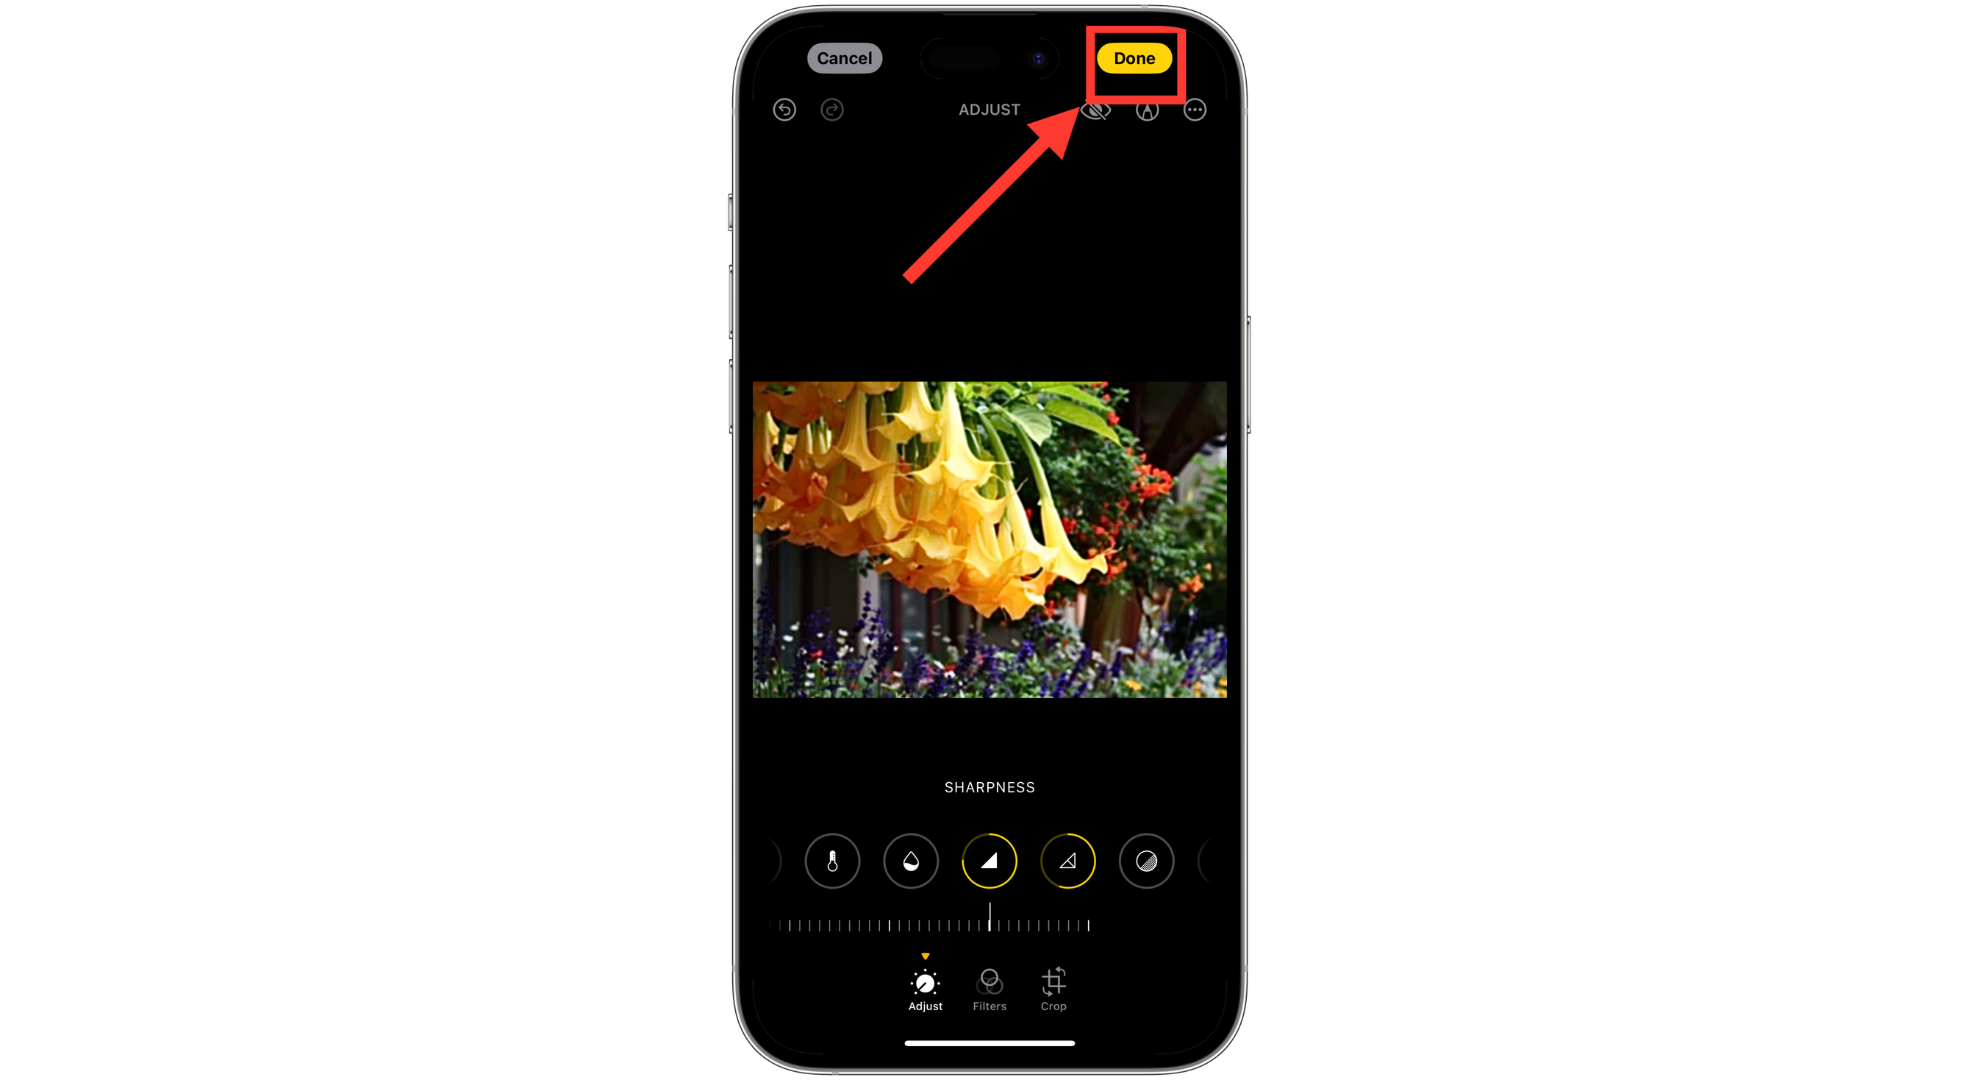
Tap Done
You might also want to tweak the brightness, exposure, and contrast to improve the photo further. Adjusting these can highlight the main parts of your photo, making everything look even better.
READ MORE: How to Detect Hidden Camera With Mobile Phone ➜
How to avoid blurry pictures in the future?

Here are some easy tips to keep in mind if you want the details in your future photos to be as clear as possible:
- Use focus mode: Most smartphones have an auto-focus feature. Just tap on your screen where you want the camera to focus. This helps reduce blurriness from shaky hands.
- Clean the lens: A dirty lens often causes blurry photos. Use a soft microfiber cloth to clean your lens regularly.
- Try action modes: Use features like Live Photos on iPhones, Motion Photo on Samsung, or Top Shot on Pixel to take multiple shots quickly. Just press and hold the shutter button in your camera app.
- Good lighting is key: Bright, natural light is best for clear photos. If you’re indoors, turn on some lights to brighten up the space.
READ MORE: How to Make A Picture Less Blurry – 4 Easy Solutions ➜
Final Thoughts
Fixing blurry pictures on your iPhone doesn’t have to be a challenge. You can easily breathe new life into your photos with the right tools and know-how. Whether using the iPhone’s own Photos app to adjust sharpness, exploring third-party apps, or utilizing online tools, there are plenty of options at your fingertips.
Remember, simple steps like cleaning your lens, using focus mode, and ensuring good lighting can prevent blurriness in future shots. By following these guidelines and exploring the methods we’ve discussed, you’ll be well on your way to capturing and restoring clear, vibrant photos that last a lifetime.
FAQs
Your iPhone photos might get blurry suddenly for a few reasons. It could be your hands shaking while taking the photo, insufficient light, problems with the camera focusing, or even technical issues with your phone. To fix it, you need to figure out what’s causing the blur.
To unblur photos for free on your iPhone, use the iPhone’s Photos app. An “Adjust” feature lets you tweak sharpness and exposure. You can also find free apps on the App Store with more tools for fixing blurry photos.
To minimize camera shake, hold your iPhone with both hands for stability, use a tripod or stabilizing device, and consider using a remote shutter release or the self-timer feature to avoid movement during capture. Hold your iPhone with both hands and use a tripod or stabilizer to stop your camera from shaking. You can also use the self-timer or a remote shutter button to keep your iPhone still when taking a photo.
In low light, try using a faster shutter speed. Increase your camera’s ISO setting or use burst mode to take lots of photos quickly. This way, you can choose the sharpest photo later.
Reviewed by Huzaifa Haroon