How to Disable the Keyboard on a MacBook in 2024
 Reviewed by Huzaifa Haroon
Disabling the keyboard on your MacBook can be a helpful fix if you have a broken keyboard, want to thoroughly clean it, or just want to avoid accidental key presses. This can be useful even when you are using an external keyboard or troubleshooting problems.
In this article, we will show you how to disable the keyboard on Mac, from old to the most recent versions of macOS for all models.
Table of Contents
1. Shutting Down Your MacBook
Turning off your MacBook is the simplest way to temporarily deactivate its keyboard to clean it or fix the keyboard. It also stands as the only method that works on every single MacBook and macOS version. Here’s how to do so:
- Click on the Apple logo in the top-left corner of the screen.
- From the drop-down menu, choose Shut Down.
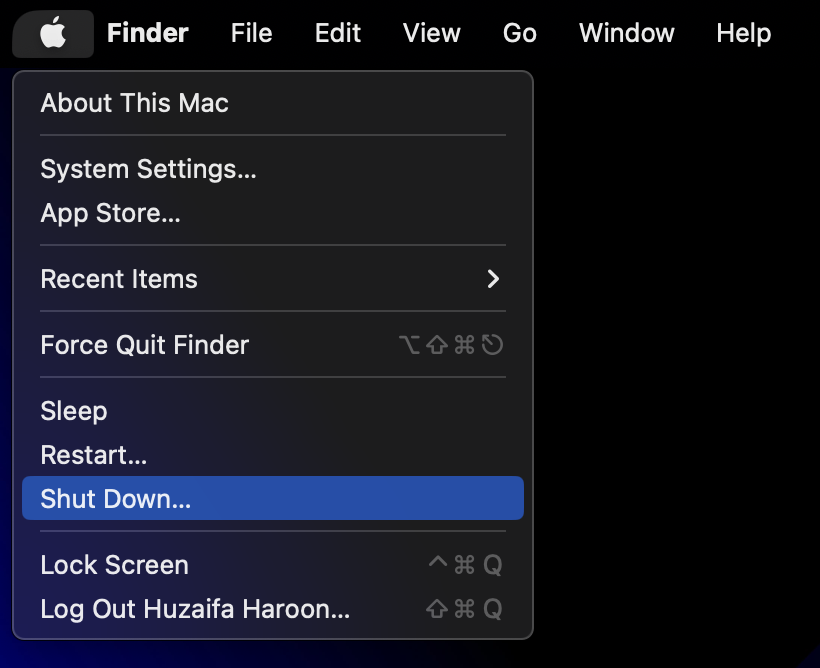
- Follow the on-screen instructions and click the Shutdown button to turn your MacBook off successfully.
2. Using Third-Party Apps
Third-party apps provide advanced keyboard customization and control, including the option to disable the keyboard on your Mac. Apart from shutting down your MacBook, this is the only other realistic option on newer macOS versions for disabling your keyboard.
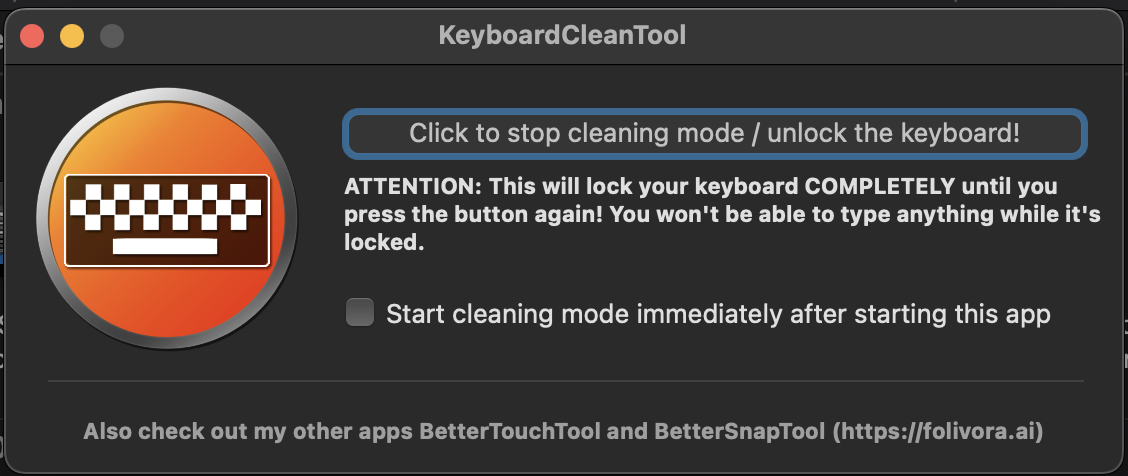
Karabiner Elements is a popular option for this, but we recommend KeyboardCleanTool as it’s much smaller, has a more straightforward installation process and doesn’t confuse you with options. As the name suggests, it’s made to disable your keyboard while cleaning it, but you can use it for any purpose:
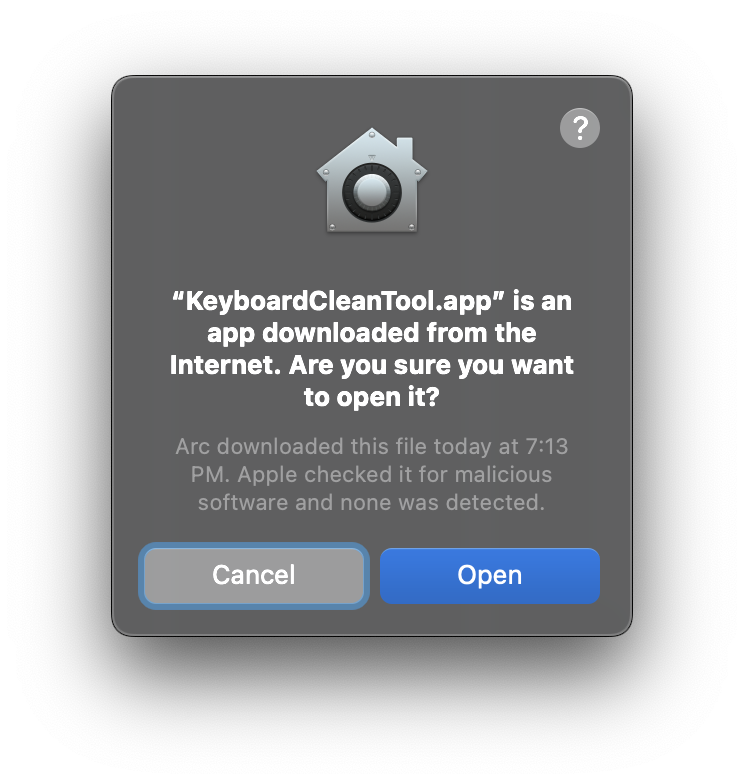
- Download KeyboardCleanTool from their website. It will be in the form of a ZIP file.
- Once dowloaded, click the ZIP file and the app will automatically install. Select “Open” when asked for confirmation.
- After installation, you’ll be prompted to update Security & Privacy settings to allow the app to control your keyboard. Follow the instructions on the screen.
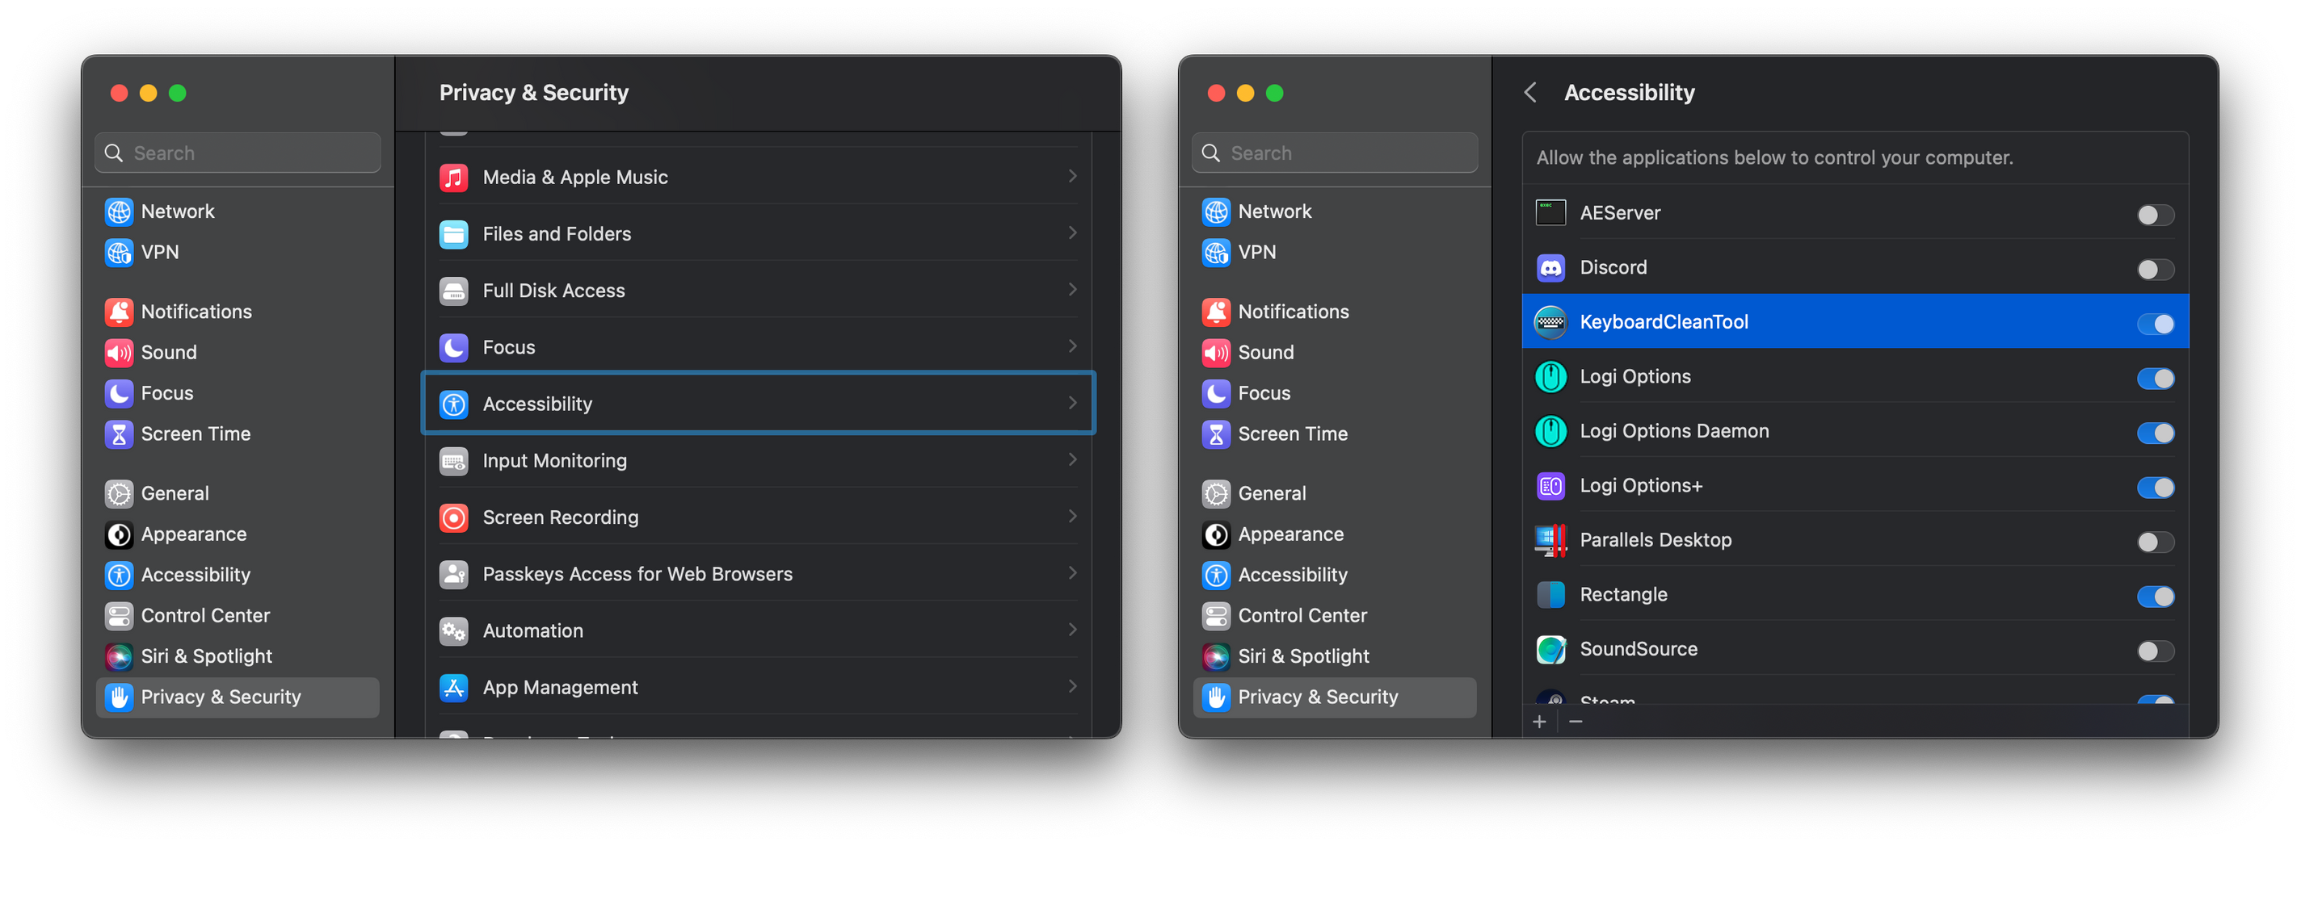
System Settings/Preferences > Privacy & Security > Accessibility > KeyboardCleanTool - Now, just open the app and click on the Click to start cleaning mode / lock the keyboard! option. You will see the keyboard icon turn orange and your keyboard will be disabled.
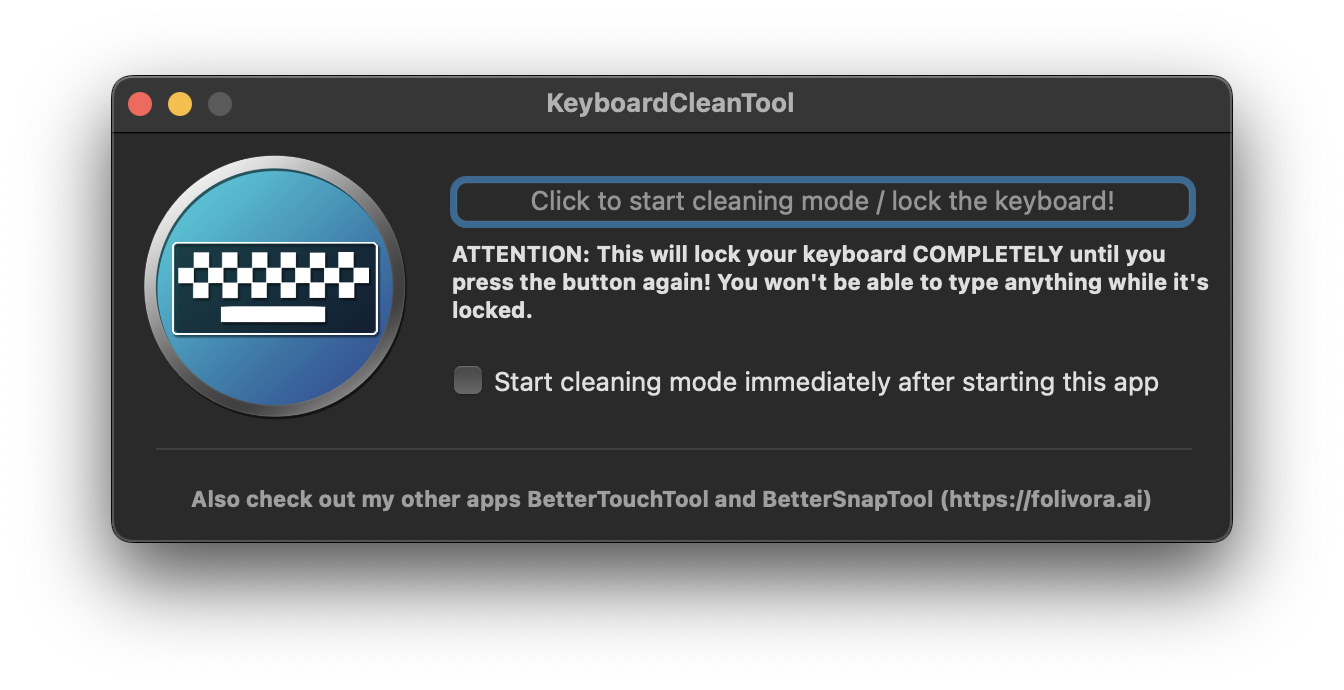
- To reactivate the keyboard, simply re-click Click to stop cleaning mode / unlock the keyboard! and your keys will come back to life.
3. Utilizing External Keyboard Preferences
With this method, you can elongate how long it takes for a key to register to the point where it’s essentially unresponsive, practically disabling your keyboard. By delaying the key’s response, you can get enough time to perform your task efficiently.
- Click on the Apple logo in the top-left corner of your screen and click on System Preferences.
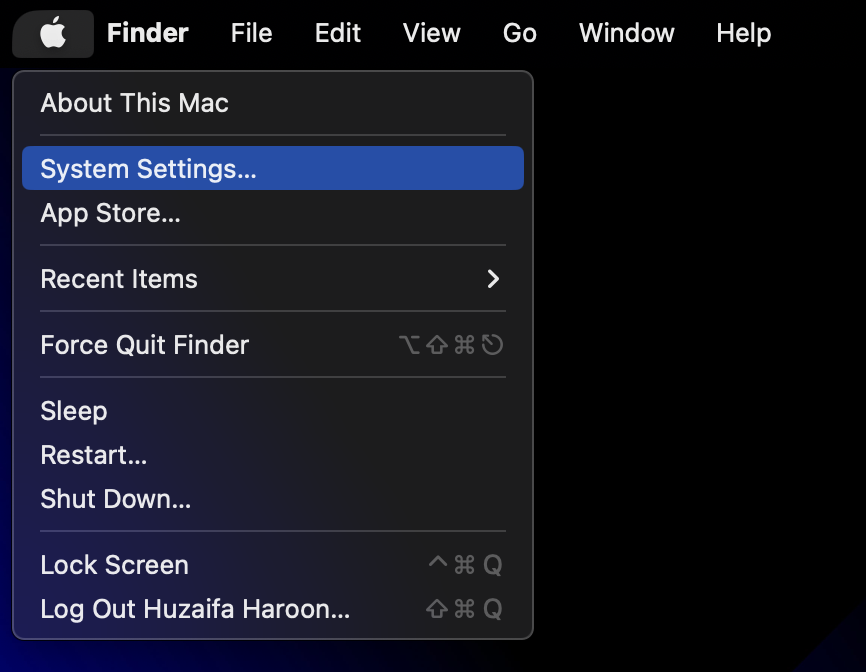
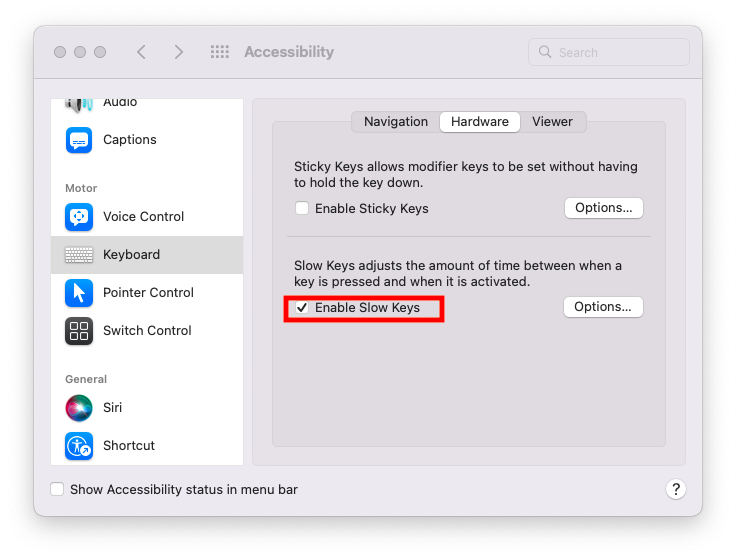
System Settings and System Preferences mean the same thing - Once in settings, select Accessibility and choose Keyboard from the left sidebar.
- Then, select the box next to Enable Slow Keys.
- Click on Options… and drag the slider to the longest option for Acceptance Delay.
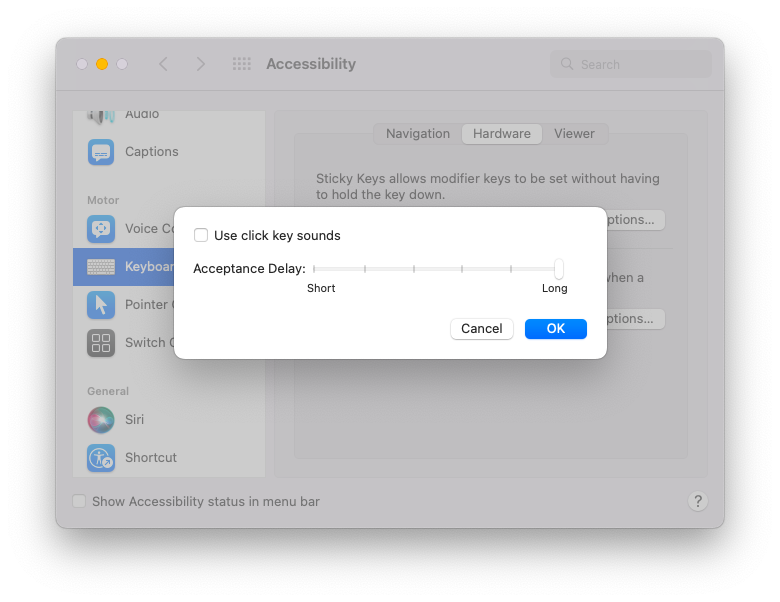
- To restore your keyboard’s functioning, simply turn off the box next to Enable Slow Keys.
4. Using Terminal Script
Starting with macOS Big Sur, many system extensions were phased out in favor of added security so this method only works till macOS Catalina.
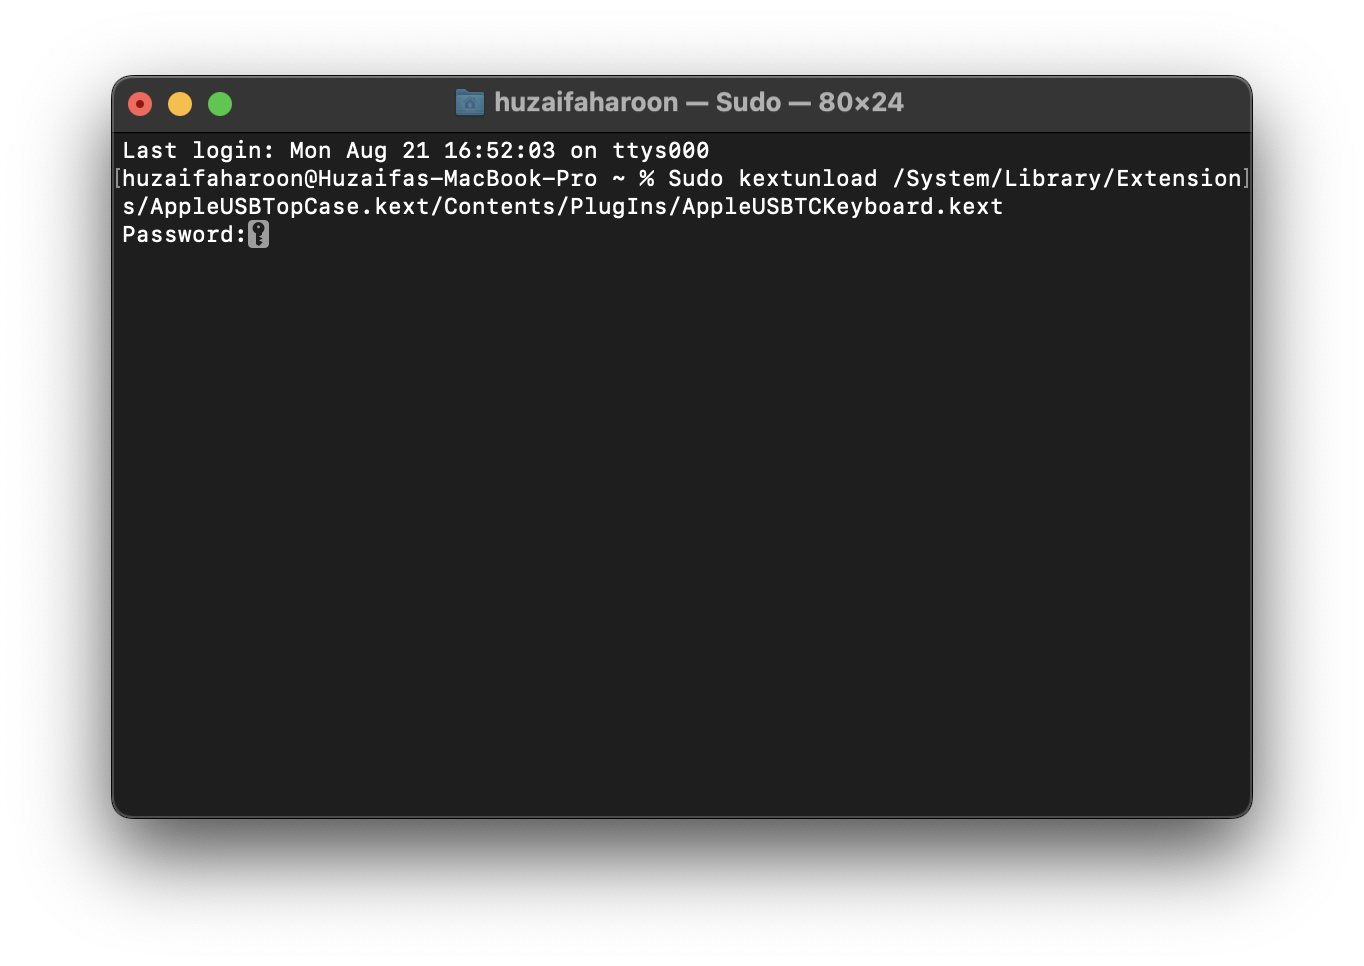
- Press Command + Spacebar and type “Terminal,” then select the first option.
- Type the following command into the Terminal window and hit Enter:
sudo kextunload /System/Library/Extensions/AppleUSBTopCase.kext/Contents/PlugIns/AppleUSBTCKeyboard.kext- Next, enter your MacBook’s password to confirm your action to disable the internal keyboard.
To restore your keyboard’s working, enter the following command into the Terminal window:
sudo kextload /System/Library/Extensions/AppleUSBTopCase.kext/Contents/PlugIns/AppleUSBTCKeyboard.kext5. With Keyboard Shortcuts
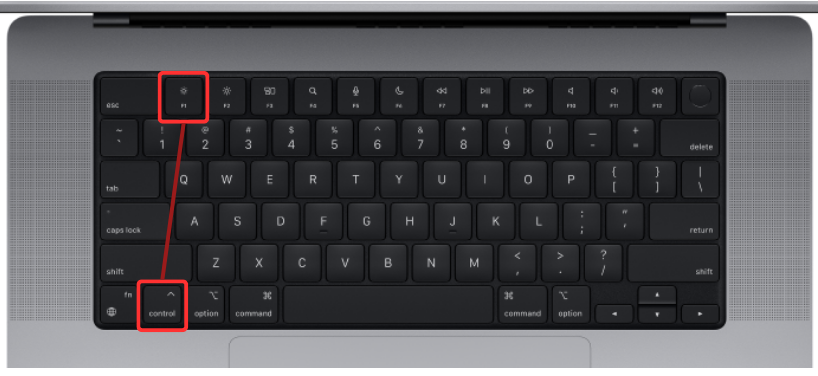
You’ll encounter the infamous Control F1 method all over the internet telling you that it disables your keyboard on, at least, older macOS versions. But this is simply untrue. This shortcut was always meant to disable the alternate functions of the function row (brightness, volume, Spotlight) and turn it into normal function keys, à la Windows.
Regardless, if you’re looking to access the standard functions of these keys, here are the steps:
- Hold down the Control key.
- Press F1 while still holding the Control key.
- Repeat the same key sequence to enable the keyboard again.
On newer versions of macOS, this shortcut has been replaced with a proper accessibility feature that you can toggle on in Settings > Keyboard > Keyboard Shortcuts > Function Keys.

Conclusion
Knowing how to disable the keyboard on Mac can be a valuable skill. Your MacBook’s keyboard may need to be turned off for various reasons, including maintenance, troubleshooting, or just to prevent accidental input while repairing those faulty butterfly switches.
The old methods of using keyboard shortcuts, mouse keys, and the script might not function on the most recent macOS versions. However, you can still disable your Mac’s keyboard by using external keyboard preferences or third-party applications. To return the keyboard to its usual functioning after finishing your activity, remember to enable it again.
FAQs
There are many reasons why you might wish to turn off the keyboard on your MacBook. For example, if you’re cleaning the keyboard and want to prevent accidental key presses, debugging keyboard difficulties, or utilizing an external keyboard exclusively for a particular activity.
Yes, you can still use an external keyboard without any problems when the built-in keyboard is disabled. This might be especially helpful if you want to keep using your MacBook with an external keyboard but are having issues with the internal keyboard.
It shouldn’t automatically breach your warranty if you use Terminal or third-party software to deactivate the keyboard. To avoid any potential issues, you must take care to utilize reliable software, adhere to reliable instructions, and exercise caution. It’s a good idea to review the warranty conditions for your MacBook or ask Apple Support for advice if you’re worried about potential warranty repercussions.
Reviewed by Huzaifa Haroon