How to Fix WSUS 0x80072EE6 Error Code
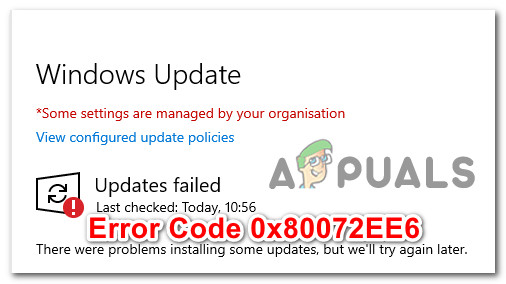
Some Windows users are reporting that they end up seeing the error code 0x80072EE6 when attempting to update their virus signature on Windows Security, when attempting to install a pending Windows Server update or when attempting to update or install Windows Live Installer.
After investigating this particular issue, it turns out that there are several different underlying causes that might be causing this particular error code. Here’s a list of potential culprits that are likely responsible for this particular Windows error code:
- Incorrect Date and Time – In case you’re seeing this error while attempting to engage in data exchange with the WSUS Server Update Service, you need to start by ensuring that the correct time & date is set accordingly. If your date & time is off, the WSUS will simply refuse the connection.
- MSXML3.dll is not Registered – In case you’re encountering this issue while checking for new updates on your Windows or Windows Server computer, you’re likely dealing with a missing DLL dependency (msxml3.dll). If this scenario is applicable, you should be able to fix this problem by using an elevated Command prompt to re-register the missing dependency.
- Badly configured Group Policy for WSUS – According to a lot of affected users that were encountering this issue while attempting to download Windows Updates via WSUS, you can expect to see this error occurring in those instances where the Group Policy responsible for specifying the Microsoft download address is incorrectly configured. In this case, you can fix the issue by ensuring that the download address is correctly stored.
- Process conflict – As it turns out, you can expect to see this issue occurring after a major driver installation, after an important Windows update, or after the installation of a conflicting 3rd party service. Since there are a lot of potential culprits that might cause this issue, you should start by using a previously created System Restore snapshot.
- System File Corruption – According to some affected users, you can also expect to see this error in instances where you’re actually dealing with some underlying case of system file corruption that is affecting your computer’s ability to connect to the WSUS servers. In this case, resetting your Windows components with procedures like clean installing or repair installing should allow you to take care of the issue.
Now that you are familiar with every potential culprit that might be responsible for the 0x80072EE6 error code, here’s a list of methods that other affected users have successfully used to get to the bottom of the issue.
Method 1: Set the Correct Time and Date
Keep in mind that if you’re encountering this problem while attempting to engage in data exchange with a WSUS (Windows Server Update Services) server, the first thing you need to do is ensure that your computer is using the correct time & date.
This is important because WSUS is extremely picky when ensuring that the machine trying to connect to the server bypasses every requirement. And one of the requirements that are very important is date, time, and timezone.
As it turns out, if the time & date is older than what it should be, you can expect to encounter this problem because the WSUS is refusing the connection.
Several affected users have confirmed that they managed to fix the issue after modifying the time, date, and timezone values to the correct values via the Date & Time utility:
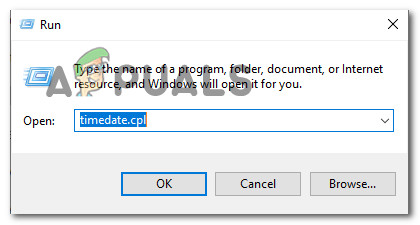
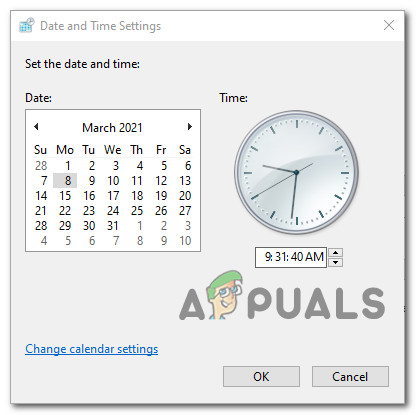
- Open up a Run dialog box by pressing Windows key + R. Next, type ‘timedate.cpl’ inside the text box and press Enter to open up the Date and Time window.
Opening the Date & Time window - Once you’re inside the Date & Time window, access the Date and Time tab, then click on Change date and time.
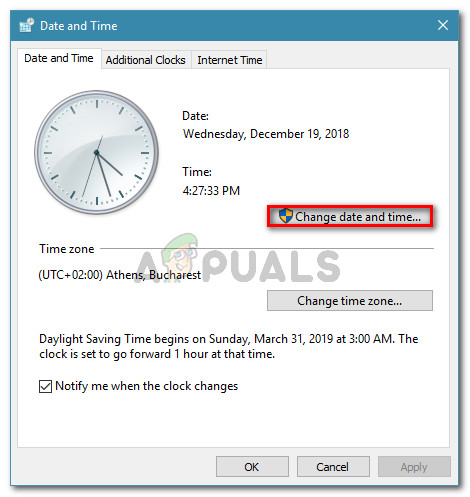
Changing the Date and time values - When you’re prompted by the UAC (User Account Control), click Yes to grant admin access.
- Inside the Date and time settings, set the correct values for Time and Date using the calendar and the digital clock before clicking Ok to save the changes.
Modifying the Date and Time Note: Optionally, if your timezone is off, return to the Date and Time tab and click on Change Time Zone in order to modify the timezone to the correct UTC value.
- Click Apply to save the changes, then restart your computer and see if the issue is fixed once the next startup is complete.
If this particular issue is still not resolved, move down to the next potential fix below.
Method 2: Re-registering the MSXML3.dll (if applicable)
As it turns out if you’re encountering this problem while attempting to check for new updates on your Windows or Windows Server computer, chances are you might be seeing this error due to a missing Microsoft XML Core Service file dependency (msxml3.dll).
Several affected users that were previously dealing with the same problem have confirmed that the problem was finally resolved after they used an elevated Command Prompt to re-register the problematic Dynamic Link Library file.
If you haven’t tried this method yet and this scenario looks like it could be applicable, follow the instructions below:
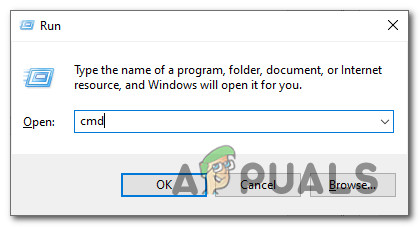
- Press Windows key + R to open up a Run dialog box. Next, type ‘cmd’ inside the text box and press Ctrl + Shift + Enter to open up a Run dialog box. When you’re prompted by the UAC (User Account Control), click Yes to grant admin access.
Opening an elevated CMD prompt - Inside the elevated CMD prompt, type the following command and press Enter to re-register the problematic DLL file:
regsvr32 MSXML3.dl
- If the operation is finished successfully, you will get a success message telling you that the operation was completed.
- Restart your computer and see if the issue is resolved once the next system startup is complete.
In case the same problem is still occurring, move down to the next potential fix below.
Method 3: Adding ‘https://’ to Microsoft update service location (if applicable)
If you receive the 0x80072EE6 error when you attempt to download an update from Windows Server Update Services (WSUS) and you have previously configured WSUS via the Group Policy editor, chances are you’re seeing this error because the location of the Microsoft Update Service location is not correctly set up.
If this scenario is applicable, there’s a very big chance that this problem is occurring because the URL under the Group Policy setting ‘Specify intranet Microsoft update service location‘ is invalid.
In case you find yourself in this particular scenario, follow the instructions below to access the Group Policy editor and modify the value of Specify Intranet accordingly so that the Microsoft Update service location is correct.
Here’s what you need to do:
- Press Windows key + R to open up a Run dialog box. Next, type ‘gpedit.msc‘ inside the text box and press Enter to open up the Local Group Policy Editor. When you’re prompted by the UAC (User Account Control) prompts, click Yes to grant admin access.

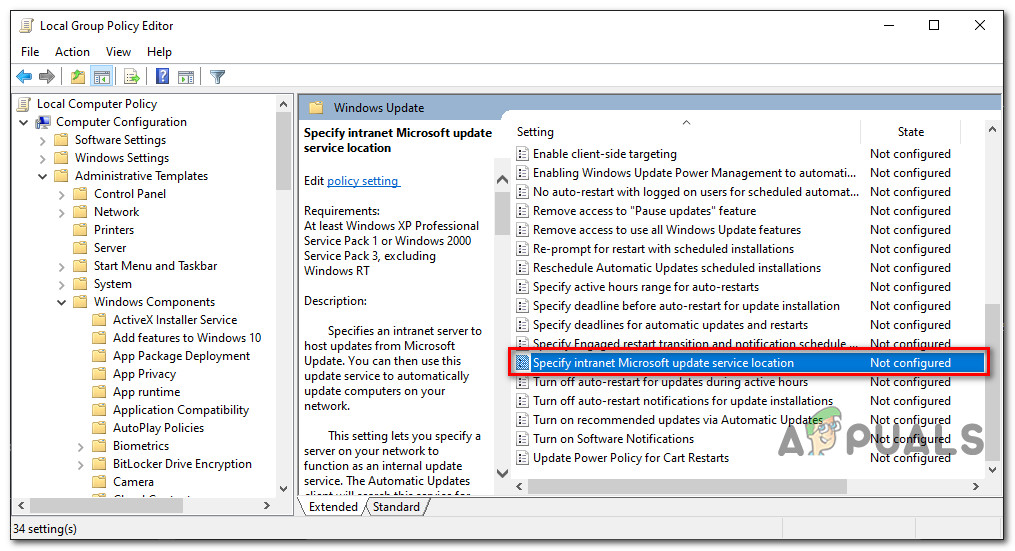
Accessing the Gpedit Utility - Once you’re finally inside the Local Group Policy Editor, use the menu on the left to navigate to the following location:
Computer Configuration\Administrative Templates\Windows Components\Windows Update\
- After you’re inside the Windows Update policy folder, move over to the right-hand pane folder and double-click on Specify Intranet Microsoft Update Service.
Accessing the Specify intranet Microsoft update service location - Next, ensure that the policy is Enabled, then scroll down to the Options tab and ensure that the address specified inside the Set the alternate download server starts with ‘HTTP://‘ or ‘HTTPS://‘.
- If the download server starts directly with the address, make the necessary modifications before clicking Apply to save the changes.
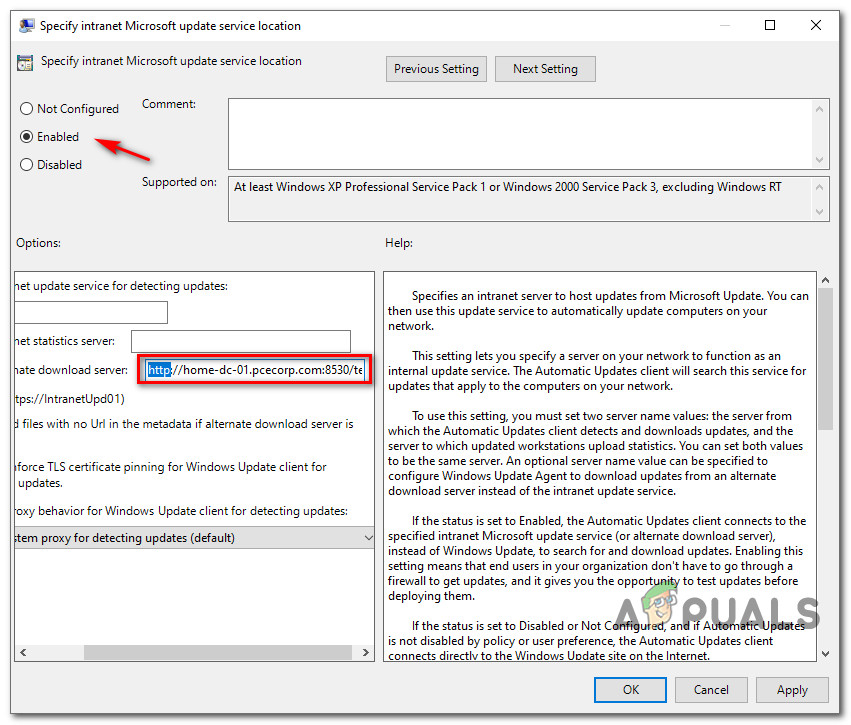
Ensuring the the ‘Specify intranet Microsoft update service location’ has the correct location - Once the policy has been correctly modified, restart your computer and see if the issue is fixed once the next computer startup is completed.
If the same 0x80072EE6 error is still occurring, move down to the next potential fix below.
Method 4: Using a System Restore Snapshot
If none of the methods above have allowed you to fix the 0x80072EE6 error, you should start considering the fact that this issue started occurring after an important update, a major driver installation or an unexpected machine shutdown ended up messing up with your computer’s ability to connect to the WSUS servers.
Since there are a lot of different potential culprits that might be responsible for this issue, one ‘cure-all’ is to use a previously created System Restore snapshot to restore your computer back to a healthy state in which this issue was not occurring.
Keep in mind that the System will allow you to revert your computer back to a healthy state in which the current circumstances that are causing the 0x80072EE6 error were not occurring.
Important: By default, the System Restore utility is configured to regularly save new restore snapshots during important system events. Unless you modified the default behavior, you should have plenty of snapshots to choose from.
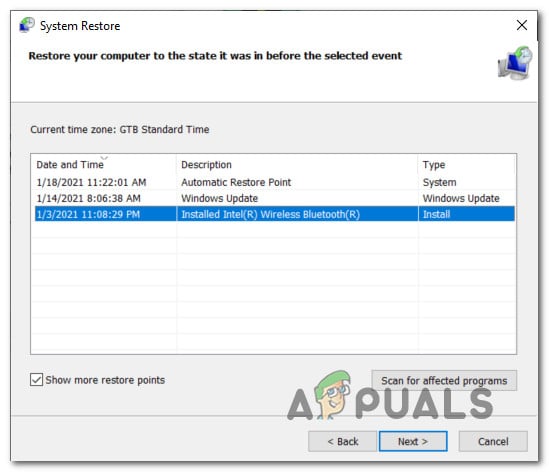
If you haven’t tried using the System restore until now, here’s a guide that will walk you through using a previously saved System Restore snapshot.
Note: Keep in mind that once you restore your computer state to an old one, every change you made since the restore snapshot was created will be lost.
If this problem still did not fix the 0x80072EE6 error in your case or you didn’t manage to find a suitable snapshot, move down to the next potential fix below.
Method 5: Reset every Windows Component
In case none of the methods presented above have been effective in your case, you should seriously take into consideration that your computer might be dealing with some type of system file corruption that cannot be resolved conventionally.
If you find yourself in a scenario like this, the only thing you can do is reset every relevant Windows component and eliminate every potentially corrupted element – When it comes to doing this, you have two ways forward:
- Clean Install – This should be your first pick if you’re looking for a quick fix that can be deployed without the need to use compatible Windows installation media. You can initiate a clean install procedure directly from the GUI menu of your Windows installation, but keep in mind that unless you back up your data in advance, you will lose any personal data that’s currently stored on the OS drive.
- Repair Install – If you have important information on the OS drive that you plan on keeping, a repair install should be the way to go for you, even if the procedure is a bit tedious. You’ll need to use compatible installation media, but you will be able to keep your personal files, installed applications, games, and even some user preferences rooted on the OS drive.