How to Setup a Dev Drive on Windows 11 for Developers?
 Reviewed by Muhammad Zubyan
Microsoft has recently introduced a new feature for Windows 11 that targets programmers and developers. Dev Home is a new application for developers that allows them to set up a developer environment in Windows, install various applications, and more.
Dev Drive is one of the main features accompanied by Dev Home, which aims to enhance the development experience in Windows. The Windows Subsystem for Linux and similar features have always been welcomed by developers on Windows, and Dev Home is intended to serve the same purpose.
1. What is Dev Drive?
Normally, if you are a developer, you would have to create various folders depending on the number of projects on which you are working. These directories, sometimes stored in a single parent directory, would act as the local storage on your computer for projects and other related files.
However, with the release of Dev Drive, you can have a dedicated volume for your development files that are stored separately from your other files. In the words of Microsoft, Dev Drive is supposed to improve the performance of any development workload on your computer.
As it turns out, Dev Drive uses the Resilient File System (ReFS) technology which provides you with more control over the settings of the dedication partition. This can include various settings, from security and antivirus configuration to administrative control, and much more.
As such, Dev Drives can be really helpful in work environments, not only for use in your home setup to separate work from personal files. Currently, Dev Drive is in public preview, which means you cannot access it directly. To use Dev Drive on your computer right away, you will have to opt into the Windows Insider Program. However, it will soon be available in stable releases as well.
2. Setup Dev Drive in Windows
Since Dev Drive is not yet available on the stable release of Windows, you will have to opt into Windows Insider Program if you wish to try it out right now. In the near future, the feature will directly be available in the Windows Settings app and you will not be needing to opt into the Insider Program.
With that said, we have provided extensive instructions on setting up Dev Drive down below. Follow through.
Step 1. Join Windows Insider Program
Currently, Dev Drive is available in the Dev Channel of the Windows Insider Program. To join the insider program, follow the instructions below:
- First, open the Settings app by pressing the Windows key + I on your keyboard.
- In the Settings app, navigate to Windows Update > Windows Insider Program.
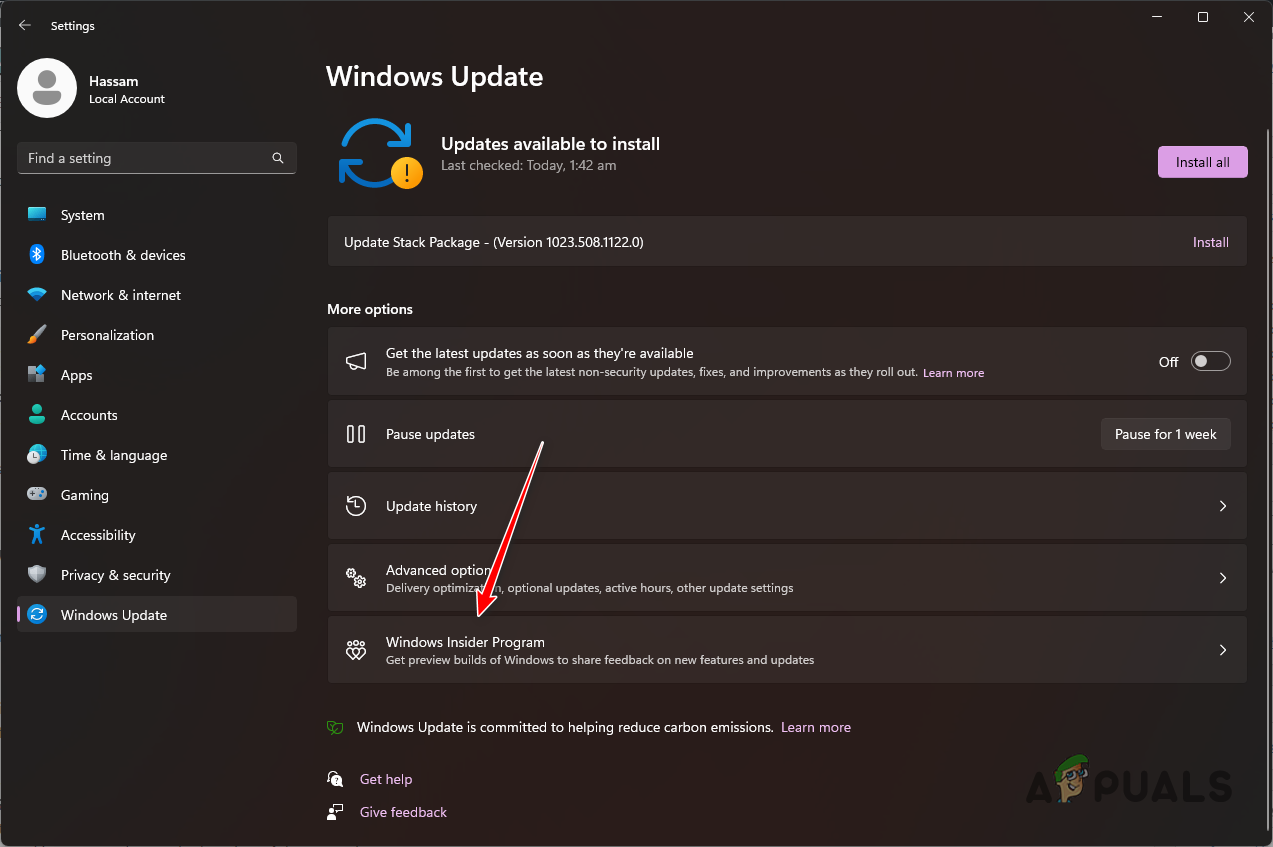
Navigating to Windows Insider Program - Click on the Get started option.
- You will have to log in via a Microsoft account and link it with the Windows Insider Program to be able to proceed.
- Once you have done that, choose the Dev Channel when prompted.
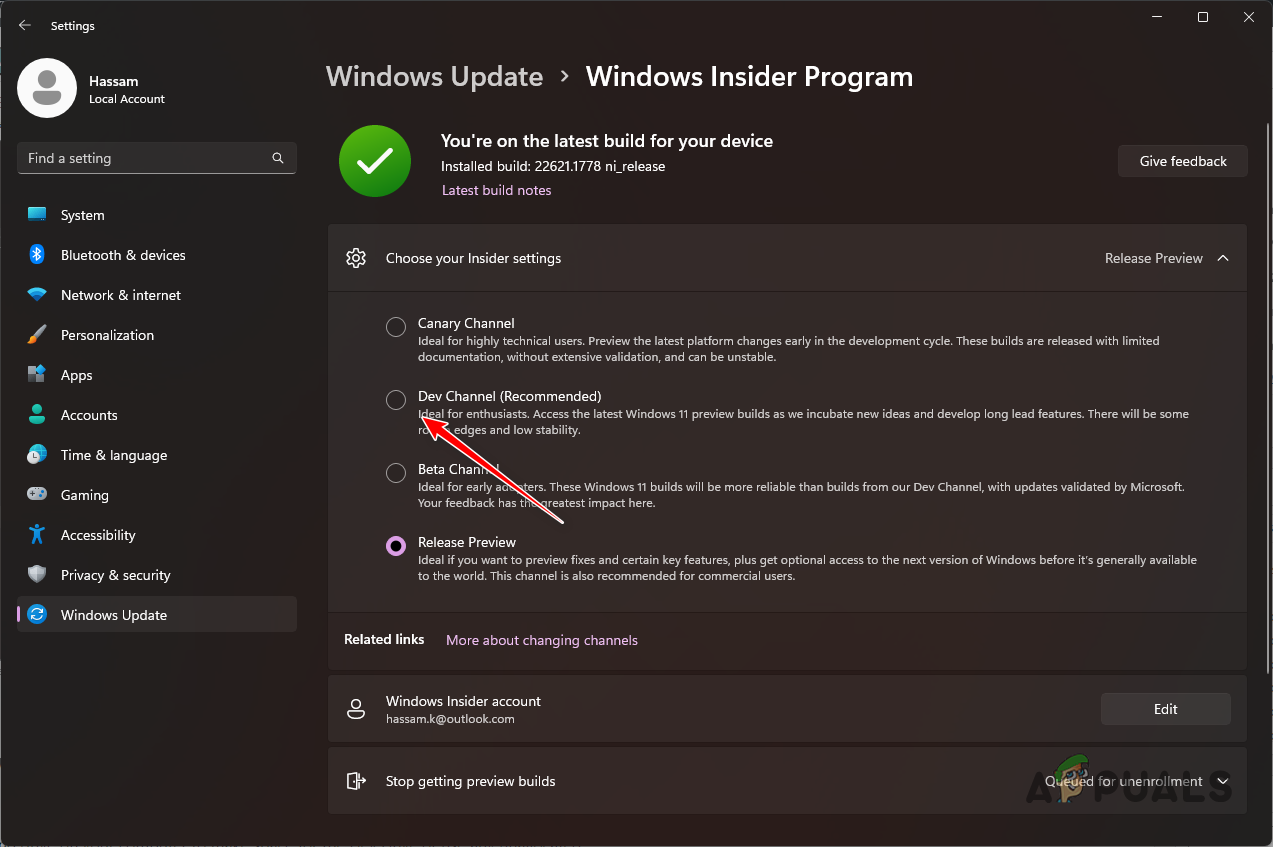
Choosing Dev Channel for Insider Program - Install the new updates and restart your computer.
Step 2. Create a Dev Drive
Now that you have rolled into the Windows Insider Program, you can create a Dev Drive. There are various options you can use while trying to create a Dev Drive. You can use a new hard drive on your computer for the Dev Drive, resize the existing drive on your computer to make space for the Dev Drive or use any unallocated space on your hard drive.
The unallocated space option will only appear if there is any unallocated space available on your hard drive. You will need at least 50 GB of free space to create a Dev Drive. Follow the instructions below to create a Dev Drive:
- First, open the Settings app by pressing the Windows key + I on your keyboard.
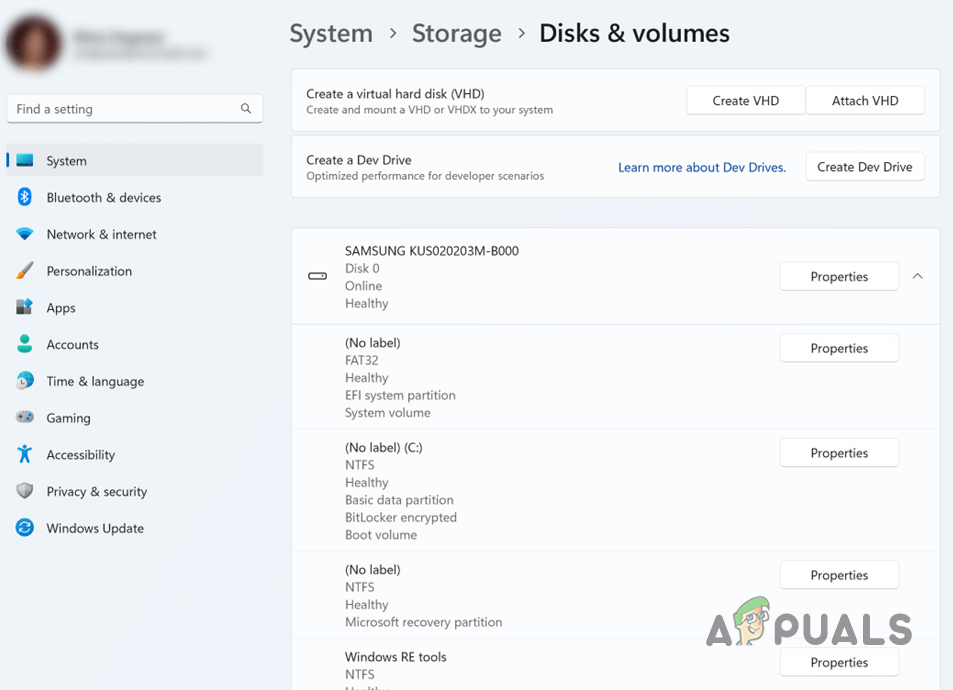
- Navigate to System > Storage > Advanced Store Settings > Disk & volumes on the Settings app.
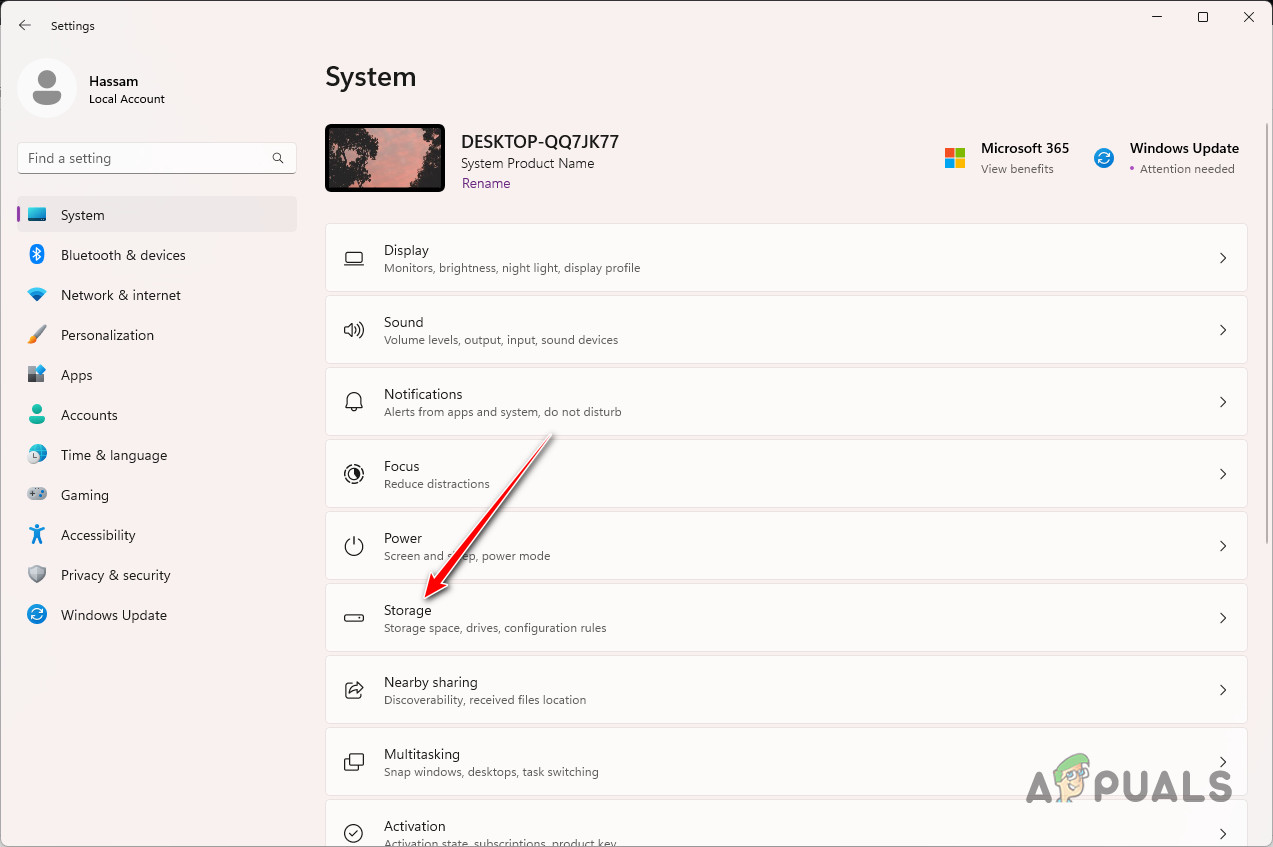
Navigating to Storage Settings - There, click on the Create Dev Drive option.

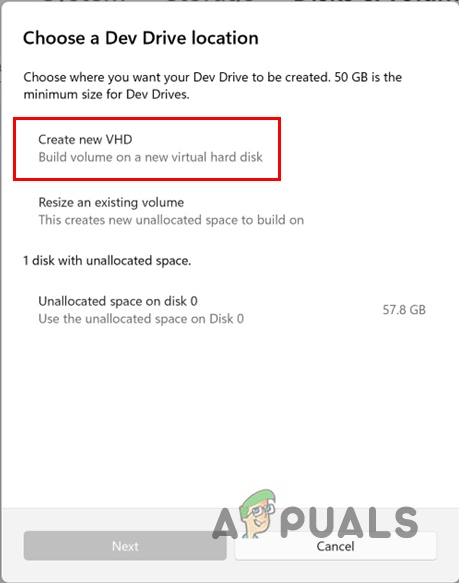
Creating Dev Drive - A new pop-up will appear asking you to choose the location of the Dev Drive.
- Here, if you wish to use a virtual hard disk, choose the Create new VHD option.
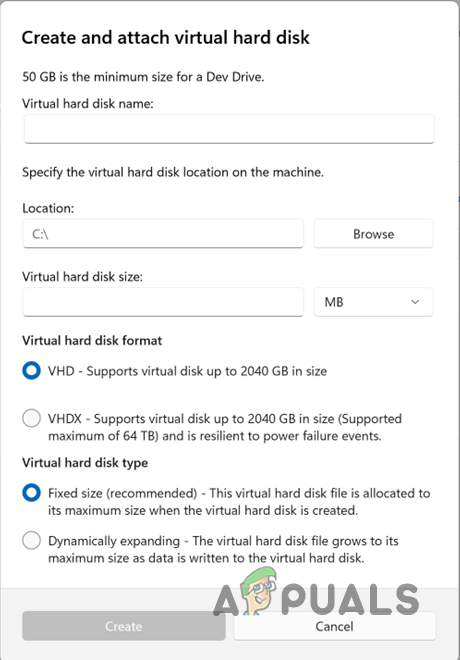
Using VHD for Dev Drive - Once you do that, you will be prompted for further details. Start by giving the virtual hard disk a name. After that, specify a location for the virtual hard disk on your machine by clicking the Browse button. Then, provide the amount of disk space to be allocated for the virtual hard disk. The minimum size is 50 GB, so keep that in mind. Finally, choose the virtual hard disk format and type as per your requirements and click the Create button.
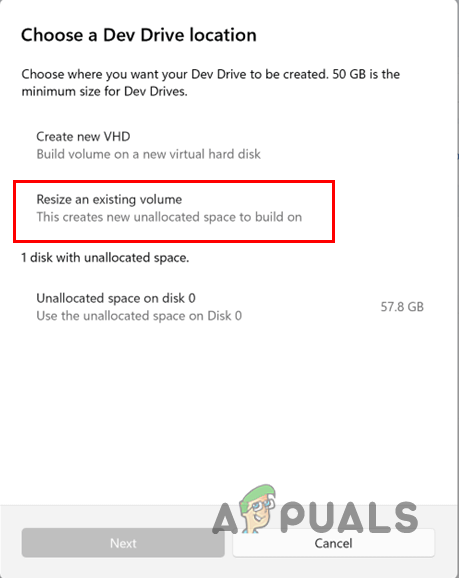
VHD Details for Dev Drive - If you would like to resize an existing Dev Drive, choose the “Resize existing volume” option on the “Choose a Dev Drive location” pop-up.
Resizing Volume for Dev Drive - Once you do that, select the volume that you would like to resize.
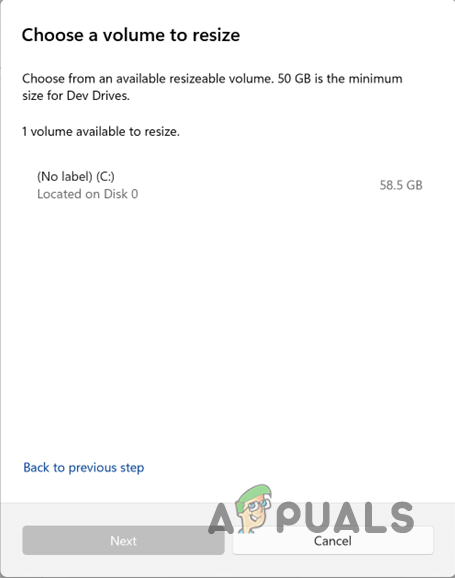
Selecting Volume to Resize - After that, decrease the size of the volume while keeping in mind you need to create at least 50 GB of unallocated space for the Dev Drive. Click Next.
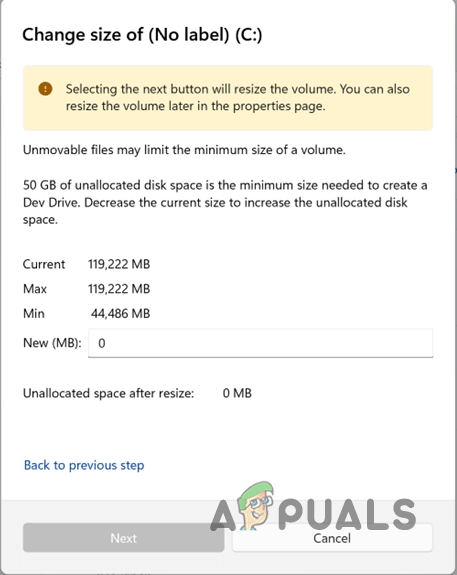
Resizing Existing Volume - To create a Dev Drive in the unallocated space, give the drive a name and assign it a letter. You can also change the size of the Dev Drive. Finally, click the Format button to create the Dev Drive.
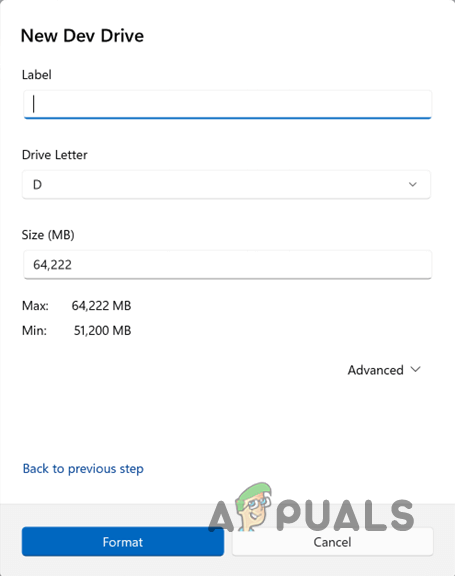
Creating New Dev Drive
With that, you have successfully created a Dev Drive on your computer. Dev Drives offer various benefits to developers that you can learn more about here. In addition, it is important to note that you are not supposed to install tools and applications on the Dev Drive. The drive is to be used only for storing project files, code repositories, and other similar files.
All of the tools, including tools aimed at developers such as Visual Studio Code or more, are to be installed on partitions other than the Dev Drive.
Reviewed by Muhammad Zubyan