Ring Doorbell not Connecting to WiFi? Try These Fixes
 Reviewed by Huzaifa Haroon
Ring Doorbell won’t connect to Wi-Fi due to issues in the router’s configurations or as a result of a problem in the bell’s firmware. You will not be able to connect a Ring Doorbell with a Wi-Fi usually after a firmware update of the doorbell or router.
All variants of the doorbell are reported to show the issue with different make/models of routers or phones. Sometimes, the issue occurs with a brand new doorbell while in other cases, a functioning ring doorbell stopped connecting to the WIFI.
Before starting the troubleshooting process, make sure the following points are met.
- The Ring Doorbell is within the range of the Wi-Fi network. If the doorbell connects to the Wi-Fi when close to it but fails in its required location, you may need a Wi-Fi extender to boost the wireless signals. You can confirm this by checking the RSSI of the bell in the Ring app.
- Only a certain number of devices can connect to a Wi-Fi network. Make sure that limit is not reached on your router. You can confirm this in the router settings or by connecting a new device (e.g., a phone) to the Wi-Fi network.
- If your doorbell is battery-powered, make sure it is fully charged or replace its battery.
- Disable Cellular or Mobile data on your phone. Some phones automatically switch to cellular data when Wi-Fi signals are weak. This can break the phone’s communication with the doorbell.
- The power adapter used with the doorbell meets the power requirements of the doorbell.
- Make sure the wiring to the doorbell is proper and no corrosion on the wires.
- The screws of the doorbell are not loose or not too tight.
1. Restart the Ring Doorbell, Phone, and Router
You will not be able to connect a Ring doorbell to a Wi-Fi if the communication modules of the doorbell, phone, or router are stuck in an error state. In such a case, restarting all the modules will solve the problem.
- Power off the router and unplug its power cable.
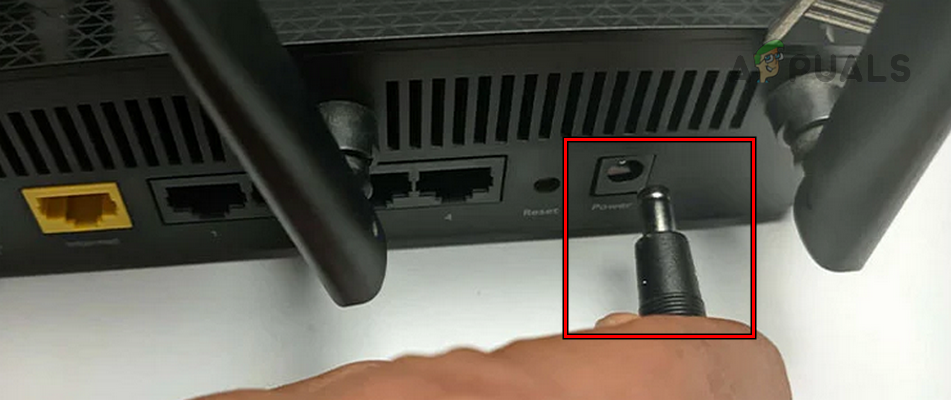
Unplug the Power Cable of the Router - Power off your phone and then power off the Ring doorbell.
- Unplug the doorbell from the power source and if it has a battery, remove its battery.
- Wait for a minute and put back the battery in the doorbell if the model supports it.
- Plug back the power cables of the devices and power on the router. Make sure all the devices are directly connected to a power source, without any surge protector or extension cable.
- Power on the phone and then the doorbell. Check if the Wi-Fi connection issue is cleared.
2. Disable VPN on the Phone
To configure a Ring doorbell, the phone, and doorbell must be on the same local network. If a VPN is enabled on your phone, the doorbell won’t be on the VPN network and thus the doorbell will not connect to the Wi-Fi.
To solve this, disable VPN on the phone. To do so on a Google Pixel phone:
- Launch the Google Fi app on the Pixel phone and go to Privacy & Security > Protect Your Online Activity (Show Details) > Advanced Settings.
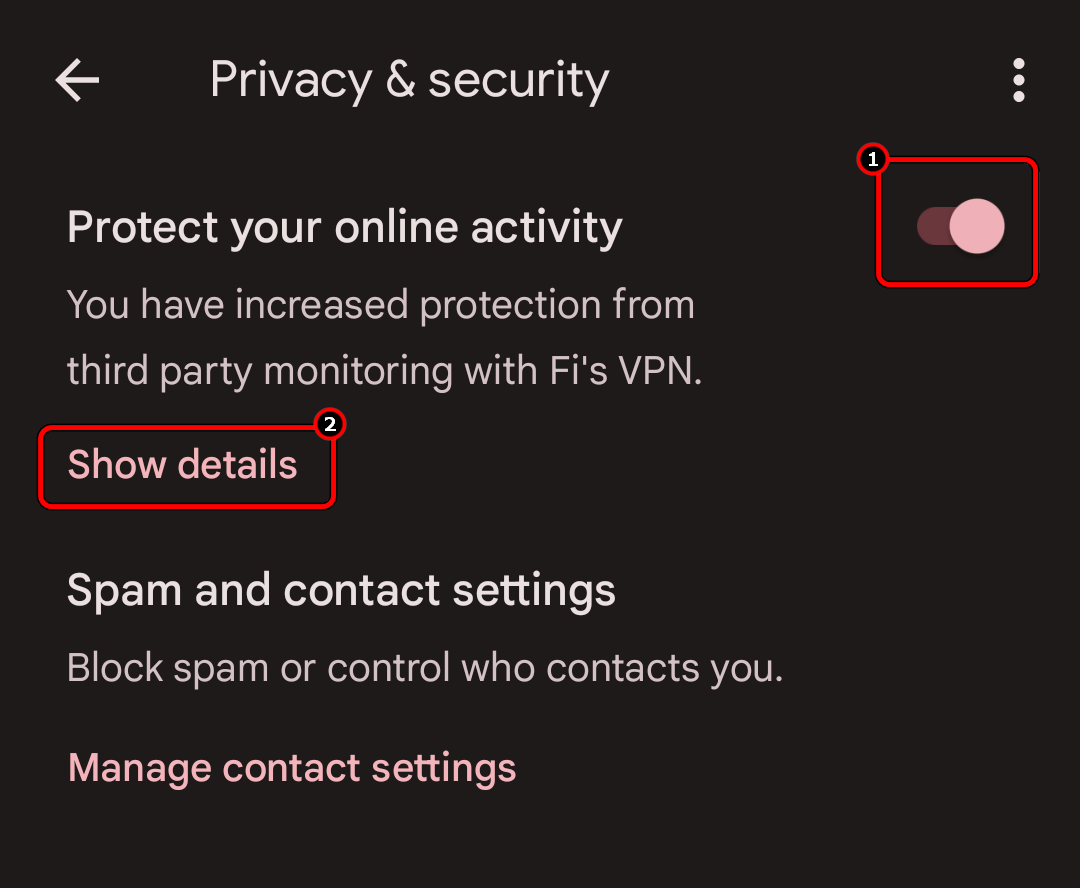
Open Show Details in the Privacy & Security Settings of the Google Fi App - Add the Ring app as an exception and check if the doorbell problem is solved.
If this does not work and your router has a built-in VPN, disable the router’s VPN and check if the problem is solved.
3. Reset the Network Settings of Your Phone
Your phone will not be able to connect to the Ring Doorbell if the network settings of your phone are not valid. Due to this, the phone will not be able to communicate properly with the Ring Doorbell. This can be fixed by resetting the network settings of your phone.
To reset network settings on an iPhone:
- Navigate to the iPhone Settings > General > Reset.
- In the list of options, tap on Reset Network Settings and confirm to reset the phone’s network settings.
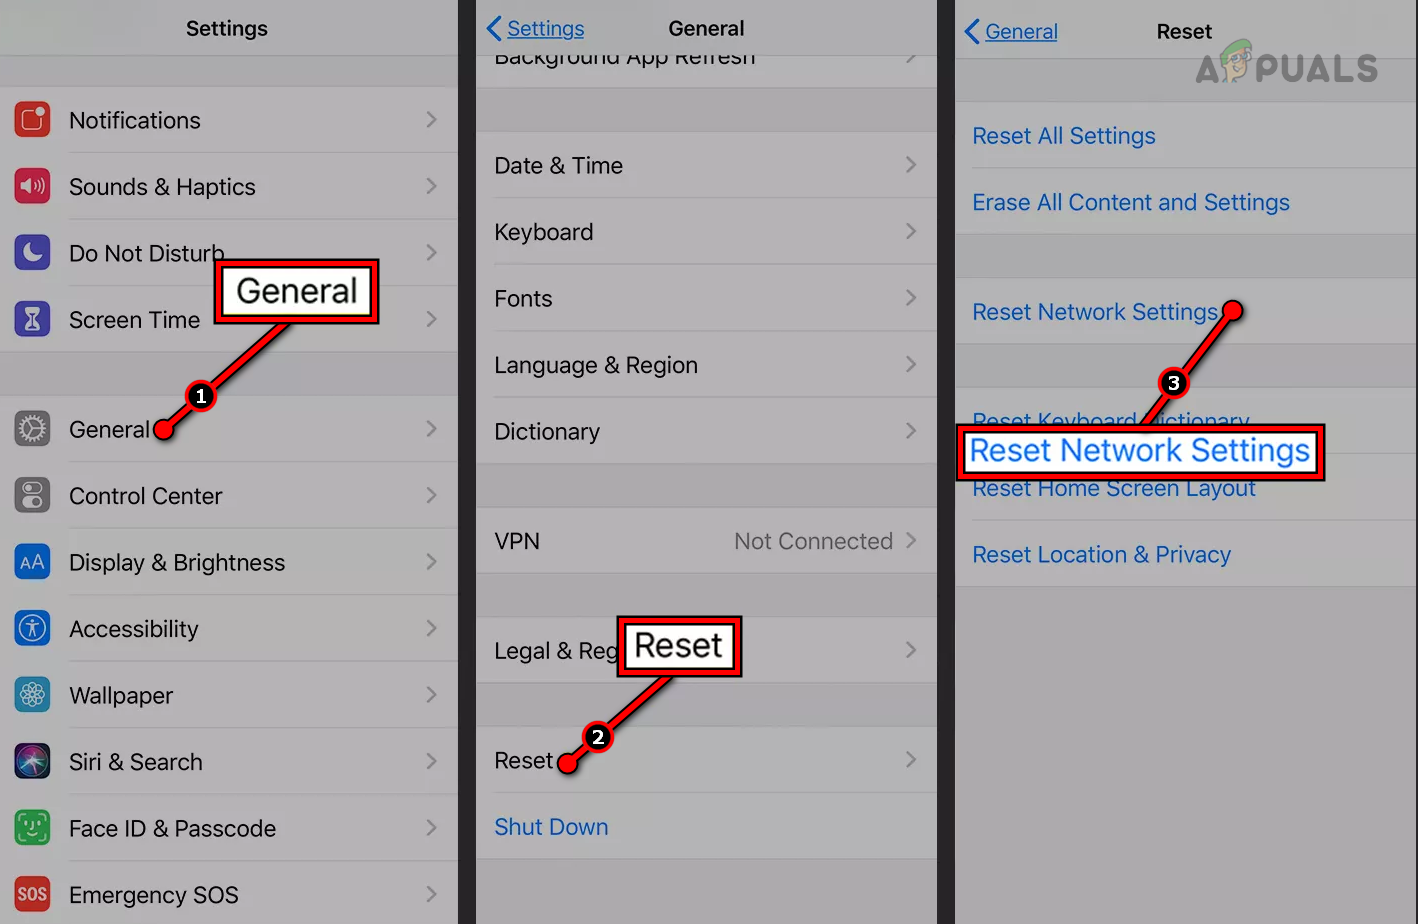
Reset the Network Settings of the iPhone - Restart the phone and Ring Doorbell. Check if the doorbell is connecting to the Wi-Fi.
4. Edit the Router Settings
Ring Doorbell won’t connect to Wi-Fi if your router’s configurations are not as per the requirements of the doorbell requirements. In such a case, editing the router’s settings will resolve the issue.
Access the admin portal of the router through a web browser or app and try the configurations discussed below.
Rename the Network and Change the Wi-Fi Password
- Navigate to Settings > Wireless Settings.
- Change the network name. Make sure not to use space in or at the end of the name. Also, do not use any special character (such as @#$#%_-‘/\!) in the name. Just use an alphanumeric name (e.g., abcd1234).
- Change the Wi-Fi password. Make sure not to use any space or special characters in the password. Just use an alphanumeric password (such as abcd1234).
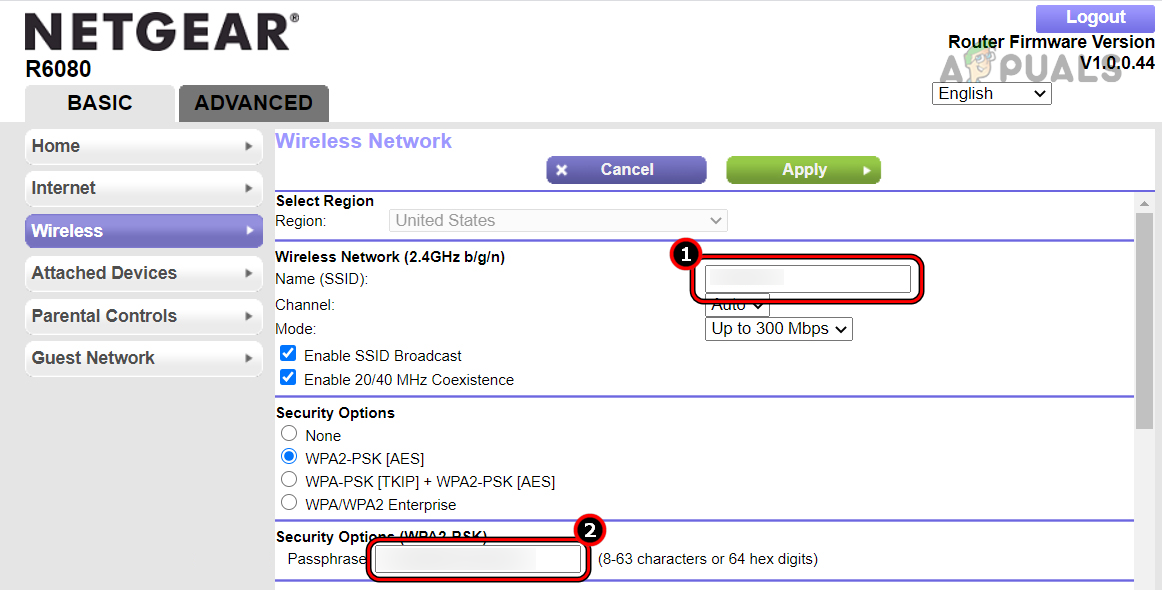
Change the Name and Password of Your WIFI Network - Make sure the Wi-Fi’s SSID is not set to Hidden.
- Save the changes and restart the router.
- Connect your phone to the renamed network and check if the doorbell is connecting to the Wi-Fi.
If you have recently changed your Wi-Fi router, set up the SSID and password of the new Wi-Fi network as the same as the old one. See if the Ring Doorbell connects to that network.
Disable Auto Optimize
- Navigate to Settings > Site > Auto-Optimize Network.
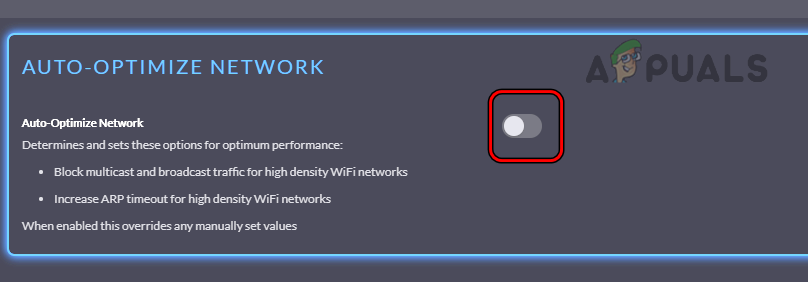
Disable Auto Optimize Network - Disable Auto Optimize and save the changes.
- Restart the router and check if the Ring Doorbell connects to the Wi-Fi.
Change the Wi-Fi Mode of the Wireless Network
- Go to Settings > Wireless Settings.
- Change the Wireless Mode to 802.11 b/g/n. For some models, you may need to disable 802.11R.
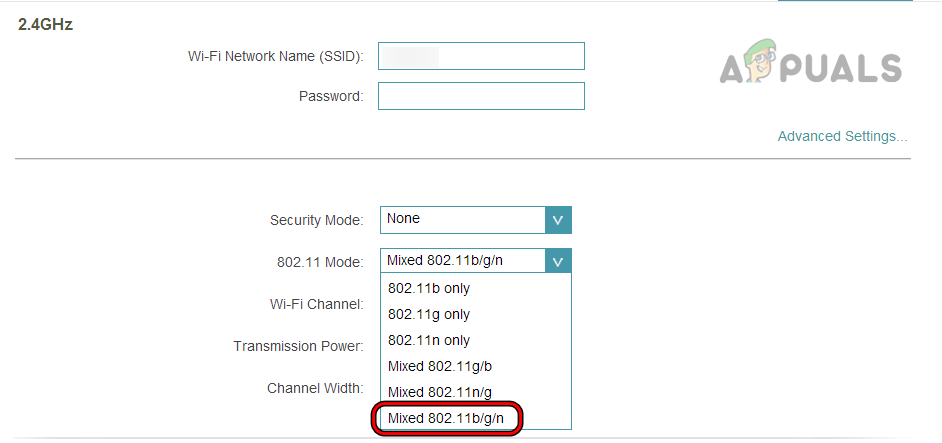
Change Wireless Mode to 802.11 b/g/n - Save the changes and restart the router. Check if the doorbell is connecting to the Wi-Fi.
- If not, set the Wireless Mode to 802.11g and check if that clears the problem.
Change the Wi-Fi Security
- Navigate to Settings > Gateway > Connection > Wi-Fi.
- Select Edit and change the Security to WPA/WPA2. For some models, you may need to disable other encryption settings (such as WEP3).
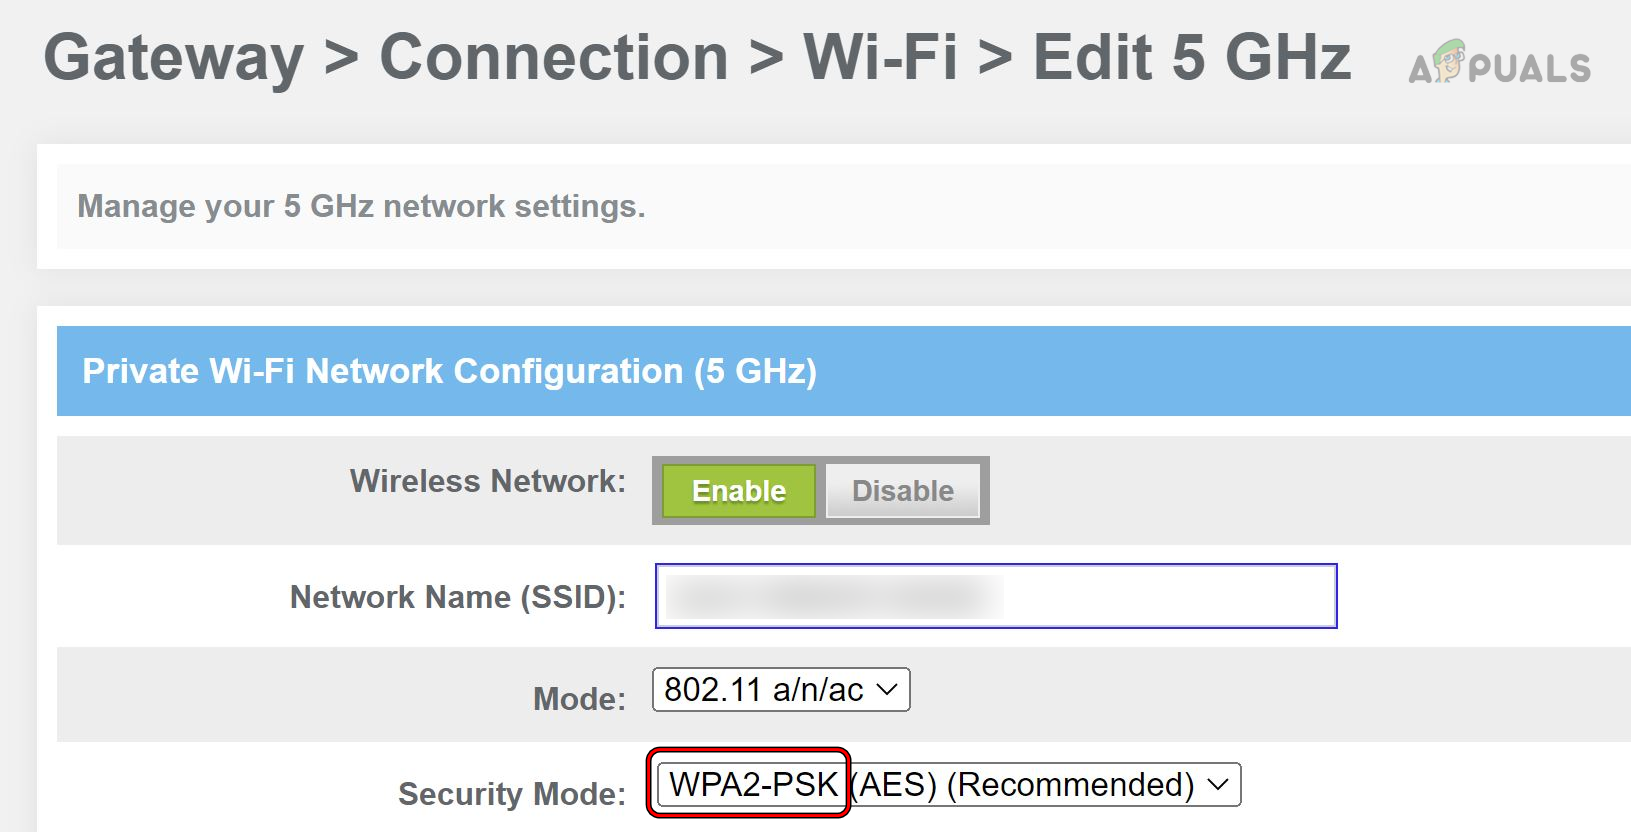
Change the Security Mode to WPA or WPA2 - Save the changes and restart the router. Verify if the issue is resolved.
Disable Multicast and Broadcast Filtering
- Navigate to Settings > Wireless Networks > Multicast and Broadcast Filtering.
- Deselect Block LAN to WLAN Multicast and Broadcast Data. If the option is already unchecked, enable it.
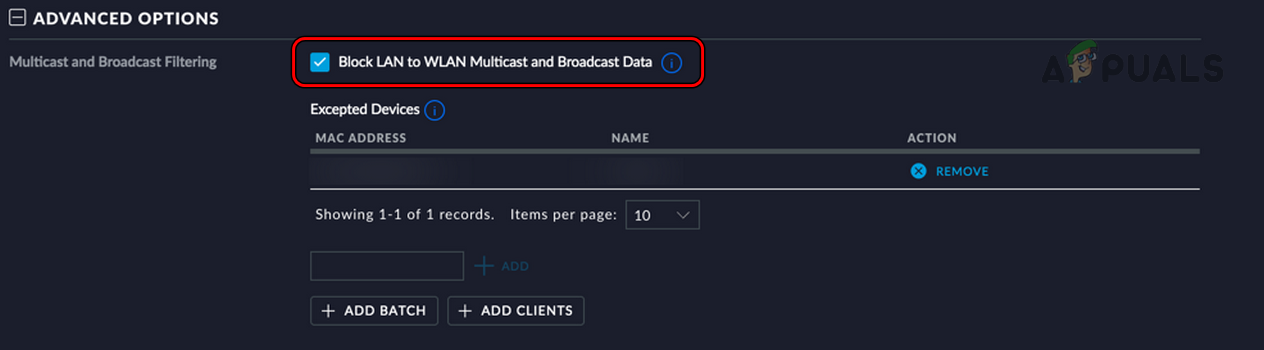
Disable Block LAN to WLAN Multicast and Broadcast Data - Save the changes and restart the router. Verify if the problem is solved.
- If not, enable Multicast DNS and save the changes.
- Restart the router and check if the problem is solved.
Enable 2.4 GHz Band Only
- Navigate to Settings > Wireless Settings.
- Disable the 5 GHz band and enable the 2.4 GHz option.
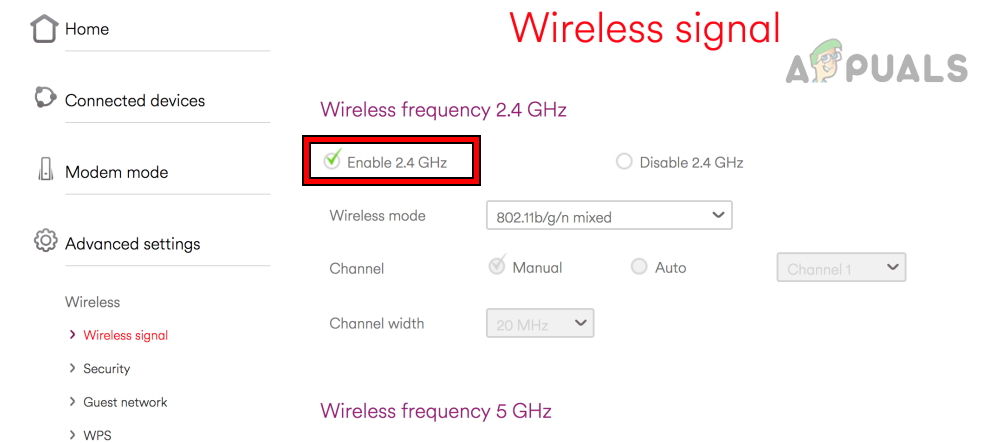
Enable 2.4 GHz in the Router Settings - Restart the router after saving the modified configurations and connect your phone to the 2.4 GHz band.
- Connect the doorbell to the 2.4 GHz band and check if the Wi-Fi connectivity issue is resolved.
If this does not work and you have a smart Wi-Fi feature (that combines both 2.4 GHz and 5 GHz bands), disable Smart Wi-Fi and retry to connect the doorbell to the Wi-Fi.
Change the Wi-Fi Channel
- Navigate to Settings > Change Wi-Fi Settings > See Network > Advanced Settings.
- Open the 2.4 GHz band and set the channel to 1.
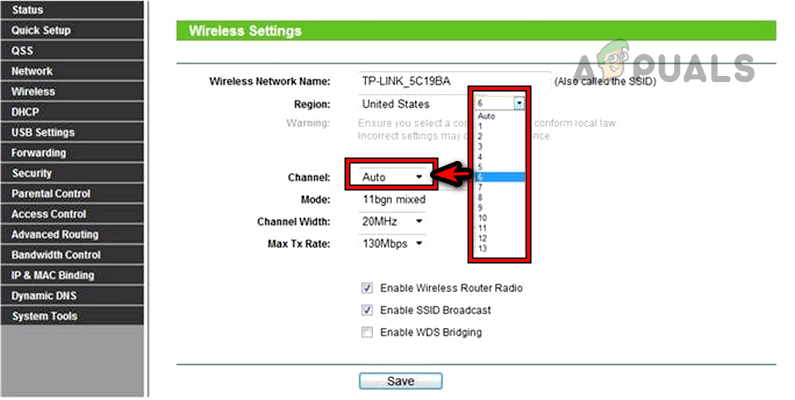
Change the WIFI Channel - Save the changes and restart the router. See if the issue is resolved.
- If not, set the channel to anything below channel 11 and check if that clears the issue.
Disable Router’s Firewall
- Navigate to Settings > Expert Mode > Internet > Firewall.
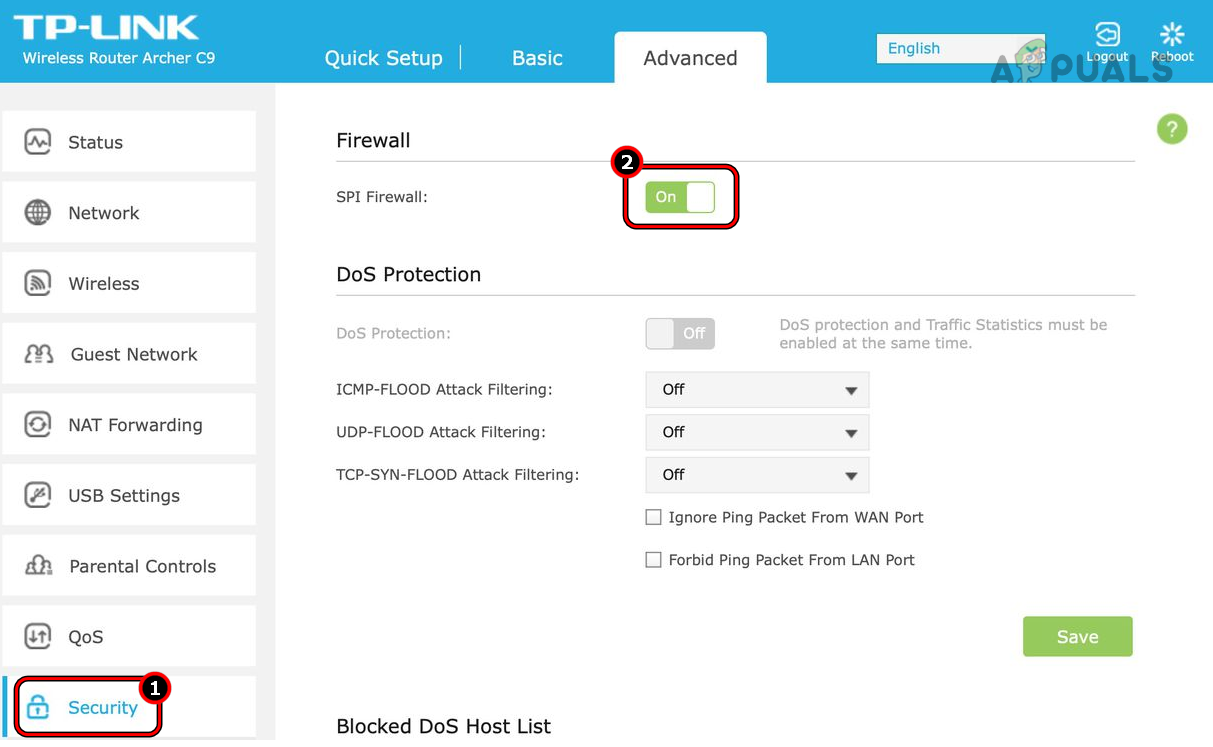
Disable the Router’s Firewall - Disable Firewall and save the changes.
- Connect the doorbell to the Wi-Fi and check if the issue is resolved.
If so, then you may enable back the firewall but exempt the doorbell in the firewall settings.
Enable DHCP or DHCP Configurations
- Navigate to Settings > Wi-Fi Settings > Advanced Setup.
- Enable DHCP and save the changes. For some routers, you may need to enable DHCP Direct Assignment.
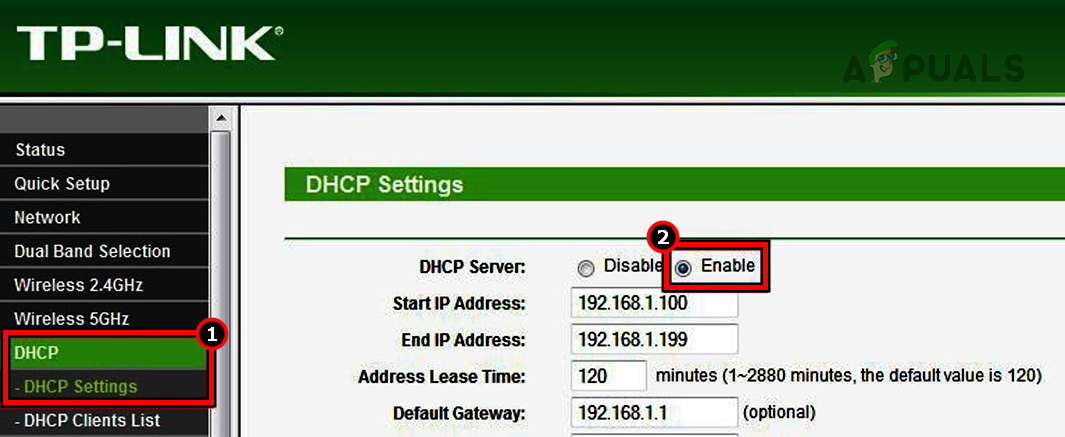
Enable DHCP in the Router Settings - Restart the router and verify if the problem is solved.
- If not, change the DHCP mode from DHCP Server to DHCP Relay and check if the issue is resolved.
If this does not work, enable manual IP in the router settings and set a manual IP for the doorbell. You will need to use the MAC address of the doorbell to set a static IP for the doorbell. If you have Mac filtering enabled on your router, add the MAC address of the doorbell to the allowed list.
Reset the Router to the Factory Defaults
If none of the above changes worked, you can try resetting your router to default settings. This will remove all custom settings and revert back to stock ones which usually work with the Doorbell.
- Use a pointy object to press/hold the Reset button of the router for 30 seconds or until the router restarts.

Reset the Router to the Factory Defaults - Upon restart, set up the router and connect your phone to the Wi-Fi network.
- Connect the Ring doorbell to the Wi-Fi and check if the issue is resolved.
If the issue persists, generate a QR code on the router for your Wi-Fi network (you can use QIFI) and use that to connect the Ring doorbell to the Wi-Fi.
If this does not work, arrange another router and check if the Ring doorbell connects properly with the Wi-Fi network from that router. If so, then the router is natively incompatible with the doorbell and you will need to use another router to make the Ring device work.
5. Try Another Network
You will not be able to connect the Ring Doorbell with the Wi-Fi if your network is natively incompatible with the doorbell. The network may be missing some features that are required for the completion of the operation of the doorbell.
Here, trying another network will let you confirm if the issue is with the Ring device or with the Wi-Fi network.
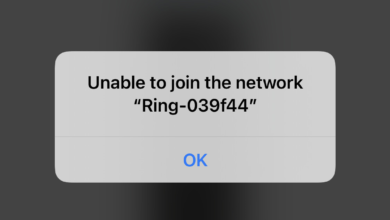
- Disconnect your phone from the current network and connect to another network. If no other network is available, enable a hotspot on another phone and connect your phone to the hotspot.
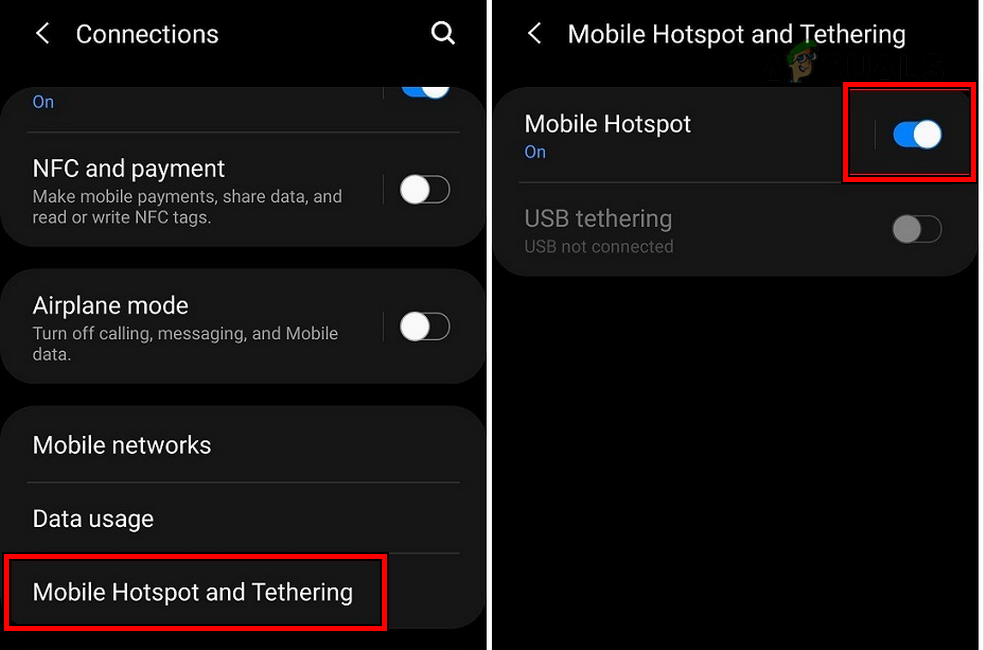
Enable Hotspot on the Phone - Launch the Ring app on your phone and check if the doorbell connects to the hotspot. If so, then either the router or your network is not compatible with the doorbell.
6. Reset the Ring Doorbell to the Defaults
If none of the above methods worked, you can move forward and reset the Doorbell to its default settings.
- Delete the Ring doorbell from the Ring app (if shown).
- Remove the doorbell from its bracket and locate its setup button. The button can be on the back, top, or side of the Ring device (depending upon the generation of the doorbell). Usually, an orange button.
- Press and hold the Setup button for 10 to 20 seconds.
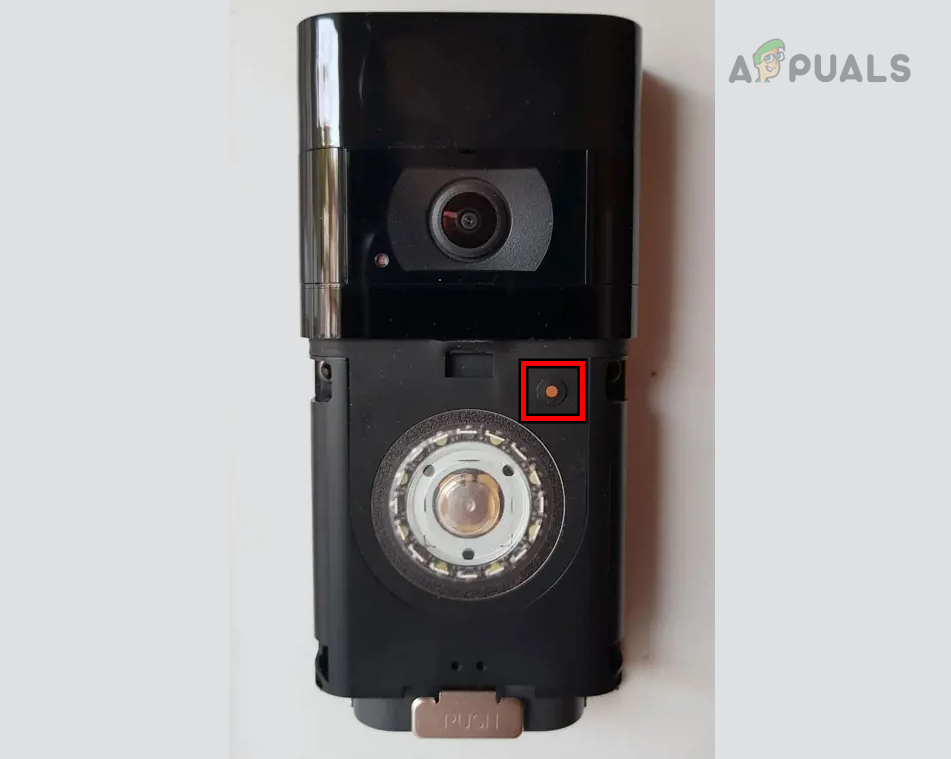
Reset the Ring Doorbell to the Factory Defaults - Release the button and the reset process will start.
- After the doorbell’s status light turns off, which may take a few minutes, the reset process will be complete. Then, proceed to set up the bell from scratch in the hopes of resolving any Wi-Fi issues.
If none of the above works, you may contact Ring Support and ask for a replacement (if under warranty).
Reviewed by Huzaifa Haroon