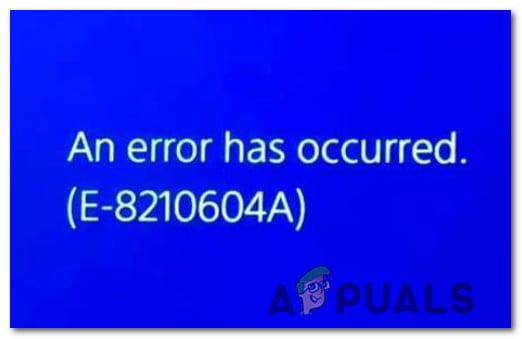
How to Fix PSN ‘Error Code E-8210604A’ When Buying a PS Plus Subscription?
The error code E-8210604A is encountered by Playstation users when they attempt to get a Playstation Plus membership or extend the current plan. This problem is reported to occur with both PS4 and PS5.
As it turns out, this issue occurs due to an unresolved glitch that sony refuses to fix months after the issue was initially reported by affected users.
Fortunately, there are a few workarounds that you can make use of if you find yourself in a similar situation.
Here’s a list of workarounds that other users that we’re also receiving the E-8210604A when attempting to buy or extend their PS Plus membership have successfully used to fix the problem:
Sign Out and Back In of PlayStation Network
Before you move down to any of the other potential fixes below, you should start simply by ensuring that the problem is not caused by a fairly common PSN glitch.
Several affected users that we’re also dealing with the E-8210604A error code have confirmed that they managed to fix the issue by signing out of their PSN account and immediately signing back in before trying the purchase of the PS+ subscription.
If you’re looking for step by step instructions on doing this, follow the instructions below:
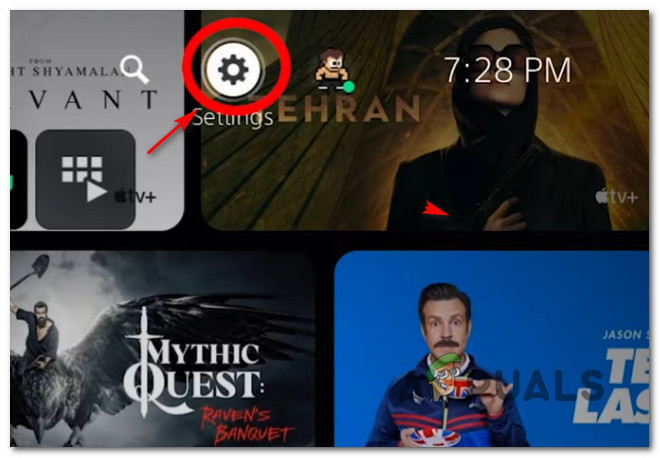
- From the main dashboard of your PS4 console access the Setting menu.

Accessing the settings menu Note: If you’re experiencing this issue on PS5, access the gear icon (settings icon) in the top-right corner of the screen.
Accessing the PS5 settings menu - Once you’re inside the Settings menu, scroll down through the list of options and access the Users and Accounts menu.
Note: This instruction applies to both PS4 and PS5. - Next, select Other from the list of available options, then select PlayStation Network and select Sign Out.
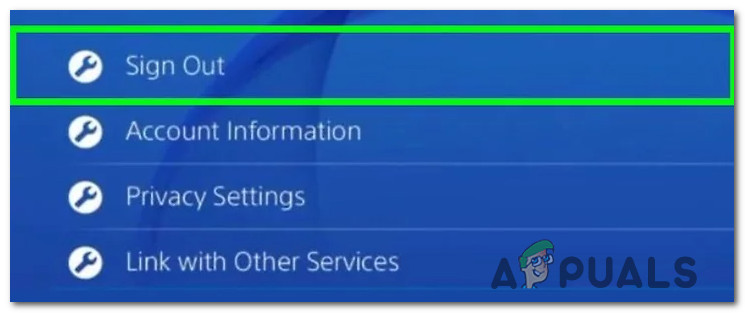
Sign Out of your Playstation system - After you confirm the operation, sign back in at the login screen that just appeared and try purchasing the Ps+ subscription once again to see if the problem is now fixed.
If the same E-8210604A is still occurring, move down to the next potential fix.
Buy the subscription through Amazon (or a different retailer)
If you get this error while attempting to renew or get a PSN membership directly from your PS4 or PS5 console, chances are you will be able to avoid using Sony’s infrastructure by using an online retailer to buy the PS+ subscription.
But before doing this, keep in mind that some retailers will charge extra for that service. So before making the final decision, compare the prices and ensure that you’re paying the same price.
From our investigations, it turns out that Amazon will not make you pay a premium for a PS+ subscription, but there might be other online retailers available to you that will do the same.
If you want to avoid using Sony’s online store to get the subscription to bypass the E-8210604A error, follow the instructions below to buy and redeem a PS+ subscription from a 3rd party retailer:
Note: The instructions below will guide you through the process of buying a digital PS+ subscription from Amazon. The delivery, in this case, is instant and they charge no extra fee when compared with Sony’s digital store.
- Open your localized version of Amazon and sign in with your account.
- After you are successfully signed in, type ‘PlayStation plus‘ subscription inside the search bar at the top and press enter to search.
- Next, scroll down through the list of results and click on a PS+ membership that fits your plan from the list of available options.
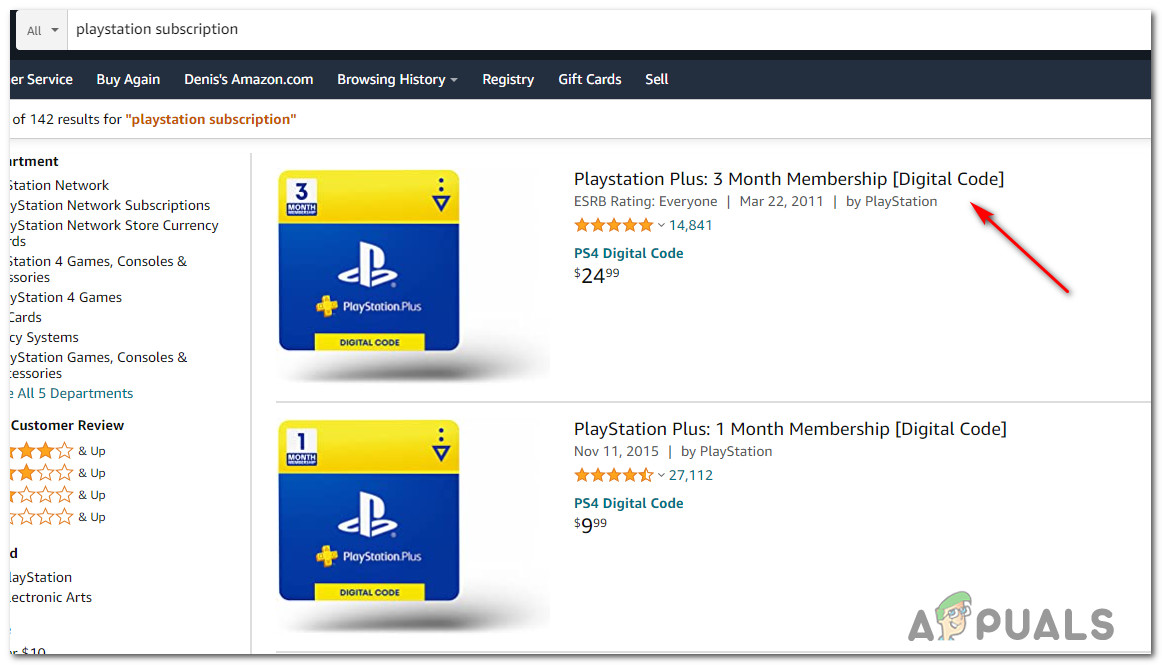
Downloading the correct PlayStation subscription Note: If you want an instant delivery, click on a listing labeled as [Digital Code]. Otherwise, the redeemable code will be physically sent to you instead of being delivered via email.
- Next, once you’re inside the PlayStation Plus Listing, select a viable edition before clicking on Add to cart.
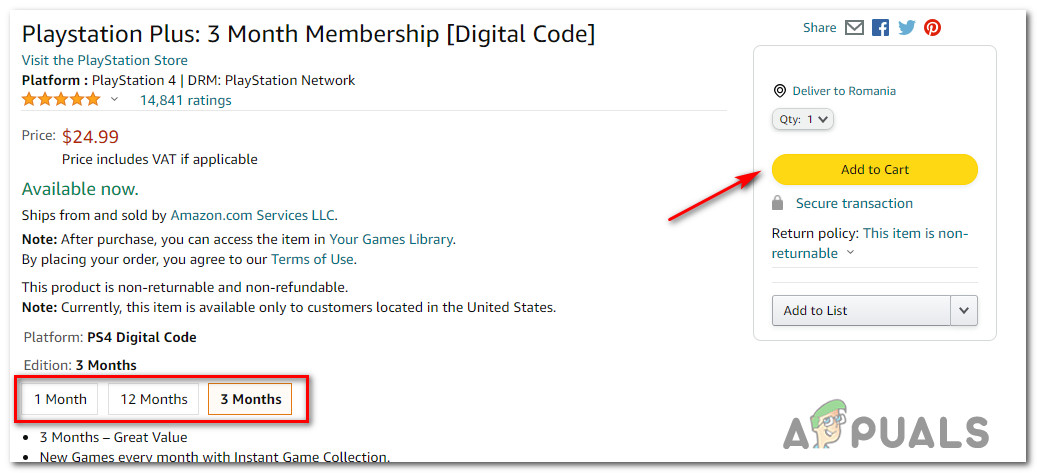
Adding the Ps Plus membership to the cart - Finally, go through the checkout page and finalize the transaction.
- After you’ve successfully made the purchase, you will receive a code that you can directly redeem on your Playstation console.
- To redeem the Playstation + code on your PS4 console, open the PlayStation Store and use the menu on the left to scroll down to Redeem Codes and press X on your controller.
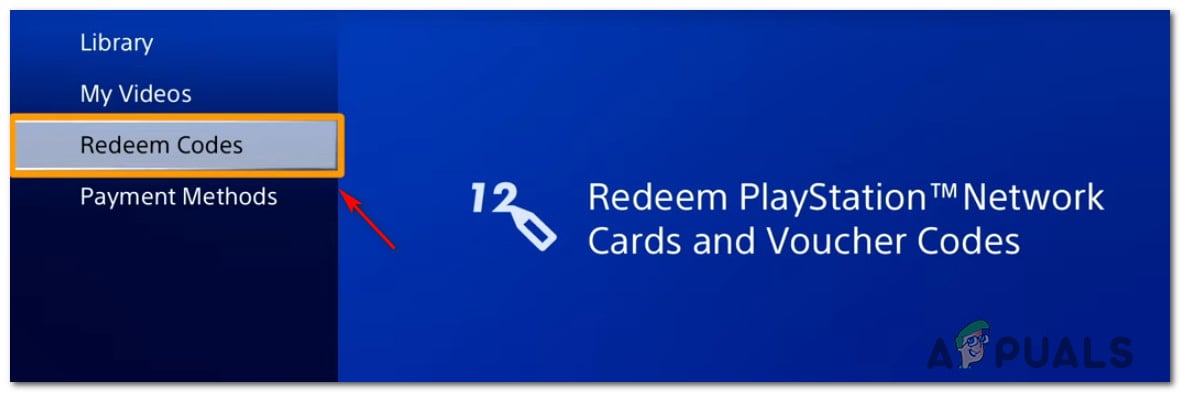
Redeem the code on your controller Note: On Ps5, you need to go to Settings > User and Accounts. Next, go to Account > Payment and Subscriptions and tap on Redeem Codes.
- Next, carefully type the 12-digit code you just got from Amazon (or another retailer) after getting your PS+ subscription and press Continue to enable it.
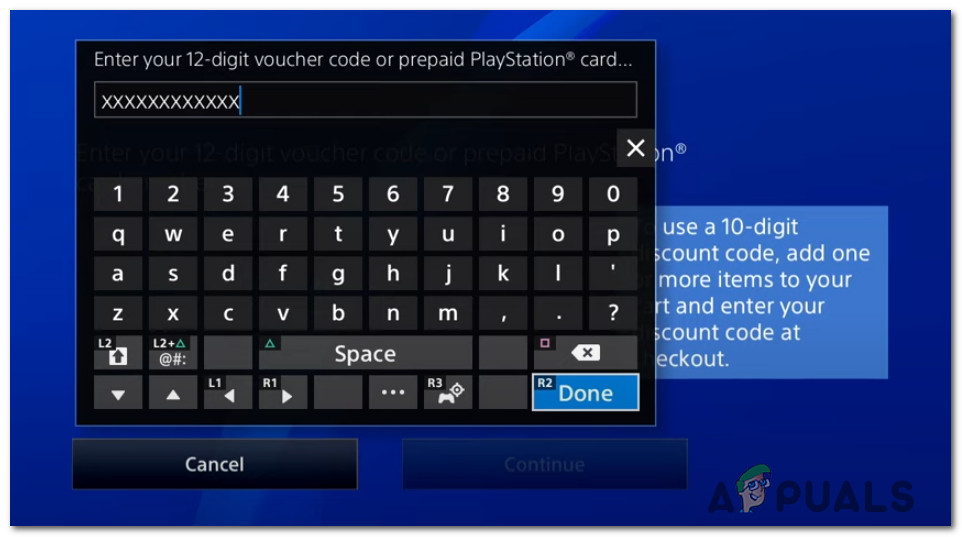
Inserting the subscription code - At the next prompt, hit confirm to effectively redeem the PS+ subscription code and wait for the confirmation message.
- After you see the confirmation message, your PS+ subscription should be already active and you should have successfully avoided the apparition of the E-8210604A error.
Note: If the subscription is not active yet, reboot your console manually and see if the new Ps+ plan shows up once your console boots back up.
If you aren’t comfortable with using a 3rd party retailer to get your PS+ subscription, move down to the next potential fix below.
Change the email associated with your PS Store profile
This might seem like a weird fix, but this workaround has consistently enabled PS4 and PS5 users to avoid the E-8210604A error and purchase their PS+ membership without issues.
According to some PlayStation gamers that have gotten this to work, you need to change the email associated with your PS Store profile to a Gmail equivalent. You can do this by accessing your personal account on your PC or directly in the PSN settings.
If you want to pursue this fix, follow the instructions below to attempt a bypass of the E-8210604A error by changing the email associated with your PS Store profile:
- From a PC, sign in to Sony’s Account Management page from any web browser.
Note: If you have 2-step verification enabled, you will need to input the verification code as well. - Once you are successfully signed in with your account, click on Security from the sidebar on the left-hand side.
- Next, move over to the menu on the right-hand side and click on the Edit button associated with Sign-in ID (Email Address).
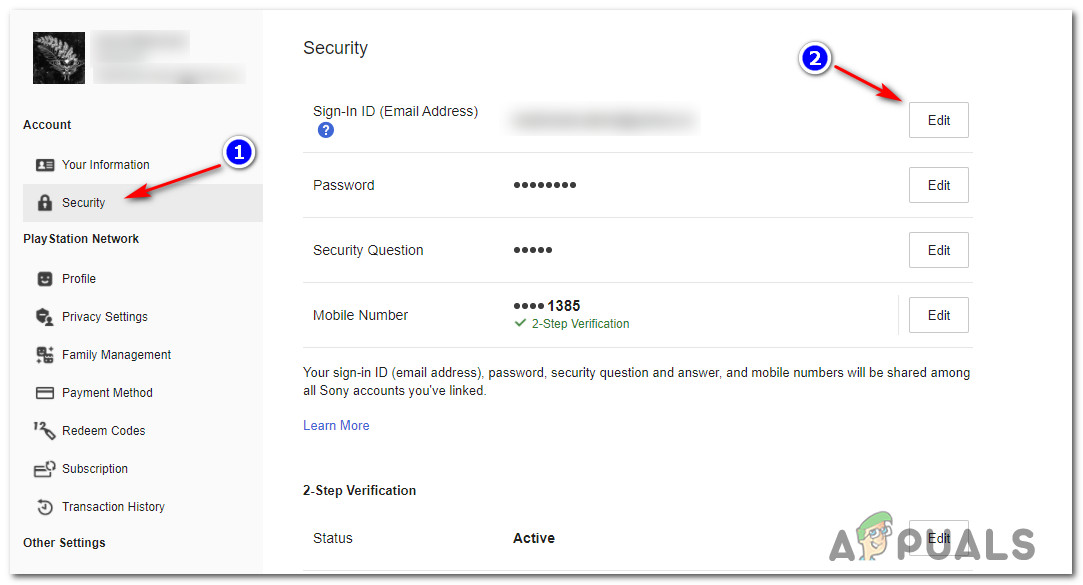
Editing the email address - From the new prompt that just appeared, enter your new email address and click on Save.
Note: You will be asked to re-enter your account password for security reasons. - Finally, you will receive an email to your new email address asking you to verify the new Sign-in ID. Access your Gmail inbox, find the correct email and click on the Verify Now button inside the email.
- Return to your console and sign in with your new email account before retrying the purchase and seeing if the E-8210604A error is now resolved.
If the problem is still not fixed, move down to the next potential method below
Top your wallet before making the purchase
As it turns out, the number one reason why you would eventually see the E-8210604A error when making a PS+ purchase on the PSN store is a denial by your card issuer. This is very common lately as a lot of banks have re-enforced their security protocols around the PS Store after a big wave of scams involving the platform.
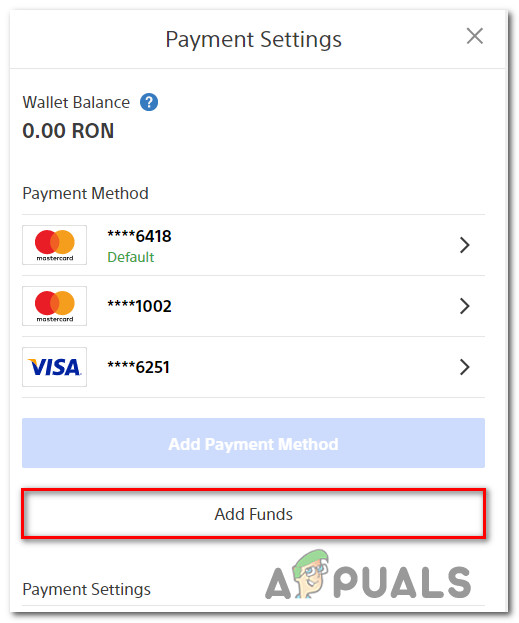
If you think this problem might be CC-related and you don’t want to call your bank and ask for clarifications, you can most likely bypass the error entirely by accessing your Account Information screen and choosing to Add Funds that you can later use to get the PS+ sub without involving a CC payment.
Follow the instructions below to sign in to the PlayStation Store and add funds to your account that you can use to purchase the PS+ subscription:
- Open any browser on your PC or Mac and access the PlayStation Store page.
- Once you are on the correct page, click on the Sign In button, then sign in with the same account you are encountering the error code on your console.

Signing in with your account Note: if you have 2-step verification enabled, you will be asked to insert the verification code from your phone or an authenticator app.
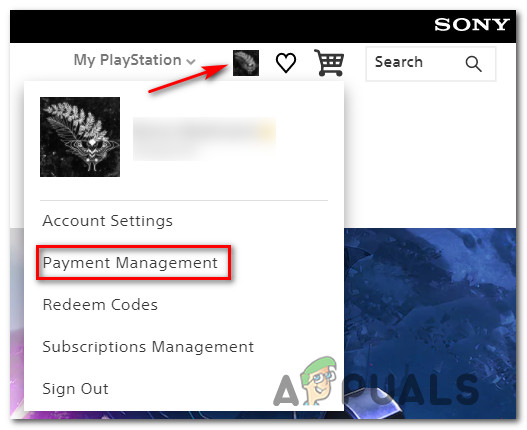
- As soon as you are successfully signed in, click on your account icon in the top-right corner of the screen, then click on Payment Management from the context menu that just appeared.
Accessing the Payment Management tab - Next, click on Add Funds from the menu on the right once you have ensured that you have a Payment Method already set up.
Adding Funds to PSN account - At the next screen, select a funding method – Either use one of your own cards or use the Redeem a Pre-Paid Card (if you already purchased store credits from an online retailer like Amazon)
- Once the funds are successfully added to your PSN account, repeat the purchasing of the PS+ subscription once again (preferably from your web browser) and see if the E-8210604A has been successfully avoided.
If the problem is still not fixed, move down to the next method below.
Remove the active CC you use to make payments on the PS Store
According to some affected users, you can also expect to see this error code in a situation where the credit or debit card you are trying to use is no longer fully authorized by the bank issuer.
If you followed every potential fix above and the E-8210604A error is still occurring on checkout when you attempt to get your PS+ subscription (or extend your current one), you might be able to resolve the issue entirely by deleting your card from your PS account before adding it again.
This will serve the purpose of re-authorize it which might end up fixing the issue in some cases. Follow the instructions below to learn how to do so:
- On a PC or macOS computer, access the PlayStation Store page.
- Once you’re inside the correct page, click on the Sign In button, then sign in with the same account you are encountering the error code on your console.
Signing in with your account Note: Keep in mind that if you have 2-step verification enabled, you will be asked to insert the verification code from your phone or an authenticator app.
- After you are successfully signed in, click on your account icon in the top-right corner of the screen, then click on Payment Management from the context menu that just appeared.
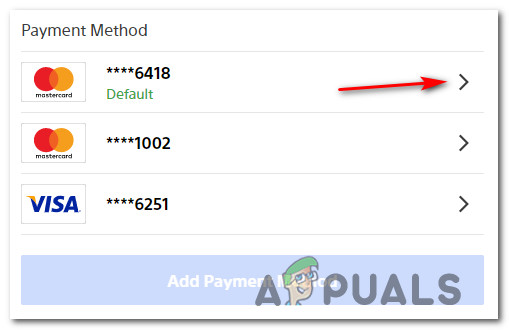
Accessing the Payment Management tab - Once you’re inside the Payment Management menu, check which of your cards is currently active (if you have multiple cards) under Payment Method.
- Click on the arrow associated with the CC card that has Default written under the last digits of the numerical value.
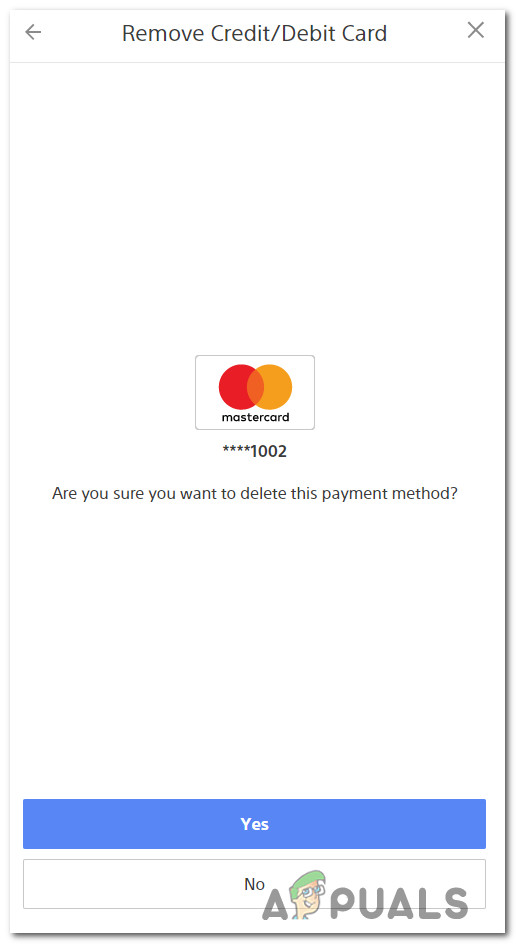
Accessing the correct CC card - Next, from the Credit Card / Debit Card Detail screen, click on the Remove button at the bottom of the menu.
- When asked to confirm the process, click Yes at the prompt then wait for the success message to appear.
Removing the Credit Card - After the card has been successfully removed, click on the Add Payment Button from the Payment Settings.
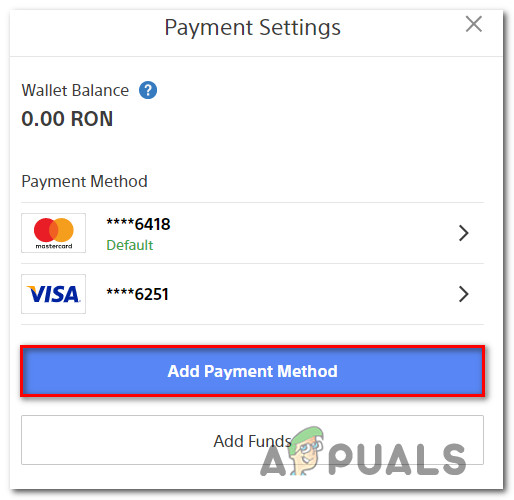
Adding a Payment button - From the next screen, click on Add a Credit / Debit Card button, then follow the on-screen instructions to add the same card that was previously triggering the error.
- After your card has been added once again, retry the purchasing of the PS+ membership and see if the problem is now fixed.
If the problem is still not fixed, move down to the next potential fix below.
Make the Purchase through Paypal (if applicable)
According to some affected users that we’re also dealing with the E-8210604A have managed to bypass the problem entirely by making the purchase through Paypal and configuring Paypal to use the CC or Debit Card that was triggering the error.
Apparently, this workaround is also recommended by an official Playstation representative via their Twitter ‘Ask Paystation’ page.
If you have a Paypal account and you wish to try this fix, follow the instructions below to attach your credit card to PayPal and make the payment through it to avoid the E-8210604A error:
IMPORTANT: Before you follow this fix, keep in mind that PlayStation Store only supports PayPal payments on a select group of countries. Check this official Playstation support page to see if your country is on the list.
- On a PC or Mac computer, access the Sony Entertainment Network page and sign in with the same account with which you are experiencing these issues.
- Once you are successfully signed in, select Payment Method (under Playstation Network) from the menu handle on the left-hand side of the screen.
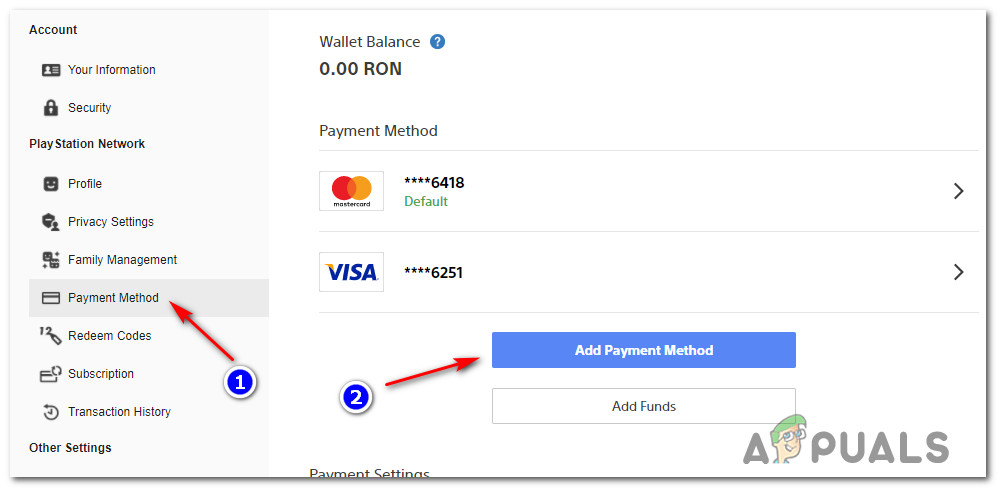
Accessing the Payment Method - With the Payment Method menu selected, move over to the right-hand side and click on Add Payment Method.
- Once you get to the Payment Method screen, select Paypal and follow the on-screen prompts to successfully connect your Paypal account to PSN.
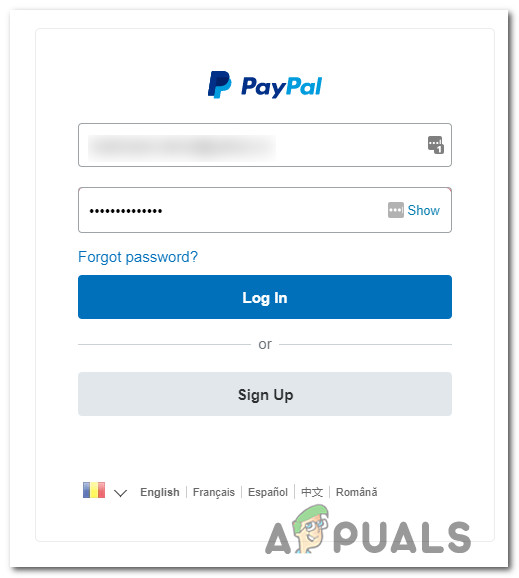
- After you’ve done this, open another tab on your browser access the Sign In page of Paypal, and enter your Paypal account credentials.
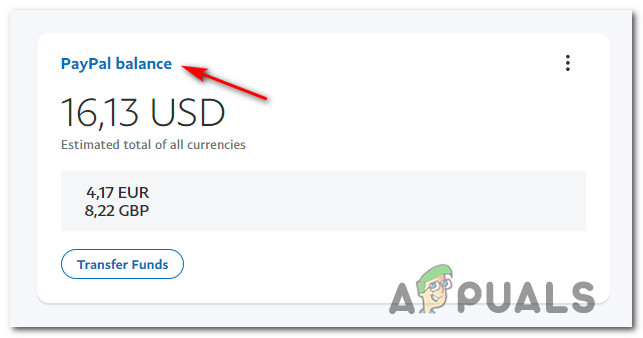
Sign in with a PayPal account - Once you have successfully signed into Paypal, click on the Paypal balance hyperlink.
Accessing the PayPal Balance hyperlink - Inside the Paypal balance page, click on Link a card at the top of the screen.
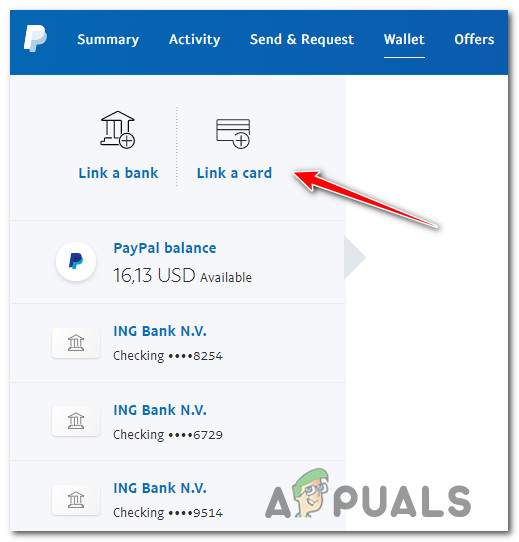
Adding a new card to PayPal - Follow the on-screen prompts to add the credit card to Paypal and click on Link Card to save it to your account.
- After the card has been successfully added to Paypal, return to your Playstation console and add the PS+ subscription to the checkout page once again.
- When you get to the page where you can select your Payment Type, select Paypal and the operation should complete without the same error code.
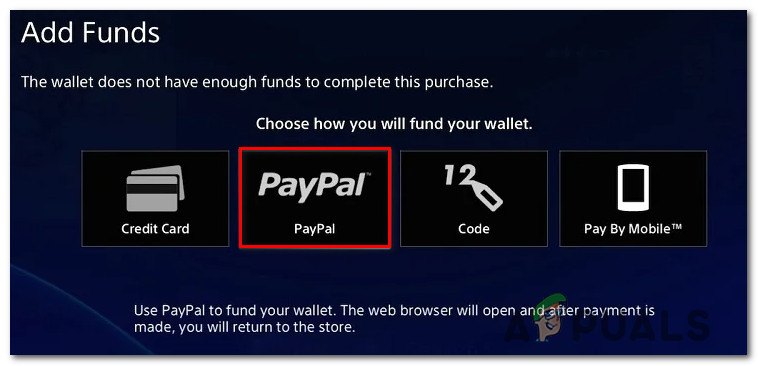
Pay with PayPal on PSN
If the same E8210604A error is still occurring when paying through Paypal or you don’t want to go this router, move down to the next potential fix below.
Reboot or Reset the router
If none of the methods above have proven to be effective in your case, chances are the problem is somehow facilitated by a network inconsistency that is preventing your console from communicating with the validation servers due to a bad IP range.
In this case, what you should do is refresh every network element to ensure that a new IP is assigned to your console.
There are two ways forward to achieve this:
- Restart your router/power cycle – What this operation will do is it will refresh your current IP and TCP data that your router is using without making any persisting changes that might affect your network interaction with Sony’s server.
- Resetting your router – Resetting your router settings will revert the device to the factory state in addition to clearing the cached data. But if your ISP is using PPPoE, this operation will also reset the currently saved credentials.
Restarting your router
This operation will NOT run the risk of affecting your immediate access to the Internet, start with a simple router reboot. This will ONLY clear the currently saved Internet Protocol data and Transmission Control Protocol data.
To perform a reset on your network device, start by identifying the power button (most likely located on the back of the device) and press it to cut off the power.
As soon as you do this, disconnect the power cable from the power outlet and wait for 1 full minute or more.
Note: Disconnecting the power after you turn your router off and waiting for it off for a minute is essential because it allows the power capacitors enough time to drain and clear any network-related temp data.
If restarting didn’t fix the problem, move down to resetting your network restart.
Reset your router
If the restart didn’t fix the error, the next step is to go for a complete router reset to ensure that no setting or network-related cached data is currently causing the problem.
Important: Understand that this will reset your router back to its factory resets, which means that any forwarded ports, blocked items, and any other custom settings.
Furthermore, if your ISP is using PPPoE, a router reset will mean that the currently saved credentials will be ‘forgotten‘. So once you go through with the reset procedure, you’ll need to recreate the PPPoE connection from scratch by inserting the credentials supplied by your ISP.
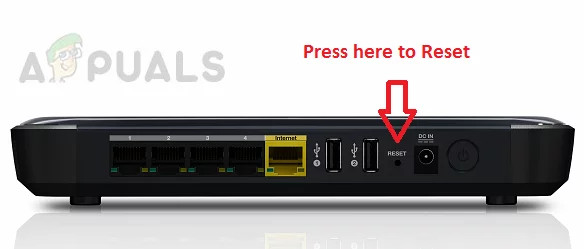
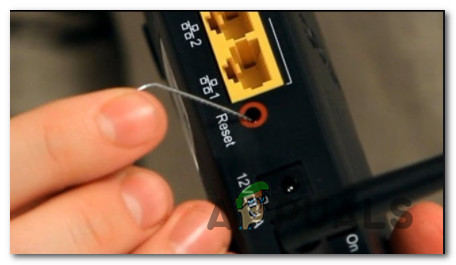
Now that you understand the consequences of this method and you want to proceed, you can initiate a router reset by finding the reset button (typically located on the rear of your router).
Once you see it press it and hold on to it until you see all the front LEDs flashing at the same time.
Once your router is reset, re-establish the internet connection by reinserting the PPPoE credentials supplied by your ISP (if applicable) and see if you can complete the purchase of the PS+ subscription once internet access is restored.