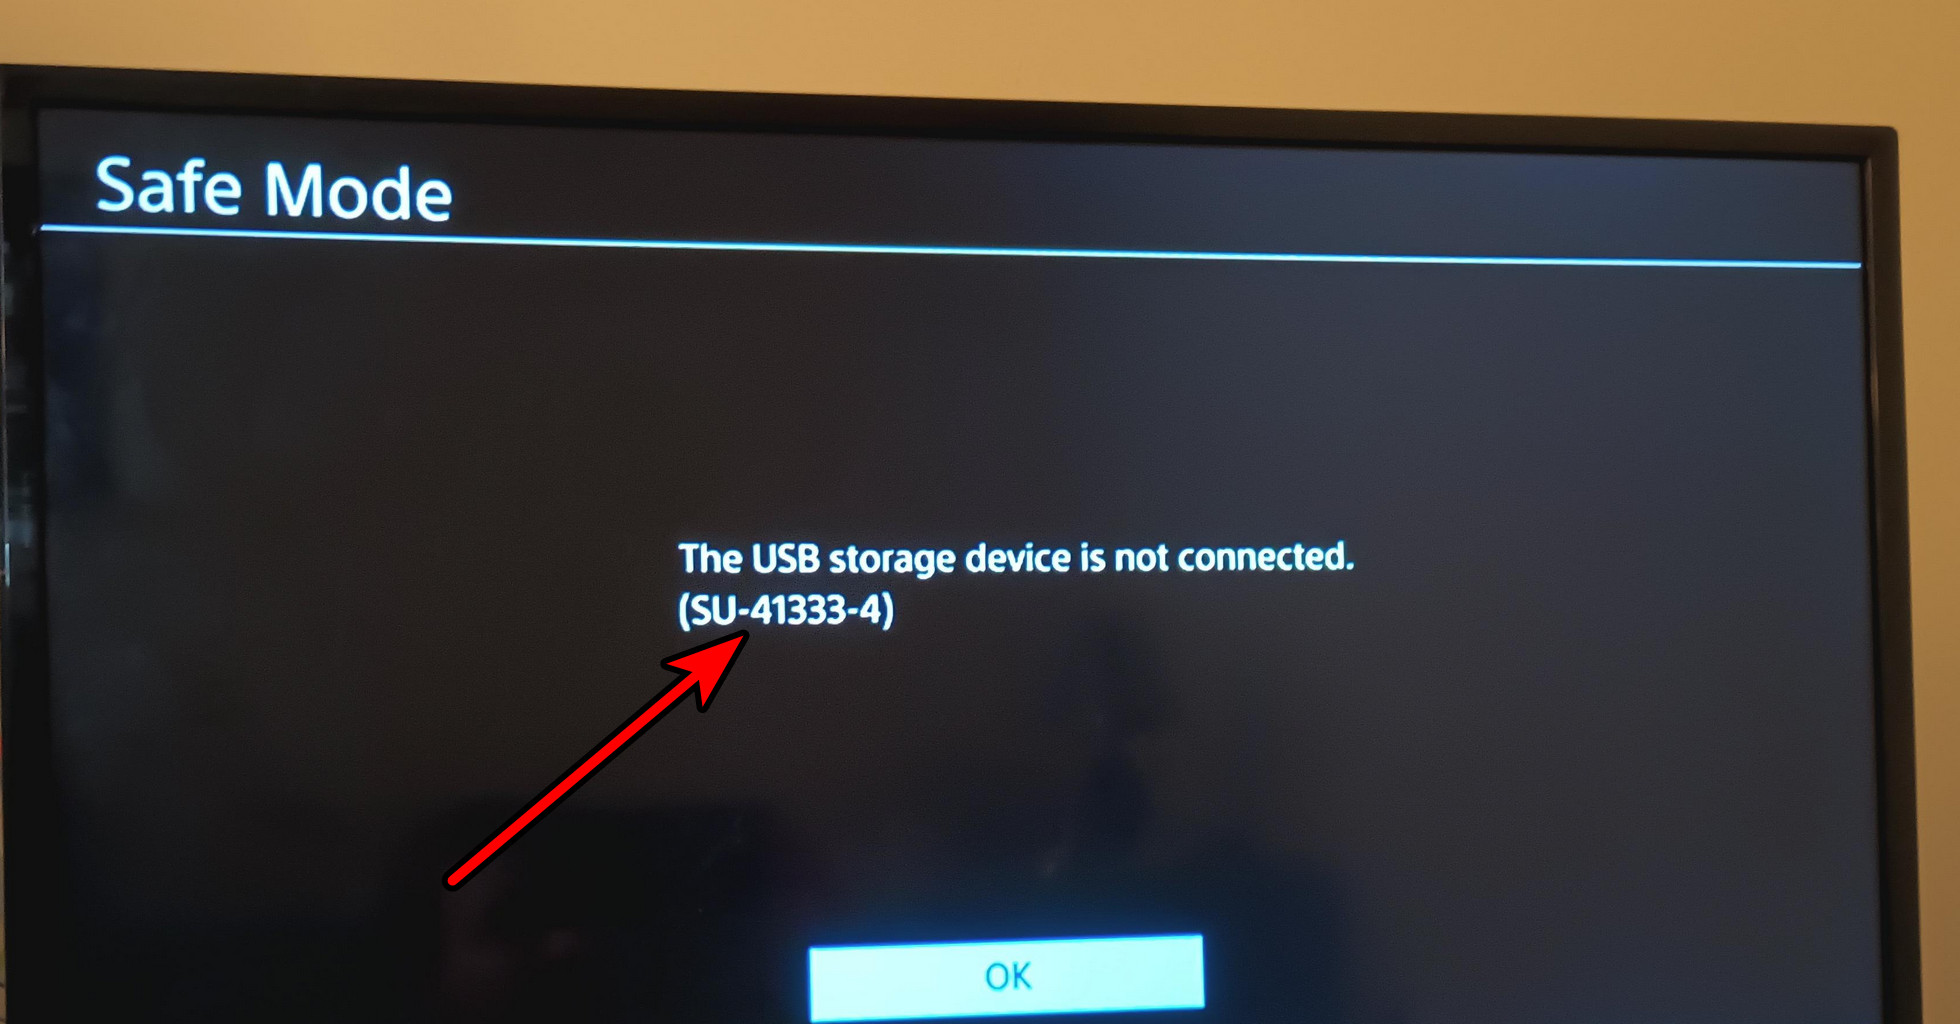
How to Fix SU-41333-4 Error on Your PlayStation Console?
If you experience the SU-41333-4 error on your PlayStation, it may signal more than just a hardware failure. This error can be triggered by various factors—including a sudden power outage while the system is operational, installing a new hard drive, updating the console via USB, or even during the initialization process.
Basic Troubleshooting
Begin with a simple step:
- Power cycling: Turn off the console and disconnect all cables (USB, HDMI, LAN, Power, etc.). Remove the console’s hard drive and leave it unattached for 2 hours. Afterwards, reconnect only the USB, HDMI, and power cords. Attach the controller and power on your PS4.
1. Initialize the PlayStation
The SU-41333-4 error sometimes appears when a crucial software component within the console is corrupted, making a file inaccessible. Initialization of the PS4 can resolve this issue.
Be aware that this will erase all data on the console that isn’t backed up either locally or online.
- Turn off the PlayStation. Once the status light is off, unplug any external devices.
- Press and hold the console’s power button.
- Release the button upon hearing the second beep, approximately 7 seconds later.
- Connect a controller via a USB cable and press the PS button.
- Select option 6, Initialize PS4 (Full Factory Reset).
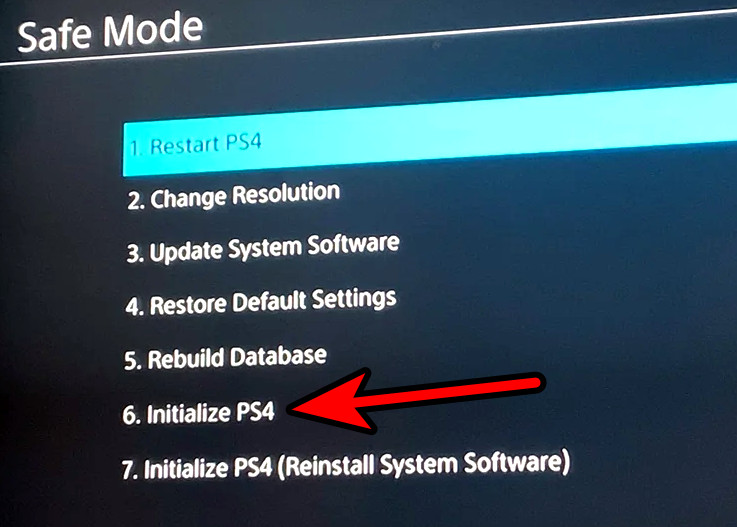
Initialize PS4 Through the Safe Mode - Follow the onscreen instructions to reconfigure your PlayStation.
2. Reinstall the System Software on the PS4
If the PS4’s system software is severely damaged and can’t be restored to factory settings, reinstalling the software can fix the problem.
Note that this will permanently erase all unsaved data on the internal drive.
- Use a USB storage device and connect it to your desktop PC (Windows, Mac, etc.).
- Format the device with the exFAT file system and create a folder named PS4 (in uppercase).
- Inside the PS4 folder, create a subfolder called UPDATE (also in uppercase).
- Go to the official PS4 system software download page and download the PS4 Console Reinstallation File (about 1 GB). Rename the downloaded file to PS4UPDATE.PUP (all uppercase).
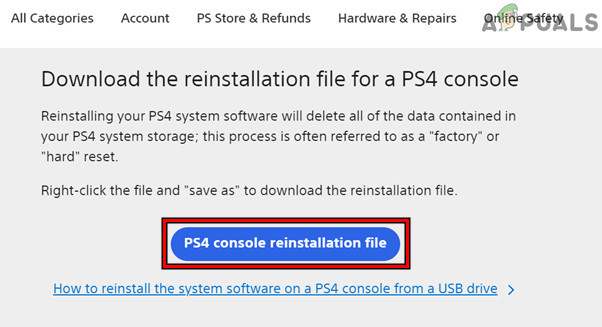
Download PS4 Console Reinstallation File - Transfer the file to the UPDATE folder on your USB device, then safely eject it from your PC.
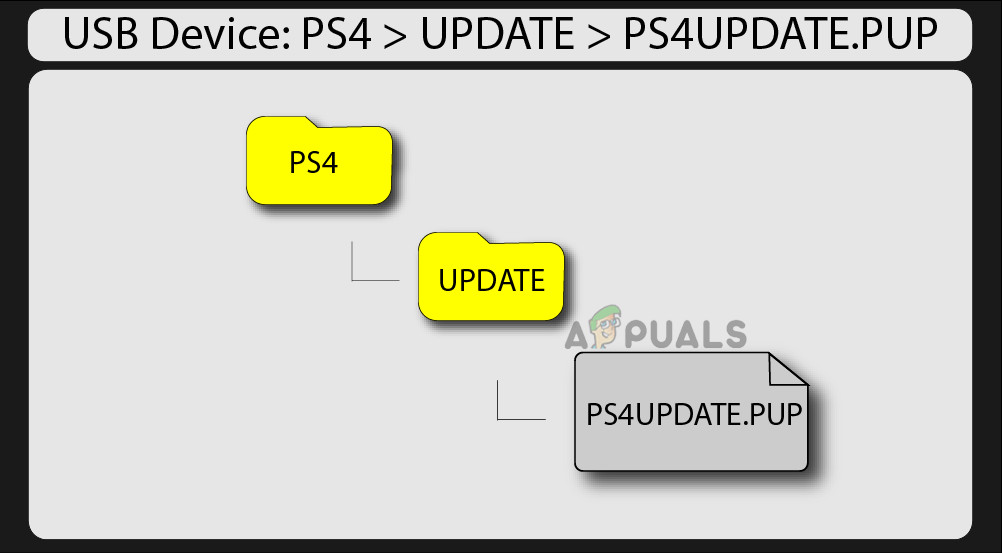
Update PS4 File - With the PlayStation powered off and the status lights out, insert the USB device containing the update into the console.
- Hold the Power button until a second beep is heard (about 7 seconds), then release.
- Connect the controller via a USB cable and press the PS button. Choose option 7, Initialize PS4 (Reinstall System Software).

Initialize PS4 (Reinstall System Software) - Select Update from USB Storage Device and confirm with OK. If the USB is not detected, try again with the USB plugged into a different slot. Moreover, check that the folder and file names match those specified in steps 3 to 8.
- Wait for the process to finish and proceed to configure your console.
3. Format the Console’s Hard Disk on a PC
An SU-41333-4 error may occur if the PS4 cannot perform read/write operations on its disk. Initializing the console will not remedy this; instead, you will need to format the hard disk on a PC.
Below, we outline the steps for a Windows PC:
- Power off the console and remove its hard disk.
- Connect the hard disk to a PC or laptop. An adapter may be necessary.
- Right-click the Windows start button and choose Disk Management.
- Locate the console’s hard disk by its size and record its disk number (e.g., Disk 1).
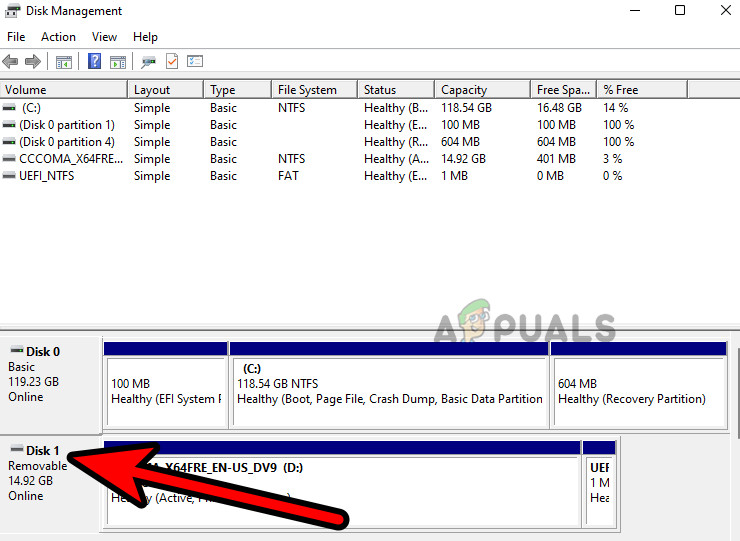
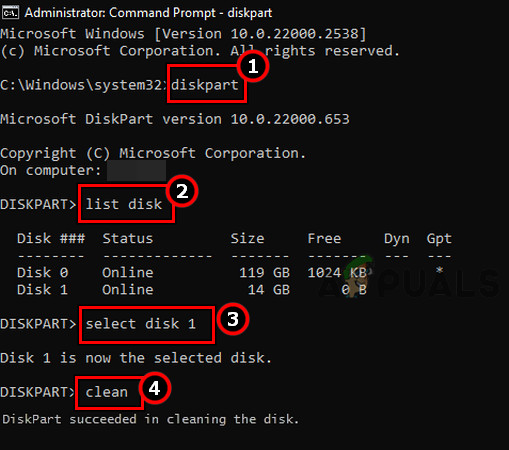
Check the Disk Number of the Console’s Hard Disk in the Computer’s Disk Management - Press the Windows key, search for Command Prompt, and run it as an administrator.
- Enter the following command and press Enter:
diskpart
- Enter the next command and press Enter:
list disk
- Identify the console’s hard disk by the number noted before and its size. Use the number to select the correct disk, as selecting the wrong disk can cause irreversible data loss.
- Type the following, substituting “x” with your console’s disk number:
select disk x
- If, for example, the console’s hard drive is Disk 1, double-check and then type:
select disk 1
- Execute the following, which will irreversibly wipe all data on the disk:
Clean
Use the DiskPart to Clean the Console’s Hard Disk - Type Exit and press Enter to leave the Diskpart utility.
- Close Command Prompt and disconnect the hard disk from your PC.
- Finally, reattach the hard disk to your PlayStation and reinstall the system software as previously described.
If the problem still lingers, it may be due to a hardware issue, ranging from a blown capacitor on the motherboard to a defective hard drive.