ZeroTier Installation Guide: How to Install & Use ZeroTier?
 Reviewed by Huzaifa Haroon
ZeroTier is an SDN (Software Defined Networking) solution that is used to create virtual networks. It allows physically distant devices to connect over the Internet as the devices are on the same local network. It has capabilities of both i.e., SD-WAN (Software Defined Wide Area Network) and VPN (Virtual Private Network).
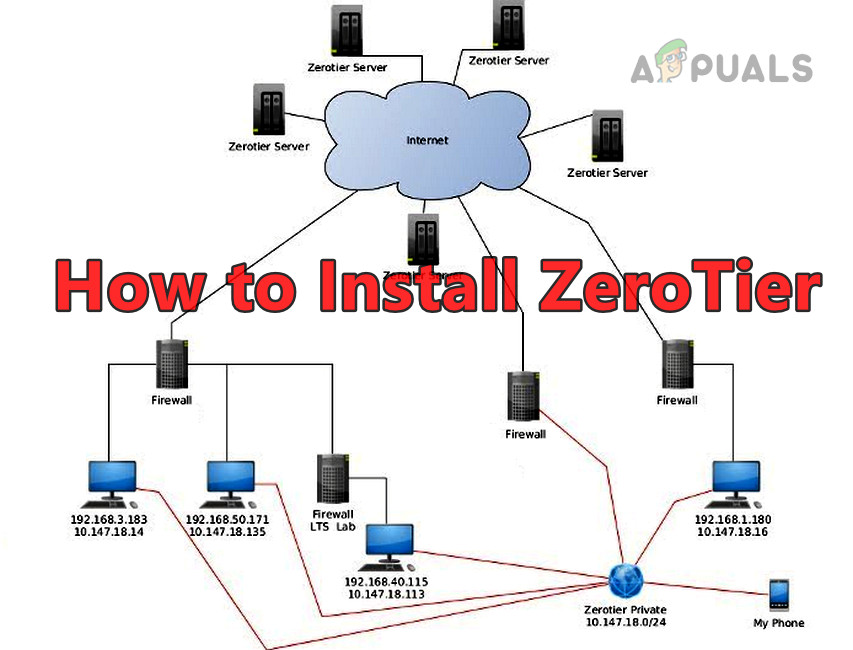
Unlike the complex traditional network solutions, ZeroTier is a smart programmable Ethernet switch that has simplified network setup, management, and security. You install the ZeroTier application on your devices, join the devices to your created network by using a unique network ID, and the devices automatically will become part of your created virtual network.
It supports multiple types of devices i.e., Windows, Mac, Linux, Android, iPhone, etc. All traffic exchanged between your devices is end-to-end encrypted. To decrease latency and maximize performance, the most direct path is used.
Essential Features of ZeroTier
The essential features of ZeroTier can be categorized as the following:
- Virtual Network
- Peer-to-Peer Connectivity
- Easy Setup
- Security
- Cross-platform support
- Centralized Management
- Free for 100 devices
- Multiple Networks: A device can join multiple ZeroTier networks (created by you or someone else), just make sure they do not have the same subnet.
- Use Cases: remote work, IoT, gaming, sharing resources, cloud infrastructure setup, device communication, etc.
Installation Prerequisites
Before installing ZeroTier, you will need a ZeroTier account and use that account to create a ZeroTier network ID.
Create a ZeroTier Account
- Launch a web browser and go to the ZeroTier web portal.
- Click on Login/Signup and open the Sign-Up option.
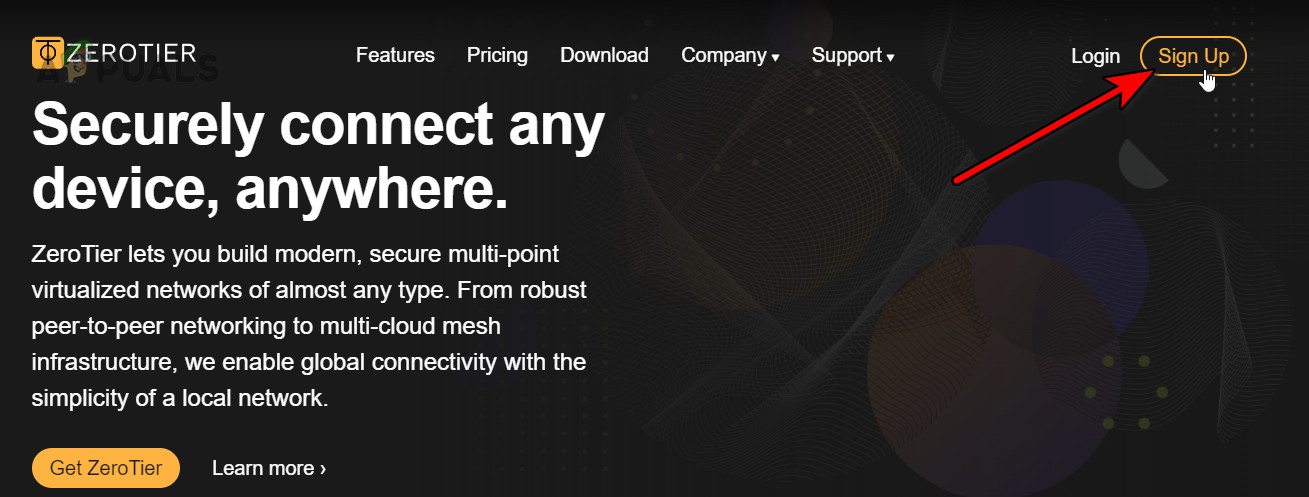
Sign Up for a ZeroTier Account - Use the appropriate option to sign up for an account. You can use Google, GitHub, Microsoft, and email options to sign up.
Create a Network
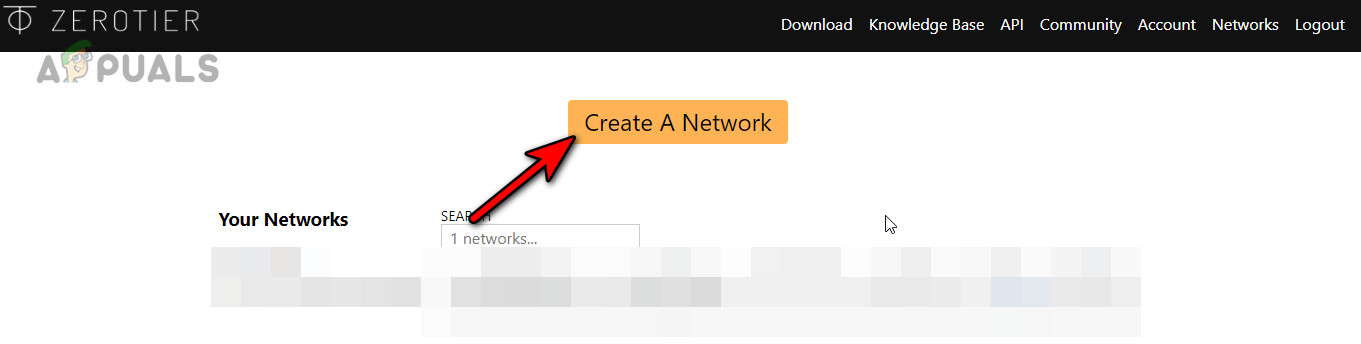
- Once logged in, navigate to the Networks tab and click on the Create a Network button.
Create a ZeroTier Network - Click on the copy icon to copy the network ID. You can open the network settings and get a know-how of the interface but do not change any settings now. Make sure the network type is set to Private, not Public.
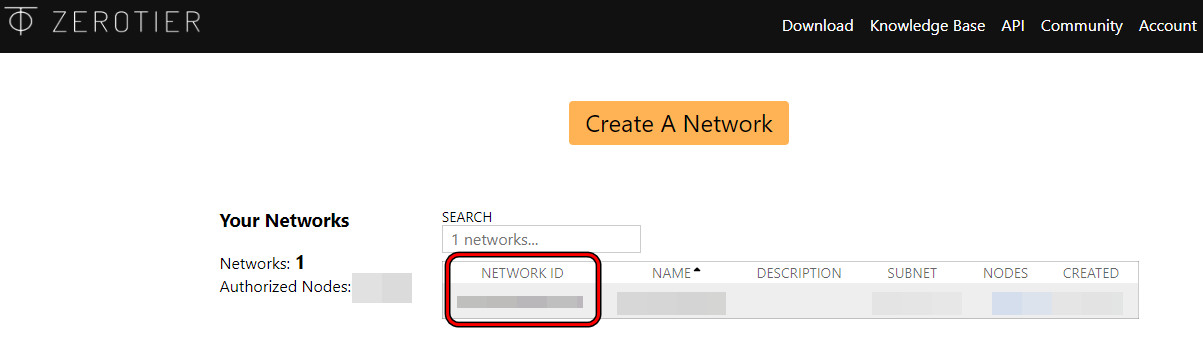
Copy the Network ID of the ZeroTier Network - Do not close this browser tab as we will be using this later on.
Install ZeroTier
ZeroTier is a cross-platform application and installing instructions depend on the device you are using. We will try to cover some famous platforms for this purpose.
Install ZeroTies on Windows
1. Download the Windows Installer
- Launch a web browser and go to the Downloads page of the ZeroTier website.
- Download the MSI Installer and if you have a Windows version earlier than Windows 10, download the ZeroTier 1.6.6 version as later versions only support Windows 10 and above.
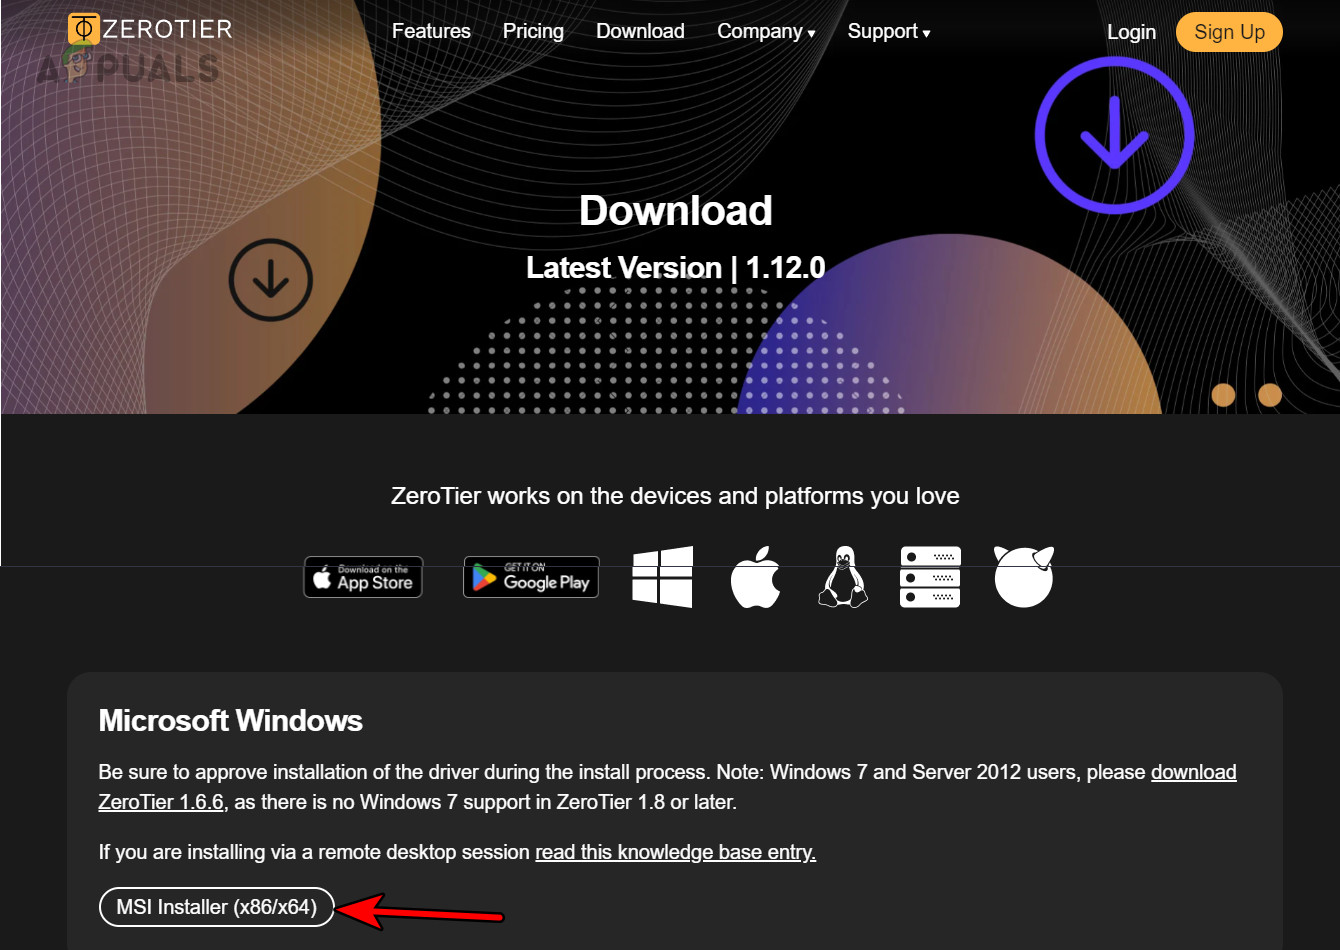
Download MSI Installer of ZeroTier for Windows
2. Open the Installer
- Launch the downloaded installer.
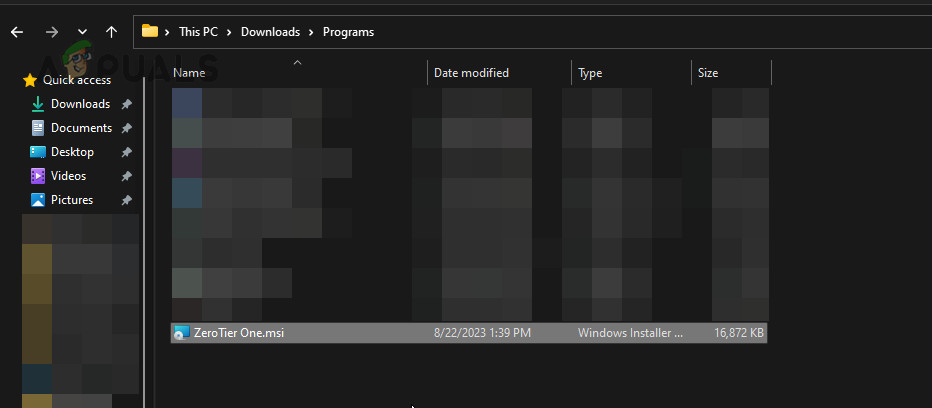
Launch ZeroTier Installer - Follow the prompts on the screen to complete the process.
3. Join Your ZeroTier Network
- Once done, open the hidden icon of the system tray and click on the ZeroTier icon.
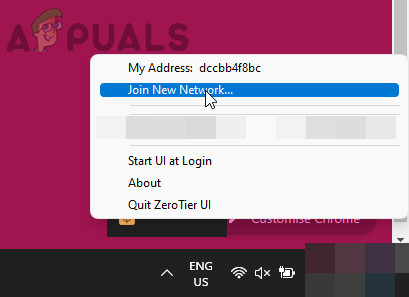
Join a New Network in the ZeroTier One App on Windows - Select Join New Network… and enter the network ID. You can copy the ID from the network tab of the ZeroTier portal.
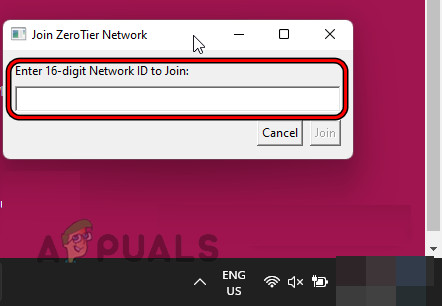
Paste Your ZeroTier Network ID and Click on Join - Click Join and wait for a minute. If asked to allow the PC to be discoverable on the network, click on Yes.
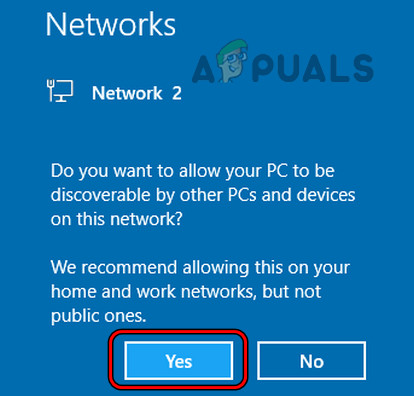
Allow Local Network Communications When Enabling the ZeroTier Network on the Windows PC
4. Authorize Your Device on the ZeroTier Network
- To authorize, navigate to the ZeroTier portal on the website and go to the Networks tab.
- Go to the Devices section and click Auth for your device. To distinguish, add a short name for your device.

Authorize Your System or Device in the Networks Tab of the ZeroTier Web Portal
5. Check the Connection Status
- To check if the connection is successful, click on the ZeroTier icon and hover over your network ID.
- In the sub-menu shown, check Status and it should show OK.
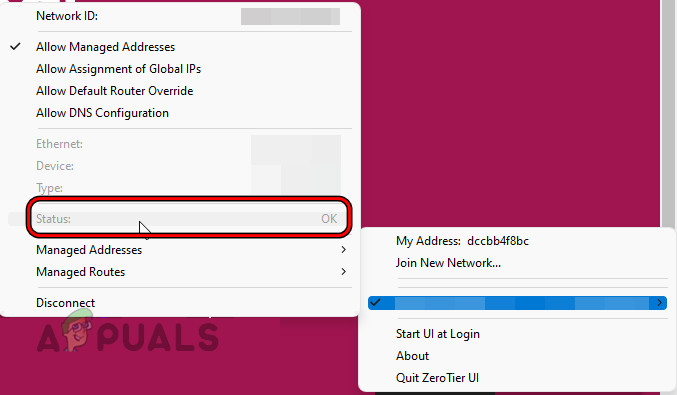
Check the Connection Status to the ZeroTier Network
Install ZeroTier on a Mac
1. Download the MacOS Installer
- Launch a web browser and go to the Downloads page of the ZeroTier website.
- Download the MacOS PKG Installer.
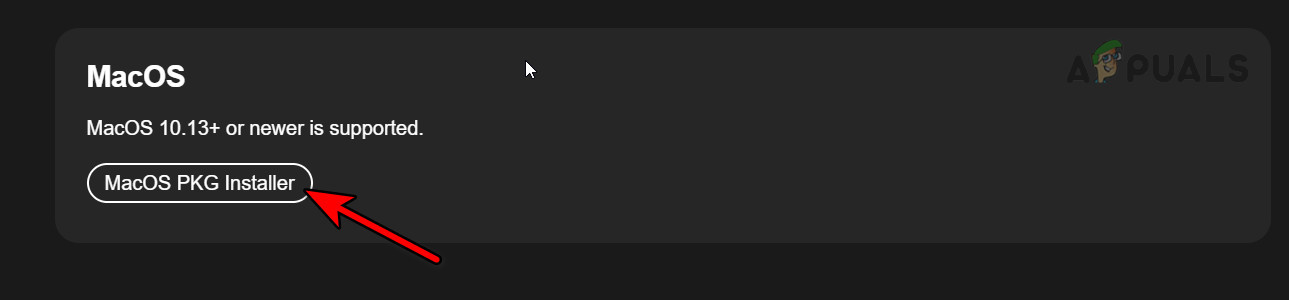
Download the MacOS PKG Installer of the ZeroTier
2. Launch the Installer
- Once downloaded, double-click on the downloaded file.
- Go to Applications and launch ZeroTier.
3. Join Your Zero-Tier Network
- In the top bar, click on the ZeroTier icon, and in the resulting window, locate the Join Network option. If it is not shown, resize the window to show all the options.
- Paste the network ID (copied in the Create a Network section) into the Join Network box and click on Join Network.
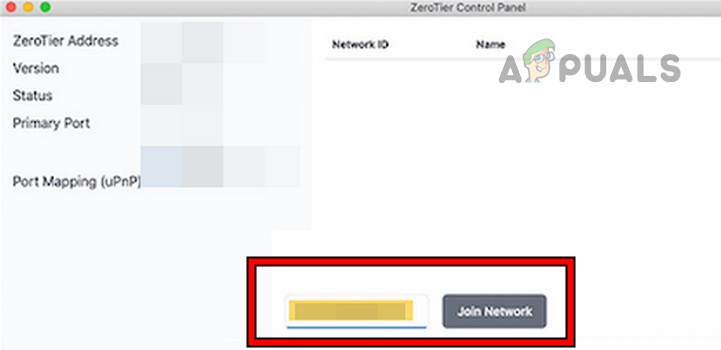
Join ZeroTier Network on the Mac
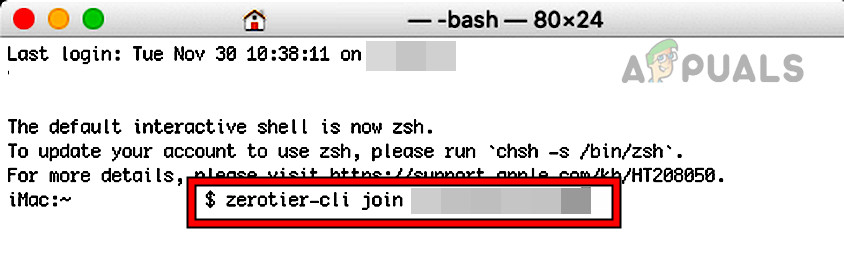
If the option to join the network is not shown, execute the following command in the Mac terminal:
zerotier-cli join <your ZeroTier Network ID>
4. Authorize Your Mac on the ZeroTier Network
- Navigate to the ZeroTier website and open the Networks tab.
- Checkmark on the Auth checkbox for the Mac.
3. Check the Connection Status
- In the top bar of the Mac, click on the ZeroTier icon and hover over your network ID.
- In the sub-menu, the Status should show OK.
Install ZeroTier On iPhone
1. Download the ZeroTier One App
- Open the Apple App Store and search for the ZeroTier One app or directly open the ZeroTier One page of the Apple App Store.
- Tap on Install and wait till it installs.
2. Join the ZeroTier Network
- Launch the ZeroTier One app and tap on the Plus icon in the top right.
- Open Add Network and paste your network ID.
- Tap on the Add Network button and in the warning message shown, tap on Allow to proceed.
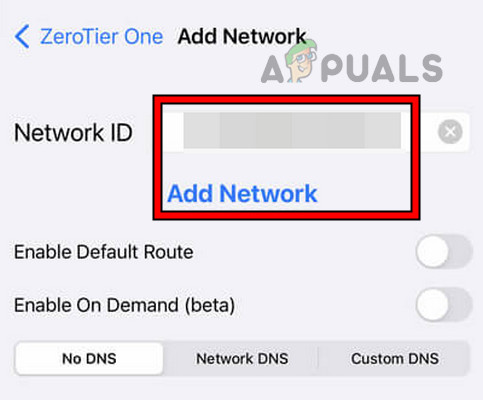
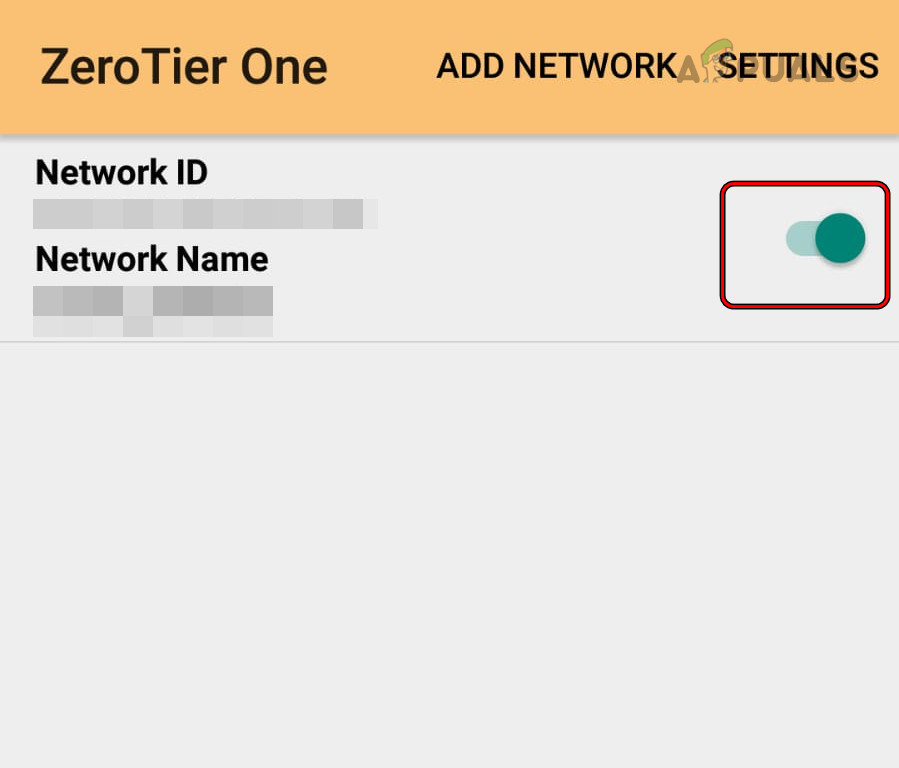
Join the ZeroTier Network on the iPhone - Enable the connect switch and if a VPN warning prompt is shown, click on Allow.
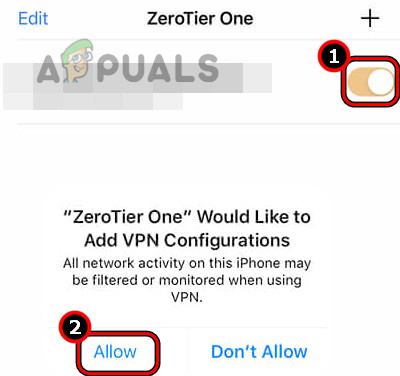
Enable and Allow ZeroTier Network on the iPhone
3. Authorize the Device
- Navigate to the Networks tab on the ZeroTier web portal.
- Checkmark the checkbox of Auth for your iOS device.
4. Check the Connection Status
- Open the ZeroTier app and tap on your network ID.
- Check the Status option and it will show OK.
Install ZeroTier on Android
1. Download the ZeroTier One App
- Open the Google Play Store and search for the ZeroTier One app.
- Tap on Install and wait till the process completes.
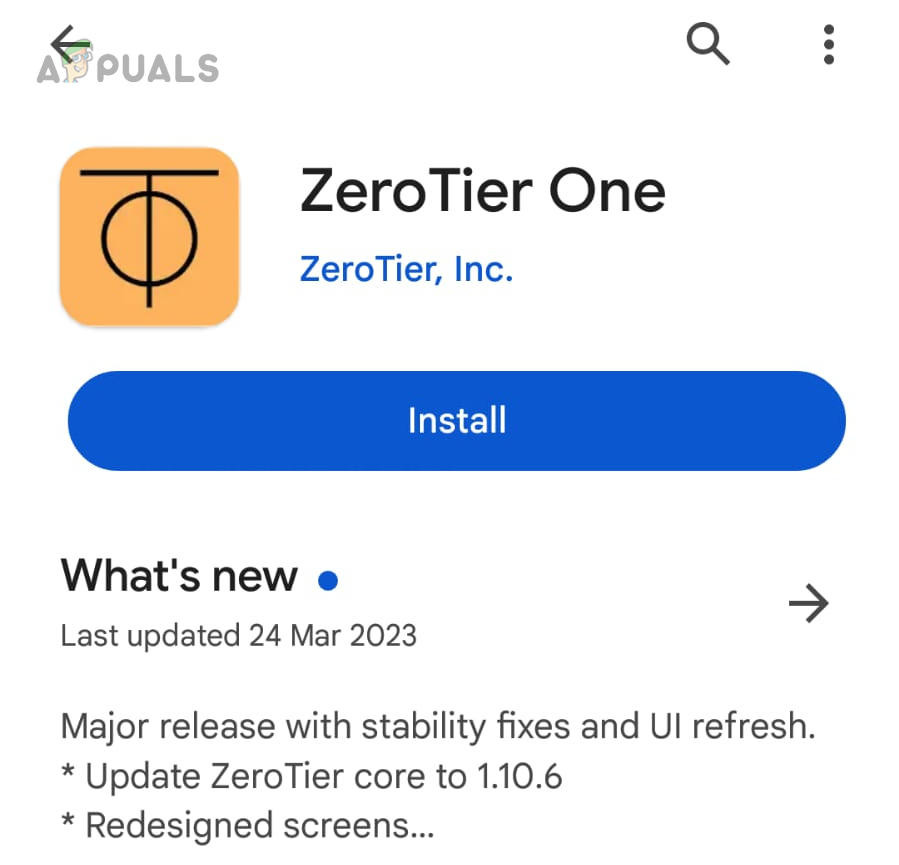
Install ZeroTier One on the Android Phone
2. Join Your ZeroTier Network
- Launch the Zero Tier One app and tap on Add Network.
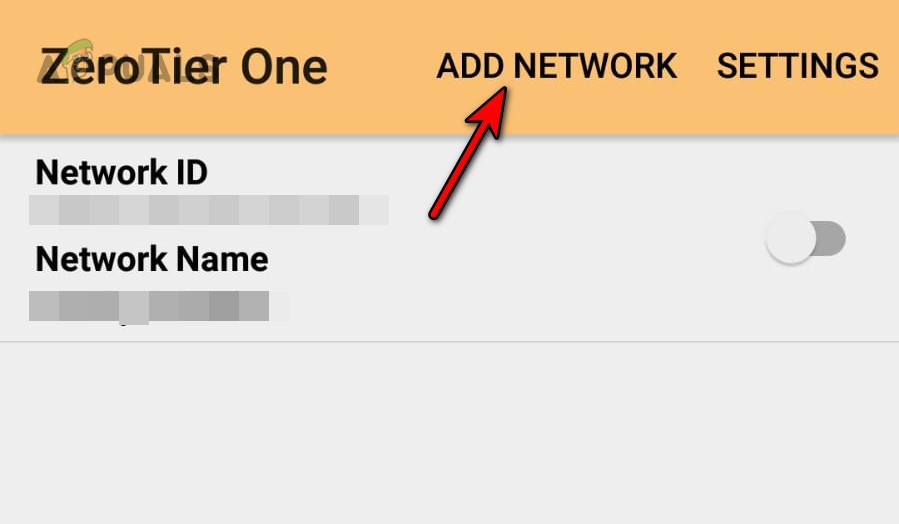
Add the ZeroTier Network to the Android Phone - Paste the ZeroTier Network ID and tap on Add.
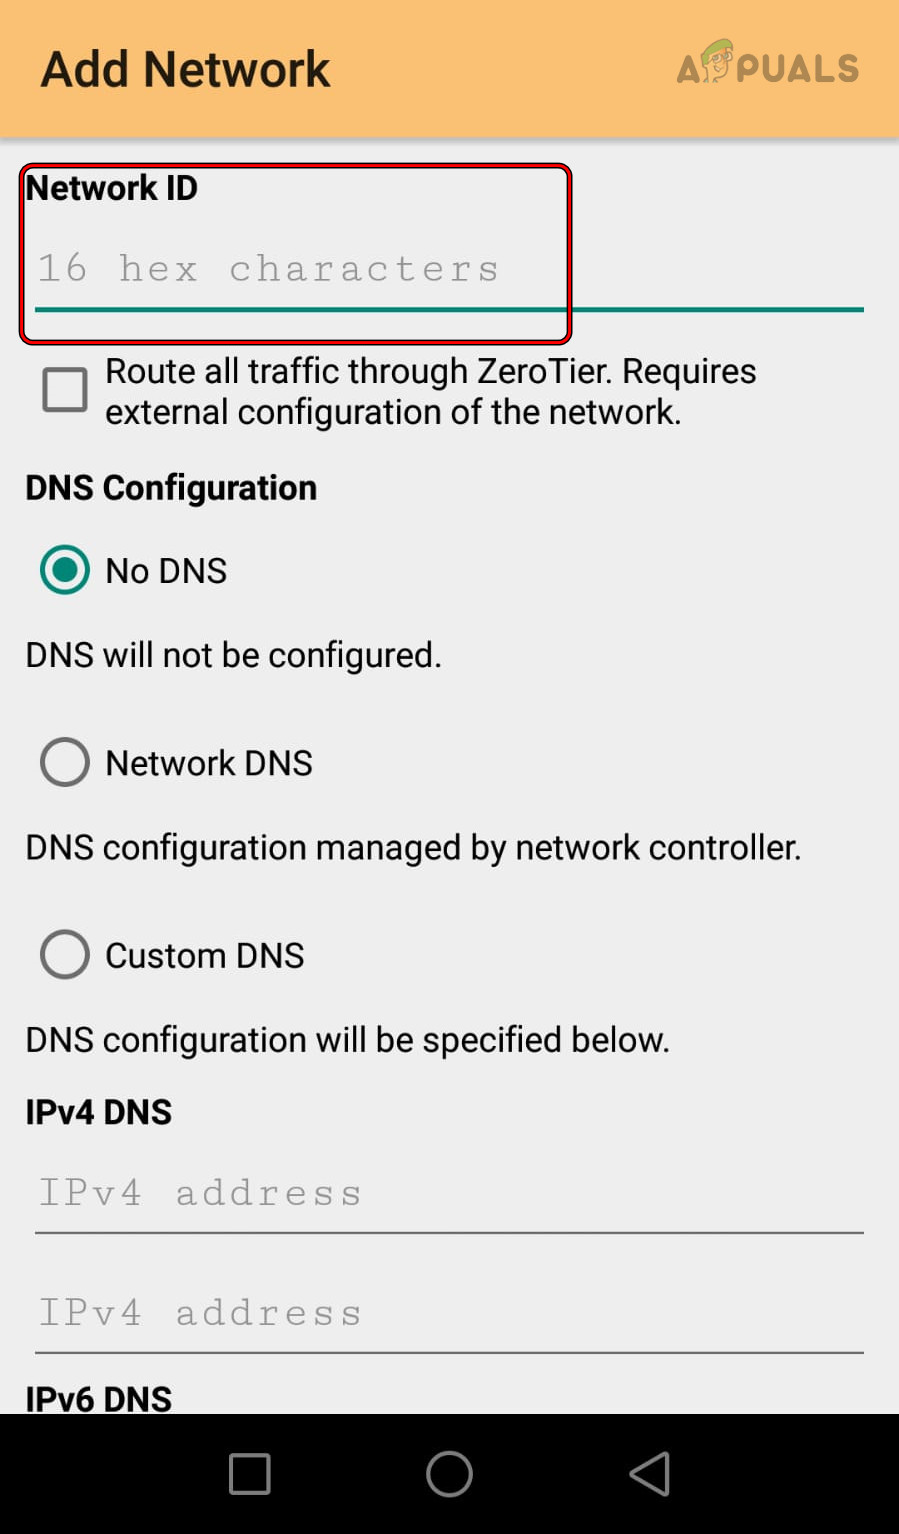
Paste the ZeroTier Network ID in the Android App - Toggle the Connect switch to on and tap on Yes in the VPN warning message shown.
Connect to the ZeroTier Network on the Android Phone
3. Authorize the Android Device
- Go to the Networks tab of your ZeroTier web portal.
- In the devices section, tick the Auth checkbox of the Android phone.
4. Check the Connection Status
- Open the ZeroTier One app on your Android device and tap on your network ID.
- Check the Status option and it will show as OK.
Install ZeroTier on Linux
We will cover steps for Ubuntu, you may need to customize these steps to work for the Linux distro you are using.
1. Install Through the Terminal
- Open the Terminal on Ubuntu and execute the following:
curl -s https://install.zerotier.com | sudo bash
- If you have GPG installed, execute the following in the Terminal:
curl -s 'https://raw.githubusercontent.com/zerotier/ZeroTierOne/master/doc/contact%40zerotier.com.gpg' | gpg --import && \ if z=$(curl -s 'https://install.zerotier.com/' | gpg); then echo "$z" | sudo bash; fi
If you like to use Snapd, one by one execute the following commands to install Snapd (not required for the latest Ubuntu versions) and ZeroTier:
sudo apt update

sudo apt install snapd

sudo snap install zerotier
2. Start the ZeroTier Service
- Open the Terminal on Ubuntu.
- Execute the following in the Terminal:
$ sudo service zerotier-one restart
3. Join the ZeroTier Network
- Open the Terminal on Ubuntu.
- Execute the following in the Terminal:
$ sudo zerotier-one.zerotier-cli join <your ZeroTier network ID>
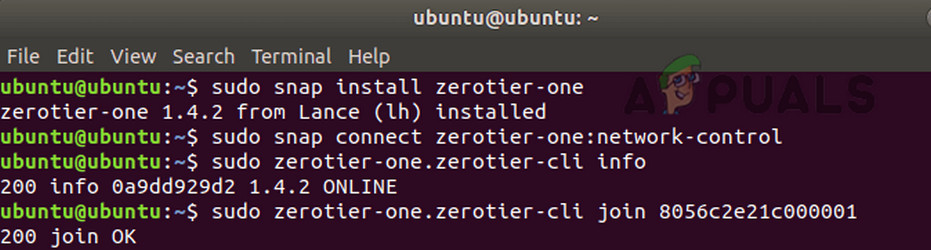
Install the ZeroTier One on Ubuntu by Using Snap
4. Check the Connection Status
- Open the Terminal on Ubuntu.
- Execute the following:
zerotier-cli status
- It will show a 200 message which means the connection is established.
Install ZeroTier on Raspberry Pi
1. Add ZeroTier Repository to the Raspberry Pi and Install it
- Launch Terminal and one by one execute the following commands:
$ sudo apt update

$ sudo apt upgrade
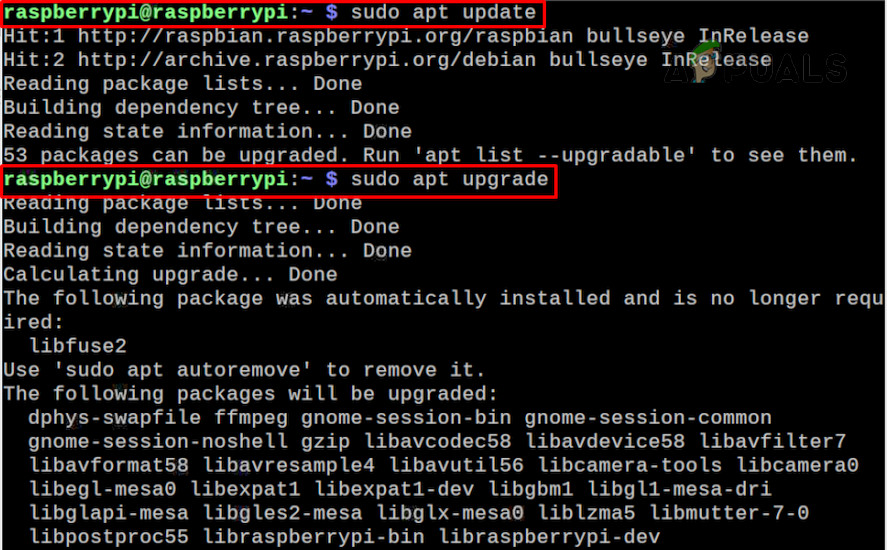
Update and Upgrade Packages on the Raspberry Pi - Execute the following command to download the GPG key from the official ZeroTier GitHub repository:
$ curl https://raw.githubusercontent.com/zerotier/ZeroTierOne/master/doc/contact%40zerotier.com.gpg | gpg --dearmor | sudo tee /usr/share/keyrings/zerotierone-archive-keyring.gpg >/dev/null

Add the ZeroTier GPG Key to the Raspberry Pi - Add your OS to the Release Shell variable by executing the following in the Terminal:
$ RELEASE=$(lsb_release -cs)

Add the OS to the Shell Release Variable - Execute the following command to add the ZeroTier repository:
$ echo "deb [signed-by=/usr/share/keyrings/zerotierone-archive-keyring.gpg] http://download.zerotier.com/debian/$RELEASE $RELEASE main" | sudo tee /etc/apt/sources.list.d/zerotier.list

Add the ZeroTier Repository to Raspberry Pi - Update the Raspberry Pi packages by using the following:
$ sudo apt update
- Install ZeroTier by executing the following:
$ sudo apt install zerotier-one
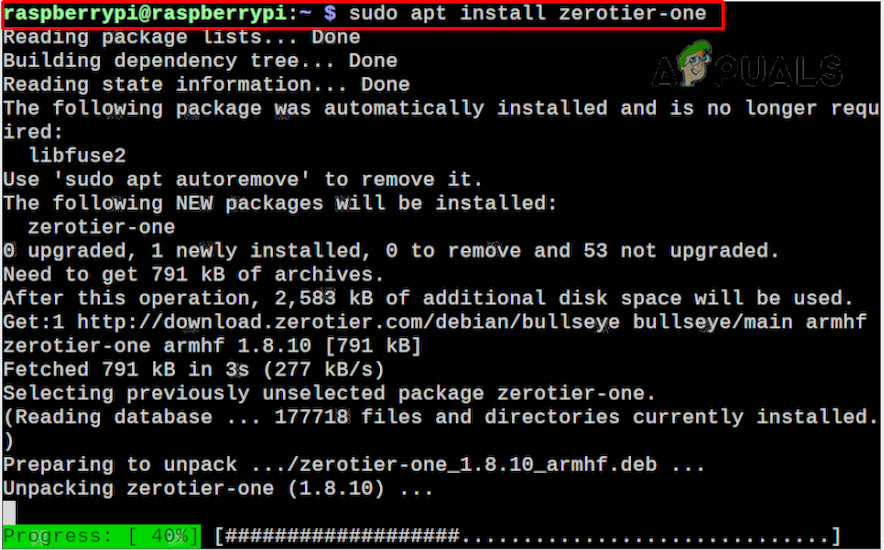
Install ZeroTier on the Raspberry Pi
2. Join the ZeroTier Network
- Launch the Terminal on the Raspberry Pi.
- Use the following command (make sure to replace the network ID with your actual ID) to add your Raspberry Pi to the network:
$ sudo zerotier-cli join <Network ID>

Join the ZeroTier Network on the Raspberry Pi
3. Authorize Your Device on the ZeroTier Portal
- Open a web browser and go to the ZeroTier web portal.
- Navigate to the Networks tab and click on Auth for the Raspberry Pi.
4. Check the Status of the Connection
- Execute the following command in the Terminal:
$ sudo zerotier-cli status

Check the Connection Status to the ZeroTier Network on the Raspberry Pi - It will return a 200 message which means the connection is successful.
Install the ZeroTier on the Router
We will list down the steps to install ZeroTier on an Asus OpenWRT router:
1. Install ZeroTier
- SSH into your router.
- Execute the following commands:
opkg update

opkg install zerotier

opkg install ipset
2. Enable ZeroTier and Join the Network
- Go to the following directory of the router:
/etc/config/zerotier
- Edit the file so that it looks as under:
# cat /etc/config/zerotier

config zerotier 'sample_config'

option enabled '1'

list join 'a1b2c3d4e5f6g6h7i8'
- Replace the a1b2c3d4e5f6g6h7i8 with your network ID.
3. Start the ZeroTier Service and Authorize the Router
- SSH into the router and execute the following:
/etc/init.d/zerotier restart

/etc/init.d/firewall restart
- Launch a web browser and go to the ZeroTier web portal.
- Tick the checkbox of Auth for the router and enable Allow Ethernet Bridging.

Enable Allow Ethernet Bridging for the Router on the ZeroTier Web Portal
4. Check the Connection Status
- SSH into the router.
- Execute the following:
# ifconfig
- Match the IPs shown with the IPs on your network tab and confirm they are ZeroTier IPs.
If you want to access the LAN on your router, you will need to configure Firewall and Manage Routes as well.
Test Connectivity Between Devices
Till now, we have checked the connection to the ZeroTier network is working. Let’s check the connection between our devices on the ZeroTier network. For this purpose, we will use the Ping command which does not accomplish anything but tells us the devices are “talking” to each other. If you are going to Ping a Windows PC, you will need to enable Inbound Rules in the Windows Firewall.
For this demonstration, we will Ping an Android phone from a Windows PC.
- Make sure the Android phone and Windows PC are connected to the ZeroTier network. Some phones will disconnect from the network when their screens turn off, so, keep the phone’s screen on during the test.
- Navigate to the Networks tab of your ZeroTier network on the website and go to the devices section.
- Copy the IP address of your Android phone.
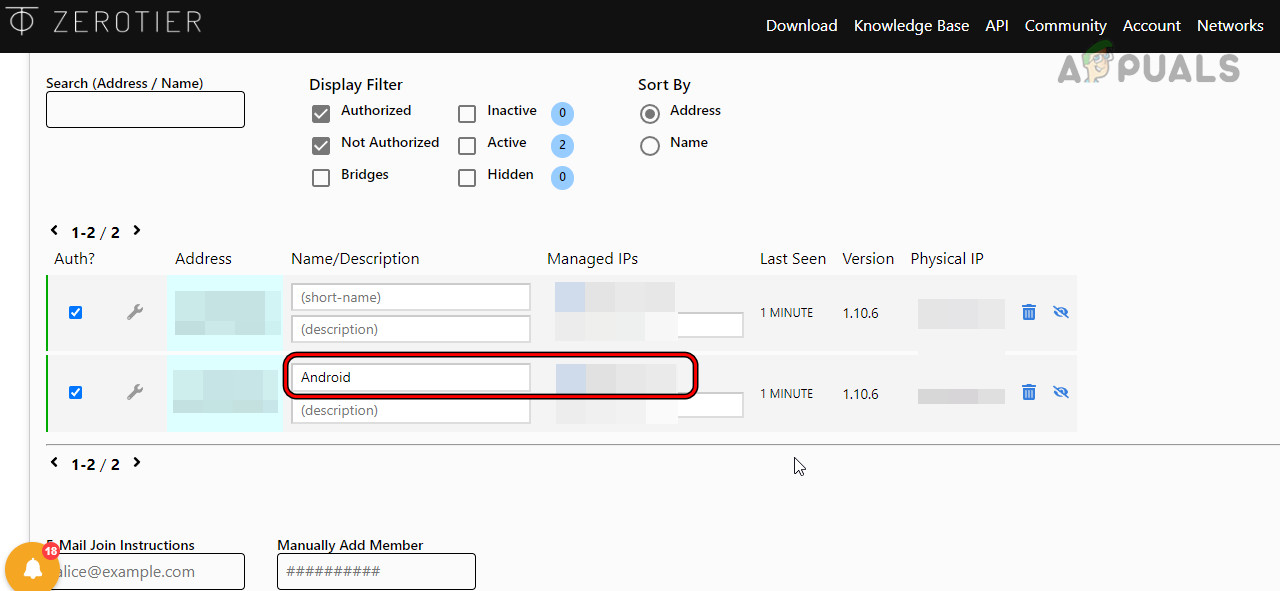
Copy the IP Address of the Android Phone from the ZeroTier Web Portal - On the Windows PC, Click Windows and search for Command Prompt.
- Right-click on it and select Run as Administrator.
- Execute the following:
Ping <IP address of your Android phone>
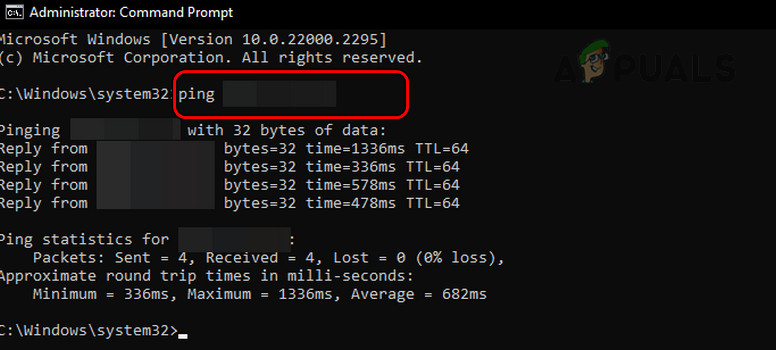
Ping Your Android Phone Through the Windows PC on the ZeroTier Network - If a reply is received, devices are working. If a request timeout message is shown, make sure the correct IP is used and devices are connected to the ZeroTier network.
Got a suggestion or query? let’s discuss it in the comments.
Reviewed by Huzaifa Haroon