How to Use Google Lens on Android and iOS?
Google Lens is one of the newest and most hard-hitting tools in Google’s arsenal – a tool that uses a combination of Artificial Intelligence, machine learning, and image recognition to identify objects in images and provide the user with contextually relevant information and actions to take. Users can give any image they capture the full Google Lens treatment via the Google Photos app, and they can also use Google Lens to identify and interact with images in real-time.
Lens was announced at the Google I/O event back in 2017, and has since made great strides as one of the first widely available spectacles of what machine learning and AI are capable of. There’s a lot Lens can do at the moment: translate over one hundred languages in real-time, identify a myriad of animal species, identify and process contact information, identify products and look for places where they can be bought, identify and research landmarks, and so much more. Google Lens, when it first came out, was exclusive to a select few Android devices. Today, Google Lens is a staple for all Android devices and is also available on iOS, although the processes for using the tool and its range of functionality on the two platforms are slightly different.
How to use Google Lens on Android
Depending on whether you want to use Google Lens in real-time to interact with your surroundings or on images you have previously captured on your device, there are two different ways you can go about using Google Lens on the Android Operating System.
Use Google Lens through Google Assistant
Google Assistant is Google’s digitized personal assistant that comes pre-loaded on all Android phones. On Android phones, Google Assistant plays home to Google Lens, allowing users to access the tool through it to identify and interact with nearby objects in real-time.
- Download the Google Lens app from the Google Play Store. The Google Lens app is available for all Android devices (and only Android devices). Only when you download the app is Lens added to your device’s Google Assistant, so you can’t really use it in real-time without downloading the app.
- Press and hold the Home button on your device to fire up Google Assistant.
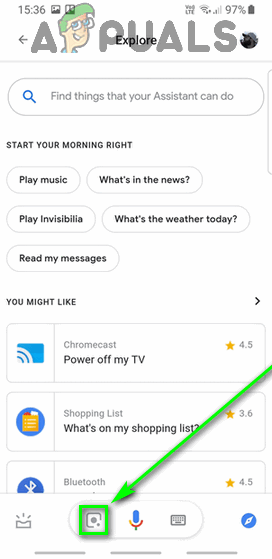
- Tap on Explore (represented by a compass icon) in the bottom-right corner of your screen.
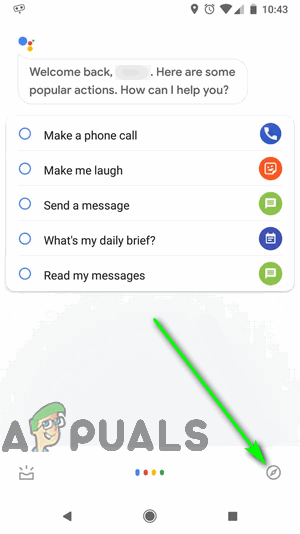
Tap on Explore - Tap on the Google Lens icon (represented by an icon that looks like a camera) located directly next to the Microphone icon at the bottom of your screen.
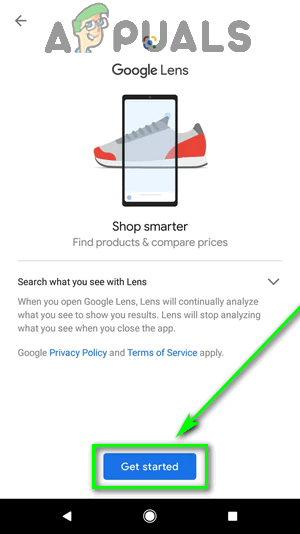
Tap on the Google Lens icon - Since this is probably your first time using Google Lens, you will have to activate it and set it up. To do so, tap on Get Started and follow the onscreen prompts and instructions. You will only have to do this once.
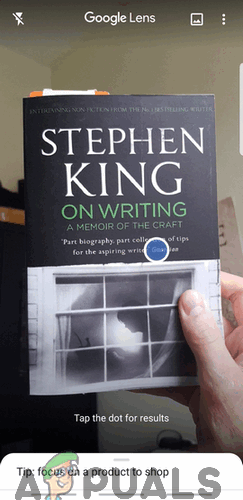
Tap on Get Started - You should now see a camera viewfinder on your screen. Bring the object you want to identify and/or interact with into the shot, and allow Google Lens a couple seconds to identify the objects within the image. Points of Interest identified by the tool are marked with white dots that can be tapped on to select the object and learn more about it.
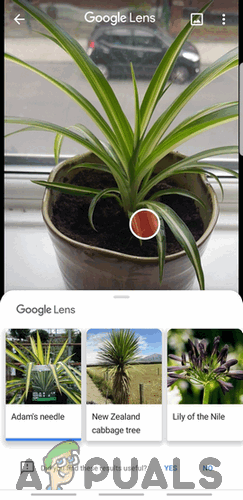
Tap on a Point of Interest to learn more about it - Depending on the Points of Interest it identifies, Google Lens will provide you with actions you can take: the Search icon retrieves information on the POI from the web, the Document icon scans the image for text, the Language Character icon translates text contained in the image, the Shopping Cart icon looks for places to purchase products in the image (and information on them), and so on.
Translate or copy text, shop for products and books, and more
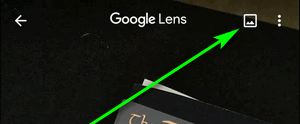
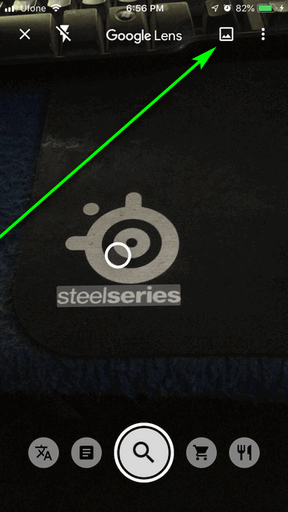
Note: If you would like to use Google Lens on images you have already captured, tap on the Gallery icon in top-right corner of the Google Lens viewfinder.
Use Google Lens from the Google Photos app
Google has integrated Google Lens into the Google Photos app – a Gallery application that, today, comes pre-installed on almost all Android devices. If your primary goal is to use Google Lens on an existing image, it can be accomplished through the Google Photos app.
- Launch the Google Photos app.
- All of the images in your device’s Gallery will show up on your screen. Navigate to the image you want to use Google Lens on, and tap on it.
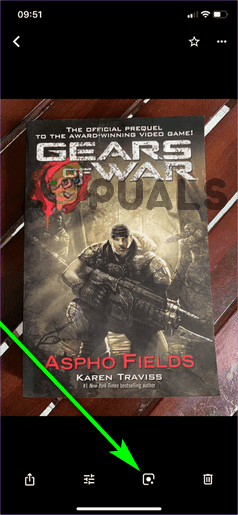
- Tap on the Google Lens icon at the bottom of your screen.
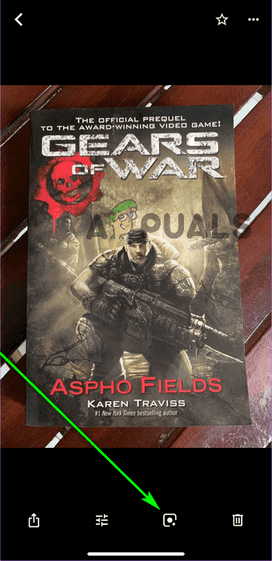
Tap on the Google Lens icon - Allow a couple seconds for Google Lens to kick in, scan the selected image, and identify Points of Interest within the image (which are then marked with colored dots). Alternatively, you can tap on the area you want Lens to focus on.
- When you select a Point of Interest, Google Lens will display a description for the POI, and, depending on the POI, provide you with contextually appropriate actions you can take.

Tap on a Point of Interest to learn more about it
How to use Google Lens on iOS
Since its release, Lens has matured significantly and become available on a wide range of different devices. The tool has also jumped Operating Systems, as it is now also available on Apple’s iOS. For those using iOS, Google Lens and all it has to offer can be accessed in two different ways.
Access Google Lens from the Google app
Google, as a search engine and information curator, is deeply ingrained into the Android Operating System. The same cannot, unfortunately, be said for iOS, but the Google app on iOS comes as close to providing a stock Google experience on mobile as possible. And to top it all off, the Google app comes with the ability to use Google Lens in real-time baked into it!
- Download the Google app from the App Store.
- Launch the Google app and, if required to, sign in to your Google Account.
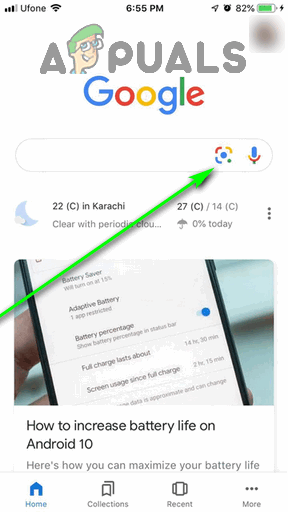
- Tap on the Google Lens icon next to the Microphone icon in the Search bar.
Tap on the Google Lens icon - In the dialog that pops up, tap on OK to grant the Google app permission to access your device’s camera.

Tap on OK - You should now have a viewfinder on your screen. Point your device’s camera towards the object you are interested in, and allow Google Lens a couple seconds to identify the objects within the image. You can also tap on a specific area to speed things up and have Lens focus on it. Points of Interest identified are marked with white dots that can be tapped on to select the object and learn more about it. Alternatively, you can scroll through the options (Auto, Translate, Text, Shopping and Dining) underneath the Capture button, select one, and tap on the Capture button to have Lens process the contents of the viewfinder in the context of the selected option.
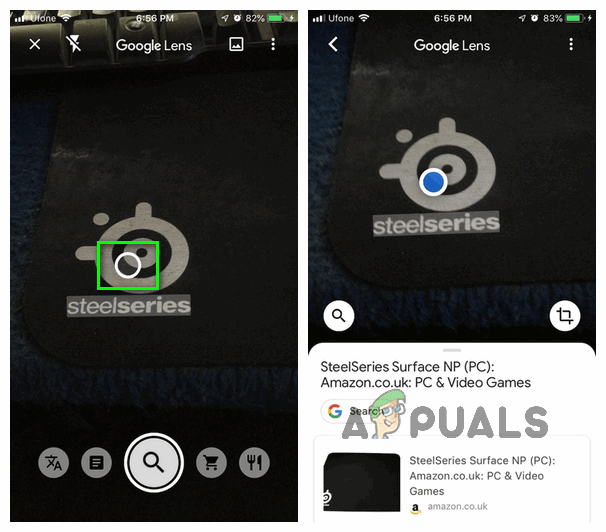
Tap on a white dot to learn more about that POI 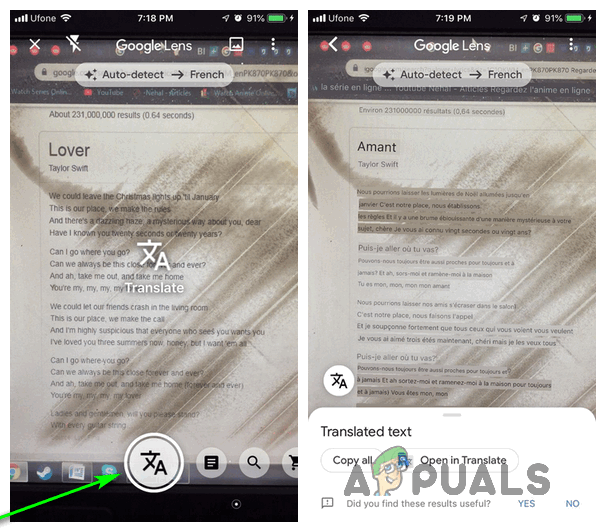
Select an option and tap on the Capture button
Note: If you would like to use Google Lens on images you have already captured, tap on the Gallery icon in top-right corner of the Google Lens viewfinder.
Use Google Lens through Google Photos
Google Photos is also available on iOS and, like its Android counterpart, the app comes with Google Lens integrated into it.
- Download the Google Photos app from the App Store.
- Launch the Google Photos app.
- Sign in to the Google Photos app with your Google Account.
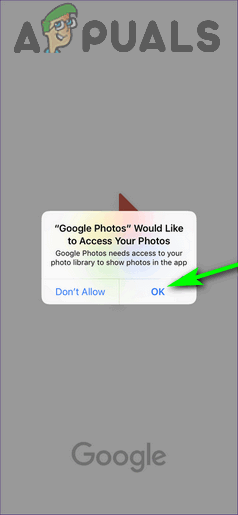
- When asked to do so, provide the Google Photos app with permission to access your device’s image gallery.
Tap on OK - On the next screen, specify if (and how) you want Google Photos to backup the photos on your iPhone or iPad, and tap on Confirm.
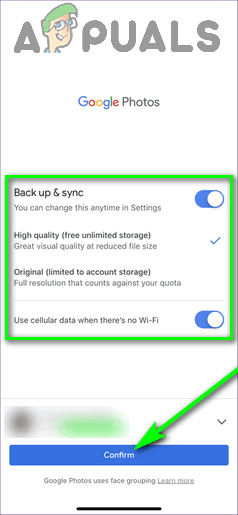
Configure the settings and tap on Confirm - You should now see all of the photos stored on your iOS device in the Gallery. Locate and tap on the image you want to use Google Lens on.
- With the image now on your screen, tap on the Google Lens icon at the bottom.
Tap on the Google Lens icon - The Photos app will fire up Google Lens and get it to start processing the image. You can tap on any area of the image you want Lens to focus on, or you can simply wait for Lens to identify Points of Interest within the entirety of the image (which it will then mark with colored dots).
- Google Lens will display a cursory description of the object you had it focus on or the POI it identified that you tapped on. Depending on the POI, Lens will also provide you with contextually relevant options (such as copying text from the image to the clipboard or translating it, or adding contact details contained within the image to the device).

Tap on a POI to learn more about it