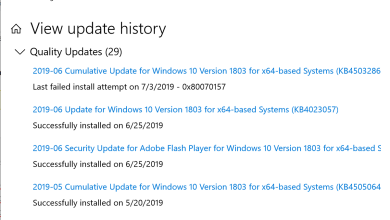
How to Fix Windows Update Error Code: 0xc1420121?
Some Windows users are experiencing a weird issue that prevents them from installing a series of feature updates that are critical to the operating system. The error that comes up is 0xc1420121. This particular issue is confirmed to occur on both Windows 10 and Windows 11.

After looking into this issue, we’ve discovered that there are actually multiple potential causes that might cause this error code on both Windows 10 and Windows 11. Here’s a list of potential culprits that you should troubleshoot against if you find yourself in the same kind of scenario:
- Generic Windows Update glitch – Both Windows 10 and Windows 11 come pre-equipped with a series of utilities that are capable of troubleshooting the most common issues that will break the update component. So before doing anything else, see if your Windows installation is not capable of repairing itself by running the Windows Update Troubleshooter.
- Macrium files interference – As it turns out, the Update component is often reported to conflict with a series of remnant files left behind by a Macrium installation. To prevent this from happening, you will need to start by uninstalling the parent software and then removing any remnant registry keys that might still trigger the conflict.
- Failing / Corrupted drive sector – It’s been confirmed by a series of affected users that this problem can also be related to a corrupted drive sector or a drive that is beginning to fail. If the problem is superficial, you might get away with it without having to change the drive by running the CHKDSK utility and allowing it to replace failing sectors with unused equivalents.
- System File corruption – This type of issue is mainly reported to occur after the users’ upgrades to Windows 11 from an older Windows version. There are a couple of ways to fix it, from deploying SFC and DISM scans to performing repair install and clean install procedures.
Now that you are familiar with every potential culprit that might be responsible for this issue, let’s dive into specifics and see how you can fix every potential scenario (step-by-step instructions below).
Run the Windows Update Troubleshooter
Before you move on to more advanced troubleshooting strategies, the ideal place to start is by running the Windows Update Troubleshooter and applying the recommended fix. Doing this might help you fix the issue automatically – as long as the problem is already covered by a repair strategy.
Note: It’s worth mentioning that the Windows Update Troubleshooter on Windows 11 is much more capable than it is on Windows 10. The dozens of automated repair strategies that are added will boost your chances of fixing the issue automatically.
If you haven’t tried running the Windows Update Troubleshooter yet, follow the instructions below for instructions on how to run it and apply the recommended fix:
Note: The instructions below are universal and will work regardless of whether you’re on Windows 10 and Windows 11.
- Press Windows key + R to open up a Run dialog box. Next, type ‘control’ inside the text box and press Enter to open up the classic Control Panel menu.

Open up the classic Control Panel interface - Once you’re inside the classic interface of Control Panel, use the search function (top-right version), type ‘troubleshooting’, and press Enter.

Open up the Troubleshooting tab - From the list of results, click on Troubleshooting.
- Next, from the list of options, click on Fix problems with Windows Update (under System and Security).

Fix problems with Windows Update - Once you’re inside the Windows Update screen, start by clicking on Advanced, then check the box associated with Apply repairs automatically.

Applying repairs automatically - Hit Next to deploy a troubleshooting scan, then wait to see if a repair strategy is recommended.
- In case you get a hit, click on Apply this fix (if prompted to do so) and wait until the operation is complete.

Apply the recommended fix - After the recommended fix is applied, restart your PC and see if the problem is fixed once the next startup is complete.
In case you already tried running the Windows Update troubleshooter and you find that the issue is still not fixed, move down to the next potential fix below.
Remove remnants of old Macrium installation (if applicable)
According to some affected users, an old Macrium installation might be preventing the Windows Update from getting installed. This is reported to occur with both PCs where Macrium is currently installed and with PCs where Macrium was previously installed (and left behind some remnant files).
Update: As it turns out, this issue can also appear immediately after you upgrade to Windows 11 on a PC where Macrium was installed on the older OS version.
If you have Macrium Reflect installed on your PC (or you previously had it installed), follow the instructions below to get rid of any remnant files that might be currently causing this conflict.
Here’s what you need to do:
Note: If Macrium Reflect is already uninstalled, skip the first 4 steps and move directly to step 5.
- Press Windows key + R to open up a Run dialog box. Next, inside the text box, type ‘appwiz.cpl’ and press Enter to open up the Programs and Features menu.

Opening up the Programs and Features menu - Once you’re inside the Programs and Features menu, scroll down through the list of applications and locate the Macrium Reflect installation.
- Right-click on Macrium Reflect, then choose Uninstall from the context menu.

Uninstalling Macrium Reflect - Follow the on-screen prompts to complete the uninstallation of Macrium Reflect, then restart your computer.
- Once your computer boots back up, press Windows key + R to open up a Run dialog box. Next, type ‘regedit’ and press Ctrl + Shift + Enter to open up the Registry Editor with admin access.

Opening up the Regedit Editor with admin access - Once you’re inside the Registry Editor, use the menu on the left to navigate to the following location:
Computer\HKEY_LOCAL_MACHINE\SYSTEM\CurrentControlSet\Services\WIMMount\
Note: You can either navigate to this location manually or you can paste the full path inside the nav bar at the top and press Enter to get there instantly.
- After you arrive at the correct location, move over to the right-hand section and double-click on ImagePath.

Accessing the ImagePath - Next, adjust the string path to the following value:
system32\drivers\wimmount.sys
Note: If the current value is ‘\??\C:\Program Files\Macrium\Reflect\wimmount.sys‘, you can be certain that this issue was actually caused by uninstalling Macrium Reflect. It’s related to a defect that makes the software fail to restore the path of wimmount.sys Image path.
- Once the modification has been enforced, reboot your PC and see if the problem is now fixed.
If the same kind of issue is still occurring even after you enforced the fix above (or this method was not applicable) move to the next potential fix below.
Deploy a CHKDSK scan
As it turns out, the Windows Update 0xc1420121 error can also be related to some type of inconsistency produced by a drive that is beginning to fail.
This issue is mainly surfacing for Windows 10 and Windows 11 users that are still on traditional HDDs. What usually happens is, storage sectors used to store Windows files are beginning to fail as the storage device is slowly dying.
If you’re dealing with this issue, the only long-term solution is to replace the drive with a new one (preferably an SSD since it’s much more reliable).
But if that’s not the option, you can try using the Check Disk (CHKDSK) utility and see if it’s capable of replacing corrupted sectors with unused equivalents.
Follow the instructions below to deploy a CHDKDSK scan and see if it ends up fixing the issue in your case:
- Press Windows key + R to open up a Run dialog box. Next, type ‘cmd’ inside the text box and press Ctrl + Shift + Enter to open up an elevated CMD prompt with admin access.

Open a CMD prompt - When you’re prompted by the User Account Control prompt, click yes to grant admin access.
- Once you’re inside the elevated CMD prompt, type the following command and press Enter to deploy a CHKDSK scan:
chkdsk C: /f /x
Note: The command above assumes that the Windows installation is located on the C: partition. If your setup is different, modify the letter accordingly.
- Once the operation is complete, restart your computer and see if the problem is now fixed.
If you already tried deploying a CHKDSK scan and you’re still seeing the same 0xc1420121 error, move down to the next potential fix below.
Deploy SFC and DISM scans
If you’ve come this far and the 0xc1420121 error is still appearing when you’re attempting to install certain Windows Updates, you should start considering the fact that you might be dealing with some kind of system file corruption.
If the corruption is superficial, you should be able to fix it by deploying SFC (System FIle Corruption) and DISM (Deployment Image Servicing and Management) scans in quick succession.
Note: But keep in mind that this will only be effective as long as the corruption does not affect your kernel files.
Start by deploying an SFC scan from an elevated CMD prompt and wait until the operation is complete.
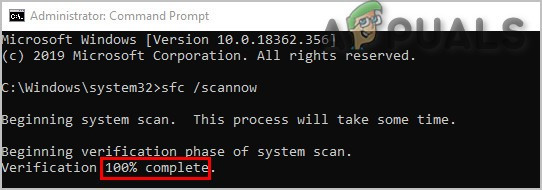
Once the operation is complete, restart your PC and wait for the next startup is complete.
After your PC boots back up, open another elevated CMD prompt and deploy a DISM scan.

Once the DISM scan is complete too, do one final restart and see if the problem is fixed. If it isn’t, move down to the final potential fix below.
Perform a repair install / clean install procedure
If you’ve come this far without a viable fix, chances are you’re dealing with some kind of system file corruption that you can’t fix conventionally.
In this case, your very last option is to go for a procedure that will successfully replace every Windows file with an equivalent that you know is not tainted by corruption.
When it comes to doing this, there are two ways word:
- Clean install – Clean installing means you will essentially wipe the operating system drive and start fresh. This won’t require you to use compatible Windows installation media, but you’ll need to back up your data in advance if you don’t want to lose it permanently.
- Repair install – In case you have sensitive information on the same partition as your OS drive, the preferred approach should be to go for a repair install (in-place upgrade). This process will require you to use compatible installation media, but the main advantage is that you get to keep all personal files, media, games, and applications currently stored on the OS drive.