FIX: Developer Mode is Disabled on this Device by System Policy
 Reviewed by Huzaifa Haroon
- Enabling Developer Mode on a Chromebook can increase functionality but also poses security risks, voids warranties, and requires data backup due to the necessity of a powerwash.
- For enterprise-enrolled Chromebooks, Developer Mode can be enabled by pressing specific key combinations to bypass administrative restrictions, though this process can void warranties and potentially harm the device.
- If standard methods fail, removing the battery and power cord to reset the device may work, but it carries a high risk of voiding the warranty and damaging the Chromebook.
Developer mode refers to a setting that enables access to advanced features and debugging tools. You can also download apps from all sources, modify the firmware, and run a Linux system on your device.
However, if you received your Chromebook from a school or another institute, chances are that the developer mode is disabled by system policy. This means you can’t enter the developer mode.
We understand how disappointing that can be. That’s why we have created this guide. Keep reading to learn a simple hack to bypass this restriction and get full control over your device!

Table of Contents
Is It Safe to Unlock Developer Mode?
Unlocking developer mode on a Chromebook can offer additional flexibility and functionality, but it comes with certain risks. So, before we dive into the process, here are some considerations to help you decide if unlocking developer mode is safe for you:
- Security Risks: Developer mode disables certain security features of the Chromebook, such as verified boot – which checks the integrity of the system software at startup. This makes the device more vulnerable to malware and other security threats.
- Warranty Voiding: Enabling developer mode can void the warranty of your Chromebook. If you encounter any hardware issues while the device is in developer mode, the manufacturer may refuse to provide warranty support or repairs.
- Data Loss: Switching to developer mode requires a powerwash, which erases all data on the Chromebook. Make sure to back up any important files or documents before unlocking developer mode to avoid losing valuable information.
- Technical Skills Required: Developer mode is intended for users who are comfortable with technical tinkering and troubleshooting. If you’re not familiar with Linux or command-line interfaces, you may find it challenging to navigate developer mode and fix any issues that arise.
- Software Compatibility: Some applications may not work properly in developer mode, especially if they rely on Chrome OS’s standard security mechanisms. Ensure that the software you plan to use is compatible with developer mode before making the switch.
READ MORE: What is Discord Developer Mode? How to Turn it ON? ➜
How to Enable Developer Mode on an Enterprise-Enrolled Chromebook?
On regular Chromebooks, you can easily enter developer mode by starting the Recovery Process and accessing the Advanced Options. The Enable Developer Mode button appears at the top of the list.
You can follow the instructions from there and restart your device into developer mode. But, when using an enterprise-enrolled Chromebook, you will see this notification during the process:

To bypass this admin block and enable developer mode, follow these simple steps:
- Power off your Chromebook.

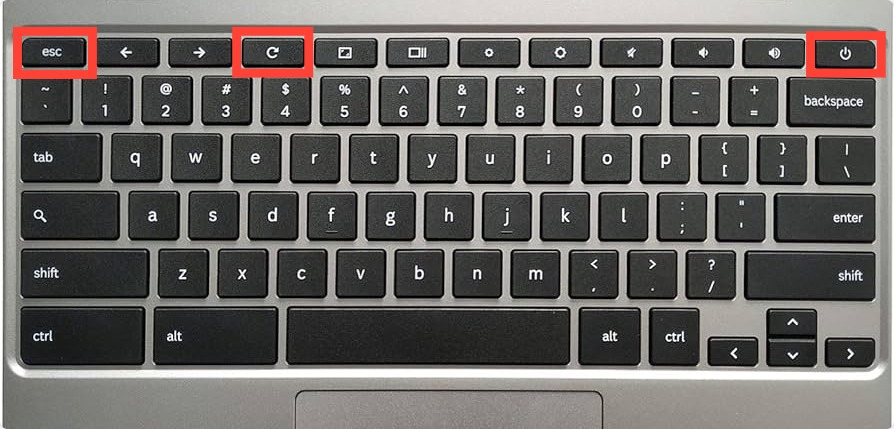
Power off button on Chromebook - Press the Esc + Power + Refresh buttons simultaneously. This should start the recovery process.
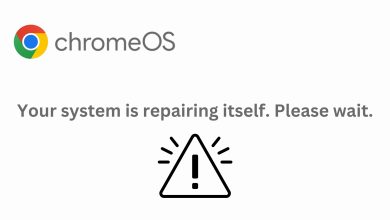
Esc + Refresh + Power buttons - You will receive this error notification.
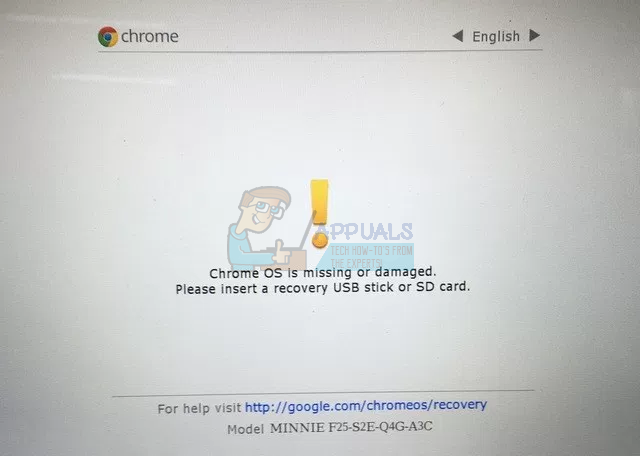
“Chrome OS is missing or damaged. Please insert a recovery USB stick or SD card.” error - Press Ctrl + D. Another notification will pop up asking you to turn OS Verification Off.
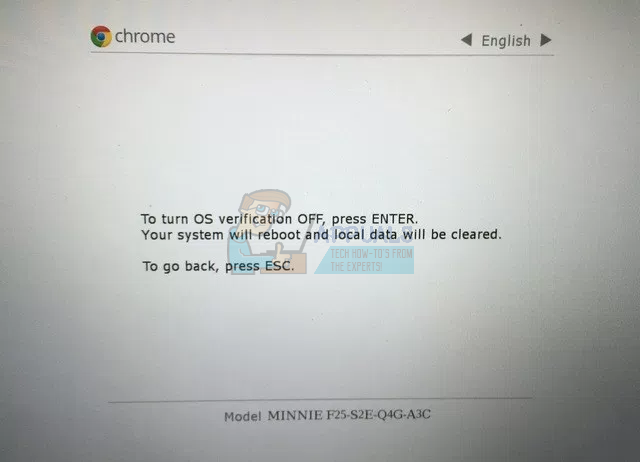
Turn OS Verfication Off pop-up - Press Enter to start rebooting your system.

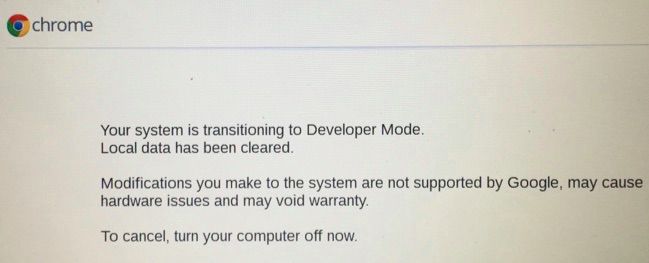
Enter button on Chromebook - Once the OS Verification is Off, the system will ask you to re-enable it by pressing the spacebar. Don’t do it, instead move on to the next step.

Chrome OS verification is off - Press Ctrl + D.

Ctrl + D buttons on Chromebook
This should start the transitioning process to developer mode. It will take a little while, and then the Chromebook will power off automatically. Restart it and choose an account to set up the system. Your Chromebook has now entered developer mode.
READ MORE: How to enable Developer Mode on Chrome OS ➜
What If This Doesn’t Work?
The above-mentioned method works 90% of the time. However, some Chromebook users are unable to bypass the Developer Mode is Disabled by the System Policy setting. In this case, follow this alternative method:
- Turn off your Chromebook.
- Unscrew the back cover.
- Remove the battery and the power cord that connects the battery to the motherboard.
- Now, open the Chromebook and press the power button for 30 to 40 seconds.
- Reassemble the Chromebook by placing the battery and the power cord back into their places.
- Secure the back cover with screws.
- Turn on the Chromebook.
- Press the Esc + Refresh + Power buttons at once. It may take up to 15 minutes for your device to boot.
- Press Ctrl + D when this notification pops up on the screen – “Chrome OS is missing or damaged”.
This method should remove your Chromebook from the enterprise enrollment. Follow the instructions that show up afterward to enter developer mode.
READ MORE: What is the Difference Between A Chromebook and A Laptop [2024 Edition] ➜
Last Words
All in all, Developer Mode is Disabled by System Policy is a simple error that occurs when an enterprise has placed restrictions on the Chromebook. This typically happens in school-assigned Chromebooks.
You can bypass the admin block by using the two methods described above. However, if you don’t want to risk your Chromebook’s warranty, it’s best to contact the school administration and ask them to remove the restriction.
If you’ve bought the Chromebook from an online marketplace, the administration will cooperate and resolve the issue happily since they also have to pay the license fee for the device.
But if you’re a student who’s currently enrolled at the school, chances are that you will have to negotiate and give them a solid reason to remove the block. Good luck!
FAQs
Yes, it’s possible to remove the school administrator from Chromebook. However, doing so will not go unnoticed. You may receive a suspension or a fine from the institute.
Yes, you can remove the admin from a school Chromebook without developer mode. First, remove the battery and the power cord that connects the battery to the motherboard. Press the power button for 30 to 40 seconds with these components removed. Now, reassemble the Chromebook and boot the device. Press Ctrl + D once the screen displays the notification “Chrome OS is missing or damaged”.
When enabled, developer mode always wipes off the Chromebook data. You can’t prevent the loss of data. However, what you can do is transfer the data on USB or save it somewhere else before enabling the developer mode.
Reviewed by Huzaifa Haroon