How to Troubleshoot Zelle Sign-in Error Code: A101
The Error A101 on Zelle means that Zelle cannot trust your device to log in or make a transaction. This can be due to not using a mobile number registered with Zelle or using a Wi-Fi connection on your phone.
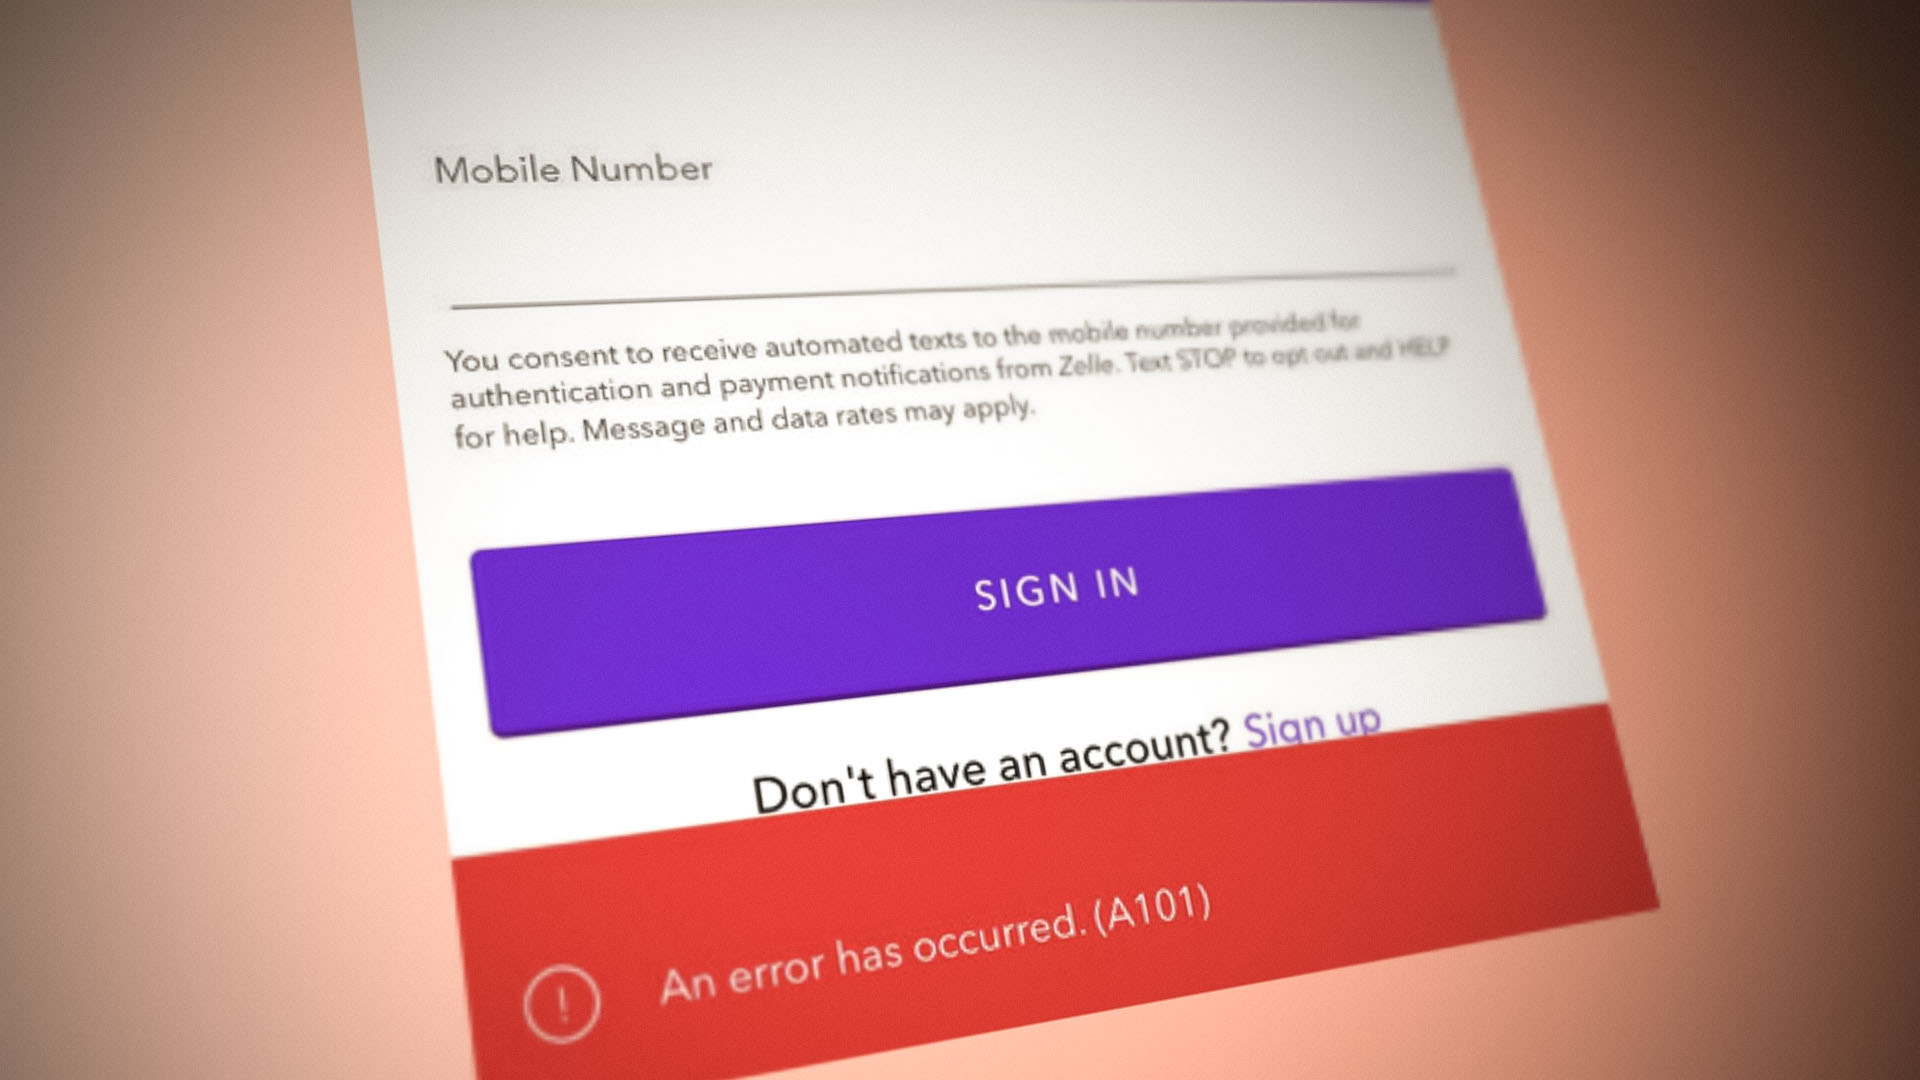
The issue arises when a user tries to log in on the Zelle app or tries to make a transaction and encounters the following message:
An Error Has Occurred. (A101)
You can fix the error Zille A101 by trying the solutions below but before that, make sure you are using the same number that was registered with Zelle. If you are using the same number, then make sure you have not changed your mobile plan (as it can trigger the issue at hand). Moreover, make sure you are not using a VoIP number with the Zelle app as it does not work with the VoIP numbers (like Google Voice, Google Fi, TextNow, Republic, etc). If you are encountering the A101 issue while sending the money, make sure you are not sending over the limit.
Disable the Wi-Fi Network and Use the Cellular Data of the Mobile Phone
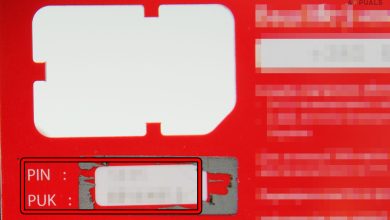
You may encounter the Zelle error A101 if you are using a Wi-Fi network to connect to the Internet (due to security measures incorporated in the Zille app) and using a cellular data plan on the phone may solve the Zelle problem. Before moving, make sure you have a data plan active on your SIM card; the same number that was registered with Zelle.
- Exit the Zelle app and remove it from the running/recent apps of your phone.
- Then scroll down (or up) to open the Quick Settings menu and tap on the Wi-Fi icon to disable it.
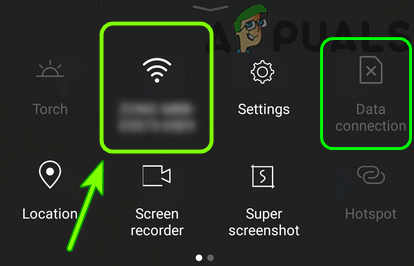
Disable Wi-Fi and Enable the Data Connection - Now tap on the Mobile Data icon and then launch the Zelle app to check if it is operating fine.
Reshuffle the SIM Cards of the Mobile Phone
If you are using a dual SIM phone and have switched the SIM (registered with Zelle) to another slot of the phone, then that may cause the Zelle app to show the error A101, and reshuffling the SIM cards may solve the problem.
- Firstly, power off your mobile and remove its SIM cards from the slots.
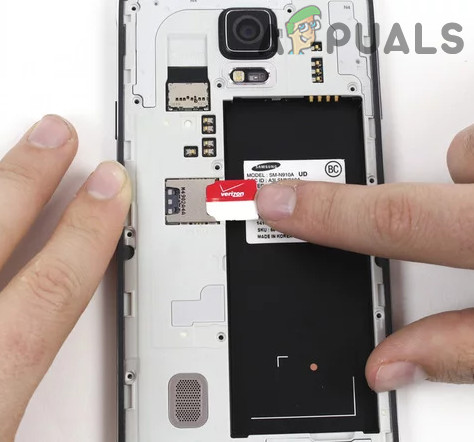
Remove the SIM Card from the Phone - Then insert the Zelle registered card to the other slot (preferably, the first slot) and power on the device. If asked to, make sure to select the Zelle registered SIM as the main (or primary) number.
- Then launch the Zelle app and check if it is clear of the error a101.
If the Zelle registered SIM card is already in the slot, then power off your phone, remove the SIM, clean it with a soft cloth, reinsert the SIM, and power on the system to check if that resolves the Zelle issue.
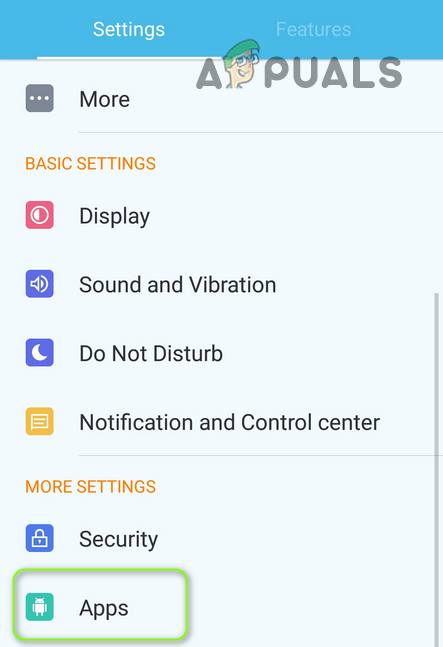
Reinstall the Zelle App
A corrupt installation of the Zelle app might cause it to show the error A101 and reinstalling the app might solve the issue. For illustration, we will discuss the process for the Android Zelle app.
- Launch your Android phone’s Settings and open Apps/Application Manager.
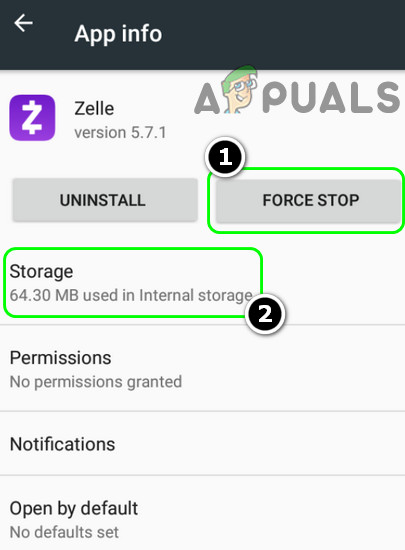
Open Apps in the Android Phone’s Settings - Now select Zelle and tap on Force Stop the app.
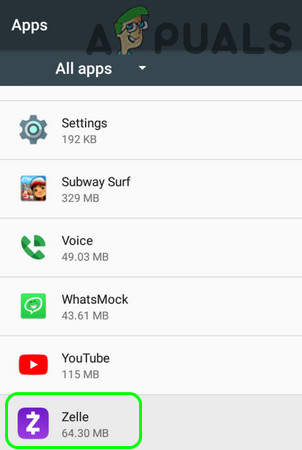
Open Zelle In Apps - Then confirm to force stop the Zelle app and open Storage.
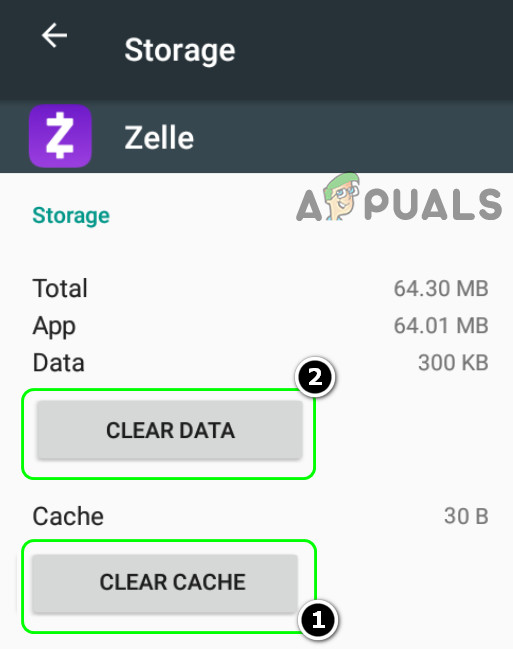
Force Stop the Zelle App and Open the Storage Settings - Now tap on Clear Cache to clear the cache of the Zelle app.
- Then tap on Clear Data and afterward, confirm to clear the data of the Zelle app.
Clear Cache and Data of the Zelle App - Now hit the back button and tap on Uninstall.
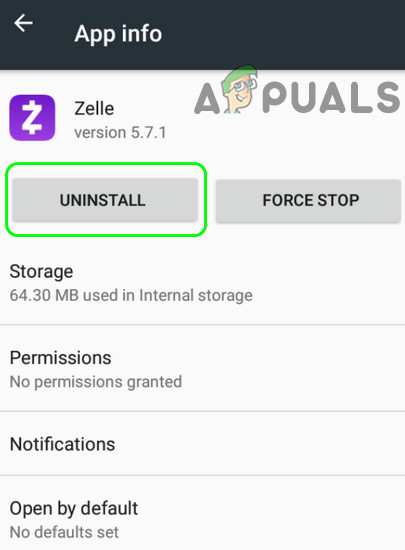
Uninstall the Zelle App - Then confirm to uninstall the Zelle app and wait till the app is removed.
- Now reboot your phone and upon reboot, reinstall the Zelle app and check if the Zelle app issue is resolved.
- If not, then repeat the above steps but at step 8, do not sign in to the old account but create a new account with the same number with which you created the previous account and check if that resolves the issue.
- If the issue persists, then check if using Zille in your banking app sorts out the error a101.
If the issue is still there, then contact Zelle support and make sure your address in the app and the billing address on the linked bank card are the same. Also, make sure the bank card is an active one, a deactivated bank card may also trigger the issue at hand.