How to Fix Pin Error 0xD000A002 in Windows 11?
The error code 0×d000a002 occurs when the users attempt to set up a PIN code for their devices. It is accompanied by the statement ‘Not able to use PIN due to a problem’.
Let’s have a look at the troubleshooting methods that will allow you to fix the problem in no time.
1. Delete the Contents of the NGC Folder
The first thing that we recommend you do is delete the contents of the NGC folder, which stores all the information regarding Windows PIN settings. There is a chance that the information in this folder has become corrupt, leading to the error at hand.
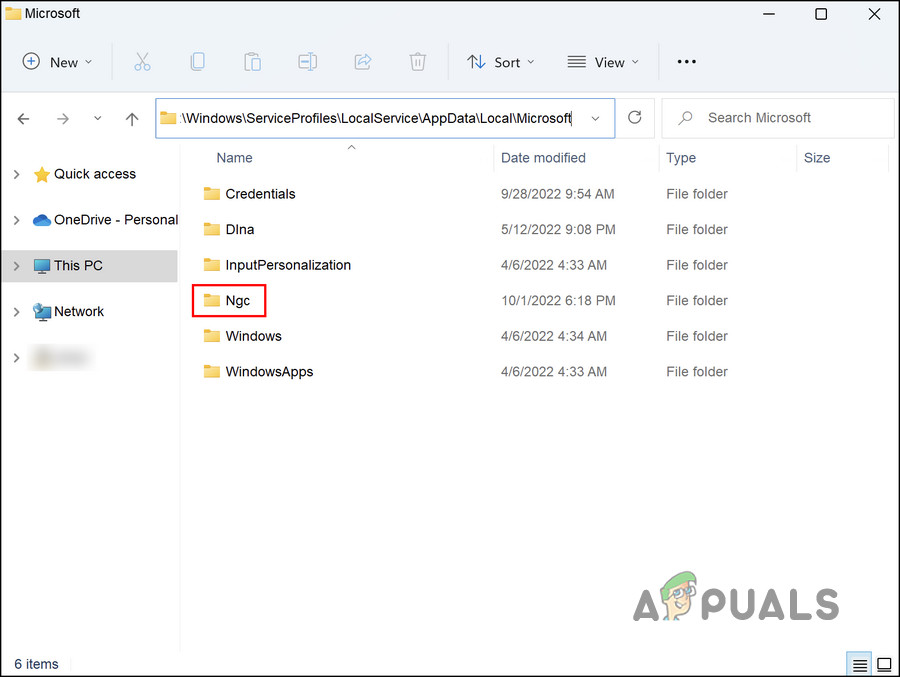
The NGC folder is located in the following location:
C:\Windows\ServiceProfiles\LocalService\AppData\Local\MicrosoftHere is how you can delete it:
- Launch File Explorer and navigate to the following location:
C:\Windows\ServiceProfiles\LocalService\AppData\Local\Microsoft
- Double-click on the NGC folder in this location.
Access the NGC folder - Once you are inside the folder, select all its contents and right-click on any one of those.
- Then, choose Delete from the context menu.
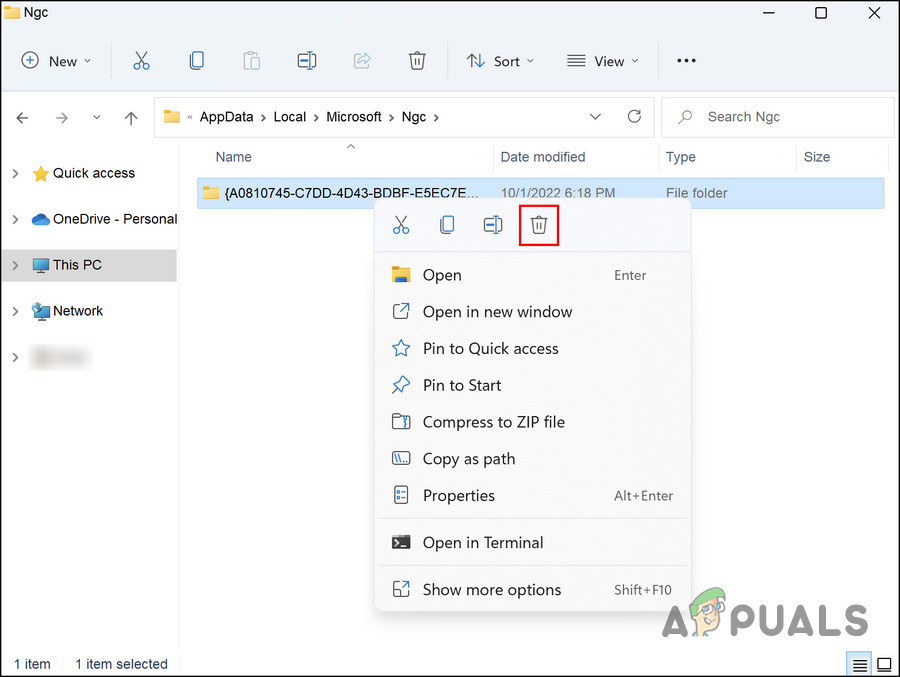
Delete the NGC folder - If you cannot access the NGC folder, right-click on it and choose Properties from the context menu.
- Head to the Security tab in the following window and hit the Advanced button.
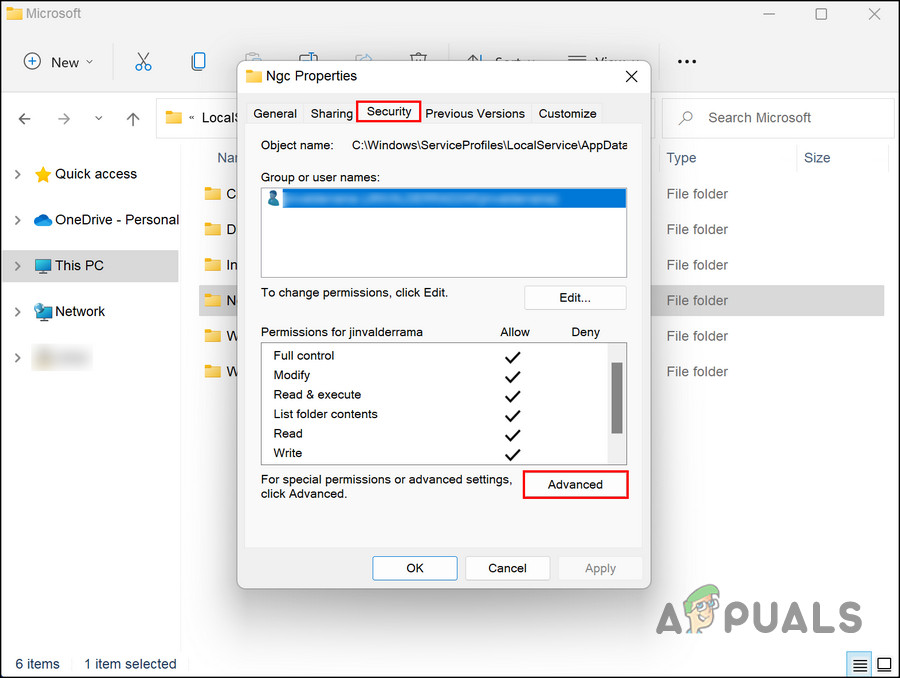
Click on the Advanced button in the security tab - In the Owner section, click on the Change hyperlink.

Click on the Change hyperlink - Now, in the Enter the object name to select section, enter the name of your user account. You can simply type Administrators if you are using an administrator account.
- Click on the Check Names button and hit the OK button.
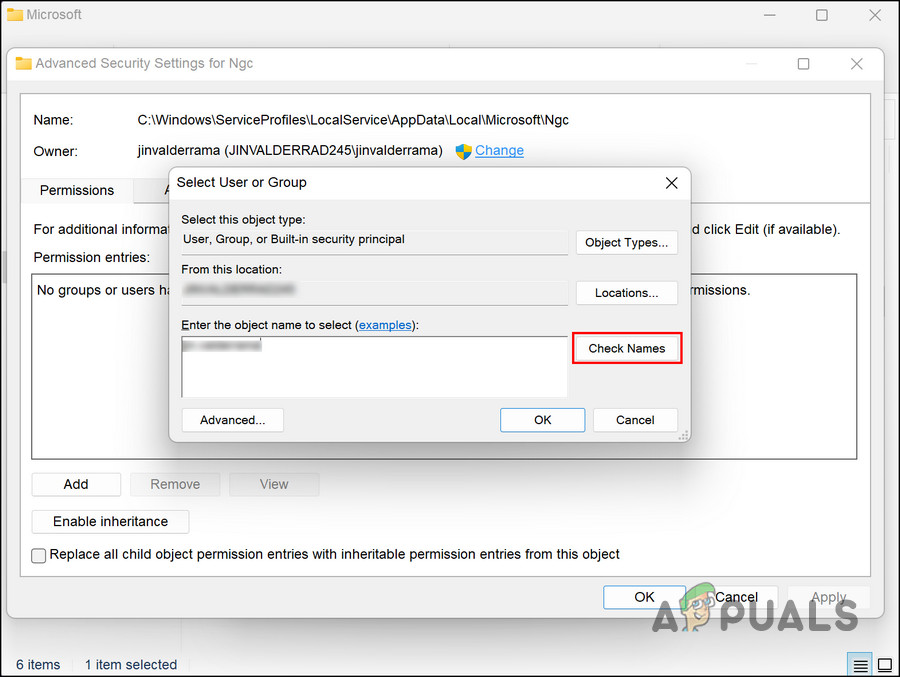
Click on the Check Names button - Next, checkmark the Replace owner on subcontainers and objects checkbox and click on Apply > OK to save the changes.
- Finally, enter the NGC folder and delete all its contents as we described above.
After the contents of this folder are deleted, it is time to set up a new PIN. For that, follow the steps below:
- Press Win + I to open Windows Settings.
- Choose Accounts from the left pane and click on Sign-in options on the right side of the window.
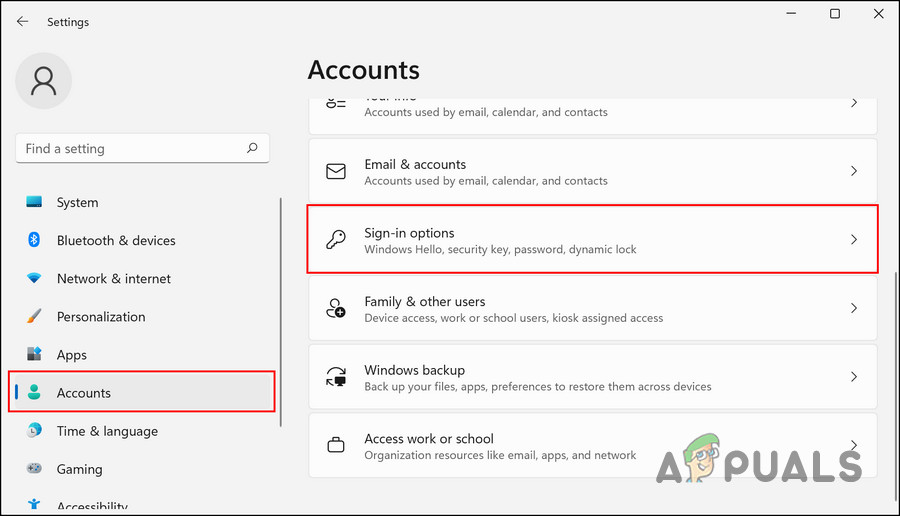
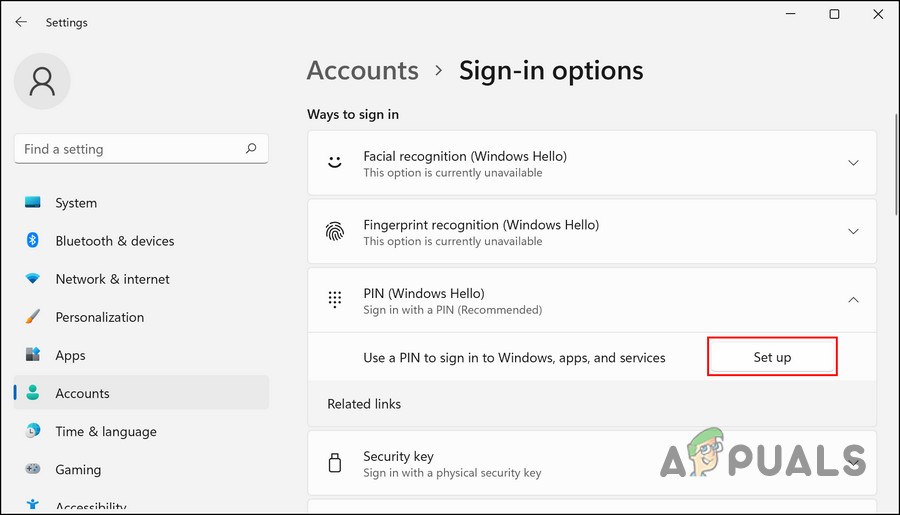
Access the sign-in options in Windows 11 - Click on Windows Hello PIN and choose Set up.
- Follow the on-screen instructions to proceed.
Hopefully, you can add a new PIN without any problems now.
2. Disable the Antivirus
Another reason you might face the problem is the third-party security programs installed on your computer. Although these security programs do a great job of protecting your computer, they also have a terrible reputation for causing issues like this.
The solution, in this case, is simple. You can temporarily disable the security program and then try to set up a new PIN. Once the PIN is set up again, you can enable the security program back.
Here is how you can proceed:
- Right-click on the security program’s icon in the taskbar.
- Choose Disable > Disable until the computer is restarted.
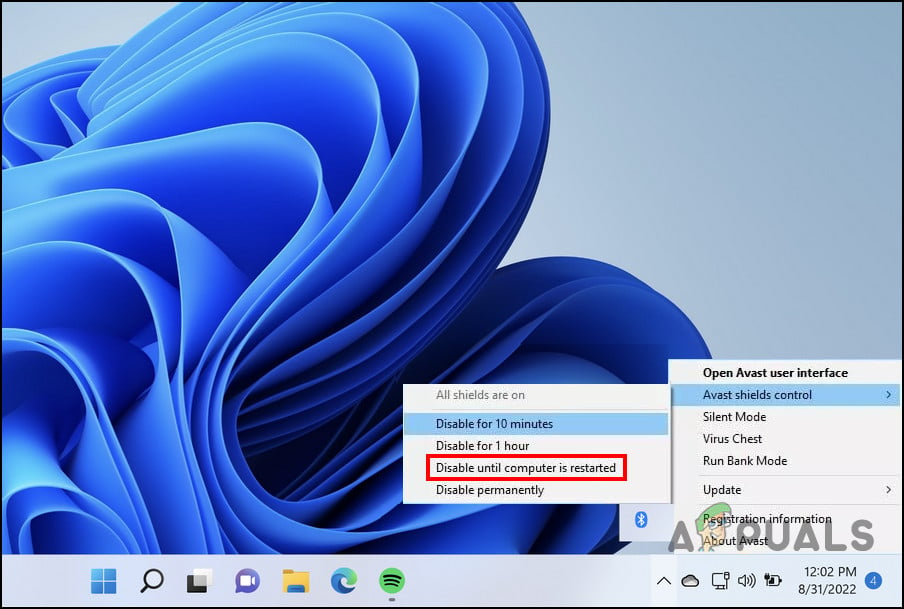
Disable the antivirus program temporarily
After the antivirus program is disabled, try setting up a new PIN by following the steps outlined in the method above.
3. Modify the Group Policy Editor
You might also face the problem if the system does not have administrative permissions to make the targeted changes.
In this case, you can use the Group Policy Editor to make these modifications and then try to set up the PIN. The Local Group Policy Editor snap-in configures and modifies Group Policy settings within Group Policy Objects (GPOs) in the Microsoft Management Console (MMC). Most commonly used by network administrators, Group Policy defines what features you, or a group of users can use.
Here is how you can modify the Group Policy Editor to make the PIN-related changes:
- Press Win + R to open Run.
- Type gpedit.msc in the text field of the dialog box and hit Enter.
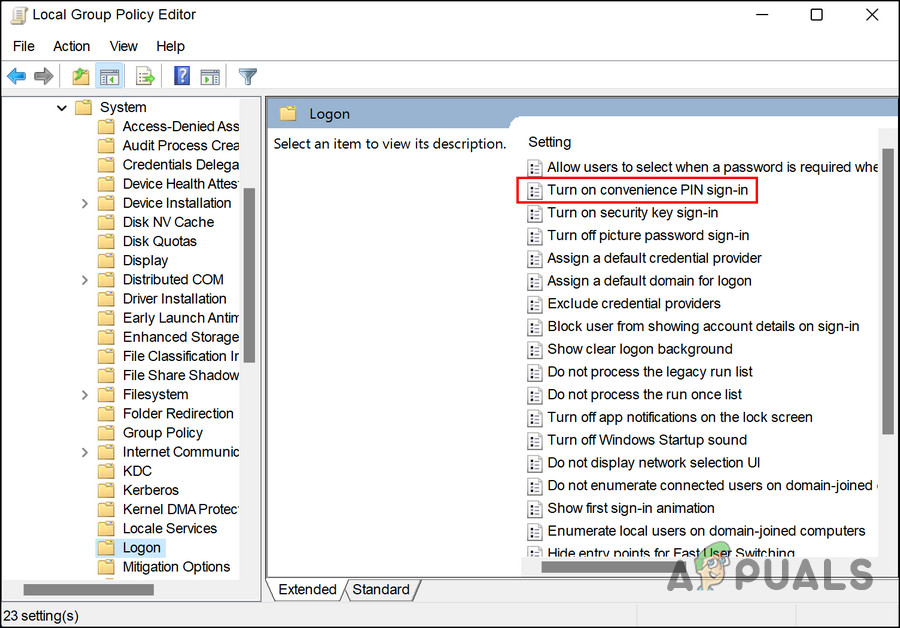
- In the Group Policy Editor window, navigate to the location below:
Administrative Templates > System > Logon
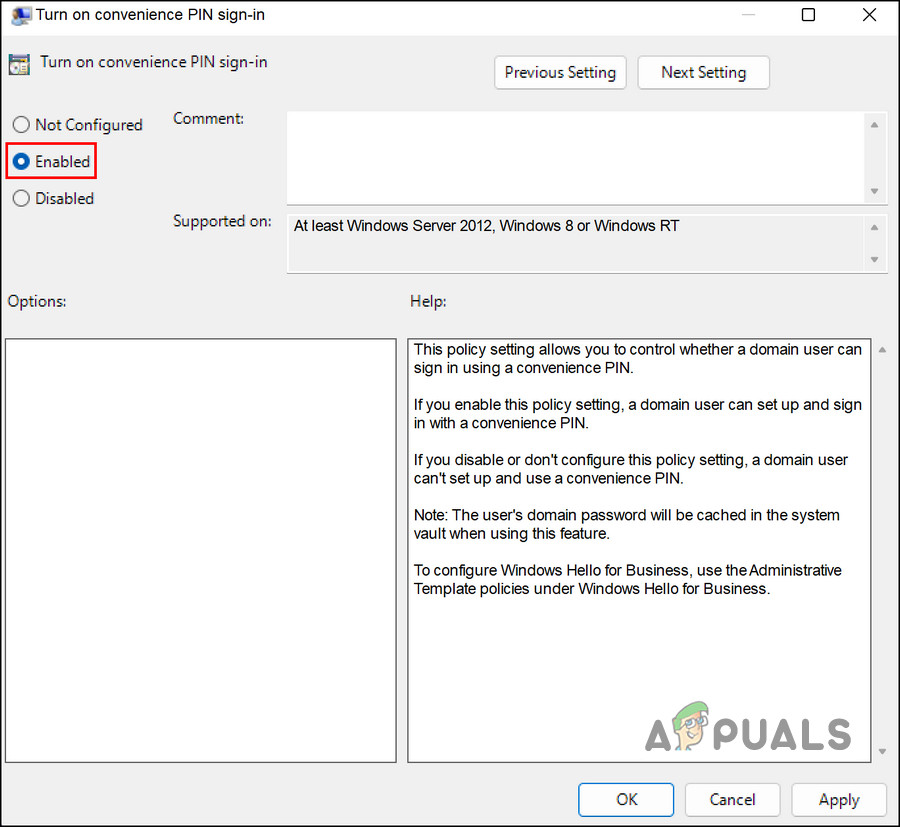
- Move to the right side of the window, locate and double-click on Turn on convenience PIN sign-in.
Enable convenience PIN sign in - Choose Enabled and then select Apply > OK to save the changes.
Enable the service
Once the changes are made, set up the PIN.
4. Restore the System to a Previous Version
Alternatively, restoring the system to a state in which the error wasn’t present, and the driver was functioning properly may be possible. You can do this using the System Restore utility, which creates restore points periodically.
Follow these steps to proceed:
- Press Win + R to open Run.
- Type control in the text field of Run and hit Enter.
- Select Create a restore point > System Restore from the Control Panel.
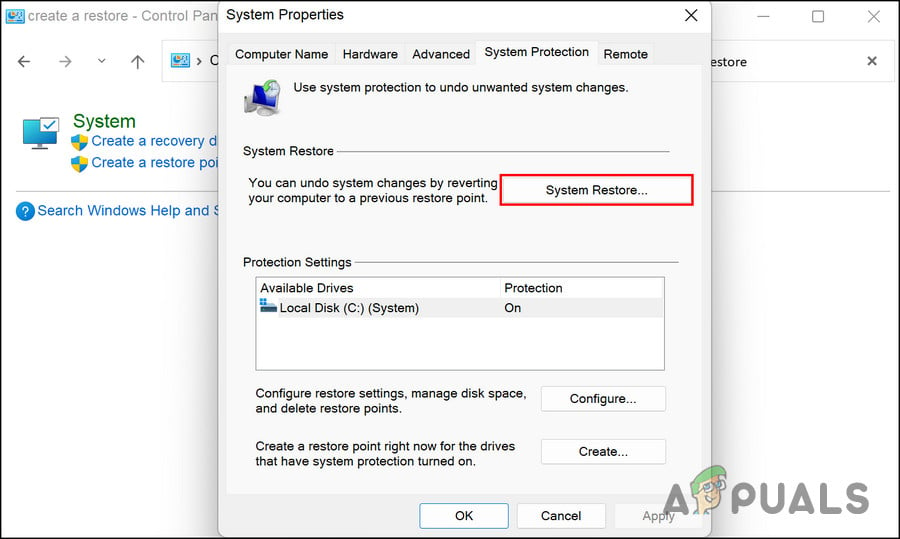
Click on the System Restore button - Click Next and then choose a restore point from the list of options available on your screen.
- Wait for the changes to implement.
5. Switch to a Different User Account
You might also be facing the issue because the user account you are currently using is corrupt. The only way to know if this is the case is by switching to a different user account and setting up the PIN there.
If you do not have another user account already, here is how you can create a new one:
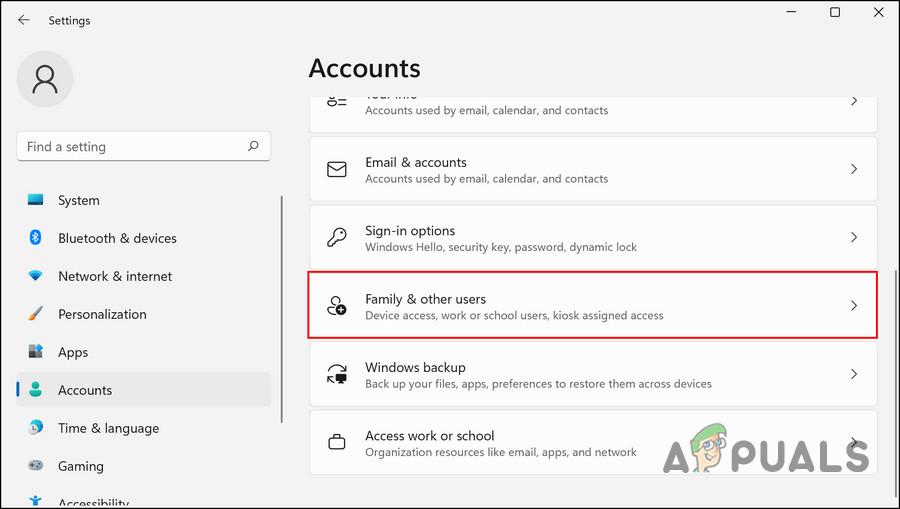
- Press Win + I to open Run.
- Choose Accounts from the left pane.
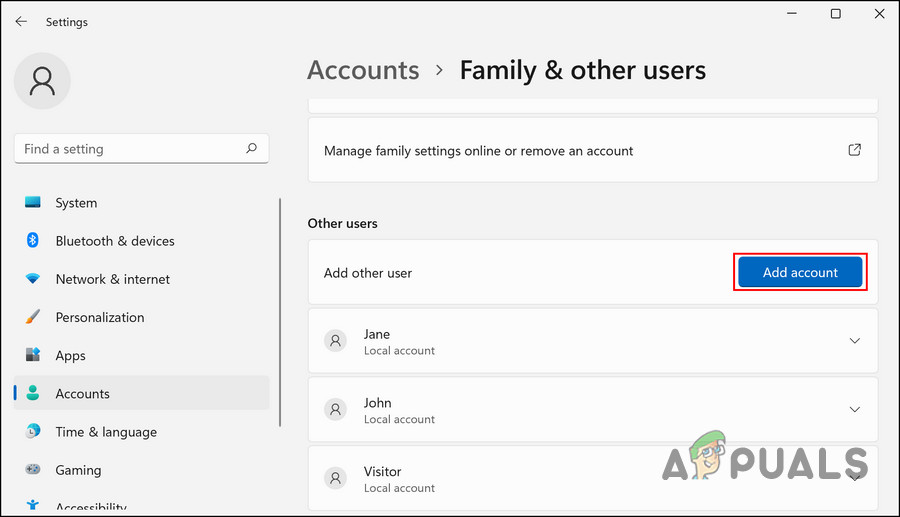
- Click on Family & other users.
Access the Family & other users settings - In the following window, head over to the Other users section and click on the Add account button.
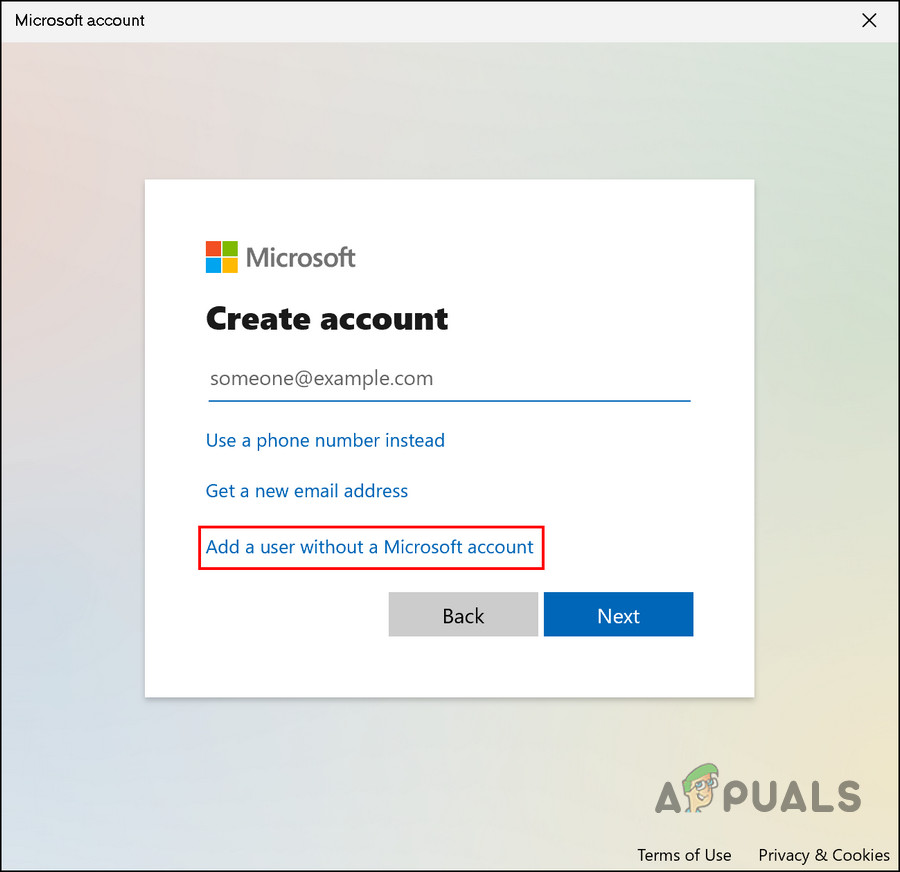
Click on the Add account button - Next, click on I don’t have this person’s sign in information hyperlink.
- Choose Add user without a Microsoft account and then enter the required details.
Add a user in Windows without a Microsoft account - Follow the on-screen instructions to proceed.
If the issue does not appear in the other user account, it implies that the issue lies within the account you are currently using. In that case, you can try running the SFC and DISM commands to identify and fix the problem.
In case switching to a different user account does not work, we recommend you reach out to the official Microsoft support team and report the issue to them. Hopefully, they will be able to identify the exact cause of the problem and suggest a relevant fix.


