Fix: “Pause updates” option greyed out in Windows Update
 Reviewed by Muhammad Zubyan
The Pause Updates option is greyed out when the functionality is disabled via a Windows policy or the registry. Windows updates are downloaded and installed automatically on your computer. These updates can contain bug fixes, new features, security patches and much more.

However, one of the drawbacks of Windows updates is the issues they can sometimes introduce. For users who prefer not to install these updates frequently, the ‘Pause Updates’ feature was introduced. This feature allows you to pause the updates on your computer for a specified time period, usually seven days.
With that said, you are able to block Windows updates indefinitely if you want to via other techniques. To fix the pause updates option in the Settings app, follow the methods below.
1. Using Group Policy Editor
The group policies are used to modify the functionality of a Windows machine. This allows you to enable or disable certain behaviors in Windows, such as the Pause Update option, and more. If the Pause Updates functionality is removed with the Group Policy Editor, you will not be able to use it in the Settings app.
Therefore, you will need to enable the Pause Updates functionality from the Group Policy Editor to be able to use it again. Once the group policies have been updated, you need to restart your computer for the changes to take effect. However, you can use the command prompt to force the changes right away.
Follow the instructions below:
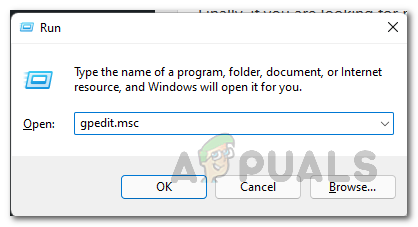
- First, open the Run dialog box with the Win key + R shorthand on your keyboard.
- After that, type in gpedit.msc and hit Enter.
Opening Group Policy Editor - This will open the Group Policy Editor window.
- Then, navigate to the following path:
Computer Configuration > Administrative Templates > Windows Components > Windows Update > Manage end user experience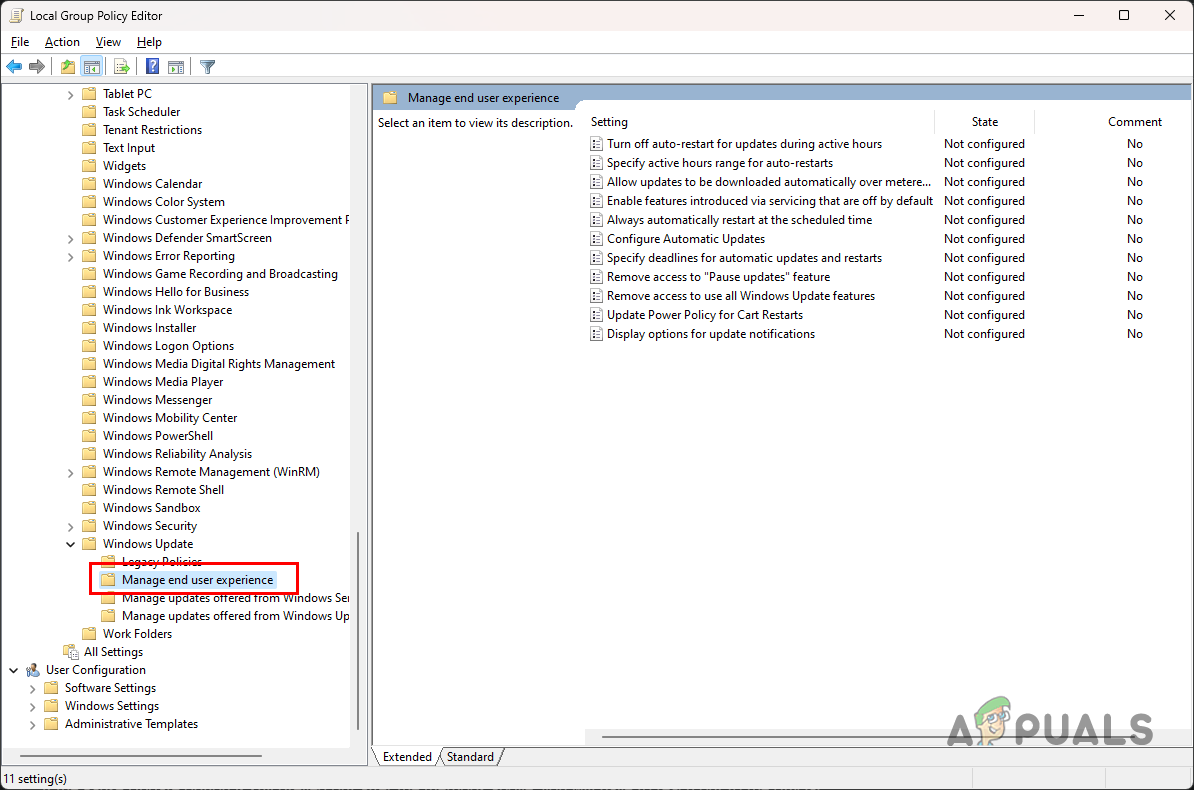
Navigating to End User Experience Policies - After that, in the right-hand pane, double-click on the Remove access to “Pause updates” feature policy.
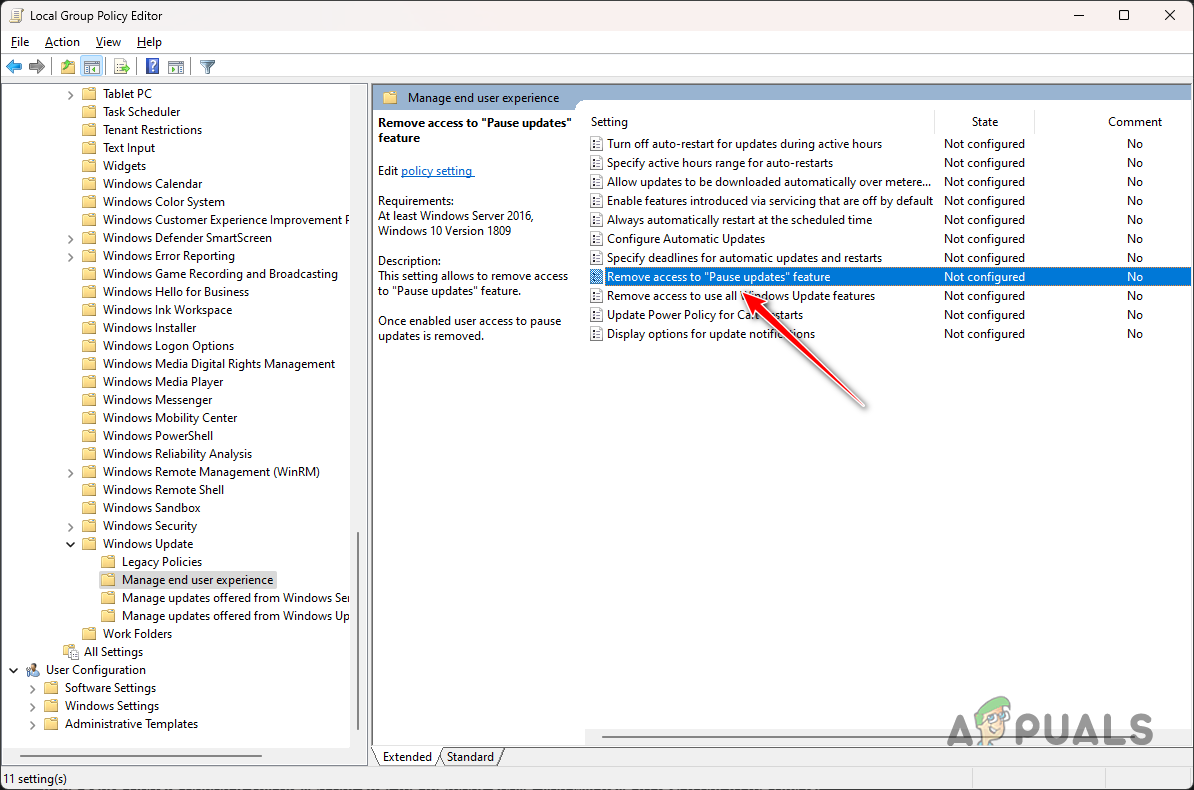
Opening Remove Access to Pause Updates Feature Policy - On the Properties window, select the Not Configured or Disabled option.

Disabling Remove Access to Pause Updates Feature Policy - Once you do that, click Apply and hit OK.
- Then, open the Start Menu and search for cmd. Click the Run as administrator option to open an elevated command prompt window.
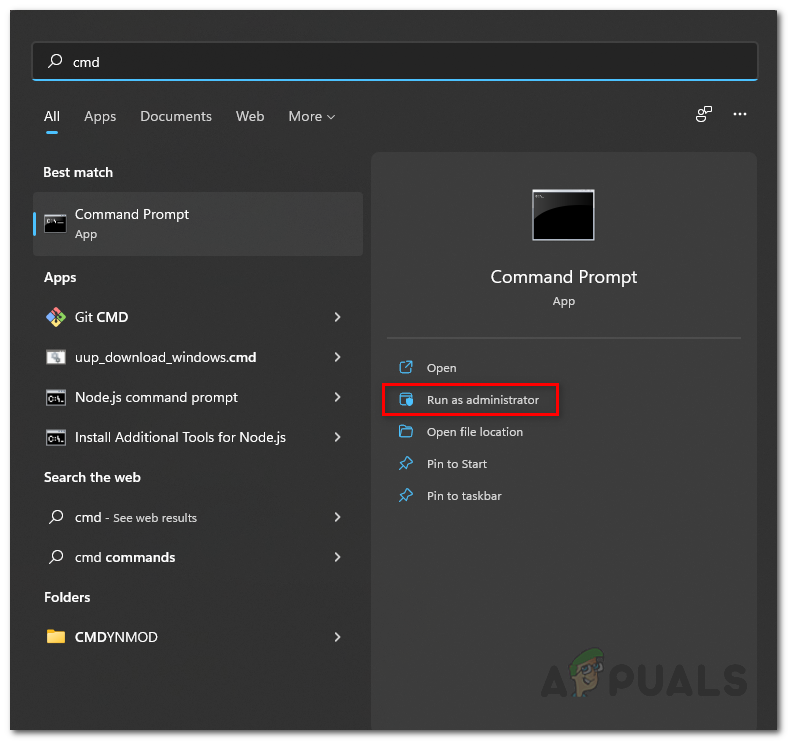
Opening Command Prompt as Admin - In the command prompt, type in the following command and hit Enter:
gpupdate /force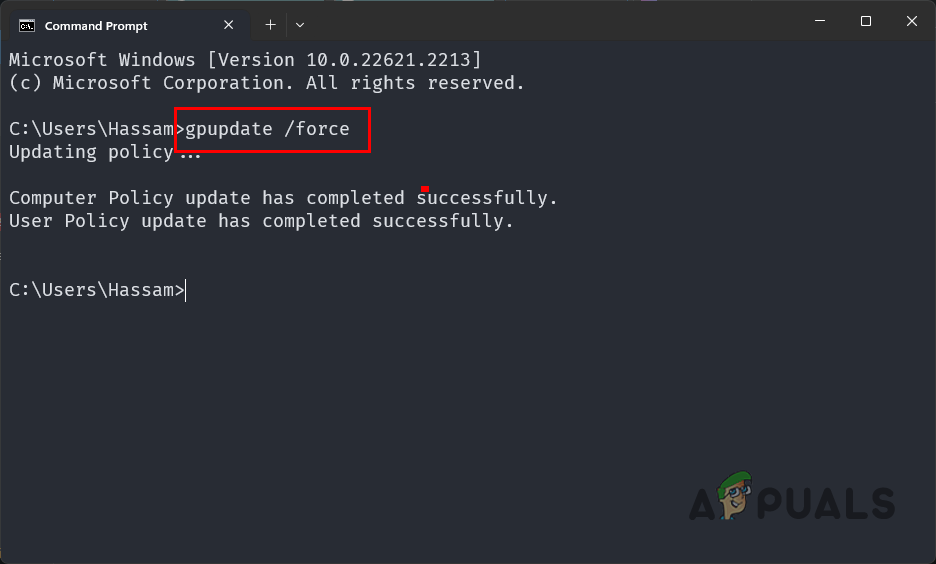
Force Updating Policies - Close the command prompt window and open the Settings app to see if the Pause Update option works.
2. Using Windows Registry
You can also use the Windows Registry utility on your computer to add or remove various features. As such, the Pause Update feature can also be manipulated via the Windows Registry as well.
To remove the inactive state of the Pause Update feature, you will need to edit the UX value for the key to restore its active state.
Before proceeding, it is important to note that modifying unwanted Windows Registry keys can cause various issues with your computer. As such, it is recommended to create a backup of your Windows Registry as a safety precaution.
Follow the instructions below carefully to restore the Pause Update feature via Windows Registry:
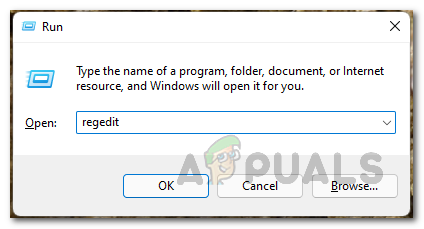
- First, press the Win key + R shortcut on your keyboard to open the Run box.
- After that, type in regedit in the Run box and hit Enter.
Opening Windows Registry - Once the Windows Registry window is open, navigate to the following path. You can do so by copying and pasting the path in the address bar:
Computer\HKEY_LOCAL_MACHINE\SOFTWARE\Policies\Microsoft\Windows\WindowsUpdate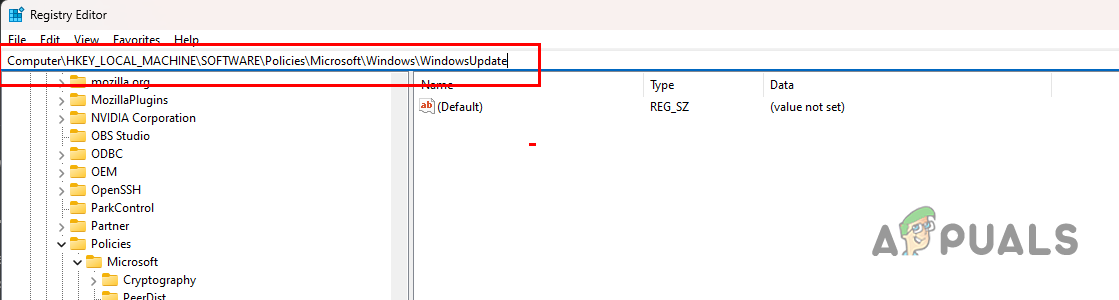
Navigating to Windows Update Policies - After that, in the right-hand pane, right-click on the SetDisablePauseUXAccess value and choose Delete from the drop-down menu.
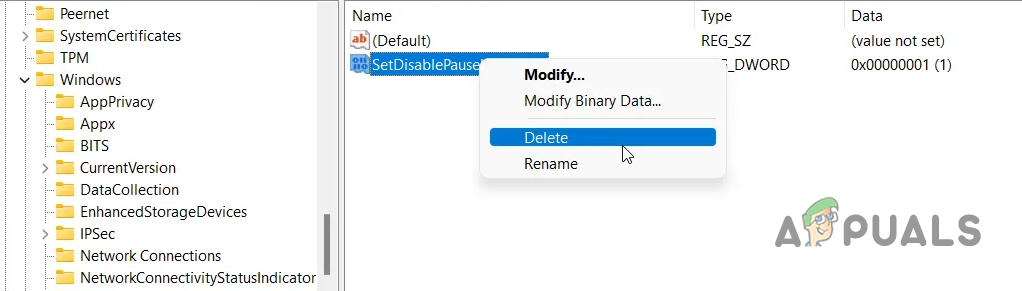
Deleting SetDisablePauseUXAccess Value - Once you delete the key, close the Windows Registry and restart your computer.
- When your PC boots up, open the Settings app and check for the Pause Update option.
You should be able to restore the functionality of the Pause Update feature with these methods. To prevent the issue from happening in future, you will need to make sure the feature is not disabled on your computer.
Pause Update option still greyed out?
If the Pause Update option is still greyed out after the methods above, you will have to reach out to the official Microsoft support team for Windows. They will be able to triangulate the issue for you, in your specific case, in more detail and resolve the problem.
Pause Update Option Greyed Out - FAQ
The Pause Update option is usually greyed out when the feature is disabled on your computer. This can happen due to Windows policies configuration or a modification in the Windows Registry.
Yes, you are able to pause Windows updates indefinitely should you wish to do so. However, it is important to note that you cannot do that via the Pause Update feature, rather a different methodology needs to be taken in order to achieve that. You can read more about that here.
Reviewed by Muhammad Zubyan