How to Fix Windows 11 Indexing is Paused (File Search Not Working)
Some Windows 11 are reporting that suddenly they’re noticing that the file search function is no longer working. Upon investigating, they’re realized that the Indexing feature is paused. Most affected users are reporting that they didn’t disable the indexing feature in the first place while others are reporting that they can’t turn the feature back on.
After investigating this issue thoroughly, it turns out that there are several underlying scenarios that are commonly known for causing this issue. Here’s a list of culprits that you should be on a lookout for:
- Indexing glitch – As it turns out, a lot of the search indexing problems occurring on Windows 11 are actually happening due to an OS-specific glitch that’s related to how Windows does file management. The vast majority of these issues can actually be fixed by running the Search and Indexing troubleshooter and applying the recommended fix.
- Windows Search service is disabled – Under certain circumstances, you can expect to deal with this issue in instances where the main service dependency required by the Indexing feature is actually disabled. In this case, you can fix the issue by restarting the Windows Search service.
- Corrupted indexing library – According to some users that we’re also dealing with this issue, the problem can also be caused by a corrupted indexing library. In this case, the only viable solution is to rebuild the entire indexing library from scratch. But keep in mind that depending on your storage drive type, this process might take several hours.
- Bad Windows update (KB5004567) – As it turns out, this problem can also be caused by a bad Windows update (if you’re using Windows 11). The KB5004567 Windows update is often singled out for causing this type of problem. So far, the only viable solution to deal with this issue is to simply uninstall the problematic update and use the Hide MS Update tool to prevent it from installing it again (at least until Windows releases a hotfix for this issue).
- Indexing is paused by local battery-saving policy – According to some affected users, this issue is often created by a local group policy called ‘Prevent indexing when running on battery power. If this policy is enabled, the indexing function will automatically be disabled while you’re on battery-saving mode.
- Outlook-induced glitch – If you have the standalone Outlook app installed locally, there’s a chance it ends up conflicting with the indexing feature as some Outlook files are forbidden from being indexed. If you’re dealing with this type of problem, the only viable solution is to make some registry changes that will prevent your OS from indexing Outlook files.
- Corrupted files inside the TxR folder – The TxR folder is prone to file accumulation. Always was, and it’s the same on Windows 11. Over time, these files could start posing problems to the indexing feature to the point where it freezes the functionality entirely. In this case, you should be able to fix the problem by clearing the TxR folder and rebooting your PC.
- System file corruption – In some cases, this issue will be entirely related to some kind of system file corruption. In this case, you should start by checking if the System Restore doesn’t have a restore point that allows you to return to a state in which the issue doesn’t occur. If this doesn’t work, you can also try running DISM and SFC scans and as a last resort, go for a repair install or clean install procedure.
Now that we went over every potential reason why you can expect to see your indexing feature disabled on Windows 11, let’s go over every potential fix that should help you fix this problem.
Run the Search and Indexing Troubleshooter
As it turns out, the indexing feature on Windows 11 is still sort of unreliable and prone to break in a variety of different circumstances. The good news is that Microsoft is actually aware of most of these issues.
Even more, Microsoft has already made a bunch of automated fixed available for this specific scenario in which the indexing feature stops working. You can take advantage of these fixes by running the Search and Indexing Windows Troubleshooter and applying the recommended fix.
This method was confirmed to be effective by a lot of affected users, the majority of them being on the latest Windows 11 release.
Follow the instructions below to run the Search and Indexing Troubleshooter utility on your Windows 11 computer and apply the recommended fix:
- Press Windows key + R to open up a Run dialog box.
- Inside the Run text box, type ‘ms-settings:troubleshoot’ and press Enter to open up the Troubleshooting tab on Windows 11.

Accessing the Troubleshooter tab - When you’re prompted by the User Account Control (UAC), click Yes to grant admin access.
- Once you’re inside the initial Troubleshoot tab, click on Other Troubleshooters from the menu on the left.

Access the Other Troubleshooters tab - Once you’re inside the Other Troubleshooters tab, scroll all the way down to the Other section, then click the Run button associated with Search and Indexing.

Accessing the Search and Indexing troubleshooter - From the next menu, select the symptoms that you’re noticing in relation to the indexing feature. This will help the troubleshooter identify the issues more easily.

Troubleshooting Indexing Failure symptoms - Once you check all the right boxes, click on Next.
- When asked to describe the issue, give a short description of the problem so the troubleshooter can cross-reference against the automated repair fixes already present.
Note: In case you get asked to provide admin permissions, click on Try troubleshooting as an administrator. - If a viable repair strategy is found, click on Apply this fix and wait for the utility to complete the job.
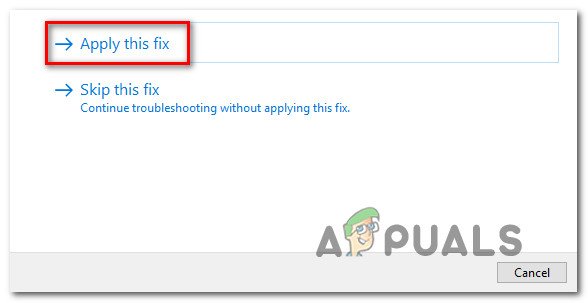
Applying the recommended fix - At the end of this procedure, reboot your PC and see if the problem is fixed once the next startup is complete.
If the search indexing function still doesn’t work even after you followed the instructions below, move down to the next potential fix below.
Force-Start or Enable the Windows Search service
If the method above was not effective in your case, another potential cause of the issue is a scenario in which the main service behind it (Windows Search) is disabled or stuck in a limbo state.
This problem is typically indirectly caused by a 3rd party system resource manager app that tries to improve the performance of the system by disabling every non-critical OS service.
If you suspect this scenario might be applicable in your case, you should be able to fix the issue entirely by accessing the Services screen and ensuring that the Windows Search service is enabled. If it’s already enabled, just restart it and you should see how the indexing feature starts working again.
Here’s how to enable or restart the Windows Search Service:
- Start by pressing Windows key + R to open up a Run dialog box.
- Inside the Run text box, type ‘services.msc’ and press Enter to open up the Services screen.

Accessing the Services Screen - At the User Account Control, click Yes to grant administrative privileges.
- Inside the Services screen, move to the right-hand pane, scroll down through the list of services and locate Windows Search.
- Once you locate Windows Search, right-click on it and choose Properties from the context menu.

Accessing the Properties screen - Inside the Properties screen of Windows Search, select the General tab from the ribbon menu at the top.
- From the dedicated General tab, change the Startup type to Automatic (Delayed Start) and click on Start if the service is currently disabled.

Force start the service and change the startup type Note: If the service is already running, click on Stop to temporarily disable it and wait for a couple of seconds before launching it again via the Start button.
- Use the search functionality to see if the indexing problem is now resolved.
If the same kind of problem is still occurring, move down to the next potential fix below.
Rebuild the indexing library
As it turns out, this type of issue can also be caused by an indexing glitch. This is typically reported to occur with Windows 11 PCs that are on the lower-end specification spectrum (barely meeting the minimum specifications).
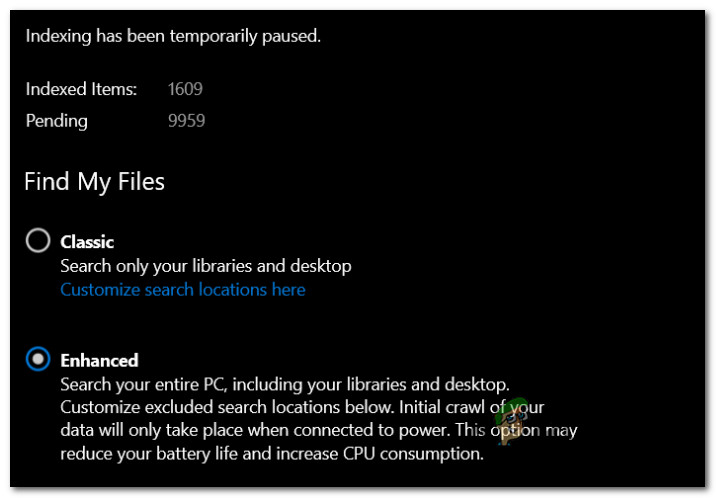
What typically happens is, a glitch facilitated by insufficient processing memory forces the indexing feature to freeze. If this scenario is applicable, you can also notice that the disk usage stays at 100% (even during idle periods) as it tries to catch up.
In this case, the only way of fixing the issue is to rebuild the indexing database from the Indexing Options menu.
Note: Keep in mind that depending on if you’re using a traditional drive or an SSD, this process might take several hours. So before following the instructions below, arm yourself with patients and don’t interrupt the indexing library rebuilding process until it’s finished.
Follow the instructions below to learn how to rebuild the indexing library from the classic Control Panel feature:
- Start by pressing Windows key + R to open up a Run dialog box.
- Next, type ‘control’ inside the text box, then press Enter to open up the classic Control Panel interface.

Open the classic Control Panel interface - Inside the classic Control Panel interface, you can use the search function (top-left corner) to search for ‘indexing’ then click on Indexing Options from the context menu that just appeared.

Access the Indexing Options menu - Inside the Indexing Options menu, select each folder inside, click on the Advanced button.

Access the Advanced Options menu - Once the indexing feature has been disabled, reboot your PC once again and see if the problem is fixed once the next startup is complete.
- If you are prompted to grant admin access, click on Yes at the User Account Control (UAC).
- Next, inside the Advanced Options menu, click on the Indexing Settings tab at the top, then click on the Rebuild button (under Troubleshooting).

Rebuilding the indexing library - Confirm the operation at the next prompt, then wait patiently until the operation is complete.
Note: Depending on your storage device, this process might take a few hours.
In case the indexing service still remains paused even after you successfully rebuilt the indexing library, try the next potential fix below.
Remove and Hide the KB5004567 Update
If you’ve come this far without a solution, you should start investigating the possibility that a bad Windows Update is actually causing this issue.
According to a lot of affected users, the KB5004567 Windows 11 update might be responsible for this indexing issue as it tends to freeze up the functionality of the main service behind it.
If everything else so far hasn’t allowed you to fix the problem, the final thing that you can try is to simply uninstall the bad update and see if the printing connectivity resumes.
But be advised that just uninstalling the KB5004567 update won’t be enough – you’ll also need to use a Microsoft tool to hide the update and make sure it doesn’t install again (at least until MS releases an official fix)
Follow the instructions below to uninstall and hide the problematic KB5004567 Windows Update:
- Press Windows key + R to open up a Run dialog box. Next, type ‘appwiz.cpl’ inside the text box, then press Enter to open up the Programs and Features menu.

Open up the Programs and Features menu Note: If you see the User Account Control window, click Yes to grant admin access.
- Inside the Programs and Features menu, click on View installed updates from the side menu on the left.
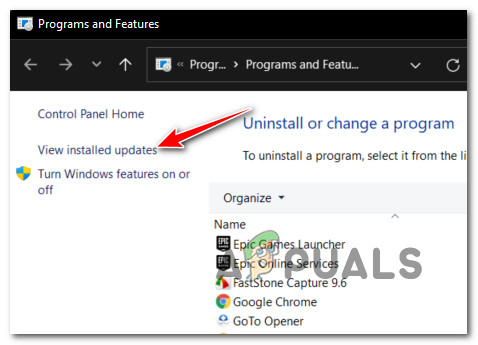
View Installed Updates - Inside the View installed updates menu, look for the KB5004567 update. When you see it, right-click on it and choose Uninstall from the context menu.

Uninstalling the Windows Updates - From the context menu that just appeared, click Uninstall once again and wait until the operation is complete.
- Once the update is successfully uninstalled, download the Windows Show/Hide Update Troubleshooter from this official download page.
- Next, extract the contents of the wushowhide archive to an easy-to-access location.
- As soon as the contents have been extracted, right-click on wshowhide.diagcab, then choose Run as administrator from the context menu that just appeared.
- At the first window of the Show or hide updates Troubleshooter, click on the Advanced hyperlink, then check the box associated with Apply Repairs Automatically then click on the Next button.

Hide the updates - Wait until the initial scan is complete, then click on Hide Updates from the list of presented options.
Hiding the updates - From the list of updates, check the box associated with the KB5004567 update, then press Next once again and wait until the update is hidden.
- Finally, reboot your PC and attempt to connect to your printer server – you should have no issues doing so.
Note: Once you get word that the issue has finally been fixed, you can use this utility again to unhide the update. To do so, click on Show Hidden update instead and select KB5004567.
If the problem is still not fixed, move down to the next potential fix below.
Disable the ‘Prevent indexing when running on battery power’ policy
If you’re experiencing this issue on a laptop only when your PC is on battery power, chances are you’re experiencing this issue due to a Local Group policy that is forcing the indexing to pause every time a power source is disconnected.
This is actually not a glitch but a feature meant to conserve battery power. However, if you want to override this behavior, you can use the Local Group Policy Editor to ensure that the “Prevent indexing when running on battery power to conserve energy” local policy is disabled at all times.
Note: Keep in mind that certain Windows versions won’t have the Local Group Policy Editor (gpedit.msc) installed. Only Pro and Enterprise versions of Windows 11 have this tool. If you have the Home, N, or Education versions, follow these steps to install the gpedit.msc utility on your Windows installation.
Follow the steps below to disable the ‘Prevent indexing when running on battery power’ policy using Local Group Policy Editor:
- Press Windows key + R to open up a Run dialog box. Next, type ‘gpedit.msc’ inside the text box and press Ctrl + Shift + Enter to open up Local Group Policy Editor with admin access.
Open up the gpedit.msc utility - At the User Account Control, click Yes to grant admin access.
- Once you’re inside the Local Group Policy Editor, use the menu on the left to click on Computer Configuration.
- Next, go to Administrative Templates, then click on Windows Components.

Accessing the Windows components key - Next, move over to the right-hand section of the screen and double-click on Search.
- Next, from the list of available policies, double-click on Prevent indexing when running on battery power to conserve energy.

Accessing the “Prevent indexing when running on battery power to conserve energy” policy - From the dedicated menu of the “Prevent indexing when running on battery power to conserve energy” policy, set the policy to Disabled, then click on Apply.

Disable the “Prevent indexing when running on battery power to conserve energy” policy - Once this policy is disabled, reboot your PC and see if the indexing issue is fixed.
In case the same type of problem is still occurring, move down to the next potential fix below.
Prevent the indexing of Outlook files (if applicable)
As it turns out, this specific issue is often encountered in situations where there’s a local installation of Outlook interfering with the indexing feature.
The issue appears due to the fact that Outlook data has some core files that are explicitly programmed to avoid being indexed. Apparently, this is an issue on Windows 11 that can ultimately freeze the indexing feature (even if it appears as enabled.
If you find yourself in this scenario and you have a local Outlook installation installed, you’ll only be able to fix this problem by making a series of Registry changes via Registry Editor that will ultimately prevent your OS to try and index the Outlook files.
Follow the instructions below for specific steps on how to do this:
- Press Windows key + R to open up a Run dialog box. Then, type “regedit” and press Enter to open up a Run dialog box.

Open up Regedit - At the UAC (User Account Control), click Yes to grant administrative privileges.
- Inside Registry Editor, navigate to the following location using the left-hand menu:
HKEY_LOCAL_MACHINE\SOFTWARE\Policies\Microsoft\Windows\
Note: If you want to speed up this process, you can also paste the entire path in the navigation bar at the top.
- Inside the Windows key, see if you have a sub-key called Windows Search. If you have it, double-click on it. If you don’t have it, right-click on the Windows key and choose Edit > New > Key and name it Windows Search.

Accessing the Windows Search menu - Once you’re inside the Windows Search menu, move over to the right-hand menu and see if you have a value named PreventIndexingOutlook.

PreventIndexingOutlook key Note: If you don’t have this value present inside the Windows Search key, right-click on an empty space inside the right-hand pane and choose Edit > New > Dword Value (32- bit) and name it PreventIndexingOutlook.
- Once you manage to locate or create this value, simply double-click on it and set its Base to Hexadecimal and its Value data to 1.
- After you manage to create and save this value, restart your PC and see if the problem is resolved once the next startup is complete.
In case you’re still dealing with the same kind of issue, move down to the next potential fix below.
Clear the TxR folder
As it turns out, some users that have found that their indexing feature stopped working abruptly on Windows 11 have managed to get the issue by clearing the TxR folder.
Note: The TxR folder is prone to become riddled with boot-related data & leftover files that might end up freezing the indexing feature on your Windows 11 computer.
Clearing the TxR folder will not produce any unintended consequences to your Windows installation as it mostly contains logs and other types of data collected by your motherboard.
Follow the instructions below to clear the TxR folder:
- Open file explorer and make sure that hidden files are visible. To do this, open the View tab from the ribbon menu at the top, then click on Hidden Items.

Enabling Hidden items - Once you’ve ensured that hidden files and folders are visible, use File Explorer to navigate to the following location:
"C:\Windows\System32\config\TxR"
- Once you’re inside the TxR folder, select everything inside and delete it.
- Reboot your PC and see if the indexing feature starts working again.
If the problem is still not resolved on Windows 11, move to the next method below.
Use the System Restore
If the indexing problem only started occurring after a recent firmware or OS change (installed Windows Update or driver), you might be able to fix it by using a previous System Restore point.
Note: System Restore is a built-in Windows utility that allows users to revert their machine to a previous state.
If you have a previous System Restore point that was created before the update responsible for the problem was installed, you should be able to resolve the error by selecting a snapshot that’s dated before the apparition of the issue.
Here’s a quick guide on how to use the System Restore utility to revert your operating system back to a healthy state:
- Start by pressing Windows key + R to open up a Run dialog box. Next, type “rstrui” and press Enter to open the System Restore wizard.

Open the System Restore utilty - Click Next at the initial System Restore screen.
- Once you get to the next screen, tick the box associated with Show more restore points.
- From the next menu, choose a restore point that is dated prior to the apparition of the indexing inconsistency and click the Next button again.

Show more restore points - Once you manage to find a good restore point, select it and click on Finish.
- Confirm by clicking Yes to kickstart the restoring process.
Note: During this process, your computer will restart and the older machine state will be restored.
Once your Windows 11 PC boots back up, see if the indexing issue is fixed. If the same problem is still occurring, move down to the next potential fix below.
Deploy DISM and SFC scans
Another possible reason that might cause the indexing feature to break is some type of system file Corruption. Most commonly, some type of file inconsistency ends up affecting your operating system’s ability to process and index new files.
If this scenario is applicable, you should be able to fix the issue by running a couple of system utilities capable of dealing with corrupted system files.
When it comes to doing this, both DISM (Deployment Image Servicing and Management) and SFC (System File Checker) are equipped to heal your corrupted system files.
Note: If your DISM utility doesn’t work throws an error, try this fix.
DISM relies heavily on WU (Windows Update) to download healthy files that will be used to replace corrupted instances, while SFC uses a locally cached archive to swap bad files with healthy ones.
The best course of action is to run both utilities in quick succession in order to improve your chances of dealing with the system corruption issue.
Here’s a quick guide on running both DISM and SFC utilities from an elevated CMD prompt:
- Start by pressing Windows key + R to open up a Run dialog box. Next, type ‘cmd’ inside the text box, then press Crl + Shift + Enter to open up a Command Prompt with admin privileges.

Open up the CMD utility Note: At the UAC (User Account Control) prompt, click Yes to grant administrative privileges
- Inside the elevated CMD prompt, type or paste the following commands in order and hit Enter after each one to initiate a DISM scan & repair procedure:
Dism.exe /online /cleanup-image /restorehealth
Dism.exe /online /cleanup-image /scanhealth
Note: DISM uses a sub-component of Windows Update to download healthy copies that will later be used to replace corrupted instances. It’s important to ensure that you are connected to a reliable network before initiating these commands. The first command (scanhealth) will make the utility analyze your files, while the second (restorehealth) will proceed to replace corrupted files with healthy equivalents.
- Once the operation is finished, close the elevated CMD window and restart your computer.
- After the DISM scan is finished, follow step 1 all over again to open up another elevated Command Prompt.
- Once you’re back inside a CMD window, type the following command to initiate an SFC scan:
sfc /scannow
Note: This procedure might end up taking several hours if you’re using an HDD instead of an SSD. Do not interrupt the scan before it’s finished to avoid creating further logical errors.
- After the scan is finished, restart your computer once again and see if the indexing problem is fixed.
If you’re still dealing with the same problem as you’re noticing that your system is still not indexing new files, try the final fix below.
Clean install or Repair install Windows
If you’ve come this far without a result, there are two procedures that will most likely get the issue resolved:
- Clean install – This method will wipe all the other content on your Windows installation drive. On top of removing all the data related to your operating system, you will also lose any personal files & personal preferences settings (photos, images, music, applications, user preferences, etc.)
- Repair install – This method will essentially reinstall the same build over the existing operating system installation. This approach is way less destructive since it will allow you to preserve all your personal files, user settings, and any installed application. However, you will need to use compatible Windows 11 installation media.
Regardless of which way you end up choosing, we’ve got you covered. If you want to keep your personal files and limit the damage as much as possible, go for a repair install. In case you want to start fresh, and you don’t care about losing personal data, go for a clean install.