How to Fix “Error: 0x0000013A” KERNEL_MODE_HEAP_CORRUPTION on Windows 11
Some Windows 11 are dealing with a weird issue where every attempt at putting their PC to sleep ends with a crash. Upon investigating the crash caused using Event Viewer, the error code displayed is 0x0000013A (KERNEL_MODE_HEAP_CORRUPTION).

We’ve investigated this particular issue thoroughly and we’ve discovered that this type of error always indicates a kernel-related issue where the heap manager has detected an underlying corrupted issue in a heap.
Now, when it comes to this issue, there are several underlying possible scenarios that might lead to the apparition of this issue. Here’s a list of possible culprits that you should watch out for:
- Update or Uninstall Dell supporting software – As it turns out, if you’re using a Dell computer and you have the supporting software installed, those programs might be responsible for causing the OS to crash while in hibernation. So far, there isn’t really a solution other than uninstalling the Dell Support Center.
- Generic drivers are causing a kernel crash – Another reason why you might expect to see this error when you attempt to put your Windows 11 to sleep is a series of generic Wi-Fi, Bluetooth, and USB Controller drivers that we’re migrated over from an older Windows version. In this case, the easiest way to fix the issue is to run the Intel Driver assistant and replace the generic drivers with dedicated equivalents from Intel.
- Kernel conflict caused by Paragon software – There is one driver (BioNTDrv_WINK.SYS) that often appears for being responsible for the crash (inside the crash dumps). This is a driver that gets installed with Paragon software, so the easiest solution to fix the kernel conflict is to uninstall the problematic tool altogether.
- Outdated BIOS version – Another scenario in which you might expect to see the 0x0000013A error occurring during hibernation or idle modes is an outdated BIOS version that is unstable when it needs to accommodate Windows 11 low-power mode. In this case, you should see if there is a new version available for your BIOS and install it.
Uninstall the Dell Support Center (If applicable)
In case you’re using Dell hardware, you should know about this weird incompatibility between Windows 11 and the Dell Supporting Center utility.
This might change in the future, but as of now, a lot of Dell desktop, ultrabook, and laptop users are reporting that their Windows 11 installation crashes every time they put it in Sleep mode or after they leave it idle for a long period of time.
Important: If you’re not using any Dell hardware or the Dell Supporting Center tool is not installed, skip this method entirely and move directly to the next method below.
As it turns out, this happens due to a program called Dell Supporting Center that apparently conflicts with a kernel process and causes the OS to crash.
As of now, the only way to resolve this major inconvenience with Windows 11 Dell computers is to simply uninstall the Dell Support Center.
Note: If a new version of the program is released, you can also try installing the latest version and see if the conflict has been patched by Dell’s engineers.
If you’re looking for step by step instructions on fixing this inconvenience, follow the instructions below:
- Press Windows key + R to open up a Run dialog box. Next, type ‘appwiz.cpl’ inside the text box and press Enter to open up the Programs and Features menu.

Opening up the Programs and Features menu - Once you see the User Account Control windows, click Yes to grant admin access.
- Inside the Programs and Features menu, scroll down through the list of installed programs and locate the Dell Supporting Center.
- When you locate the correct program, right-click on it and choose Uninstall from the context menu that just appeared.

Uninstall Dell supporting tool - Inside the uninstallation screen, follow the on-screen instructions to complete the uninstallation of Dell Supporting Center, then reboot your PC and see if the issue has been fixed by putting your PC into hibernation mode once again.
Note: If you’re fond of this tool, you can also go to the official download page of Dell and download the latest rebranded version of this tool – Dell Support Assist. Additionally, here are a few other troubleshooting steps that you can try for Dell computers.
If the same 0x0000013A (KERNEL_MODE_HEAP_CORRUPTION) error is still occurring despite the fact that you uninstalled the Dell Supporting Center tool.
Run Intel Driver Assistant to install every compatible driver
If the first method above was not applicable in your case, the next thing you should worry about is a potentially conflicting generic driver that is forcing the system to crash while in low-power mode.
This is commonly reported to occur with generic drivers that have been migrated to Windows 11 from an older Windows version.
Several other users that have dealt with this particular scenario have confirmed that the crashes with the 0x0000013A error have stopped once they used the Intel Driver Assistant to replace the generic equivalents of the CPU, Bluetooth, and Wi-Fi Card drivers with equivalents from Intel.
If you want to pursue this fix too, follow the instructions below:
- On your Windows 11 computer, open up your default browser and navigate to the official page of Intel Driver & Support assistant.
Note: If it’s the first time you’re using this tool, you will be asked to install a small utility that will scan your system locally for outdated driver and firmware. If asked to do so, install the local tool as instructed.
Downloading the Intel® Driver & Support Assistant - Once the tool is installed locally, wait until it scans your system of possible outdated drivers. If any occurrences are found, click on the Download All button and wait for the utility to download every pending driver.

Downloading all - Next, click on Install all to replace every current generic driver with Intel’s dedicated equivalents.
- When asked to restart your PC, do so and see if the issue is fixed once the next startup is complete.
In case you’re still seeing the same 0x0000013A error after your Windows 11 OS crashes when you put it into sleep, move down to the next method below.
Uninstall Paragon Software & remove BioNTDrv_WINK.SYS (if applicable)
One driver that is commonly mentioned as a potential cause for this type of KERNEL_MODE_HEAP_CORRUPTION crash is BioNTDrv_WINK.SYS. This is a driver that typically gets installed with Paragon software.
BioNTDrv_WINK.SYS is a backup or cloud service software driver that’s known to conflict with certain kernel processes on Windows 11.
If you find yourself in this scenario and you have the Paragon Software package installed, the first thing you should do is go over on the developer’s website and install the latest available version.
In case that’s not an option for you (as you already have the latest driver version installed), the only option for you is to simply uninstall the conflicting software.
Follow the guide below for step by step instructions on how to do this:
- Press Windows key + R to open up a Run dialog box. Next, type ‘appwiz.cpl’ inside the text box, then press Enter to open up the Programs and Features menu.

Open up the Programs and Features menu - Once you see the User Account Control, click Yes to grant admin access.
- Inside the Programs and Features menu, scroll down through the list of currently installed programs and locate the entry associated with Paragon software.
- When you see it, right-click on it and choose Uninstall from the context menu.

Uninstall the Paragon software - Inside the uninstallation screen, follow the on-screen instructions to complete the uninstallation prompts until you manage to get rid of the software.
- Reboot your PC and see if you still get the same kind of crash when you attempt to put your Windows 11 PC to sleep.
If this method was not applicable to you or you already uninstalled the Paragon software and the 0x0000013A (KERNEL_MODE_HEAP_CORRUPTION) error is still occurring, move down to the final potential fix below.
Update BIOS version to the latest
If none of the methods above have been effective in your case, the final culprit that you should investigate is an outdated BIOS driver that is not really compatible with the Windows 11 pre-release that you currently have installed.
Note: Keep in mind that Windows 11 just launched officially, so motherboard manufacturers are only now beginning to roll out BIOS firmware updates to accommodate this new operating system.
As of now, most of the major manufacturers have released BIOS updates to improve kernel stability on Windows 11. Chances are by installing the BIOS update compatible with your motherboard, you will be able to fix the 0x0000013A error appearing when you switch your PC to low power mode.
Of course, BIOS interfaces will vary a lot among different motherboard manufacturers, so we won’t be able to provide you with a dedicated guide that will walk you through the entire process of updating your BIOS version to the latest.
But a good start is to take the time and read the official documentation provided by your motherboard manufacturer in regards to updating your BIOS. Here are a few useful links:
Note: If your motherboard is not among the list above, do a Google search on ‘BIOS Update + motherboard model’ and take the time to read the documentation thoroughly to get a grasp of the entire process.
If your motherboard manufacturer recommends that you update via a flash drive, follow the instructions below for a general guideline that will show you how to set up a flash drive and use it to update your current BIOS version:
- First things first, start by ensuring that you have a blank USB flash drive at your disposal. If you have important data on your drive, take the time to store it away before advancing to the next step.
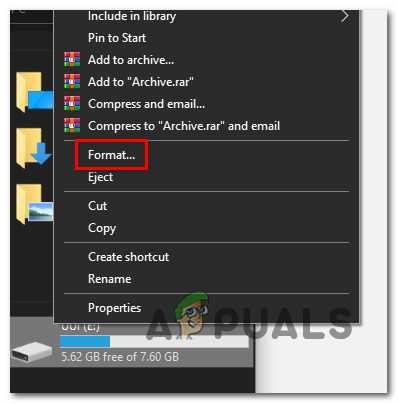
- Next, open File Explorer, right-click on the flash drive and choose Format from the context menu.
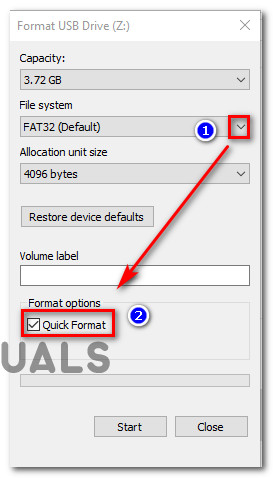
Formatting the removable drive - Inside the Format screen, choose FAT32 from the file system options, then click on Quick Format and hit the Start button to commence the process.
Formatting the drive to the required format - Once the operation is complete, visit the website of your motherboard manufacturer website and download the BIOS update after you take the time to read the entire documentation about updating.

Downloading the latest BIOS version - After you download the latest version of the BIOS driver, paste it on your flash drive (by following the instructions).
Important: You might need to place the BIOS update in a specific folder, so take the time to read the documentation properly. - Once you manage to copy the BIOS update on your flash drive, reboot your PC and press the SETUP key at the initial screen to access the BIOS Settings.

Press the Setup screen Note: In case you don’t manage to spot the Setup screen on screen, press the Esc key, the Dell key or one of the following F keys – F2, F4, F6, F8, and F12. Additionally, you can search online for specific instructions on accessing your BIOS settings according to the motherboard model that you’re using.
- Once you’re finally inside the BIOS settings menu, look for the Advanced (Expert) settings and see if you can spot an option similar to Update System BIOS (or similar).

Updating the BIOS - Follow the remaining instructions to complete the BIOS update, then reboot your PC normally and see if the 0x0000013A error is now fixed.