Fix: Tiny Tina’s Wonderlands Won’t Launch
Tiny Tina’s Wonderlands failing to launch can be usually associated with the saved files that are stored on your computer by the game. The game has been troubling a lot of users by refusing to launch, however, the issue does not seem to be that big and you can essentially get around it via a few methods. In some cases, the problem can arise when you do not have sufficient permissions over the folder where the game is installed. This can be easily rectified from the Security tab of the folder. In this article, we are going to show you how to do all of that and ultimately get rid of the issue in question so just follow through.
As it turns out, Tiny Tina’s Wonderlands is a fairly new game and as expected, there are some bugs and issues with the game that can be a hurdle in your gaming experience. However, for the most part, the game seems to run flawlessly. Before we get started with the various methods that you can use to fix the issue in question, we should first go through the different causes of the problem so that you have a better grasp of the problem. As such, let us get right into it without any further delay.
Now that we have gone through the possible list of causes in question, let us get started with the different methods that you can use to resolve the problem in question. So, without any further delay, let us jump right into it.
1. Delete Saved Files
The first thing that you should do when you encounter the problem in question is to delete the saved files that are stored on your computer by the game. These files are used to store your game settings and other general stuff. That said, you do not have to worry about losing your game progress as that won’t be reset once you delete the said files.
With that out of the way, follow the instructions given down below to do this:
- First of all, open up the Run dialog box by pressing the Windows key + R on your keyboard.
- In the Run dialog box, type in “%localappdata%\Tiny Tina’s Wonderlands\Saved” without the quotation marks and then hit Enter.
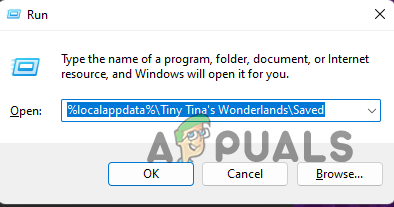
Navigating to Tiny Tina’s Wonderlands Saved Files Directory - In the Explorer window that opens up, delete the three files stored in that directory.
- Once you have done that, relaunch the game to see if the issue has been resolved.
2. Change Game Installation Directory Permissions
If the first method does not fix the problem for you, it is possible that the problem may be related to user permissions in this case. As it turns out, the issue can occur when the user account that you are using to launch the game does not have full control over the folder. This can be easily resolved via the Properties window of the game folder. To do this, follow the instructions given down below:
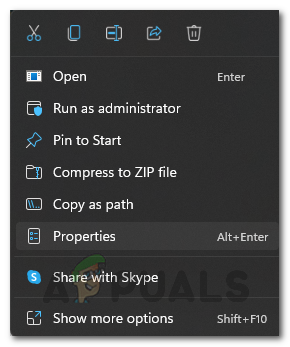
- To start off, open up the File Explorer window.

Opening up File Explorer - After that, navigate to the location where Tiny Tina’s Wonderlands is installed. Right-click on the folder where the game is installed and from the drop-down menu, choose the Properties option.
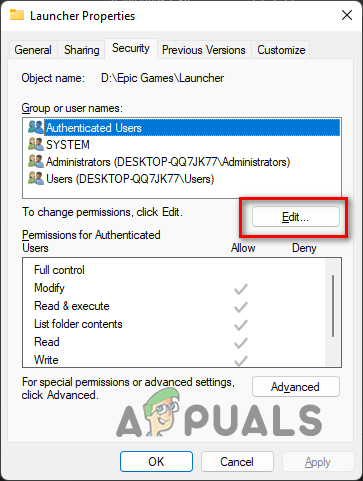
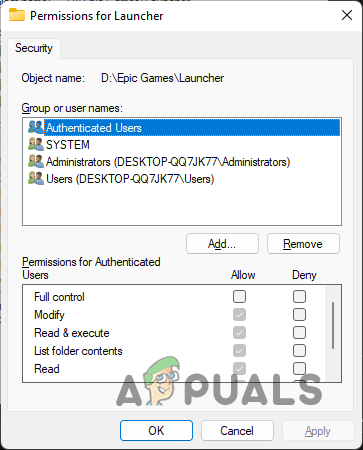
Opening up Properties Window - On the Properties window, switch to the Security tab.
- Once you are there, click the Edit button provided.
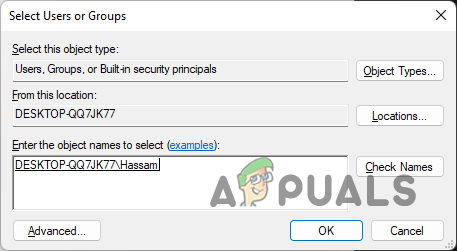
Editing User Permissions - Then, click on the Add button provided.
User Permissions - On the follow up dialog box, type in the username of your Windows user account in the empty field provided. After that, click the Check Names button. An underline should appear under the username that you provided. Click OK.
Adding User Account - With that done, highlight your user account from the list and tick the Allow checkbox of Full Control.
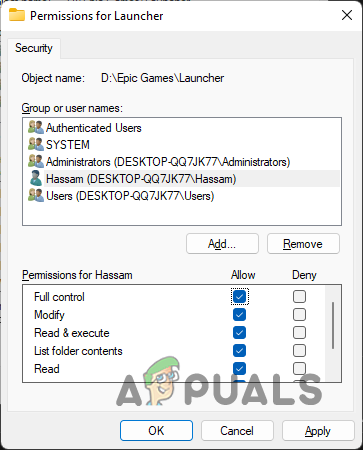
Allowing Full Control - Finally, click Apply and then hit OK.
- With that done, launch the game to see if the issue is still there.
3. Launch Game in DirectX11
As it turns out, the version of DirectX that is being used to launch the game can also trigger the issue in question. In case you do not know, DirectX is an important part of Windows when it comes down to video games and other multimedia. Several users have reported that changing their DirectX version has fixed the problem for them so it might just work out for you too. To do this, follow the instructions down below:
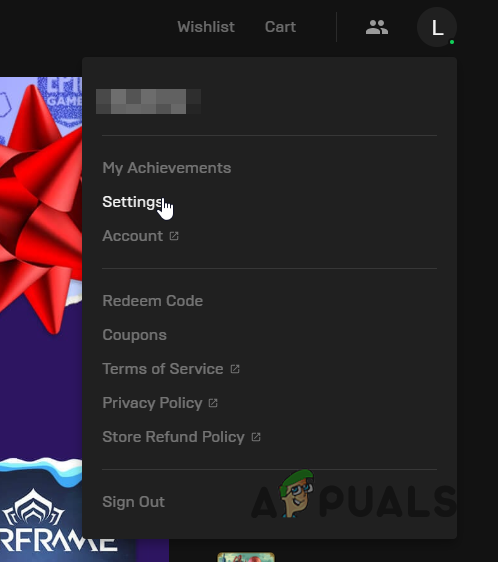
- First of all, open up the Epic Games Launcher on your computer.
- After that, click on your profile icon and from the drop-down menu, choose the Settings option.
Navigating to Epic Games Settings - Scroll down and then expand Tiny Tina’s Wonderlands under Manage Games.
- There, click the Additional Command Line Arguments checkbox and then enter “-dx11” in the field provided without the quotation marks.

Running Tiny Tina’s Wonderlands on DirectX11 - With that done, launch the game to see if the issue has been resolved.
4. Remove XMP and Other Overclocks
As we have mentioned, overclocking is another reason that your game may not be able to launch. It is no secret that overclocking your components can give you a free performance boost when done currently. Usually, there is no reason to not do it if you know how to do it. However, there are cases where it can cause some stability issues with certain games in rare scenarios.
As it happens, this might be one of those cases where any overclocks might be stopping the game to not start up. As such, we would first recommend turning off XMP Profile from your BIOS settings if you have enabled that. With that done, see if the issue still persists. In case it does, remove any further overclocks from your GPU and CPU and then give it a shot again.