Fix: There’s a Problem with Your Game’s Setup in FIFA 22 on PC
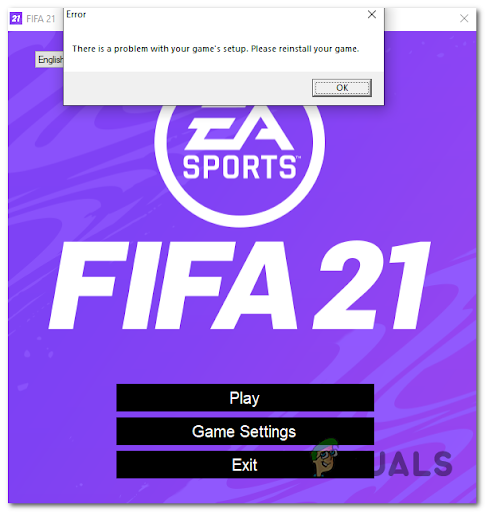
One of the most common errors that PC FIFA 22 players are currently dealing with is the ‘There’s a problem with your game’s setup‘ error. This error does not let you launch your game and forces you to remain at the launch menu indefinitely. The complementary message suggests you should reinstall the game, but a lot of affected users have reported that it was not effective in resolving the issue.
After more and more players have encountered this issue, we’ve done an in-depth investigation and actually come up with a shortlist of culprits that might trigger this particular FIFA 22 error:
- Missing Visual C++ Redist packages – Players are reporting that this issue might be caused due to the Visual C++ Redist packages that are missing from your system. To fix this, you can download them from the Microsoft official page and follow the official prompts to install them.
- Missing DirectX – This error could be also caused by the missing of DirectX from your computer. It’s either this, or you don’t have the necessary version. If this scenario is applicable, you can fix this by downloading and installing DirectX from the Microsoft official page.
- Corrupted files – Another scenario that might cause this issue are some corrupted or missing files that are not letting the game work properly. In this case, the first thing you should do is verify the integrity of the files via Origin. In case the integrity scan finds out files that are actually corrupted, they will be replaced.
- Outdated Windows version – As it turns out, this FIFA 22 game’s error is also related to an outdated Windows build. This problem is mostly reported on Windows 10 and Windows 11 with versions missing a key infrastructure update. To fix this, you need to access the Windows Updates inside the Settings and install every pending update that you’re missing.
- Missing Media Feature Pack – Depending on your current Windows version, this FIFA 22 error might be also caused because you are missing the Media Feature Pack. This is specific to N versions of Windows and can usually be fixed by accessing the Optional features inside your Settings, then manually installing the feature.
- Proxy policy interference – As it turns out, this particular issue can also be related to a series of proxy walls enforced at the File Explorer level via a Local Group Policy Editor. In this case, you can get the issue resolved by changing the explorer proxy settings via the Local Group Policy Editor.
- Cache data – The Origin temp files could also be a cause for this error. Especially in scenarios where you haven’t cleared your Origin-related temporary files after you reinstalled the game. In this case, you can fix this by deleting the cache data from the ProgramData folder, then deleting it from the AppData folder.
- Corrupted windows host file – A less common scenario that might ultimately trigger this behavior with Fifa 22 is a scenario in which the Windows host file accumulated data that is interfering with the game’s connection with the server. In this case, you can get the issue fixed by effectively resetting the Windows host file.
Now that you are aware of all the possible causes for this error, here’s a list of all the methods we’ve come up with that should help your repair your game and fix the Game’s Setup issue:
Install the Redist. X32 and x64 bit packages
Since this is the most common issue that might ultimately produce the ‘There’s a problem with your game’s setup‘ error, the first thing you should do is troubleshoot against a potential Visual C++-induced issue. According to a lot of users, this error could be caused due to the Visual C++ Redist packages being corrupted, or missing from your system.
So the first thing you can try is to install all the missing Visual C++ Redist Packages. You can download them from the Microsoft official site.
In case you don’t know how to download and install the Visual C++ Redist packages, here are the steps you need to follow:
- Open any browser you want to use and access the Microsoft official download page where you can download the Visual C++ Redist Packages.
- After you are inside this page, download both the x86 and x64 bit files.

Downloading the correct version of Visual C++ - When the files are downloaded, click on them to open the installer. Click on Install if the option is available and follow the on-screen prompts. If not, click on Repair and leave the installer replace any corrupted Visual C++ dependencies with healthy equivalents.

Modifying the visual C++ setup Note: Once you’re done with it, repeat the process for the other file.
- After the installation is complete, reboot your PC, then open the FIFA Game’s Setup menu to see if you get past it and actually play the game again.
If the problem is not resolved after following the steps above or you already had every required Visual C++ dependency, try the next potential fix below.
Install the missing Direct X dependency
If the first method didn’t work in your case, another thing you can try to finally get past the launch screen of the FIFA 22 is to make sure you install every DirectX dependency that the game needs. This solution seems to have a lot of players, specifically those that are not yet on Windows 11 (which supports the latest DirectX version natively).
Note: You can find the newest version of this file on the official Microsoft page.
But before you install DirectX, our recommendation is to go to the system’s folder and delete a file named D3DCompiler_43.dll after you create a backup copy of it. This will help solve file system inconsistencies related to the DirectX dependencies.
Here are the steps you need to follow in case you don’t know how to install DirectX:
- Open File Explorer and access the disk you have your Windows installed on.
- Then access the Windows folder, then open the System32 folder.

Accessing the System32 folder - After that, search for the D3DCompiler_43.dll file and create a backup of it by copying and pasting the file wherever you want.
- Once you’ve done that, right-click on the file and click on Delete.

Removing the problematic D3D Compiler - After that, open your default browser and go to the official Microsoft download page where you can download the file.
- When you are inside the page, click on the Download button to download the file.

Download the End-User Web installer - Once the file is downloaded, double-click on the executable and proceed with the installation.

Agreeing with the EULA - When the installation is complete, restart your computer and try to test if the error still appears after it boots back.
In case the same error still appears, check below the next potential fix.
Verify the integrity of the files via Origin
As it turns out, the ‘There’s a problem with your game’s setup‘ error might also be caused by some corrupted files that your FIFA 22 has accumulated over time. In most documented cases, this type of issue can be fixed by repairing the game from Origin.
By doing this, the integrity of the game’s files will be verified and repaired if the local installation contains any corrupted files.
In case you don’t know how to verify the integrity of the files, here are the steps you need to follow:
- Start by opening the Origin app, then access the My Game Library.

Access the My Game Library menu - Once you’re inside your Origin’s library, look for FIFA 22 game and click on it.
- Next, from the context menu that just appeared, click on the Settings gear icon and click on Repair to start the process.

Repair Fifa 22 inside Origin - Wait until the process is finished and the integrity of the files is verified. The corrupted files will be fixed in case there are any.
- After that, test the game’s launcher to see if the error still occurs.
If you’re still unable to get past the initial launch screen of Fifa 22, move down to the next potential fix below.
Install every pending Windows Update + install the Media Feature pack
As it turns out, this problem can also occur due to a missing Media Feature pack dependency. This is typically reported to occur with N versions of Windows 10 and Windows 11. However, the issue can also be rooted in a missing feature update that’s available with every Windows version (Windows 10 and Windows 11).
Most community members experiencing this issue on Windows 11 managed to fix this by installing the pending Windows updates that were available. But if you’re using an N version of Windows, you’ll also need to install the Media Feature from the Optional Features tab (inside the Windows Settings).
Here is the guide you need to follow in case you don’t know how to do this:
- You need to start by opening a Run dialog box by pressing the Windows key + R.
- Next, type ‘ms-settings:’ and press Enter to open the Settings of your Windows.

Accessing the Microsoft Settings menu - After you are inside the Settings, click on the Windows Update section.

Accessing the Windows Update menu - Once you’re inside the dedicated Windows Update menu, go ahead and install every pending update that’s currently available.

Install the available Windows Updates Note: If you are prompted to restart before you get the chance to install every pending update, restart as instructed, but make sure to return to this screen once the next startup is complete and continue with installing the remaining updates.
- Once you are finished with installing every pending update, go back to the starting menu of the Settings and click on Apps, then access the Apps & features section.

Access the Apps and Features screen under Windows - Once you are inside the Apps & features, click on Optional features.
- Now you need to click on Add feature. Inside the new menu that has appeared on your screen, search for the Media Feature Pack and select it.

Install the Media Feature pack - From the next menu, follow the prompts to complete the installation of the Media Feature Pack.
- After the feature is installed, reboot your PC, then test the Game Setup of your FIFA 22 to see if you still encounter the error.
If you’re still dealing with the same dreadfully issue that prevents you from actually launching the game, move down to the next potential fix below.
Change Internet Explorer proxy settings
As it turns out, this particular issue can also be rooted in a problem caused by a custom Explorer proxy policy that ends up preventing the game from launching.
This issue is exclusive to Pro and Enterprise versions of Windows 10 and Windows 11.
If you’re dealing with this type of problem, you can fix it by accessing the Local Group Policy Editor (mpedit.msc) and enabling the Disable changing proxy settings policy. Doing this will ensure that no custom File Explorer settings end up affecting the connection to the EA servers.
Follow the instructions below to disable the proxy policy related to Internet Explorer using the Local Group Policy Editor:
- Press the Windows key + R to open a Run dialog box, then type ‘gpedit.msc’ inside the search box to open the Local Group Policy Editor.

Accessing the Gpedit utility - Now that the Local Group Policy Editor appears on your screen, click on the User Configuration, then click on Administrative template. Now click on Windows Components and search for Internet Explorer, then click on it.

Access the Internet Explorer policy cluster - After that, on the menu from the right side, you need to search Disable changing proxy settings.
- Once you find it, double-click on it to open the setting, then click on Enable to disable the Explorer’s proxy setting, and click on Apply to save the changes.

Enable the proxy related policy - Now you need to reboot your computer. When it boots back, try to open the FIFA 22 game’s setup to see if the error still appears.
Go to the next method in case this method hasn’t helped.
Clear Origin Cache Data
This error could be caused by some corrupted temp files that are stored in the FIFA 22 ProgramData and AppData folders. The majority of users dealing with this kind of problem have reportedly fixed it by accessing the files and deleting the files.
By doing this, you will essentially be forcing all the files to be downloaded again by Origin, without any harmed files.
In case you don’t know how to clean the ProgramData and AppData folders from cache data, here’s what you need to do:
- Open a Run dialog box by pressing the Windows key + R, then type ‘%programdata%’ inside the search box and press Enter to open the ProgramData folder.
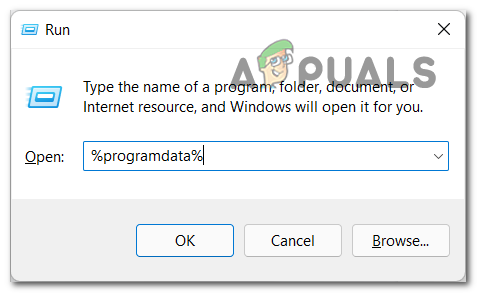
Accessing the ProgramData folder - Now that you are inside the ProgramData folder, search and open the Origin folder.

Accessing the Origin folder - After that, select everything inside this folder except the LocalContent folder, then delete the files.

Clearing the localcontent folder - Once you’ve done that, press the Windows key + R again to open another Run dialog box in which you need to type ‘%appdata%’, then press Enter to open the AppData folder.
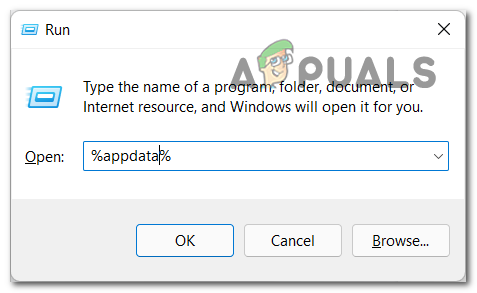
Accessing the AppData folder - After that, look for the Origin folder and delete it.

Deleting the Origin folder - When the folder is completely deleted, click on the AppData folder located on the upper side of your screen to exit the Roaming folder. Then access the Local folder.

Access the Local folder - Now you need to find the Origin folder and delete it completely as well.

Delete the second origin folder - Once you’ve deleted this folder as well, restart your PC, then open FIFA 22 to see if the Game’s Setup still doesn’t work.
In case neither of the methods before has helped you fix this FIFA 22 error, check below the last potential method.
Reset the Windows Host file
If none of the methods above have proven to be effective in your case, the last thing you can try is to reset the Windows Host file. This method has repeatedly been confirmed for Windows 11, but you can potentially replicate it on Windows 10 too.
By creating a default Hosts and replacing the current equivalent with this new file, you should be able to resolve some connectivity issues and the ‘There’s a problem with your game’s setup’ error in FIFA 22.
Here is some step by step instructions that will help you create a new host file to replace the current one on your Windows installation:
- Press Windows key + R to open up a Run dialog box.
- Next, type ‘notepad’ and press Ctrl + Shift + Enter to open up a notepad window with admin rights.

Open Notepad with admin rights - At the User Account Control (UAC), click Yes to grant admin access.
- Once you’re inside the elevated Notepad window, paste the following text:
# Copyright (c) 1993-2009 Microsoft Corp.
#
# This is a sample HOSTS file used by Microsoft TCP/IP for Windows.
#
# This file contains the mappings of IP addresses to host names. Each
# entry should be kept on an individual line. The IP address should
# be placed in the first column followed by the corresponding host name.
# The IP address and the host name should be separated by at least one
# space.
#
# Additionally, comments (such as these) may be inserted on individual
# lines or following the machine name denoted by a '#' symbol.
#
# For example:
#
# 102.54.94.97 rhino.acme.com # source server
# 38.25.63.10 x.acme.com # x client host

# localhost name resolution is handle within DNS itself.
# 127.0.0.1 localhost
# ::1 localhost
- After you paste the text, click on File, then click on Save as. Name the file “hosts”, then save it to the desktop.

Accessing the Hosts menu - Now close the Notepad, then search for %WinDir%\System32\Drivers\Etc using the File Explorer search option.
- Inside that folder, rename the hosts file and type ‘Hosts.old’.

Renaming the current hosts file - After you’ve done that, move the hosts file that you previously saved on your desktop inside this folder.
- Once you’ve done that, launch the game and test to see if you still encounter the issue.


