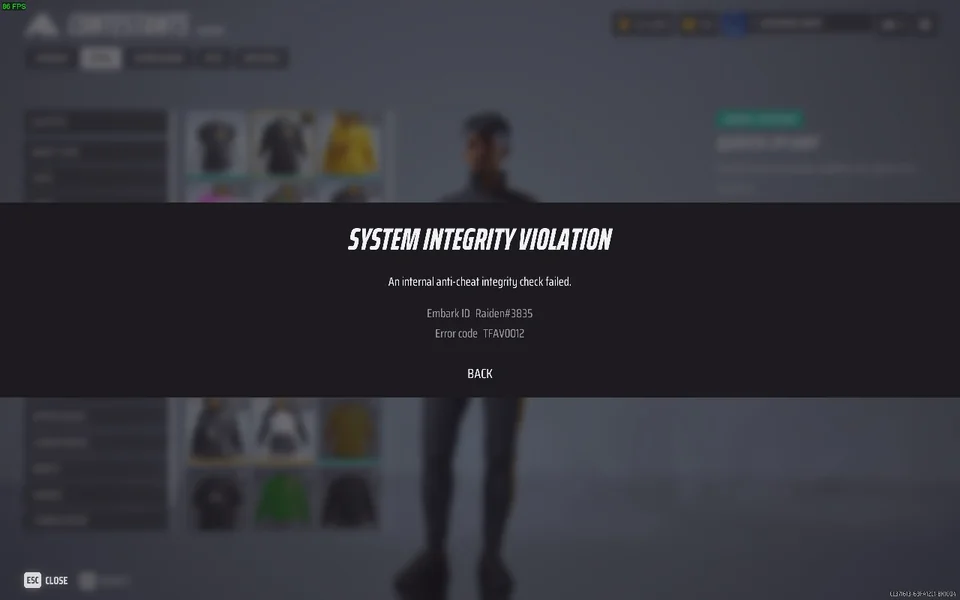
How to Fix Error Code TFAV0012 in The Finals?
The error TFAV0012 in “The Finals” is often triggered by the anti-cheat system when it detects suspicious activity on the system. However, this error can also be caused by background applications, such as crosshair and overlay applications, that inadvertently interfere with the game’s processes.
Not all background applications are permitted by The Finals. Even so, the absence of background applications does not guarantee immunity from this error message.
Several factors, other than third-party applications, can contribute to this error. Enabled Dynamic Tracing, system and game file corruption, and issues with anti-cheat files are among the common causes we’ve come across while investigating solutions for this problem.
For some users, simply restarting their PC has resolved the error. It is therefore advisable to restart your system before trying any of the following methods.
1. Disable Dynamic Tracing (DTrace)
The performance monitoring tool Dynamic Tracing (DTrace) can hinder The Finals’ anti-cheat from performing an integrity check. Disabling DTrace can be an effective first step in troubleshooting the error.
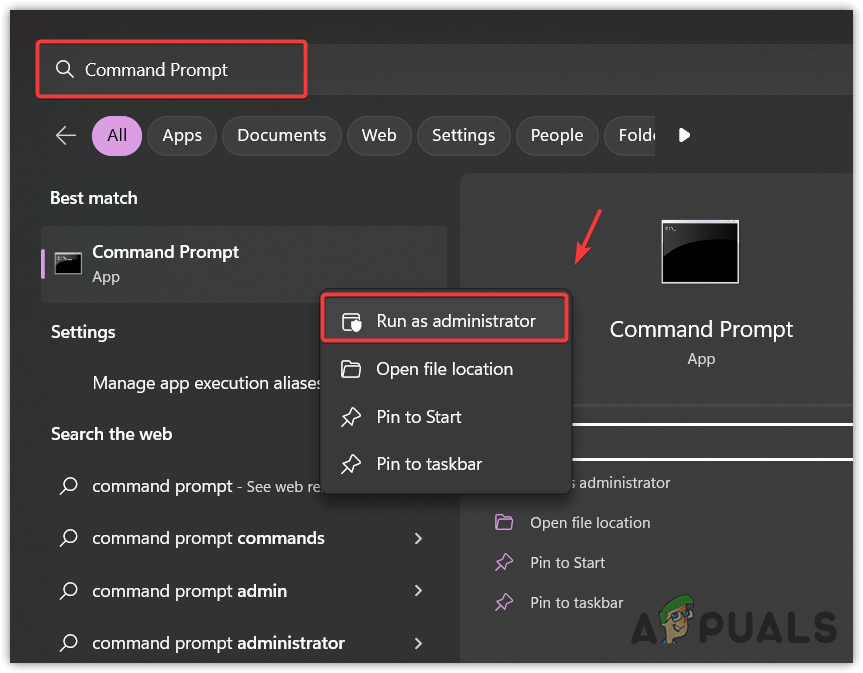
- Open the Start Menu and type Command Prompt.
- Right-click on it and choose Run as administrator.
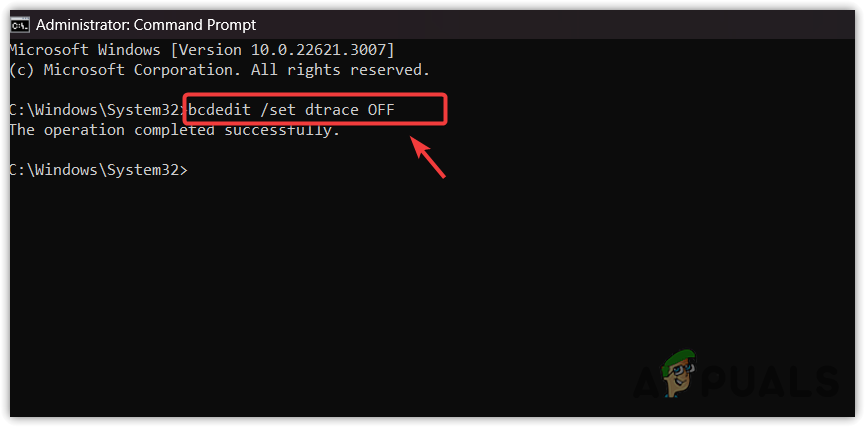
- Enter the following command to disable DTrace:
bcdedit /set dtrace OFF
- Restart your computer to apply the changes and check if the error is resolved.
2. Configure Compatibility Settings for EasyAntiCheat_EOS.exe
Compatibility issues with the EasyAntiCheat_EOS.exe executable file, which runs the anti-cheat program for The Finals, can prevent it from functioning properly. To address this, you can set the file to run in compatibility mode for Windows 8.
- Open Steam and go to Library.
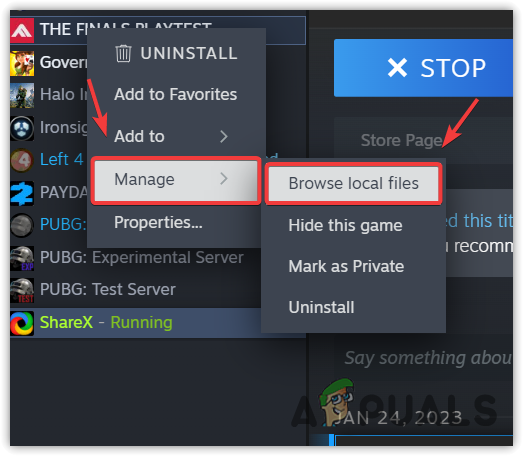
- Right-click on The Finals, hover over Manage, and select Browse Local Files.
- Navigate to the EasyAntiCheat folder.
- Right-click on EasyAntiCheat_EOS.exe and choose Properties.
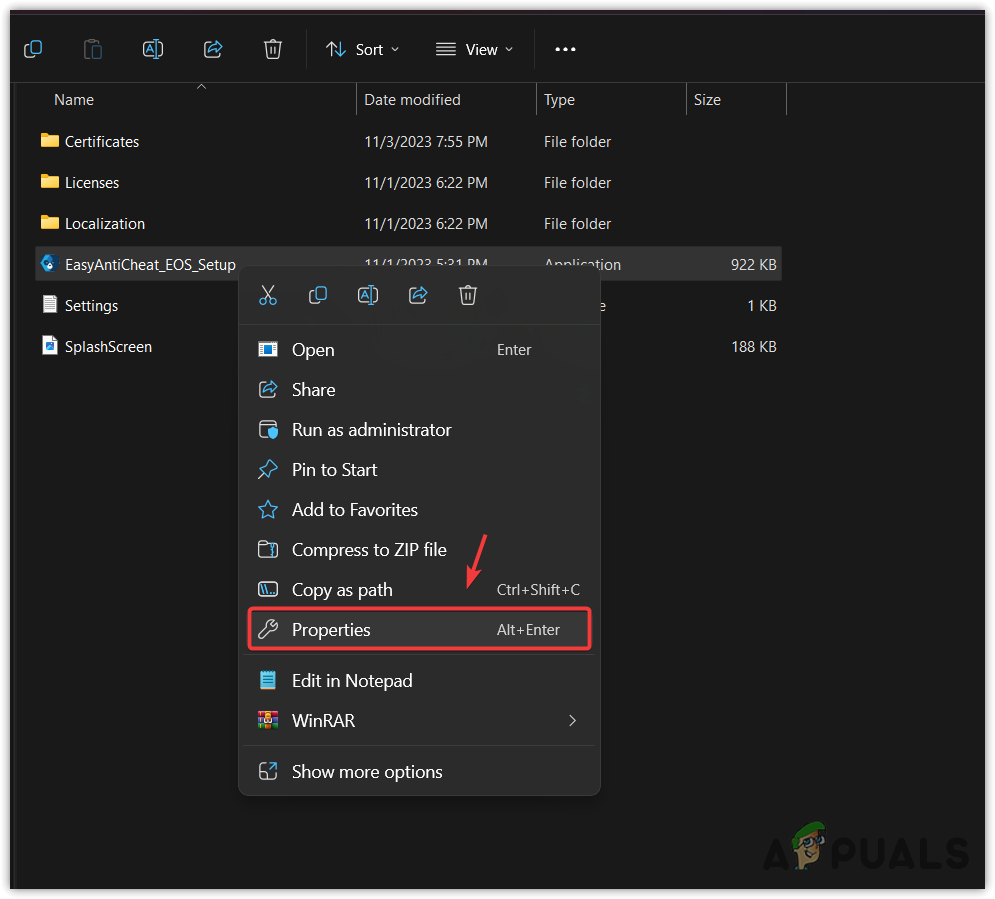
- Select the Compatibility tab.
- Check the box for Run this program in compatibility mode for and select Windows 8 from the dropdown menu.
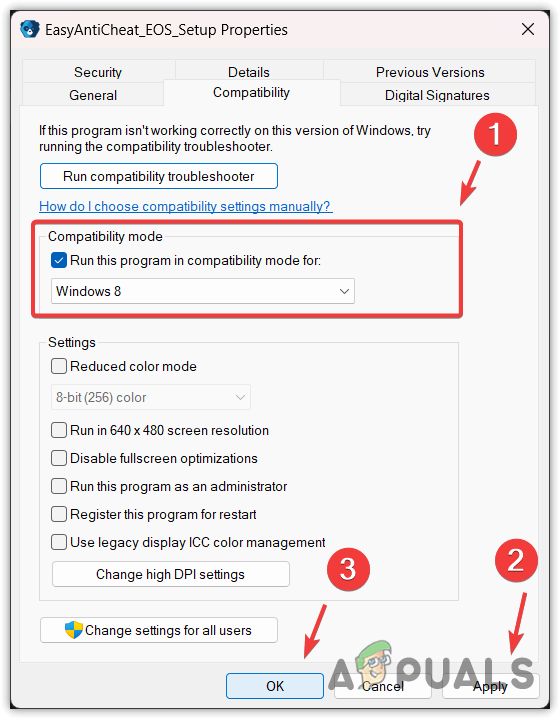
- Click Apply and then OK to save your changes.
- Test if the error has been fixed.
3. Run System File Checker
Corrupted system files can cause the TFAV0012 error message to appear. Running the System File Checker (SFC) can restore any files that may be causing the issue.
- Press the Windows key and type Command Prompt.
- Right-click on it and select Run as administrator.
- Type sfc /scannow and press Enter to start the scan.
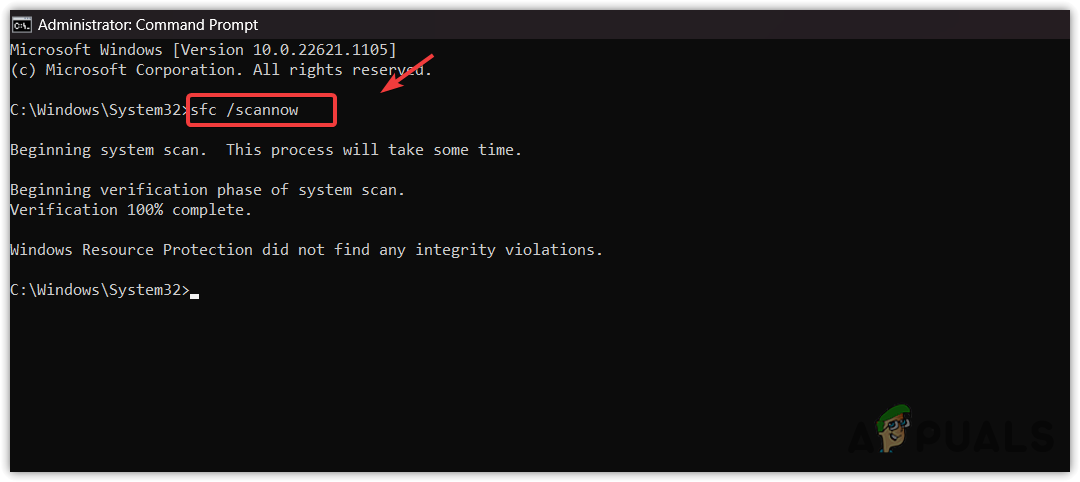
- Wait until the scan and repair process is complete. Afterwards, verify if the error code TFAV0012 has been resolved.
4. Verify the Game Files
Corrupted game files can also be the culprit. Verifying the integrity of the game files with Steam may fix the corruption.
- Launch Steam and proceed to your Library.
- Right-click The Finals and choose Properties.
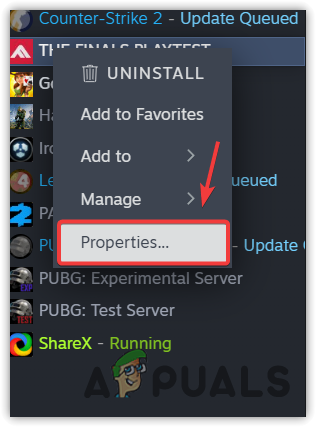
- Select LOCAL FILES and click on VERIFY INTEGRITY OF GAME FILES…. Please note that this process can take some time to complete.
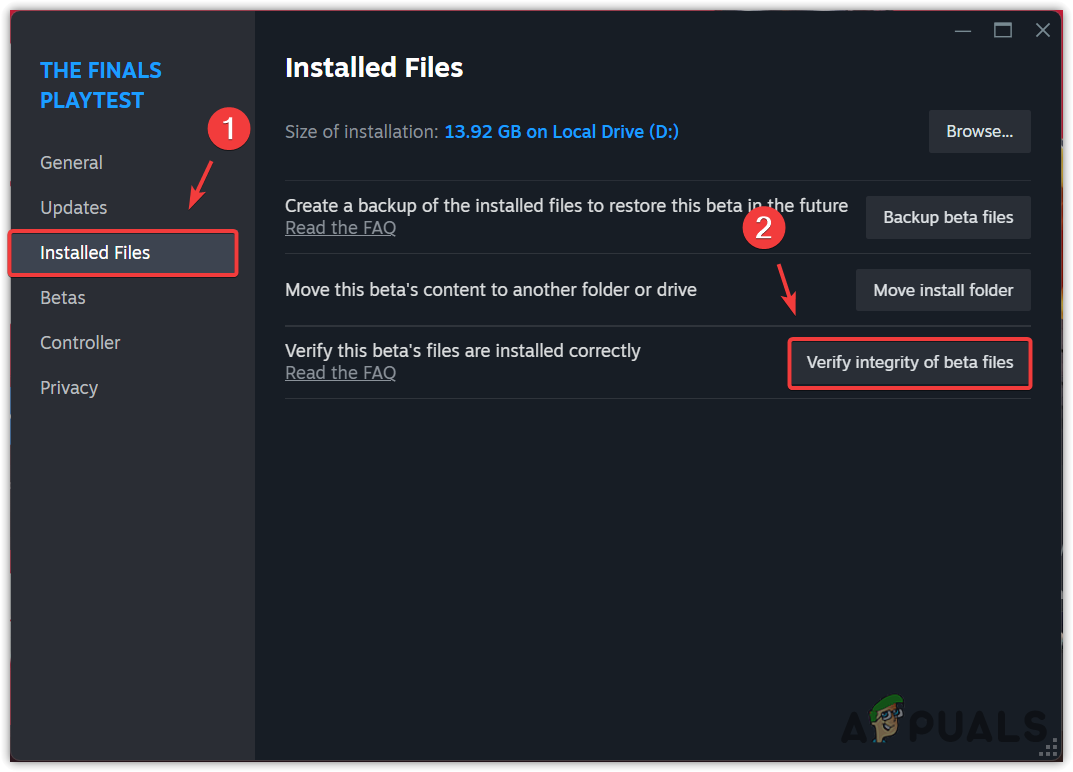
- After the verification process is completed, launch The Finals to see if the error has been fixed.
5. Close Overlay, Background, and Diagnostic Applications
Third-party applications such as overlay tools, crosshair customization, and keyboard lighting software might cause the EasyAntiCheat to fail during integrity checks. It is advisable to close all unnecessary background applications to ensure optimal gameplay in The Finals. You can do so from the system tray in the bottom right corner of your desktop.
6. Rename Embark and Discovery Folders in AppData
Persistent errors might result from corrupted cache files within The Finals. Renaming the cache folders within the AppData directory might help.
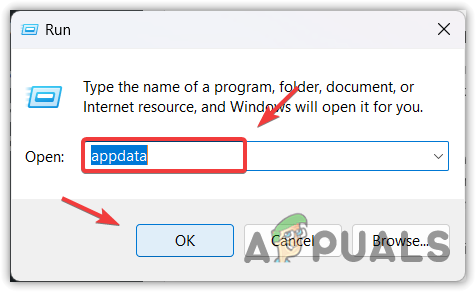
- Right-click on the Start Menu and choose Run.
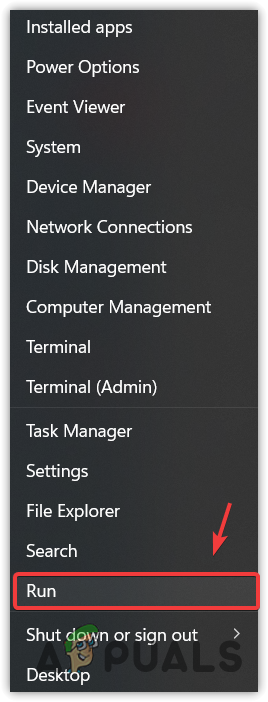
- Type %appdata% and click OK to open the folder.
- Navigate to the Local directory.
- Locate and rename the Embark and Discovery folders.
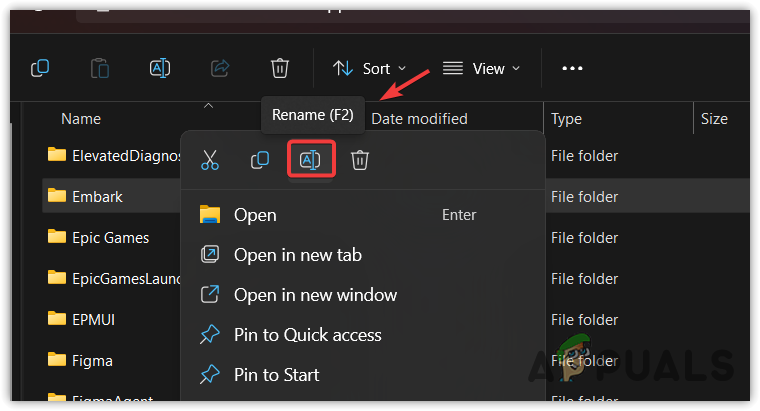
- Verify if renaming the folders resolved the error.
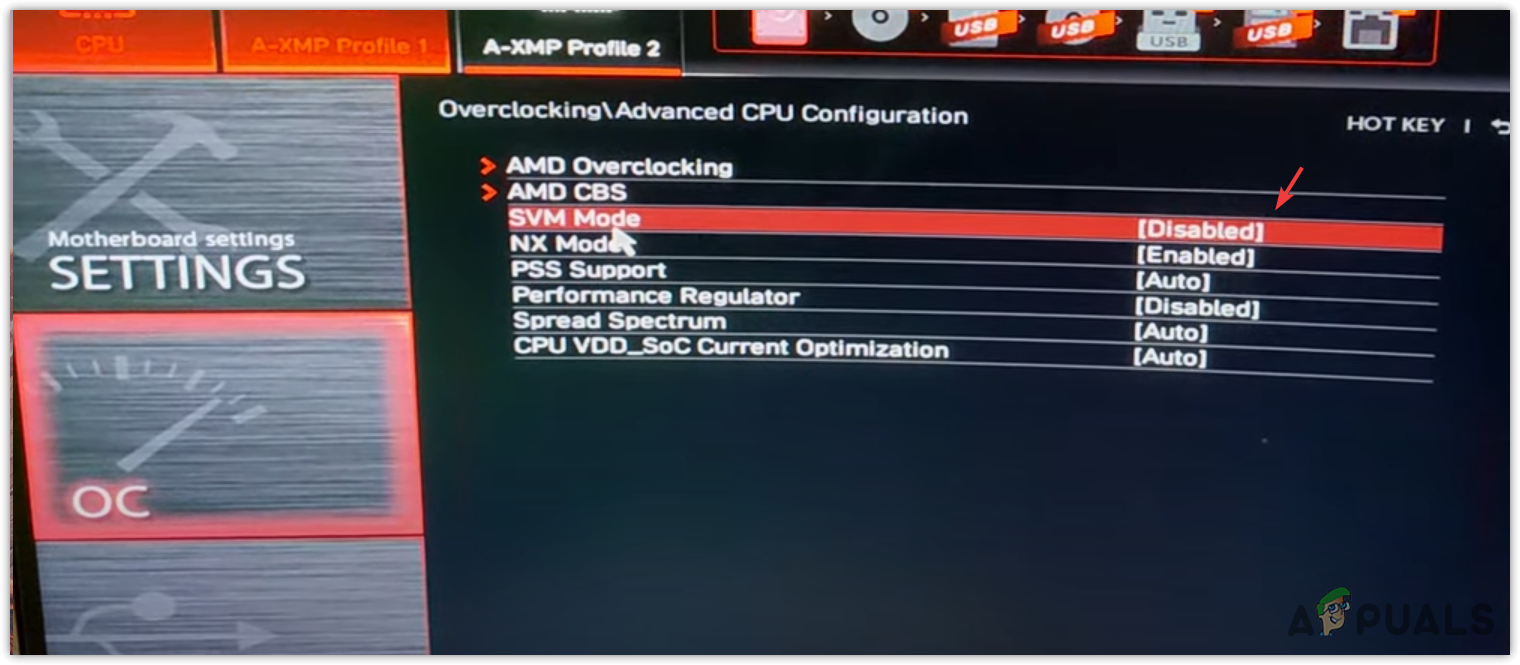
7. Enable SVM (Secure Virtual Machine) and Secure Boot
SVM and Secure Boot are BIOS features that enhance security and can help in resolving errors by preventing malicious applications and drivers from running.
- Enter your motherboard’s BIOS settings upon startup.
- Navigate to Overclock settings and select Advanced CPU Configurations to access additional options.
- Activate the SVM Mode here.
- Proceed to Security Settings, choose Advanced, then Windows OS Configurations, and finally enable Secure Boot.
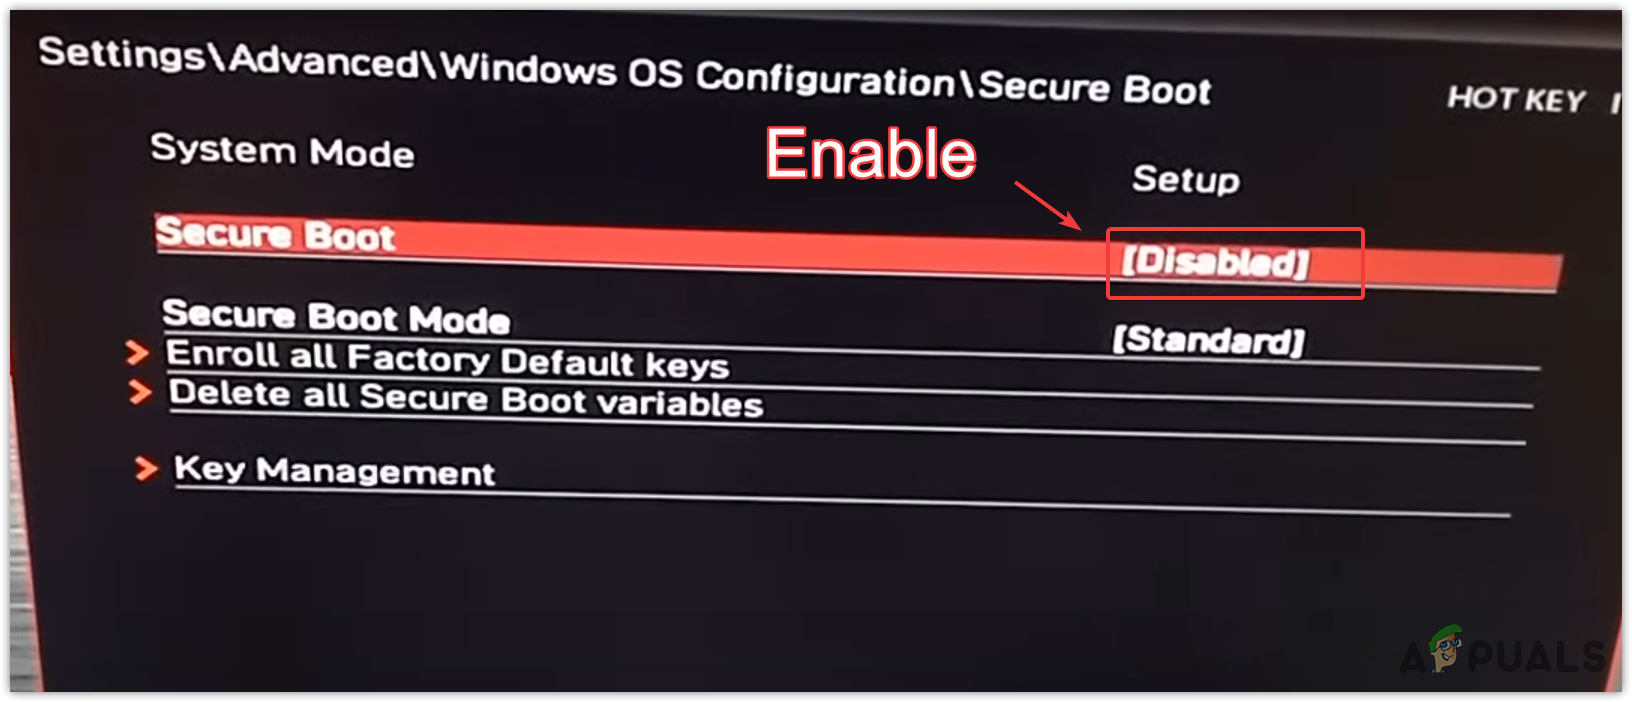
Note: You must switch to UEFI mode in BIOS before the Secure Boot option becomes available. - Boot into Windows and open Windows Security settings by searching for it from the Start Menu.
- Select Device Security from the menu on the left and click on Core Isolation Details.
- Finally, enable both Memory Integrity and the Microsoft Vulnerable Driver Blocklist.
- Check if the error has been successfully resolved post-configuration.
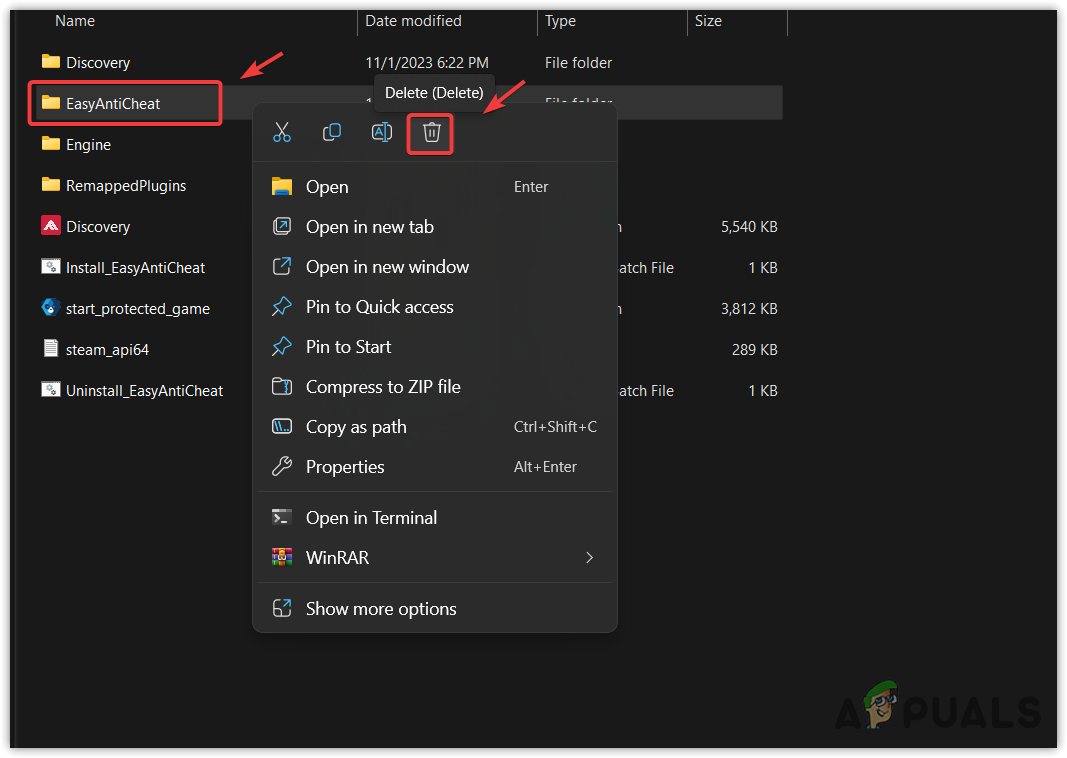
8. Reinstall EasyAntiCheat
Corrupted EasyAntiCheat files can be the source of many gaming-related errors. A fresh installation of these files may resolve the error.
- Launch Steam and navigate to Library.
- Right-click on The Finals, hover over Manage, and choose Browse Local Files.
- Delete the EasyAntiCheat folder by right-clicking on it and selecting Delete.
- Go back to Steam, select Library, and the game The Finals.
- Under Properties, choose the Local Files tab and hit VERIFY INTEGRITY OF GAME FILES to reinstall the EasyAntiCheat software.
- After completion, start The Finals again to see if the issue persists.
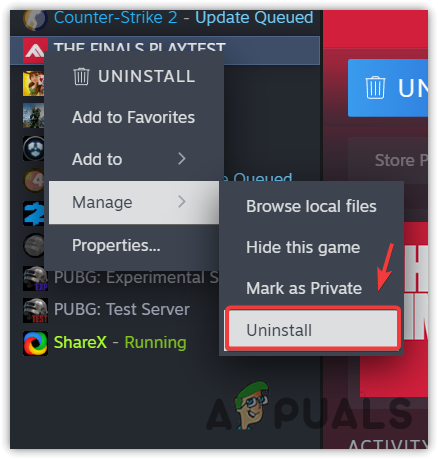
9. Clean and Reinstall The Finals
If you’ve tried all the above solutions to no avail, reinstalling The Finals may be necessary. Make sure to follow the steps below:
- Open Steam and head over to the Library section.
- Right-click on The Finals, hover over Manage, and select Uninstall.
- Confirm the uninstallation by clicking Uninstall again.
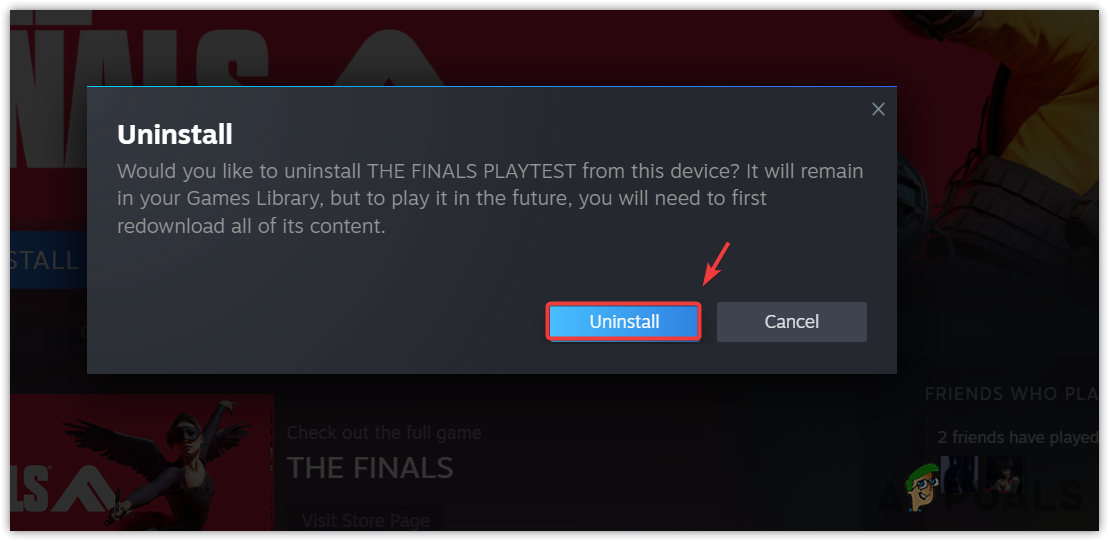
- Reinstall The Finals and check if the error has been successfully fixed.
This guide covers all the known solutions to this error. If none of them work for you, you may consider performing a factory reset on your device as a last resort, which should maintain your data and applications. Refer to this guide on how to perform a factory reset.