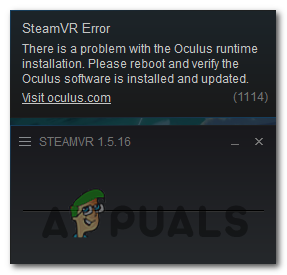
How to Fix SteamVR Error 1114
Some VR enthusiasts are seeing the Error 1114 every time they attempt to open the Steam VR tools in order to use their Occulus Rift. This issue is not OS specific as it’s confirmed to occur on Windows 10, Windows 8.1, and Windows 7.
If you’re troubleshooting this particular issue, you should start by doing a simple restart and see if it fixes the problem. This is reported to resolve the 1114 error in instances where the Oculus tools have just finished updating and the OS needs a system startup in order to finish the changes.
Another instance that might be causing this problem is some type of corrupted dependencies that is causing the initialization of the SteamVR utility to fail. In this case, you can fix the problem by using the OculusSetup.exe executable to repair the entire installation. If that didn’t work, you should go for a complete reinstall and see if this ends up fixing the issue.
Method 1: Rebooting your Computer
If you didn’t try this already, go for a simple restart and see if it allows you to resolve the problem. There are a lot of affected users who confirmed that a simple restart finally allowed them to use Occulus using SteamVR tools without encountering the 1114 error.
This will be effective in situations where the SteamVR tools have just finished updating – Sometimes the installer is unclear when installing an update that actually needs a system restart in order to finish the operation.
After you performed the restart, wait for the next startup to complete, then repeat the action that was previously causing the 1114 error and see if the problem is now resolved.
In case the same problem is still occurring, move down to the next potential fix below.
Method 2: Repairing the Occulus Installation
If a simple restart didn’t work, the next potential fix that you should try is to try and repair the Oculus installation using the provided tools. If you’re using the Oculus rift, the most convenient way of repairing involved utilities is to download the Oculus setup file and choose the option to repair.
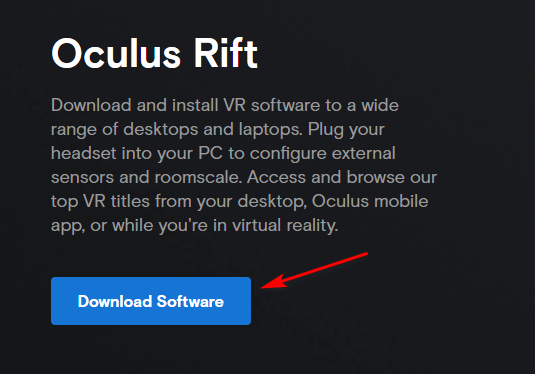
To do this, visit the official Oculus Setup page and click on the Download Software button associated with the Oculus product that you own.
Once the OcculusSetup.exe file is downloaded, double-click on it and click Yes at the UAC (User Account Control) to grant administrative privileges.
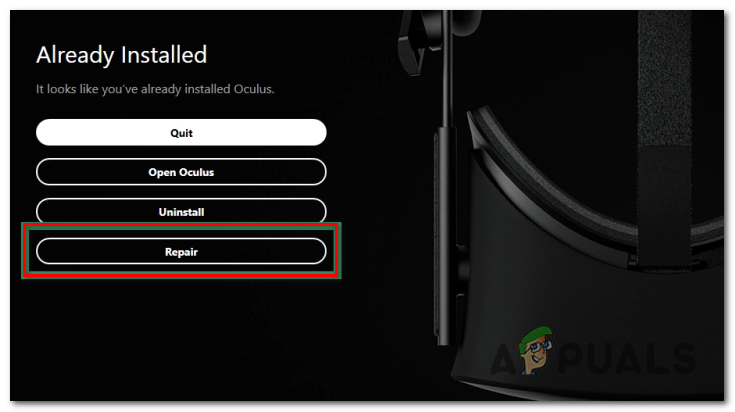
After you open the utility, it will automatically detect that the VR tools Oculus requires are already installed. Because of this, you will be presented with a list of available options. At the Already Installed screen, click on the Repair button.
Next, follow the on-screen prompts to complete the repair operation, then restart at the very end once you get the success message.
Once the next startup is complete, open the SteamVR app again and see if you still end up seeing the Error 1114.
In case the same problem is still occurring, move down to the next potential fix below.
Method 3: Reinstalling Oculus
If none of the fixes above have allowed you to resolve the problem and you’re still seeing the 1114 error every time you attempt to open SteamVR, chances are you’re dealing with some kind of file corruption.
As it turns out, some VR users that were also facing the 1114 error have managed to fix the problem after resolving corrupted instances by reinstalling the Oculus software and every associated dependency.
If you want to follow this particular guide, here’s a quick guide on uninstalling & reinstalling every software instance that might be contributing to the apparition of the 1114 error:
- First, press Windows key + R to open up a Run dialog box. Next, type ‘appwiz.cpl’ inside the text box and press Enter to open up the Programs and Features menu.

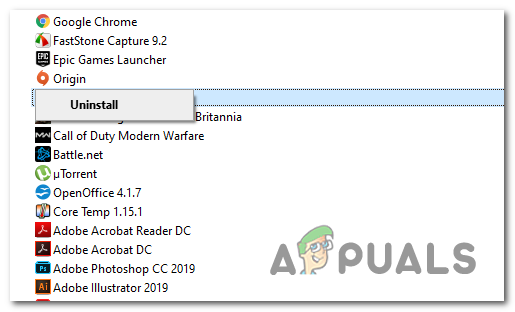
Type appwiz.cpl and Press Enter to Open Installed Programs List - Once you’re inside the Programs and Features menu, scroll down through the list of installed programs and locate the Oculus app. When you see it, right-click on it and choose Uninstall from the newly appeared context menu.
Uninstalling Oculus software - Inside the uninstallation screen, follow the on-screen instructions to complete the uninstallation,
- Next, open File Explorer (My Computer), navigate to /ProgramFiles/Oculus, and manually delete the Oculus folder. After you do this, restart your computer.
- Once your computer boots back up, go ahead and reinstall the Oculus software by visiting the download page of Oculus and download the OculusSetup.exe file by using the Download button associated with the VR product that you’re using.
Downloading the compatible Oculus software - Once the OculusSetup.exe file is downloaded, then open it and follow the on-screen instructions to re-install the Oculus VR tools that you previously uninstalled.
- Once the installation is complete, reboot your computer once again and launch SteamVR once your computer boots back up to see if the problem is now resolved.