How to Set and Use iPhone Without an Apple ID?
When you set up your new iPhone, you are required to enter your Apple ID so that you can use all of the amazing features offered by Apple.
Downsides of Setting Up an iPhone Without an Apple ID.
When you do not use an Apple ID, you will not be able to access multiple features, such as the Apple Store, which is necessary if you want to install any third-party applications. Without it, you cannot download any apps.
Apart from this, you will not be able to use iCloud, which helps you store your information, including pictures, videos, and files. It serves as a backup that you can use when you create your Apple ID. If you do not create an account, you will be unable to back up any of your information.
How can one set up and use an iPhone without an Apple ID?
Nevertheless, if you are not comfortable sharing your data with Apple, or you just want to set up your iPhone without an Apple ID for a limited period, there are two methods that you can use. We have discussed these methods in this post. Let’s check them out!
1. Set up your iPhone without an Apple ID via Settings.
If you have bought a new iPhone, you will be required to enter your Apple ID during the setup process. However, if you are a new iPhone user and do not want to create an Apple ID immediately, you can set up your iPhone without an Apple ID through settings.
Nevertheless, it is crucial to note that if you have an Apple ID but do not want to add it to your phone, you will not be able to restore any of your previous data, such as pictures and videos, to your device.
Here’s how you can set up your iPhone without an Apple ID via Settings:
- Begin by turning on your iPhone; press and hold the Power button until the Apple logo appears on the screen.
- Then, the setup process will begin; at this point, you need to select your preferred language and location.

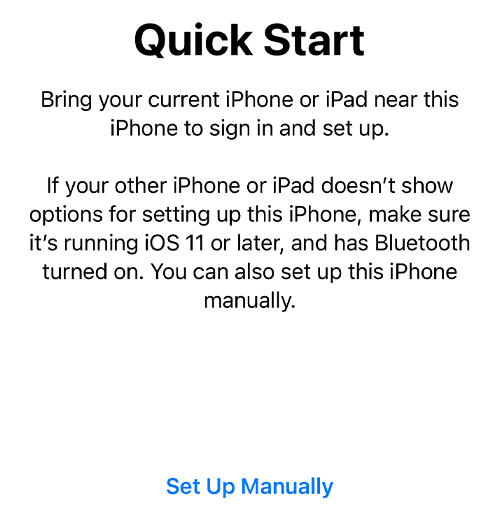
Select your preferred language along with your location - Next, you will see two options on your device. You need to tap on “Set up Manually.

Tap on Set up Manually - After this, connect your device to a Wi-Fi network. You can also use your cellular data to set up your iPhone.
- Then, you need to set up a password. Also, you must set up Face ID or Touch ID. However, if you do not want to set up any of these, you can tap on ‘Set up Later in Settings’.
- You will be required to transfer or restore your data from another iPhone (if you have one) to the new one, but for this, you will need to use your Apple ID. If you do not want to use that, tap on ‘Set Up as New iPhone.’

Go to Set Up as New iPhone - After completing this step, tap on ‘Forgot password‘ or ‘Don’t have an Apple ID?’ option to continue without entering an Apple ID.

Tap on Forgot password or Don’t have an Apple ID? - Tap on ‘Set up later in Settings.’ Afterward, a notification will pop up on your screen; tap on ‘Confirm‘ to continue the process.
- Lastly, you need to tap on the “Don’t Use” option. With this, you will be able to use your iPhone without an Apple ID.
2. Activate the iPhone without an Apple ID using iCloud DNS.
Another method you can use to set up and activate your iPhone without an Apple ID is by using iCloud DNS. You can employ this method if you have purchased a second-hand iPhone and cannot activate it. However, this method is not a permanent solution, and you will need to set up an Apple ID eventually.
In addition, this method can only be used for iOS 10 or later versions. However, it will not provide complete access to the device, but it is workable for a temporary period. Below is the step-by-step process for activating an iPhone using iCloud DNS:
First, you need to factory reset your iPhone. Here’s how you can do it:
- Go to Settings and tap on General.
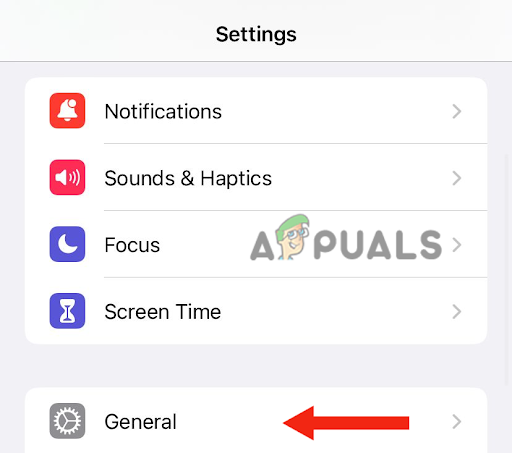
Tap on General - Next, scroll down and tap on Transfer or Reset iPhone.
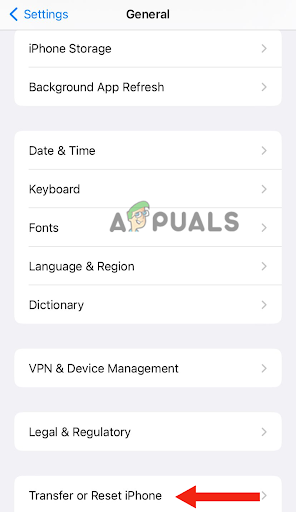
Go to Transfer or Reset iPhone - Tap on Erase All Content and Settings.
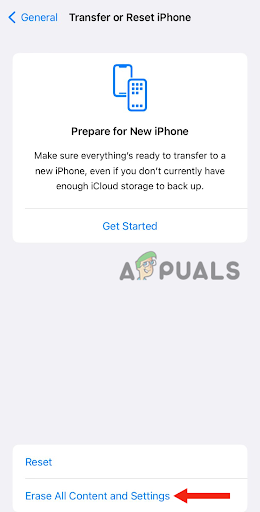
Tap on Erase All Content and Settings - After this, you need to enter the passcode that you use to unlock your iPhone. With this, your iPhone will get reset to its factory settings.
After resetting your iPhone, set it up until you reach the Wi-Fi page.
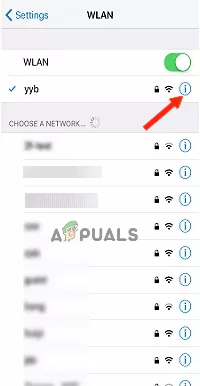
- Next, you need to tap on the info icon next to the Wi-Fi network to which your device is connected.
Tap on the info icon next to the Wifi network - Tap on the DHCP tab.
- Then, you need to use one of the following DNS IP addresses according to your location:
North America: 104.155.28.90
EU: 104.154.51.7
Asia: 104.155.220.58
Elsewhere: 78.100.17.60
Choose DNS IP addresses according to your location - After you have entered the IP address, you need to go back and connect to the Wi-Fi network as you usually do.
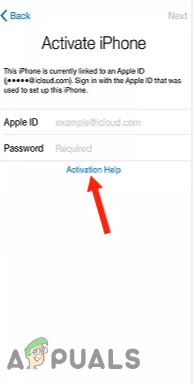
- Finally, you need to tap on the back button. When you are asked to enter your Apple ID, tap on Activation Help, which is below the Password section. By doing this, your iPhone will connect to the bypass server, and you will not have to enter your Apple ID.