Rogue Company Low FPS and Stuttering? Try these fixes
Many users complained about the Rogue company low FPS stuttering. When they play games on their systems they face issues regarding lag, crashing, and FPS drop.

Here are some reasons for Rogue Company crashing
- Use of single-core of CPU: Sometimes the games we play are designed on multicores. Similarly, your computer performs other tasks at the same time. The use of Multicore will perform these tasks more effectively. So, using multicore for Rogue Company will increase the FPS.
- Inappropriate Graphics Settings: Graphics settings are responsible for the game’s resolution. When we use high-quality graphics, it ultimately slows down your game. If Rogue Company has low FPS stuttering, then avoid using high-quality mode. Set your settings to a moderate level.
- Full-screen Optimization: Although this feature fascinates you while playing the games. It prioritizes certain tasks to perform by CPU and GPU. It generally supports the games features but playing full-screen mode may not support Rogue Company FPS boost. So it is better to keep your game in gaming mode. So, it will run more effectively.
- High-resolution Quality: Increasing the resolution gives more stress to GPU drivers. If your graphic drivers are not capable of bearing higher resolution, they ultimately affect the performance of the game. It’s better to try to lower the resolution quality. It will boost the FPS.
In this article, we will discuss the ultimate FPS increase for Rogue Company. This article will help you in achieving the best gameplay experience, boosting your overall FPS drastically, and lowering input like maintaining a great visual fidelity regardless of your system effects. Before starting fixing the rogue company’s low fps stuttering, ensure a few things to get better results.
1. Set quick system restore Point
Setting up a system restore point will allow you to safely and securely follow all optimizations. These may include the liberty to revert or restore windows, games, and other files fast and easily. So, here are the steps to set the restore point for the system. If your system faces an issue after updating or installation, this restore point will help you to go back to the previous point and fix the issue without even losing files
- Go on the Start Menu and type the System Restore Point on the search bar.
- Click on the Create a restore point, system, properties will open.
- Go on the Production settings and highlight the C: Drive and select Configure.

System Restore Point - Make sure that Turn on system protection is Enabled. Now come down to the Max Usage.
- Drag the max Usage Bar to 5% and press the Apply and then OK.
- Now go back and select Local Disk (D:) and press the Create option.
- Name the Restore point. Let’s say Rogue Backup. Then click on Create. It will take a few moments, the system restores point will be created.
2. Update the Graphics Drivers.
All the images, videos, and even texts in the game are directly related to graphics drivers. So, Graphics drivers play a very important role in a game’s performance. Generally, Rogue Company supports NVIDIA GPU Drivers. Here are a few steps that will help you in updating them.
- Go and open the Nvidia control panel by right-clicking on the screen.
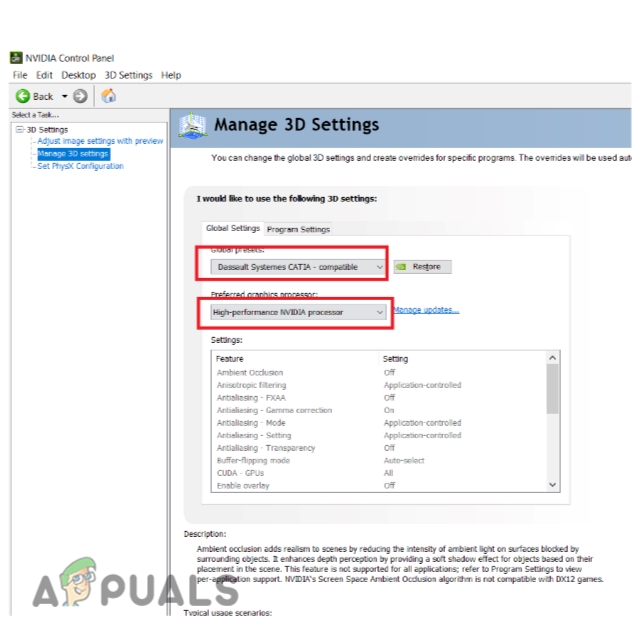
Open Nvidia Control Panel - Then select Manage 3D settings from the left side of the screen.
- Now press the Global Settings Setting Tab and search for Rogue Company. (if it is not present you can add it by click in on Add option).
- Here you will see an option to select the preferred graphics processor for the program. Go and set it to a High-performance NVIDIA processor.
Update NVIDIA GPU Drivers
3. Allow Rogue Company to use all cores of the CPU
CPU has many cores. So, instead of using a single-core CPU, multiple cores give better results. Multi-Cores can process several tasks at a time easily when you run some powerful app or game. So, it is necessary to allow the Rogue Company to use all cores of the CPU to fix FPS drops and stutter.
If you play your game on steam follow these steps;
- Open Steam and go to the Games will pop up on the right side of the screen.
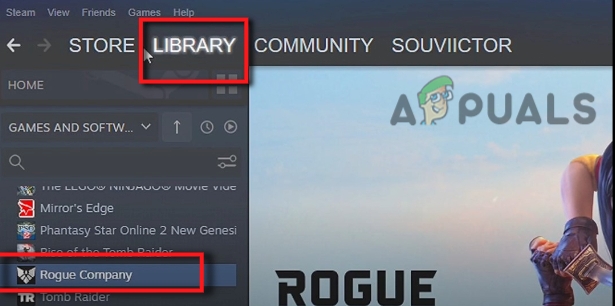
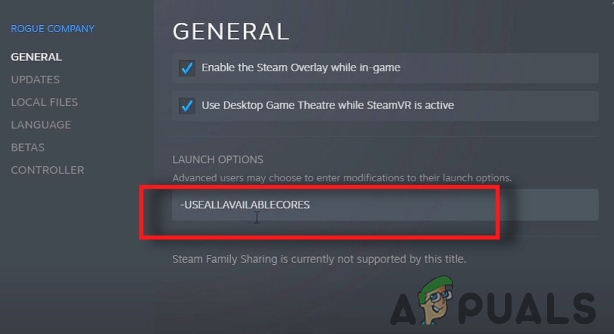
All Cores of CPU-Steam App - Now Right-click on the Rogue Company. Then go to its Properties.

Properties of Rogue Company - In the search field of Launch Option, paste the following Command;
-USEALLAVAILABLECORE
If you are playing Rogue Company on Epic Game, here are a few steps to follow;
- Open the EPIC Game Click on the profile and then select Settings.
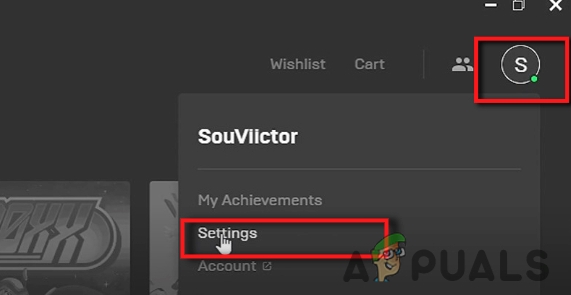
Use All Cores of CPU-Epic Games - Now scroll down, and click on the Rogue Company.
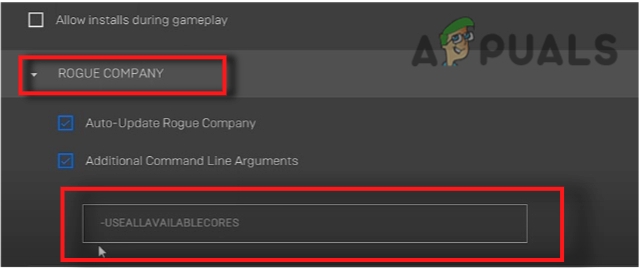
- Few options will pop up. Check the option Additional Command Line Arguments.
- Place the command in the empty box.
-USEALLAVAILABLECORE
- Now close the window and launch the game again.
All Cores of CPU-Epic Games
4. Best Graphics Settings
Graphic settings play a very important role in getting more FPS in Rogue Company. These settings maintain the quality of the game thoroughly. So, here are some steps that would help you out in the graphics setting.
- Open the Rogue Company app. Now click on the Gear Icon.
- Go on Press Display now select Screen Mode.
- Try to choose the full mode for the lower input lag.
- Now go to VSYNC and select Then go to Global Settings and select low.
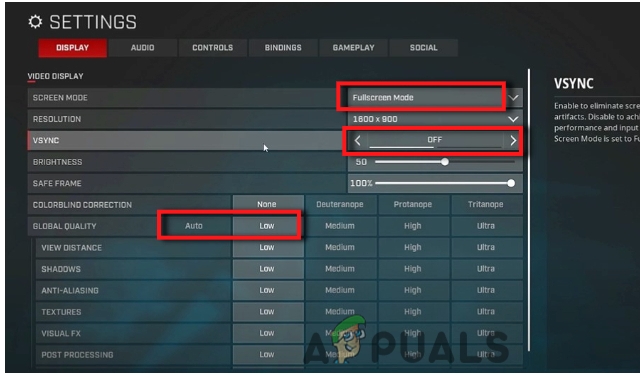
Graphics Settings of Rogue Company - Click on Apply to save the changes.
5. Disable full-screen Optimizations on the Rogue Company
This feature drops the FPS. Games usually run smoother in game mode. So, it is important to disable it to resolve the issue. But first, find the location of the Rogue Company.
If you are using Steam App then follow these steps;
- Open the library go to Rogue Company and press Right-click on it.
- Select the properties and go to the Local Files
- Now press the Browse It will lead you to the installation file.
- Go to Local Disk (C :).
- Now go to Program Files and then Epic Gamesand then Rogue Company.
- After you find the installation location, navigate the Rogue Company.
- Then click on Binaries and then Win64.
- Now right-click on the Rogue Company and go to its properties.

File Location of Rogue Company - So, select Compatibility and then check the box of Disable full-screen Optimization.
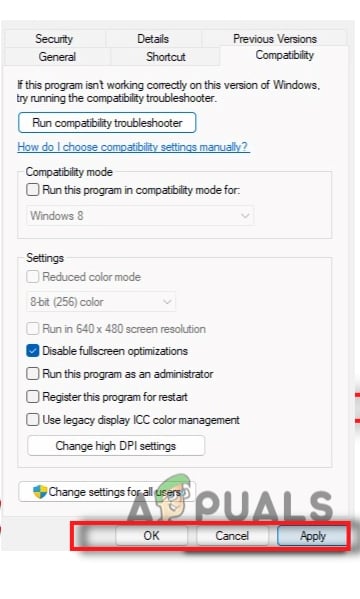
Disable full-screen Optimizations - Lastly, to save the changes click on Apply and then press ok.
6. Lower the Resolution Quality on Rogue Company
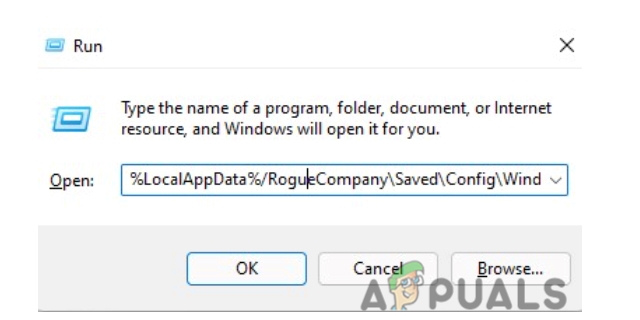
Doing this will reduce the number of pixels that your computer will render, increasing FPS. So, here are the steps to perform this task. first of all, Press the Window key + R from the keyboard and type this command;
%LocalAppData%/RogueCompany\Saved\Config\WindowsNoEditor
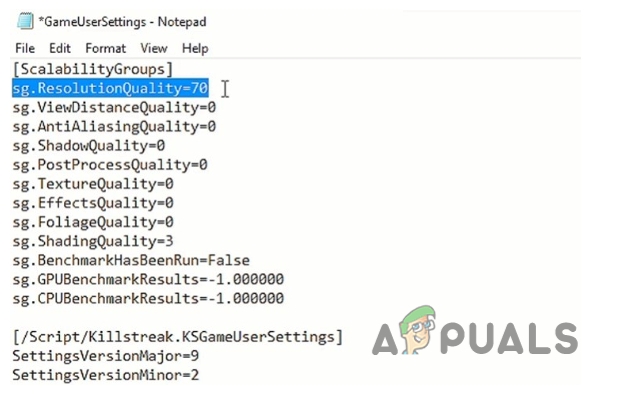
- Now select the GameUserSetting file and Right-click on it.
- Go to Edit. It will open a code file.
- Now insert the following command just under the first line. Save this file by clicking Ctrl + S.
sg.ResolutionQuality=70
7. Set High Priority on Rogue Company
It is usually done to make your computer dedicate the maximum performance to Rogue Company. Sometimes the tasks running in the background lower the FPS. The running game as an administrator will launch it effectively but we need some extra effort to boost the FPS. So, the following steps will help you with Rogue Company low FPS stuttering.
- Go and download the High Priority Rogue Company.zip from the link below https://drive.google.com/file/d/1TqhriJNL347cmmC_OTkkolO2c4BfTzt8/view
- Now right click on the High Priority. Select Merge Option.

Set High Priority on Rogue Company - Now click on Yes and then Ok to apply the changes.


