How to Fix ‘Recipient Address Rejected’ Error when Sending Emails
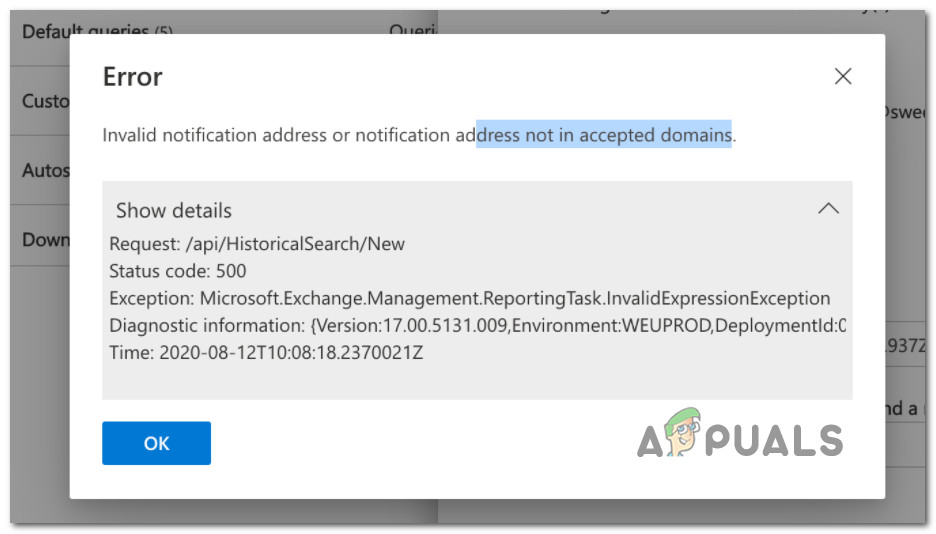
You’ll typically encounter the ‘Recipient Address Rejected. Access Denied‘ error after you use Outlook (or a different email client_ to send an email that bounces back with the ‘message not delivered’ event. Most commonly, this error message is associated with status errors 541 and 551.
After researching this problem extensively, we managed to identify a couple of common scenarios that might be responsible for this particular issue. Here’s a shortlist of potential culprits that might trigger the ‘Recipient Address Rejected. Access Denied’ error when you’re trying to send an outbound email:
- Non-Existent email address – One of the most common reasons why you can expect to see this error is a scenario where you’ve just send an outbound mail to an email address that doesn’t actually exist. In this case, the only viable fix is to double-check that you’re sending the email to a valid inbox and modify the recipient if necessary.
- DNS Problem – A DNS issue is not out of the cards, especially if you find this error occurring with every email that tries to leave your email client. In case emailing from the web interface of your email provider is fine but you continuously get the error with Outlook, Thunderbird (and the likes). In this case, clearing your DNS cache should allow you to fix the issue.
- Email gets rejected by an anti-spam filter – Another possibility (if you mailed the same inbox previously) is an anti-spam filter that’s labeling your email as spam. In this case, the only way to fix the issue is to ask the recipient to whitelist you so that your emails get through.
- DBEB is blocking external emails – If you previously configured Exclaimer Cloud through Microsoft 365 and you get this error while sending emails to public folders, the problem is most likely caused by DBEB. In this case, you can fix the issue by ensuring that the public folders are hosted on-premise.
Now that we went over every potential reason why you might be dealing with the ‘Recipient Address Rejected. Access Denied’ error, let’s start troubleshooting the issue using a series of methods that other affected users have successfully used.
Insert the correct recipient
Before you do anything else, start by double-checking if your recipient email is correct. If you previously emailed this recipient, make sure it still has the clearance to get past the mail gateway.
If you’re experiencing this issue within a gated email network, ensure that the recipients that return the ‘Recipient Address Rejected. Access Denied’ errors are still part of your organization.
In case you’re using Exchange discover that you get this error because you’re mailing to non-existent users, one solution is to create a CatchAll mailbox/address.
If you’ve just determined that you’re mailing to the correct recipient\s and you’re still getting bounces with the ‘Recipient Address Rejected. Access Denied’ error, move down to the next method below.
Flush DNS & Clear Temp TCP/IP Data
If the error is only occurring while you are connected to this particular network, you should start suspecting a potential DNS issue. It’s not uncommon to see the ‘Recipient Address Rejected. Access Denied’ error occurring due to a problem with the data transmission or protocol.
In this case, if a single computer on the network is affected, you should assume that a glitch with the network adapter or a bad DNS range is preventing the emails from leaving your gateway.
To fix this issue, you should do a complete TCP or IP reset on the affected computer (or on every computer part of this network that’s experiencing this issue).
Follow the instructions below for complete steps on flushing the DNS and TCP / IP temp data:
- Press Windows key + R to open up a Run dialog box. Next, type ‘cmd’ inside the text box, then press Ctrl + Shift + Enter to open up an elevated Command Prompt.
Open an elevated Command Prompt - When you’re prompted by the User Account Control prompt, click Yes to grant admin access.
- Once you’re inside the elevated Command Prompt, type the following commands and press Enter after each one to complete a DNS & TCP/IP reset:
ipconfig /flushdns
nbtstat -R
nbtstat -RR
netsh int reset all
netsh int ip reset
netsh winsock reset
- Once every command is processed successfully, close the elevated Command Prompt.
- Open your email client and try sending the exact same email to the same recipient and see if it’s still bouncing back.
If the ‘Recipient Address Rejected. Access Denied’ error is still not fixed, move down to the next potential fix below.
Ask Recipient to whitelist
Another fairly common reason why you can expect to get this error is an active anti-spam filter that’s presently used by the recipient domain. Due to your past history or the behavior of the recipient, your message is being detected and labeled as spam – that’s most likely the reason why it’s bouncing back.
From our investigations, it turns out that there are 3 big reasons why you can expect to see the ‘Recipient Address Rejected. Access Denied’ error when there’s a shield put in place by the recipient:
- The recipient of the spam filter has marked a similar message as spam in the past. In this case, every email from the same sender and every email that is similar to the one that was marked as spam will be treated in the same way.
- Email gets bounced due to a domain policy that blacklists or defines every email coming from this particular address as spam.
- The message is received by the email domain but it’s segregated due to a policy and ends up not being delivered to the intended inbox.
If any of the scenarios presented above are true, there is only one fix – asking the recipient to whitelist you so that they’ll get your email correspondence.
But since you can’t really do this from your regular email since it bounces back, you’ll need to use an alternate email.
If the scenario described above was not effective as you are experiencing this issue after configuring Exclaimer Cloud for Microsoft 365, move down to the next potential fix below.
Make the Exchange mail folders Public (if applicable)
If you are seeing the ‘Recipient Address Rejected. Access Denied’ error when trying to send an email after configuring it with Exclaimer Cloud via Microsoft 365, the reason for this is most likely related to the Directory-Based Edge Blocking (DBEB).
Just so you understand, DBEB is enabled by default in Microsoft 365 and it’s configured to reject external emails with addresses that are not found inside the Azure Active Directory.
But that doesn’t mean you don’t have those addresses. Most likely, they are considered external since they are currently stored in a public folder mailbox that is not synchronized with the Azure Active directory.
If you find yourself in this particular scenario, there are three potential fixes that will allow you to fix the error:
- Ensure that all public servers are hosted on-premise
- Ensure that your public servers are hosted in Exchange online
- Disable Directory Based Edge Blocking (Not Recommended)
Note: All of the methods presented below will require you to be a global administrator with full credentials.
Ensure that public folders are hosted on-premise
This operation will ensure that the public folders containing your emails are hosted on-premise. This operation involves accessing the Microsoft Azure Active Directory Connect screen and making some adjustments to the Optional Features.
This operation will ensure that the Mail Enabled Public Folder addresses will no longer be considered invalid by the DBEB feature.
Follow the instructions below to fix the ‘Recipient Address Rejected. Access Denied’ error by ensuring that every public folder is hosted on-premise:
- First things first, open up the Microsoft Azure Active Directory Connect screen.
- Once you’re inside, use the vertical menu on the left to select Optional Features.
- Next, move over to the right-hand section and check the box associated with Exchange Mail Public Folder.
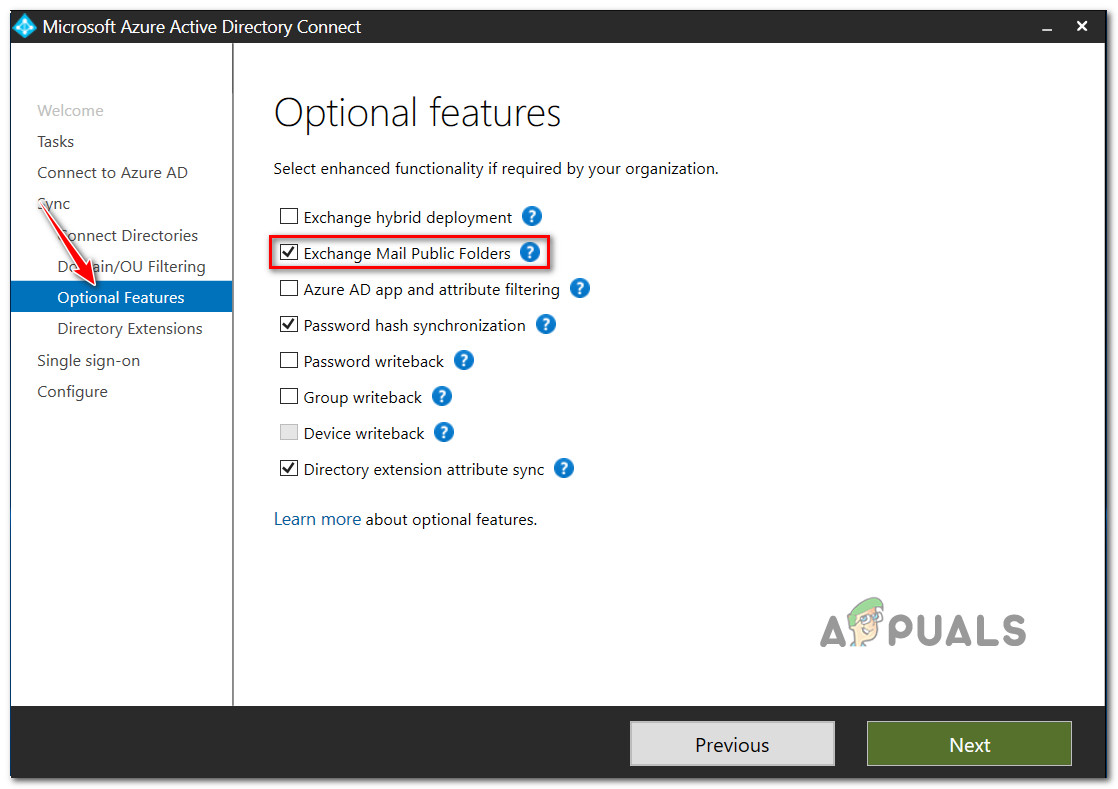
Enable the Exchange Mail Public Folders - Click Next to save the changes, then retry sending the email that was previously failing and see if the problem is now fixed.
Ensure that public servers are hosted Online
Keep in mind that Directory-Based Edge Blocking (DBEB) is not yet supported for Mail Enabled Public Folders. That’ll mean that you’ll need to resort to a few workarounds.
The first workaround is to stop routing the emails send to Public folders to Exclaimer Cloud – this can be done by accessing the Mail flow menu and establishing an exception rule.
Follow the instructions below to ensure that the public servers are hosted Online:
- Start by logging into Exchange Online with your account.
- Once you are signed in with your account, navigate to Mail flow from the list of options, then access the rules tab.
- From the list of available rules, select Identify Messages to send to Exclaimer Cloud, then click on Edit.
- Inside the ediable menu, scroll all the way down to the bottom of the section and click on Add Exception (under Except If).
- From the list of available options, select Recipient…Is this person.
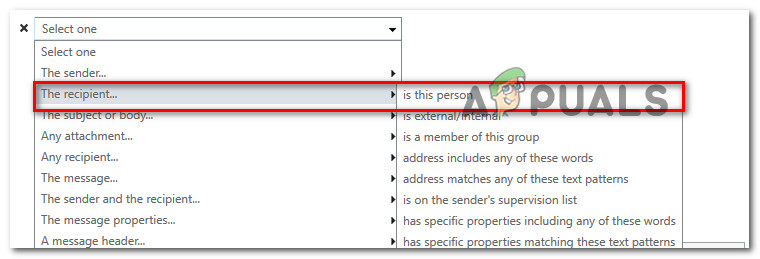
Adjusting the Exchange Online rule - When you see the Select Member’s dialog, select all the public folder mailboxes that you’re currently using.
- Finally, click on Add to enforce the change, then click Ok then save to enforce it.
Disable Directory Based Edge Blocking
Although we’re not recommending this method, another workaround that will allow you to prevent the DBEB from blocking your emails is to disable the Directory-Based Edge Blocking mechanism entirely.
To do this follow the instructions below:
- Sign in to Exchange Online with your account.
- Once you are successfully signed in with your account, go to Mail flow, then access the Accepted domains categories from the context menu that just appeared.
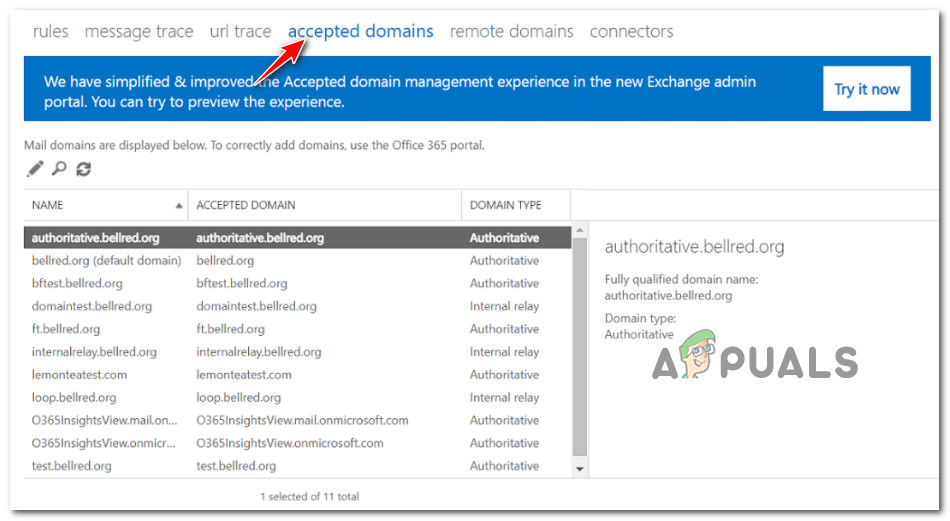
Accessing the Accepted Domains menu - Next, select the root domain of the public folder and click on Edit.
- Under This accepted domain is, select Internal relay and hit Save to effectively disable DBEB.