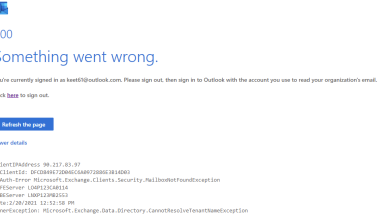
How to Fix Outlook Error 0x80190194?
The 0x80190194 error is frequently reported by Outlook users when sending and receiving the email via this email client or when trying to download the OAB (Offline Address Book). This problem is reported to occur with every recent Outlook version.
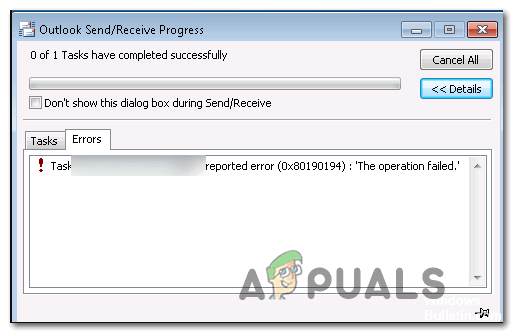
According to users that were also dealing with the 0x80190194 error code in Outlook, there are several different causes that might end up causing this problem:
- Corrupted Outlook folder – By far, the most common cause that will cause this error is corrupted data that made its way inside the AppData folder associated with the Outlook application. If this scenario is applicable, you can most likely fix the issue by renaming the main Outlook folder, forcing your OS to disregard it, and create a new healthy instance.
- Corrupted Offline Address Book – If you’re encountering this problem with a Microsoft Exchange account, it’s possible that you’re dealing with a partially corrupted OAB update mechanism that ends up affecting your email functionality. In this case, you can either try to force a manual OAB update or clear the contents of the Offline Address Book folder in order to remove any corrupted instance that might cause this behavior.
- Corrupted Outlook Profile – Under certain circumstances, you might expect to see this error due to the fact that your current local Outlook profile contains corrupted files that end up affecting the sending or receiving operation. In this case, you should be able to fix the error by deleting the current Outlook profile before recreating it from scratch.
Method 1: Renaming the Outlook Folder
One of the most common causes that might end up triggering the 0x80190194 error is corrupted data that’s currently present inside the main AppData folder associated with the Outlook application.
As it turns out, if this scenario is applicable, you should be able to fix the issue by accessing the App Data folder and renaming the existing Outlook folder in order to force the application to create a fresh folder. This will not make you lose any important data currently stored on your email since conversations and attachments are already backed up on the cloud.
To rename the Outlook folder, follow the instructions below:
- Press Windows key + R to open up a Run dialog box. Next, type ‘%appdata%’ and press Enter to open up the AppData folder on your computer.
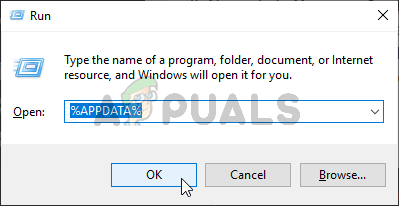
Opening the AppData folder Note: You can also get to this location manually, but keep in mind that this folder is hidden by default.
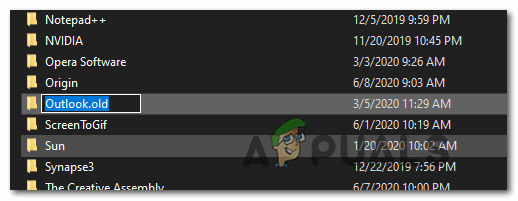
- Once you’re inside the AppData folder, access the Roaming folder, then look for the entry named Outlook. When you finally manage to locate it, right-click on it and choose Rename from the newly appeared context menu.
- Name the Outlook folder to ‘Outlook.old’ and press Enter to save the changes. By adding the ‘.old‘ extension, you’re ensuring that your operating system disregards this folder and creates a new one from scratch in order to avoid instances of file corruption.
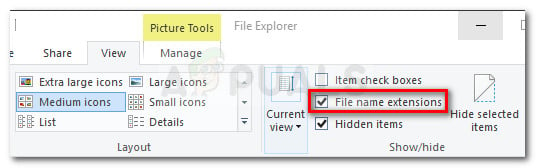
Adding the .old extension Note: If the extensions are not visible by default, use the ribbon bar at the top of the File Explorer window to go access the View tab, then check the box associated with File Name Extensions.
- Once this modification has been enforced, restart your computer and see if the problem is fixed at the next system startup.
In case the same problem is still occurring, move down to the next potential fix below.
Method 2: Updating or Clearing the contents of the OAB folder
If you’re encountering this error code with a Microsoft Exchange account, keep in mind that by default, Outlook will automatically update the Offline Address Book (OAB) once every 24 hours.
However, there are certain scenarios in which this mechanism might become corrupted and affect the functionality of your mail profile. If this scenario is applicable, you can either hope that a manual update will clear the corrupted files or you can clear the contents of the OAB folder manually.
Here’s how to update the OAB forcibly via Outlook menu:
- Outlook 2007 and older – Access the Tools > Send / Receive tab from the ribbon bar at the top, then click on Download Address Book.
- Outlook 2010, Outlook 2013 and Outlook 2016 – From the ribbon at the top, go to Send / Receive > Send / Receive Groups and click on Download Address Book.
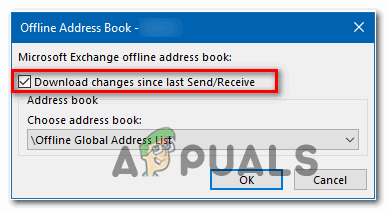
After you open the Address Book Utility, check the box associated with Download changes since last Send / Receive, then select the correct OAB using the drop-down menu below.
Once you update the Offline Address Book utility, restart the Outlook client and see if the problem is fixed. In case you’re still encountering the same 0x80190194 error, follow the instructions below to clear the contents of your Offline Address Book Files:
- Ensure that Outlook and any associated instance is closed.
- Open up a Run dialog box by pressing Windows key + R. Next, type ‘%localappdata%’ to open up the hidden AppData folder.

Opening AppData in the Run dialog box - Once inside the root folder of AppData, navigate to Microsoft > Outlook and double-click on the Offline Adress Book folder.
- When you’re inside the Offline Adress Book folder, press Ctrl + A to select the contents inside this folder, then right-click on a selected item and click on Delete from the newly appeared context menu.
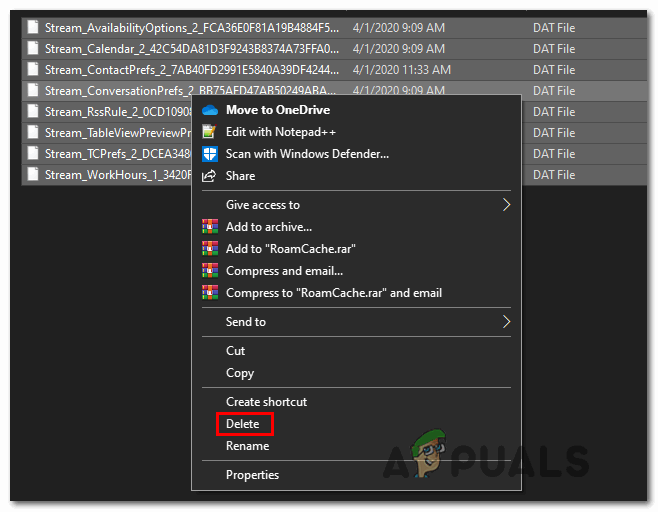
Deleting the contents of the OAB folder - Once the contents of the OAB folder are cleared, restart Outlook and repeat the action that was previously causing the 0x80190194 error to see if the problem is now fixed.
In case the same problem is still occurring, move down to the next potential fix below.
Method 3: Create a new Outlook profile
If none of the fixes above have proven to be effective for you, it’s likely that you’re dealing with a partially corrupted Outlook profile. In the vast majority of cases, this problem ends up being caused by a selection of files that are being stored locally.
Some users finding themselves in a similar situation have confirmed that they were finally able to fix the issue by creating a brand new profile with the same email account and removing the original Outlook profile.
The instructions for doing so are quite tedious, so we’ve created a step-by-step guide to make things a little easier for you:
- Start by ensuring that Outlook and any associated instances are completely closed.
- Open up a Run dialog box by pressing Windows key + R. Next, type ”control mlcfg32.cpl’ inside the text box and press Enter to open up the Mailbox directly.

Opening the Mail dialog box Note: If you’re encountering this issue on Windows 10, this command will not work. In this case, type ‘control’ in the dialog box to access the Classic Control interface, then click on Mail.
- Once you’re inside the Mail window, click on Show Profiles (under the Profiles tab).

Outlook Mail - Once you’re inside the Mail window, start by selecting the problematic email profile individually and click the Remove button. Do this and then confirm your choise to empty the list of connected email profiles.
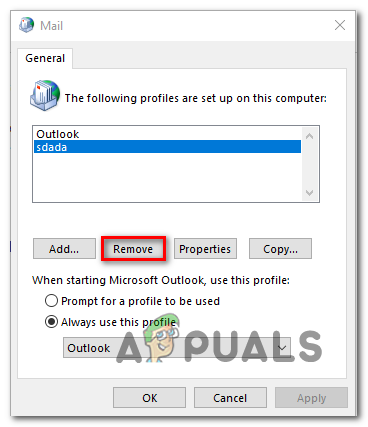
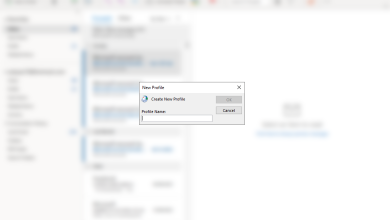
Removing your Outlook email profile - Once there are now profiles, you have successfully cleared the locally stored files. Next, click on Add, specify a name for your new profile, and click on Ok to create it.
- Next, follow the on-screen instructions the Add Account wizard to add your user email account once again. Once you manage to fulfill every required information, click on Finish to complete this process.

Adding the primary account again - After you manage to create the new account, return to the main Mail dialog box, then select Always use this profile toggle and then connect it with Outlook using the drop-down menu. Finally, click Apply to save the changes.
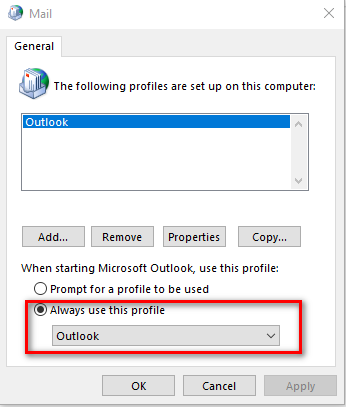
Connecting the newly created profile with Outlook - Restart your computer to enforce the changes, then launch Outlook and see if the problem is fixed at the next computer startup.