Fix: No Audio “This Device Cannot Start. (Code 10)” Error
Almost every single person who has a computer uses it to listen to music, watch movies and/or play games, which is why a computer losing its ability to play audio can be a pretty big deal. Windows computers can lose their ability to play audio for a wide variety of different reasons, and just one of these reasons is the Code 10 issue. The Code 10 issue is where a Windows computer’s audio device fails to start, leading to the computer not being able to play any audio.
If you can no longer hear any audio from your computer, you may want to check to make sure that the cause of the issue in your cases is, indeed, the Code 10 error before you try to do something about it. In order to verify whether or not the Code 10 error has caused your computer to no longer be able to play any audio, press the Windows Logo key + R to open a Run dialog, type devmgmt.msc into the Run dialog and press Enter to launch the Device Manager, double click on the Sound, video and game controllers section to expand it and locate and double click on your computer’s audio device (the High Definition Audio Device, for example). If you see the following error message in the Device status section of the Properties dialog that opens up, you are indeed affected by the Code 10 issue:
“This device cannot start. (Code 10)”
If you are affected by this issue, do not fret as you have quite a few viable options when it comes to trying and solving the Code 10 issue. The following are some of the most effective solutions that can be used to try and get rid of the Code 10 problem and restore an affected computer’s ability to play audio:
Solution 1: Make sure that the Windows Audio service is started
In many cases, the Code 10 issue is born when the Windows Audio service is not started or fails to start. That being so, you should, first and foremost, make sure that the Windows Audio service is started and is set to start as soon as the computer boots up, and see if that fixes the problem. In order to do so, you need to:
- Press the Windows Logo key + R to open a Run
- Type services.msc into the Run dialog and press Enter.
- Locate and double click on the Windows Audio service in the right pane.
- Open the dropdown menu in front of Startup type and click on Automatic to select it, configuring the service to start as soon as the computer boots up. Click on Apply. Click on OK.

- Restart the computer so that the changes may take effect.
Check to see whether or not the issue has been resolved once the computer boots up.
Solution 2: Update the drivers for the computer’s audio device
- Press the Windows Logo key + R to open a Run
- Type devmgmt.msc into the Run dialog and press Enter to launch the Device Manager.
- Double click on the Sound, video and game controllers section to expand it.
- Locate and double click on your computer’s audio device (the High Definition Audio Device, for example).
- Navigate to the Driver
- Click on Update Driver
- Click on Search automatically for updated driver software.
Allow Windows to search for an updated version of the drivers for the computer’s audio device. If Windows does find an updated version of the drivers, it will download and install it, and once it is done, check to see if the problem has been resolved.
Solution 3: Uninstall the computer’s audio device
- Press the Windows Logo key + R to open a Run
- Type devmgmt.msc into the Run dialog and press Enter to launch the Device Manager.
- Double click on the Sound, video and game controllers section to expand it.
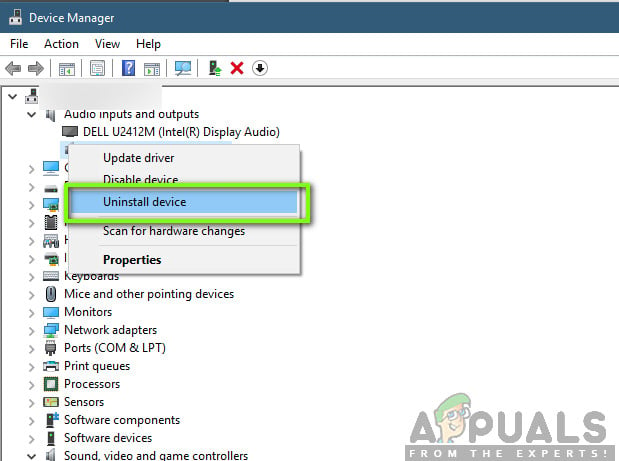
- Locate and right-click on your computer’s audio device (the High Definition Audio Device, for example).
- Click on Uninstall in the context menu.
- Enable the Delete the driver software for this device option by checking the checkbox beside it. Click on OK.
- Wait for the audio device to be uninstalled, and then restart your computer.
When your computer boots up, it will automatically reinstall the audio device, and once it has done so, you may check to see if that rid your computer of the Code 10 problem.
Solution 4: Get rid of the Code 10 problem by tweaking the computer’s registry
- Press Windows Logo key + R to open a Run
- Type regedit into the Run dialog and press Enter to launch the Registry Editor.
- In the left pane of the Registry Editor, navigate to the following directory:
HKEY_LOCAL_MACHINE > SYSTEM > CurrentControlSet > Control > Class
- In the left pane of the Registry Editor, click on {4D36E965-E325-11CE-BFC1-08002BE10318} to have its contents displayed in the right pane.
- In the right pane of the Registry Editor, locate and right-click on the registry value titled UpperFilters, click on Delete in the context menu and click on Yes in the resulting popup to confirm the action.
- Next, locate and right-click on the registry value titled LowerFilters, click on Delete in the context menu and click on Yes in the resulting popup to confirm the action.
 Note: If you don’t see the UpperFilters registry value or the LowerFilters registry value, this method isn’t for you. However, if you only have one of them, delete the one that you have and move on.
 - Close the Registry Editor.
- Restart your computer. Check to see whether or not the issue has been fixed once your computer boots up.
Solution 5: Uninstalling Audio Controller and Power Cycling
Another last thing to try is uninstalling the Audio Controller from your device and then power cycling your computer. When we uninstall the controller and boot the computer back again, Windows will notice the missing Audio controller and will automatically install the default drivers back in. This fixed the problem for numerous users. If default drivers don’t work, you can always update them to the latest build later on.
- Press Windows + R, type “devmgmt,msc” in the dialogue box and press Enter.
- Once in the Device manager, expand the Audio category and locate ‘High Definition Audio Controller’. Right-click on it and select Uninstall.
- After uninstalling the device, Shut down your computer. Make sure that you do not restart.
- After the computer is shut down, unplug the power button from the main plug. Now press and hold the button for around 1 minute.
- Wait for an additional 4-5 minutes. Now you can plug everything back and turn on the laptop/PC.
Note: If you have a laptop, you should also consider taking out the battery of the laptop.