How to Fix KB5022289 Failed Install Issues in Windows 11/10
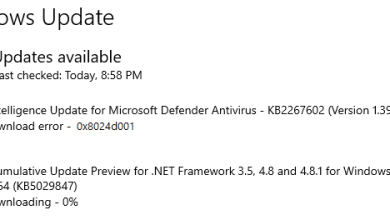
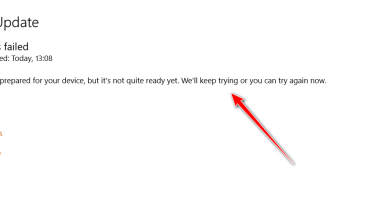
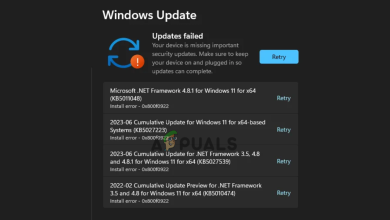
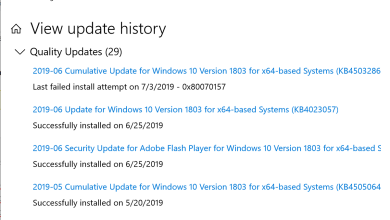
When updating Windows, you might encounter the issue where Microsoft KB5022289 fails to install. This indicates that the update was downloaded but encountered a problem during installation. Various factors can lead to this, such as a poor internet connection, insufficient storage space, or interference from third-party programs.

Corrupted system files, virus and malware attacks, and hardware issues during the installation process can also contribute to the failure of the update.
To fix this problem, you can run the Windows troubleshooter, disable third-party programs, or restart your computer. The solutions provided below should help you resolve the KB5022289 error that failed to install on your Windows PC.
1. Free up Disk Space
To install updates, Windows requires a certain amount of storage. If there’s not enough space, the update might fail and result in an error. You can delete unnecessary files and applications to free up space for the update.
1.1 Use Disk Cleanup Tool
- Click the Start button, type disk cleanup in the search box, and click Open.
- Select the files or folders to clean up and then click OK.

Use Disk Cleanup Tool - Pick the files you want to delete and click OK.
- At the prompt, confirm the deletion by selecting Delete Files.

Use Disk Cleanup Tool - Return to File Explorer and refresh the disk you cleaned up.
1.2 Uninstall Desktop Programs You No Longer Need
- Press the Start button and type Control Panel.
- Select Open, then navigate to Programs.
- Choose Programs and Features.

Uninstall Desktop Programs You No Longer Need - Select a program and then click Uninstall.

Uninstall Desktop Programs You No Longer Need
2. Remove External Hardware
Before updating, remove all external hardware such as printers, hard drives, or scanners from your computer, as they might interfere with the update process.
- Select Show hidden icons on the Taskbar, right-click the hardware icon, and choose the item you want to remove.

Remove External Hardware - Navigate to Windows Explorer: Safely Remove Hardware and Eject Media, and enable it.
- If that doesn’t work, make sure the device has stopped any ongoing activity before removal.
- Click on Start, proceed to Settings, and choose Devices.
- Select the hardware, right-click it, and choose Remove Device.

Remove External Hardware - Confirm with hardware manufacturers for any updates or new drivers necessary.
3. Run Windows Update Troubleshooter
If you encounter an error code while installing the Microsoft KB5022289 update, running the Windows Update Troubleshooter can help resolve the issue.
- Click on Start, select Settings, then go to Update & Security.
- Select Troubleshoot and click on Additional Troubleshooters.

Run Windows Update Troubleshooter - Pick Windows Update, then click Run the Troubleshooter.
- Restart the computer after the troubleshooter completes.
- To check for new updates, click Start, head to Settings, and go to Windows Update.
- Look for updates and install any that are available.

Run Windows Update Troubleshooter
4. Run the System File Checker Tool (SFC) and DISM
The System File Checker (SFC) can be used to search for and repair missing or corrupted system files in the Windows operating system. DISM (Deployment Image Service and Management Tool) can download new Windows images from the servers to repair damaged Windows images.
- Update Windows to the latest version and restart your computer.
- Type command prompt in the search bar, right-click it, and select Run as administrator.
- Enter sfc /scannow and press Enter.
 and DISM")
Run the System File Checker Tool (SFC) and DISM - If the error persists, run the following commands one at a time:
dism /online /cleanup-image /scanhealth
dism /online /cleanup-image /checkhealth
dism /online /cleanup-image /restorehealth
- Once you see the message The operation completed successfully, type exit or close the Command Prompt window.
5. Repair Hard-Drive Errors
Hard drive issues can cause errors on your computer when updating drivers or software. Repairing these errors is crucial for data integrity and system functionality. This process involves scanning the disk for errors and fixing them accordingly.
- Launch the File Explorer from the taskbar.
- From the left pane, select This PC.

Repair Hard-Drive Errors - Under Devices and Drives, right-click on the desired hard drive and choose Properties.
- Navigate to the Tools tab.
- In the error checking section, click Check.

Repair Hard-Drive Errors - Choose Scan Drive and wait for the scan to finish.
6. Check Device Manager for Errors
Device Manager displays the operational status of devices connected to your computer. Issues with any of these devices are indicated by a mark, such as a red X, a down arrow, or a commonly seen yellow exclamation mark. It is important to check and resolve any issues present.
- Press Start, type Device Manager in the search bar, and open the app.

Check Device Manager for Errors - Expand the category containing the device you wish to check.
- Right-click on the Device and select Properties.
- Go to the General tab.
- Review the component’s status in the Device Status section.

Check Device Manager for Errors - If the status indicates that the device is not working properly, there will be an error code and a description to go with it.
- Consider enabling the driver if it appears to be disabled.
If the error persists, you may need to reinstall the driver. Follow these steps:
- Search for Device Manager in the search box and open the app.
- Right-click the device driver you wish to uninstall and select Uninstall.
- Click the Uninstall button and restart your computer.

Reinstall Device Driver - Windows will automatically reinstall the driver upon restart.
If the problem persists, consider contacting Microsoft for further assistance. Leave your comments below, and our experts will respond.