[Fix] MME Internal Device Error in Premiere
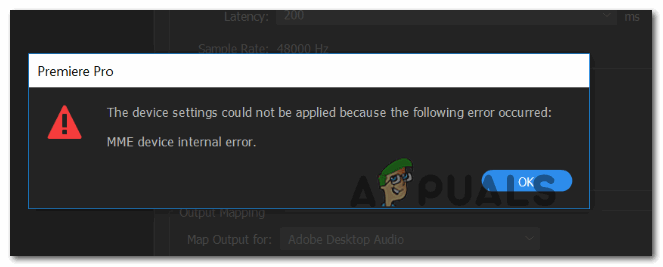
Some Windows users are reporting that they see the ‘MME Internal Device‘ error in Premiere Rush and Adobe Premiere PRO and no audio output is available when editing a video. This problem is mainly reported to occur on Windows 10.
When troubleshooting for this particular issue, you should start by seeing if your operating system is not capable of fixing the problem automatically. Do this by running the Recording Audio Troubleshooter and applying the recommended fix.
If this doesn’t work and you don’t really require microphone input when editing your videos in Adobe Premiere PRO or Adobe Premiere Rush, you can fix the problem swiftly by accessing the Audio Hardware settings and changing the Default Input to None. But doing this will restrict Adobe from tuning in to the audio your connected microphone picks up.
Another possibility that might end up causing the ‘MME Internal Device‘ error is a restriction imposed by Windows 10. It’s possible that microphone access is turned off for the device where you’re using Adobe Premiere on. In this case, you should be able to fix the issue by navigating to the Privacy tab of the Settings app and allowing Microphone access for this device.
However, if you’re encountering the problem on Windows 10, you can also expect to see this problem due to an Audio Capture bug that was introduced along with the Creator’s update and affects UB audio capture on various video editing apps. In this case, you can either install the hotfix released by Microsoft via Windows Update or you can install the 3rd party WDM Audio driver ASIO4ALL.
If everything else fails, you need to seriously consider that you are actually facing some kind of system file corruption that is effecting the recording infrastructure of your OS. In this case, you can either perform a clean install or a repair install in order to refresh every relevant OS component that might be responsible for this problem.
Method 1: Running the Recording Audio Troubleshooter (Windows 10 Only)
In the event that you’re experiencing microphone issues with other applications than Adobe Premiere Pro, it’s very likely that you’re dealing with a generic inconsistency that your Windows 10 OS might be capable of resolving automatically.
You can expect to see the ‘MME Internal Device‘ error due to an incorrect recording configuration – In this case, running the Recording Audio troubleshooter might fix the issue for you (if the problem you’re encountering is already covered by a repair strategy).
This utility was build to scan your computer for common audio recording problems and automatically applied verified fixes if a compatible scenario is found. Several users that were previously dealing with the ‘MME Internal Device‘ error have confirmed that this method worked for them.
If you’re encountering this issue on Windows 10, follow the instructions below to run the Recording Audio troubleshooter and apply the recommended fix:
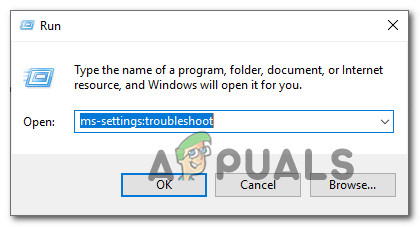
- Press Windows key + R to open up a Run dialog box. Next, type “ms-settings:troubleshoot” inside the text box and press Enter to open up the Troubleshooting tab of the Settings app.
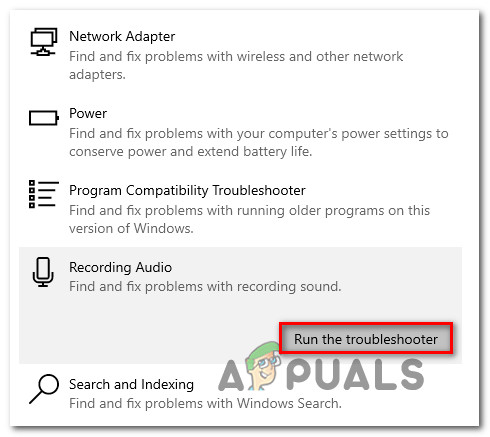
Accessing the Troubleshooting tab - Once you’re inside the Troubleshooting tab, move over to the right-hand menu and click on the Recording Audio entry. Next, click on Run the troubleshooter from the newly appeared context menu to launch the troubleshooter.
Running the Recording Audio troubleshooter - When you’re prompted by the UAC (User Account Control), click Yes to grant admin access to this troubleshooting utility.
- Wait patiently until the initial analysis is complete, then take a look at the results. If the utility ends up recommending a fix, apply it swiftly by clicking on Apply this fix.

Apply this fix Note: Keep in mind that depending on the fix that gets recommended, you might need to follow an additional set of instructions in order to apply the fix.
- After the recommended fix is successfully deployed, reboot your computer and see if you are able to edit videos in Adobe premiere without encountering the ‘MME Internal Device‘ error.
In the event that the same problem is persisting, move down to the next potential fix below.
Method 2: Set Default Input to None
If you don’t really care about microphone input, then there’s a really simple fix that will allow you to work around the ‘MME Internal Device‘ error – You can simply go into your Adobe Premiere settings and change Input from Audio Hardware to None.
This small but important modification will ensure that Premiere is no longer listening from microphone sounds, so the error message will stop appearing even in situations where Windows is preventing the Premiere app (and other 3rd party apps) from using the built-in microphone.
This is more of a workaround rather than a fix, but a lot of affected users have confirmed that this operation was successful in allowing Premiere Pro and Premiere Rush users to top encountering the ‘MME Internal Device‘ error.
If you want to give this workaround a try, follow the instructions below:
- Open your Premiere application and use the ribbon at the top to select Edit, then navigate to Preferences > Audio Hardware.
- Once you’re inside the Audio Hardware menu, move over to the right-hand side menu, and expand the drop-down menu associated with Default Input.
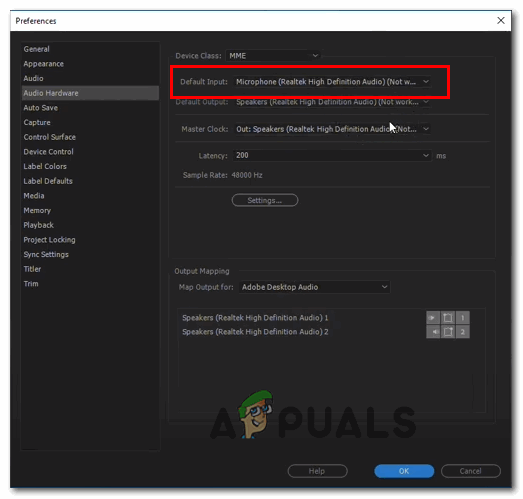
Modifying the Default Input Menu - From the Default Input drop-down menu, select None, then save the changes by clicking on Ok.
- Restart your Adobe Premiere application and see if the issue is now resolved.
In case you really need Microphone input and you can’t really afford to disable it from the Audio Hardware menu, move down to the next potential fix below.
Method 3: Allowing Microphone access (Windows 10 Only)
If you’re encountering this problem on Windows 10, and a trip to Preferences > Audio Hardware (in Adobe Premiere) is pointing out that your audio devices aren’t working properly, you’re likely seeing the ‘MME Internal Device‘ error because the microphone access for this device is turned Off.
Several affected users that encountered a similar issue have confirmed that they managed to fix the issue by accessing the privacy settings on Windows 10 and modifying the default behavior for the active microphone so that it’s able to access the device it’s on.
If the scenario described looks like it could be applicable to your current situation, follow the instructions below to allow Microphone access and resolve the ‘MME Internal Device‘ Error on Windows 10:
- Open up a Run dialog box and press Windows key + R. Next, type ‘‘ms-settings:privacy-microphone” and press Enter to open up the Microphone Privacy window for the Windows Settings app.
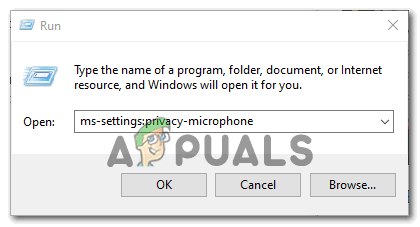
Running the ‘ms-settingsprivacy-microphone’ in Run command - Once you’re inside the Settings app, move over to the right-hand section and click the Change button associated with Allow access to the microphone on this device.
- Next, from the newly appeared context menu, enable the toggle so that the Microphone has access to this device.

Enabling Microphone access to this device - After you manage to do this modification, close the Settings menu, restart Adobe Premiere and see if the problem has been fixed.
In case you still end up seeing the ‘MME Internal Device‘ error, move down to the next potential fix below.
Method 4: Resolving the Audio Capture bug on Windows 10
If you’re encountering the issue on Windows 10 that’s not updated to the latest build and none of the potential fixes above have worked for you, it’s very likely that you’re dealing with a bug with the Creators Update on Windows 10.
This is a well-known problem that affects USB audio capture with various video editing apps including Adobe Premiere Pro and Adobe Premiere Rush.
If this scenario is applicable, you have two ways forward:
Option A – Installing every pending update along with the fix that resolves this inconsistency (Microsoft has already patched this problem via a hotfix that gets installed via Windows Update)
Option B – Installing the ASIO4ALL Universal ASIO Driver for WDM Audio in order to circumvent the generic Audi driver bug.
Regardless of your preferred way of fixing the problem, we have created two separate guides that will walk you through both Option A and Option B.
If you want to fix the ‘MME Internal Device‘ error by installing every pending Windows Update, follow Option A (Recommended. On the other hand, if you have no desire to update and install the Microsoft provided hotfix, follow Option B.
Option A: Installing the hotfix via Windows Update
- Open up a Run dialog box by pressing Windows key + R. Next, inside the text box, type ”ms-settings:windowsupdate’ and press Enter to open up the Windows Update tab of the Settings app.
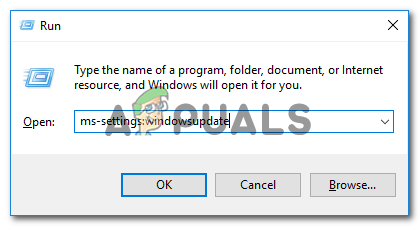
Opening the Windows Update screen - Once you’re inside the Windows Update screen, move down to the left-hand section and click on Check for Updates button.
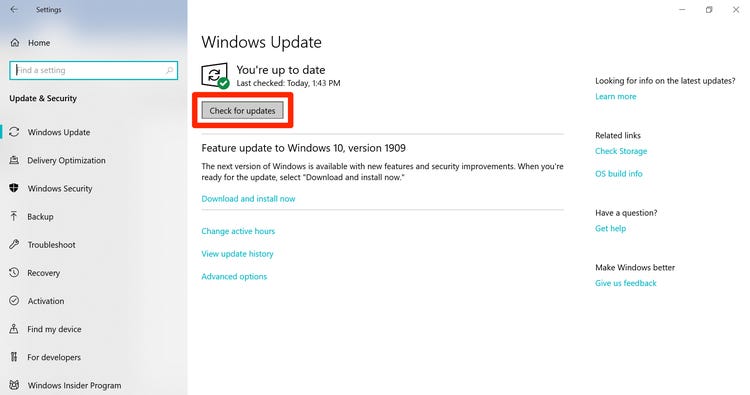
Check for Updates - Next, wait for the initial scan to complete. If the scan reveals that there are pending Windows Updates that are waiting to be installed, follow the on-screen instructions to Download & Install the pending updates.
Note: In the event that you have a lot of pending updates that are waiting to be installed, you might be prompted to restart your computer before you get the chance to install them all. If this happens, restart as instructed, but make sure to return to the same screen once the next startup is complete. - Once you made sure that every pending update is installed, reboot your machine one final time and see if the ‘MME Internal Device‘ error has been fixed by trying to edit a video in Adobe Premiere PRO or Adobe Premiere Rush.
Option B: Installing ASIO4All WDM Audio Driver
- Visit this link (here) and download the latest version of the Asio4all driver by downloading the latest version associated with your language.
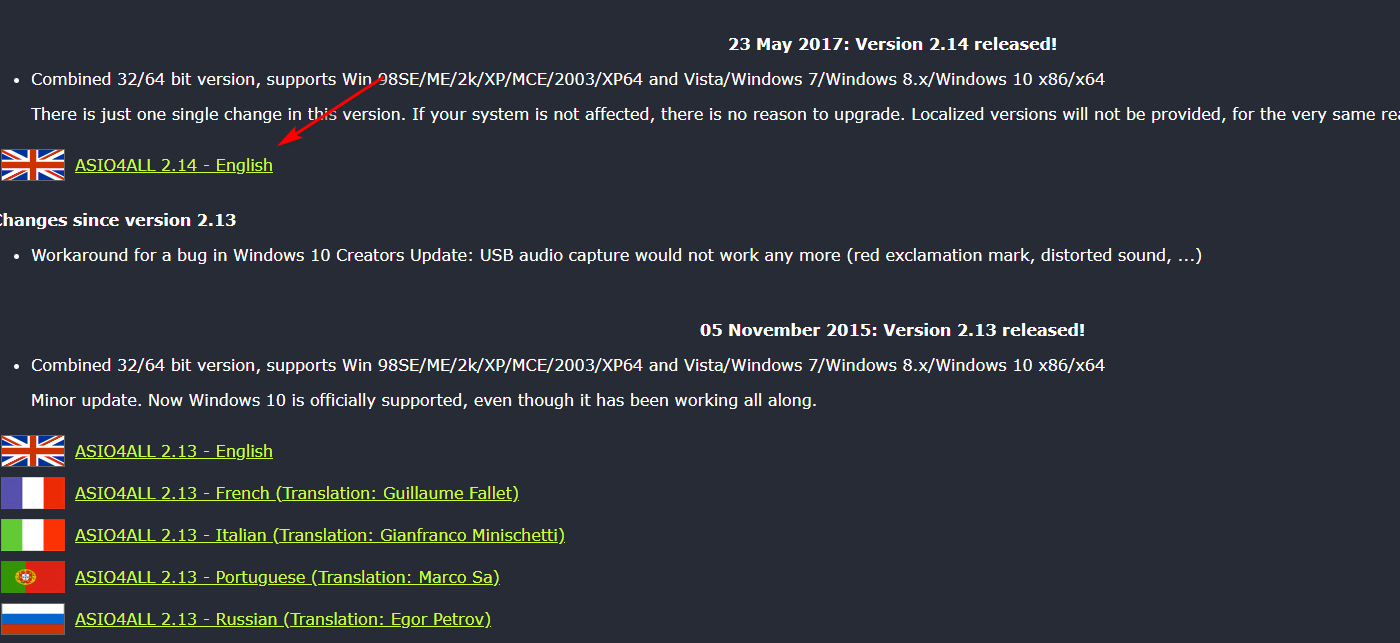
Downloading the latest version of ASIO4All - Once the download is complete, open the installer executable, and click Yes at the User Account Control prompt to grant administrative access.
- Next, follow the installation prompts to complete the installation of the ASIO4All driver.
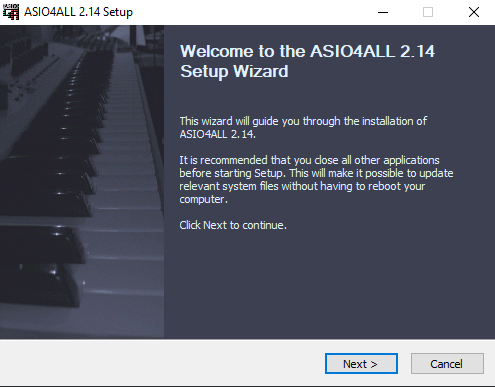
Installing the ASIO4ALL driver - After the operation is complete, perform a system restart and see if the issue is now resolved.
In case the same problem is still persisting, move down to the final fix below.
Method 5: Performing an in-place repair
In the event that none of the potential fixes above have allowed you to fix the issue, it’s very likely that the ‘MME Internal Device‘ error is somehow being facilitated by some type of system file corruption that’s affecting your OS files.
If this scenario is applicable, the only way to fix the issue is to perform a procedure that ends up refreshing every Windows component and ensures that there’s no corrupted data that might end up causing this problem.
Of course, the most popular option is a clean install, but this is not the most efficient solution. Sure, it will refresh every OS component, but unless you backup your data in advance, you can expect total data loss on your OS drive. This includes personal media, installed applications, games, and user preferences.
If you want the most efficient approach, go for a repair install (in-place reinstall) – While this operation will require you to insert a compatible installation media, the main advantage is that the procedure will only reinstall system files (Windows components), without touching your applications, games and user preferences.