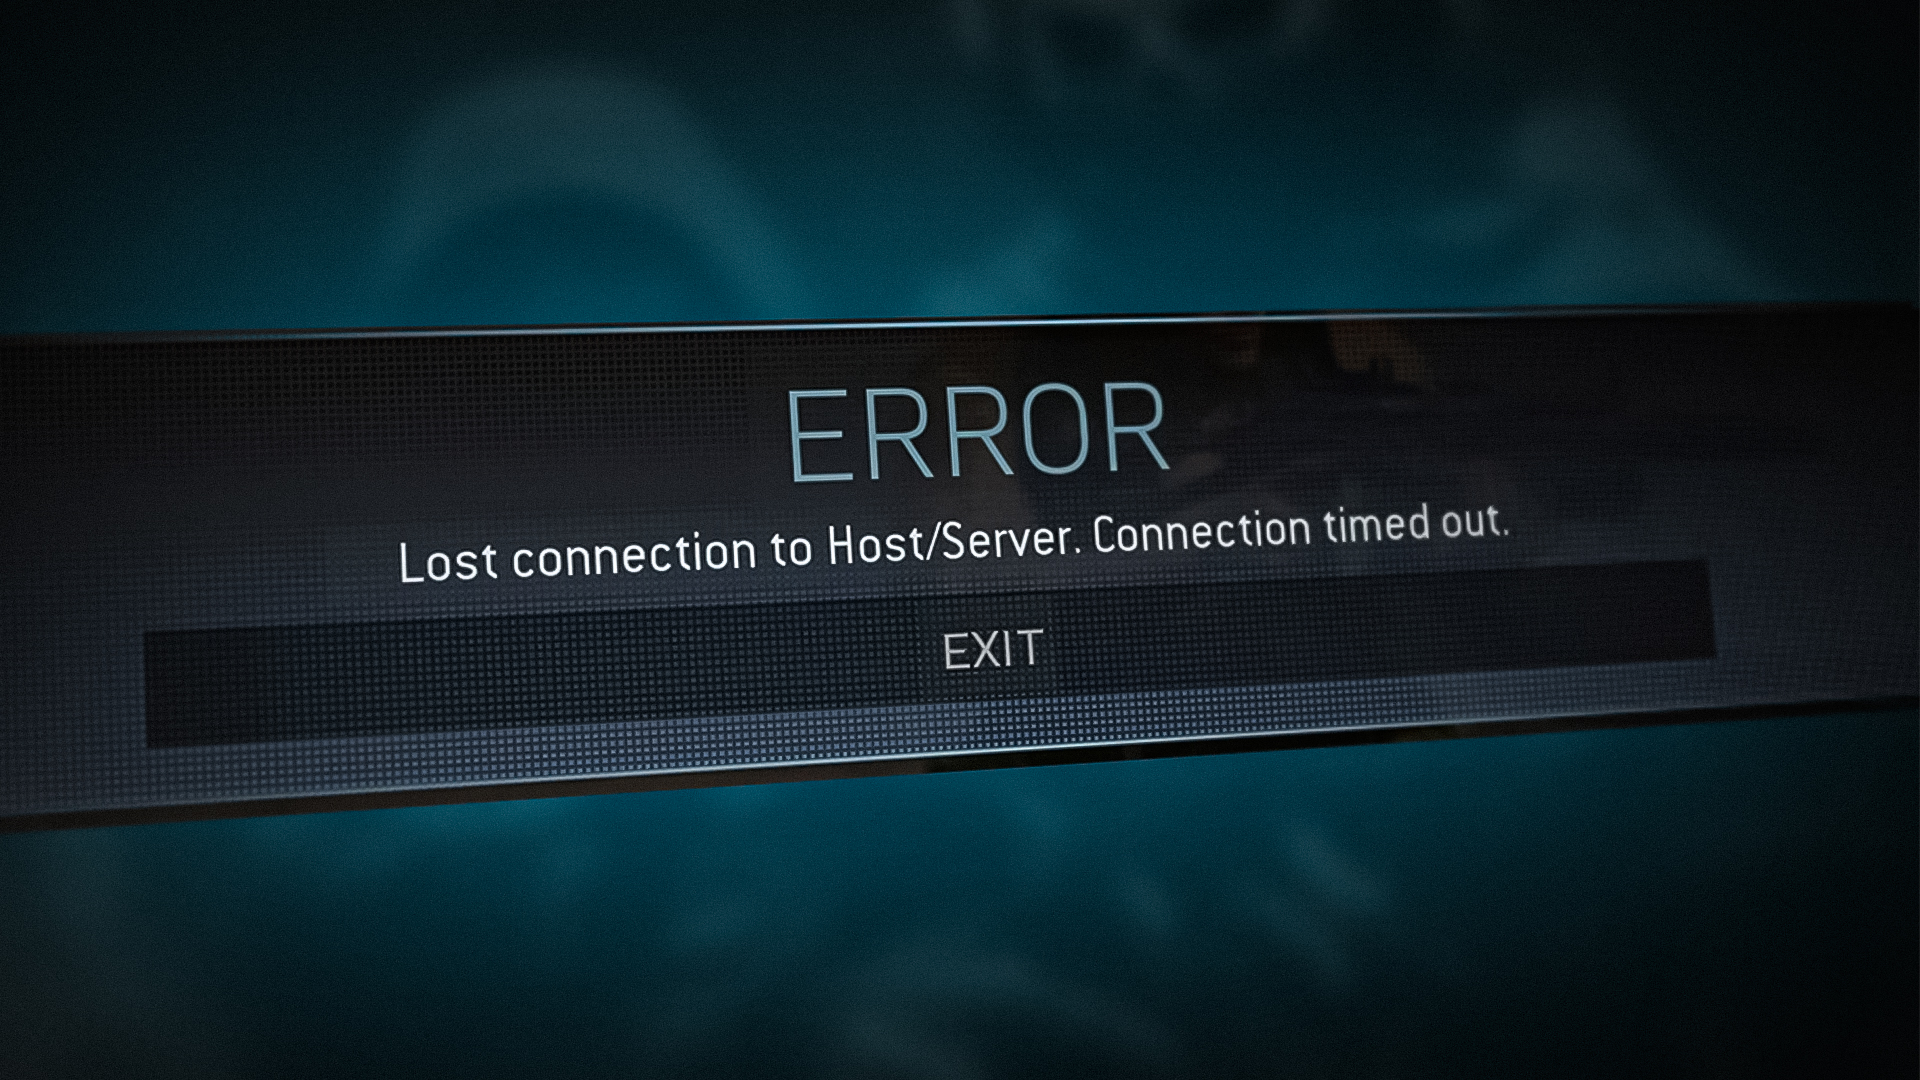
Fix: “Lost Connection To Host/Server” Error in COD: Warzone
The error “Lost connection to host on Warzone” mainly occurs due to issues with your game file configurations or because of problems with your network. The game’s configuration issues may range from the absence of administrative rights from the game to corrupt game configuration files.
Before following any of the mentioned methods below, it is important to check if the game’s servers are up & running because if the game servers status if offline you won’t be able to play the game. Follow these steps to check if the servers are up & running:-
- Head over to this official link provided by Activision: (here).
- Now check if it says “All Platforms” Online. If the servers are working fine it should look like this:-
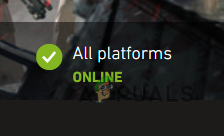
Warzone Servers Online
If it says offline it means that the servers are down right now and you won’t be able to play the game in that case you will have to wait until the servers are online. If the servers are online and you are still facing this issue you can follow the methods below.
1. Change System’s Preferences to Best Performance
If you are using your system in the Balanced or Power Efficiency Mode, then that system sacrifices essential computing power to conserve the system battery. However, this essential computing power is needed by the game and hence the issue occurs when it is not present. Here, changing the system’s power mode to the best performance may solve the problem.
- Right-click Windows and select Settings.
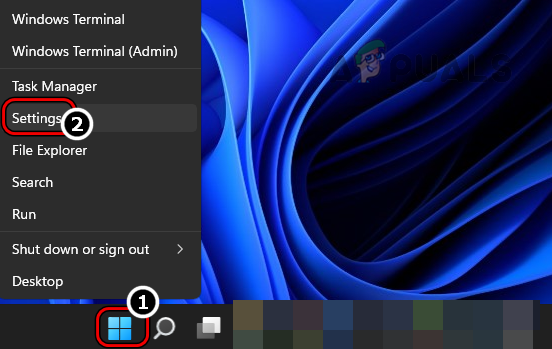
Open Windows Settings Through the Quick Access Menu - Now, in the right pane of the Setting’s System tab, open Power & Battery and expand the dropdown of Power Mode.
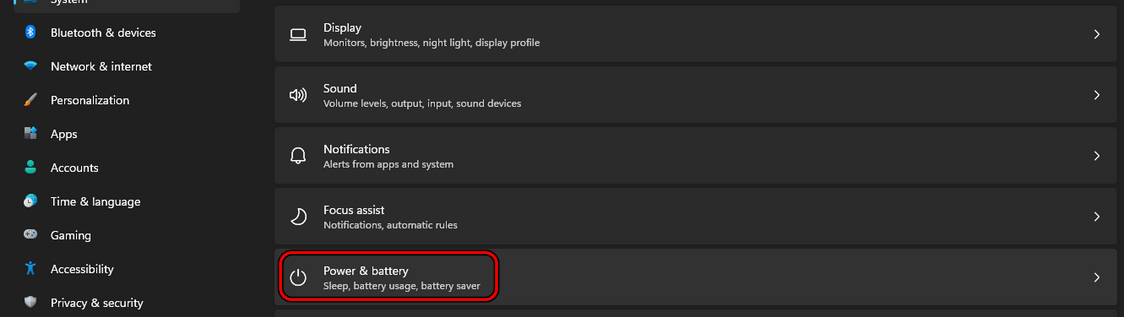
Open Power & Battery in the System Tab of the Windows Settings - Then select Best Performance and afterward, launch Warzone to check if its lost connection to host problem is cleared.
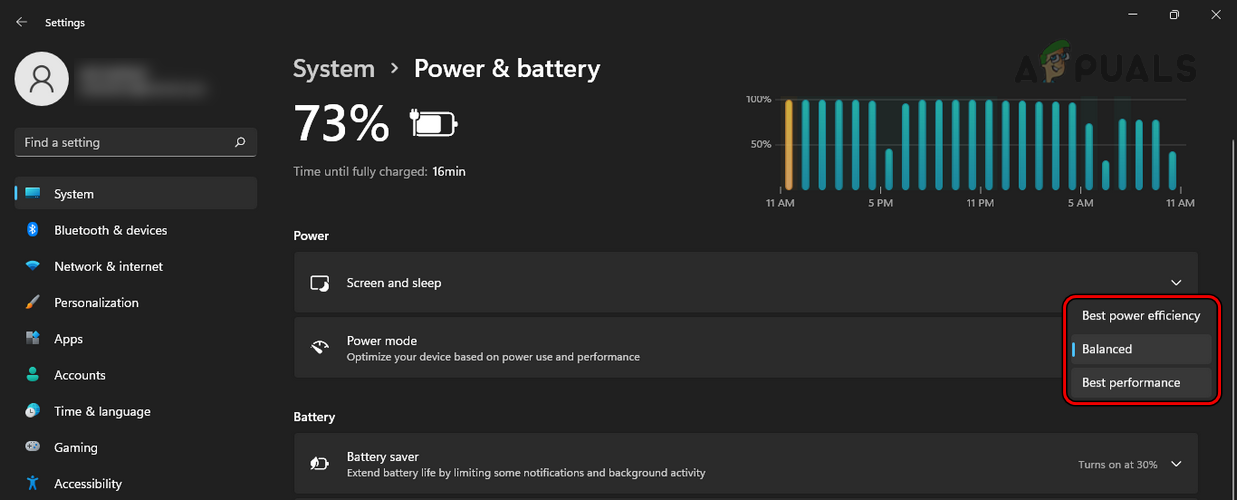
Change the System’s Power Mode to Best Performance
2. Launch Battle.net Client and Warzone as an Administrator
If the Battle.net client and Warzone are failing to access a resource essential for their operation due to UAC restrictions, then that could also result in the Warzone connection problem. Launching the Battle.net client and Warzone as an administrator may resolve the issue.
- Right-click on the Battle.net client’s shortcut and select Run as Administrator.
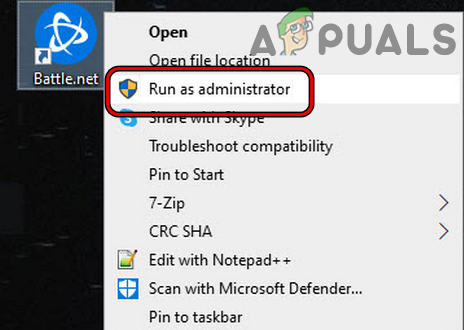
Open the Battle net App as an Administrator - Now select Warzone and expand its Options.
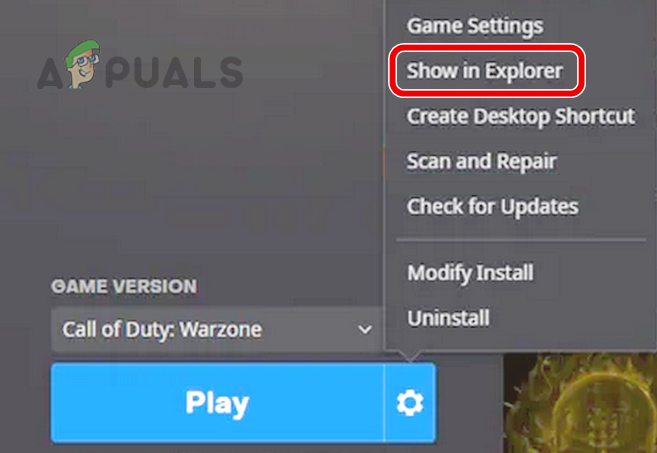
Show Warzone in Explorer - Then choose Show in Explorer and the resulting window, right-click on Warzone’s EXE file and select Run as Administrator.
- Now check if Warzone is clear of the issue.
3. Enable V-Sync in the Game’s Settings
If Warzone is failing to match the game’s framerate with your display’s framerate, then it may glitch out the display modules of the game and cause a connection issue. In this case, enabling V-Sync in the game’s settings may resolve the issue.
- Head to the Game Settings and steer to its Graphics tab.
- Now enable Sync Every Frame (V-Sync) and then relaunch the Warzone game to check if it is clear of the connection issue.
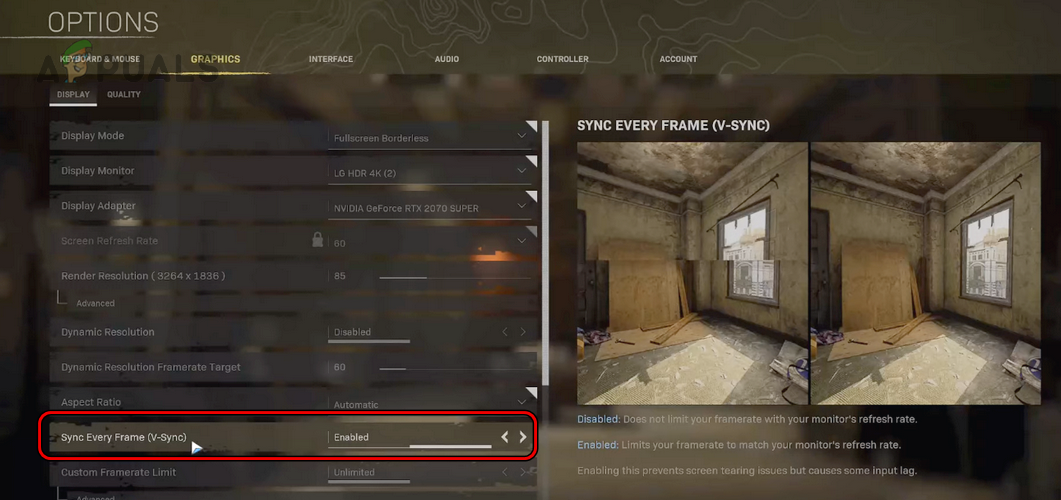
Enable Sync Every Frame (V-Sync) in the Warzone Settings - If not, check if limiting the game’s FPS to 60 resolves the issue.
4. Flush the DNS Cache of Your System
If the DNS cache of your system has gone corrupt, then it may hinder the proper and timely translation of the web addresses essential for the operation of the Warzone game, thus causing the issue. In this scenario, flushing the DNS cache of your system may clear the connection problem.
- Click Windows, search for Command Prompt, right-click on its result, and in the sub-menu, select Run as Administrator.
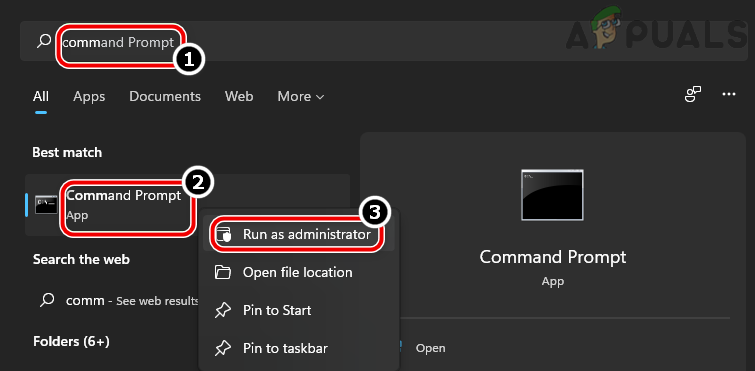
Open Command Prompt as Administrator - Now, one by one, execute the following:
ipconfig /flushdns

netsh winsock reset

ipconfig /release

ipconfig /renew
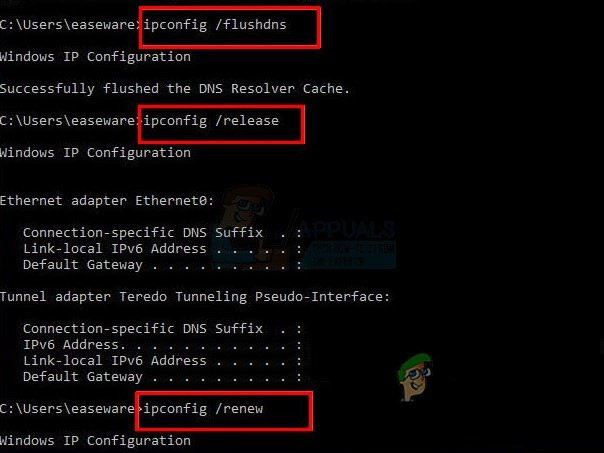
Flush DNS Cache of Your System - Once done, close the Command Prompt windows and restart your PC.
- Upon restart, launch Warzone and check if it is clear of the lost connection issue.
5. Disabling Cached Spot and Sun Shadows
Warzone may show the host connection problem if its cached spot and sun shadows are corrupt as due to the corruption, essential game modules cannot process the designated tasks, thus causing the connection error. In this scenario, disabling Cache Spot Shadows and Cache Sun Shadows may resolve the issue.
- Head to the Warzone Settings and open its Advanced Video Settings.
- Now, in the Light and Shadow section, disable Cache Spot Shadows and Cache Sun Shadows.
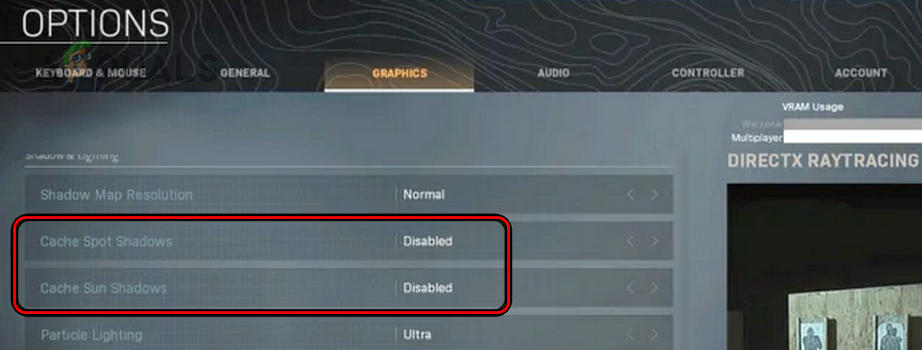
Disable Cache Spot Shadows and Cache Sun Shadows in the Warzone Graphics Settings - Then apply the changes made and relaunch the Warzone game to check if its lost connection error is cleared.
6. Rename Your Warzone Gamer Tag
If your Warzone gamer tag does not match your gamer tag on other Call of Duty games, then the COD servers may refuse to respond to certain queries from your profile and cause various issues like the one under discussion. In this context, renaming your Warzone gamer tag as per your COD profile may resolve the issue.
- Go to Warzone Options and head to its Account tab.
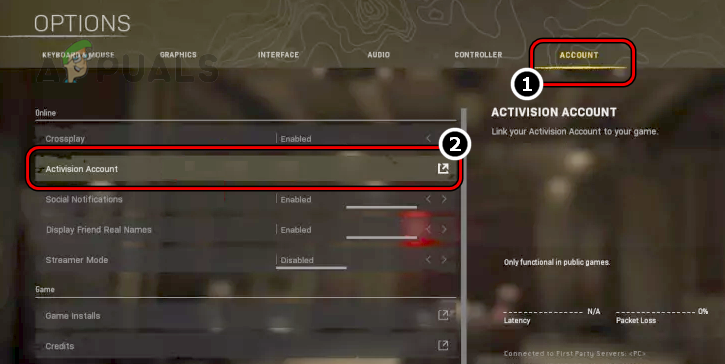
Click on Activision Account in the Account Tab of Warzone Settings - Now click on Activision Account and change your Nickname.
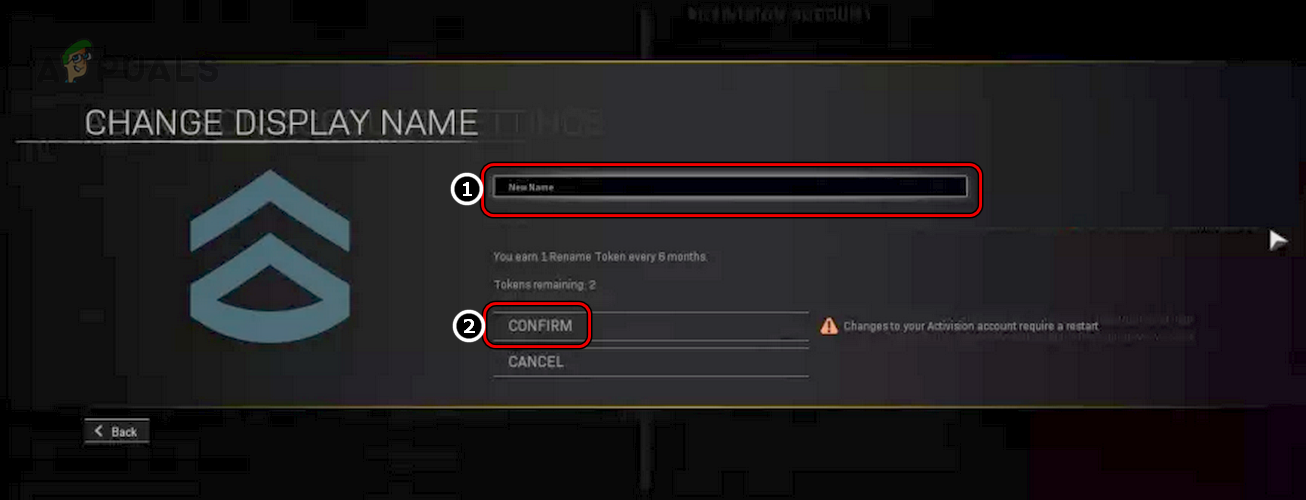
Change Your Gamer Tag for Warzone - Then relaunch the Warzone game to check if its lost connection problem is cleared.
7. Disable Warzone’s Crossplay Feature
If Warzone’s Crossplay feature is glitched, it can break the game’s communication with its server and cause various host connection issues. In this context, disabling the game’s Crossplay feature may solve the problem.
- Head to the Warzone Options and steer to the Account tab.
- Now disable the Crossplay feature and relaunch Warzone to check if it is operating normally. You may keep Crossplay chat enabled.
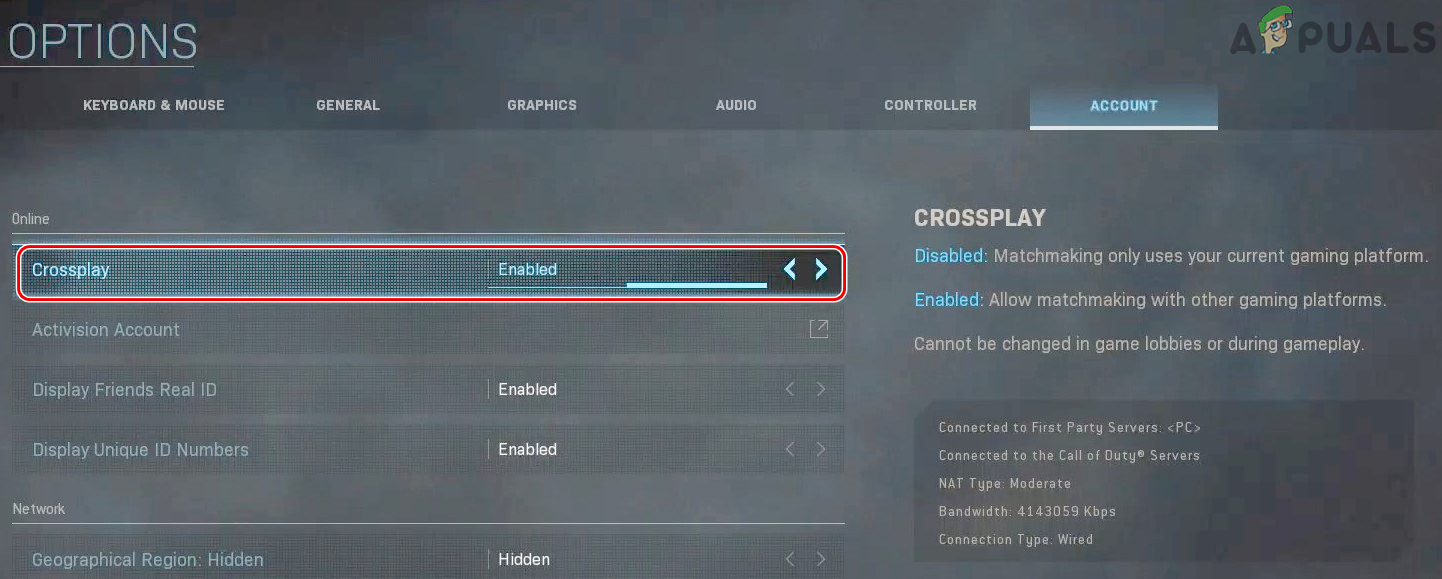
Disable Crossplay in the Account Tab of Warzone Options - If the Cross-Platform Play feature is already disabled, check if enabling it resolves the issue.
8. Delete Warzone’s Configuration File
You may also encounter this problem if the game’s configuration file is corrupt or if any customization to the game’s settings is barring the game from operating normally. In this case, deleting Warzone’s configuration file may clear the error. A new config file with default settings will be created on the game’s next launch.
- Firstly, make sure the Warzone game is closed and no process related to it or its launcher is operating in your system’s Task Manager.
- Then, right-click Windows and open Run.
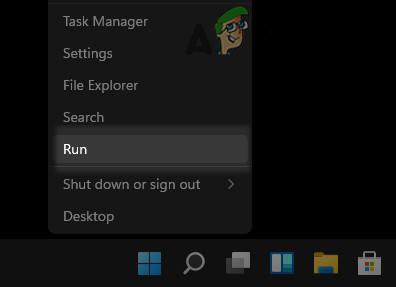
Open the Run Command Box from the Quick Access Menu - Now navigate to the following:
Documents
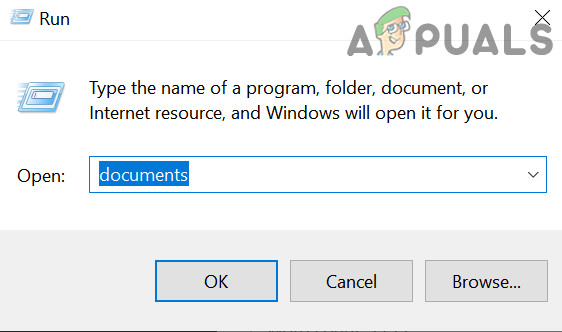
Open Documents Folder Through the Run Command Box - Now open the COD folder and double-click on the Players folder.
- Then backup config.cfg file and afterward, delete it.
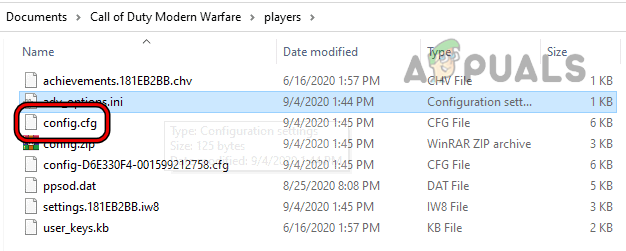
Delete Config.cfg File of Warzone - Now launch Warzone as an administrator and check if its connection issue is cleared.
9. Relink your Battle.net ID
A temporary glitch in COD servers could lead to broken connections between the host and the servers. Here, relinking your Battle.net ID may clear the glitch.
- Launch the Battle.net client and log out of the current profile.

Logout of Blizzard Launcher - Then close the Battle.net app and make sure no process related to Warzone or Battle.net is running in the system’s Task Manager.
- Now launch a web browser and head to the Call of Duty website.
- Then log in using your credentials and head to your profile.
- Now unlink the device (like a console or Blizzard launcher) where you are encountering the issue.
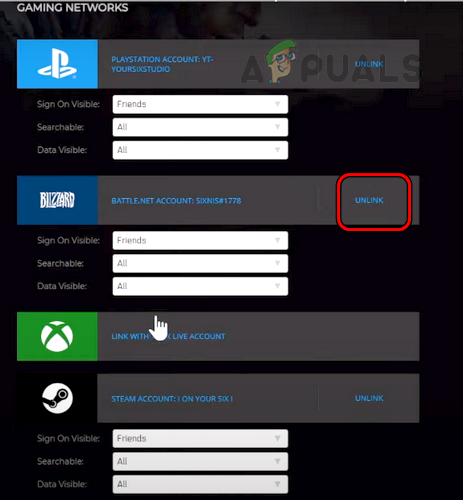
Unlink Your Blizzard ID on the Call of Duty Website - Then launch the Battle.net app as an administrator and log in using your credentials.
- Now launch Warzone and check if it is working fine.
10. Change the DNS Server of Your Device
If the DNS server of your system is failing to timely translate Warzone’s required web addresses, then that may fail to resolve addresses essential to the game. Here, changing the DNS server of your system, device, or console may resolve the Warzone issue. For illustration, we will go through the process of changing the DNS server on a Windows system.
- Right-click on the network icon in the system tray and open Network and Internet Settings.
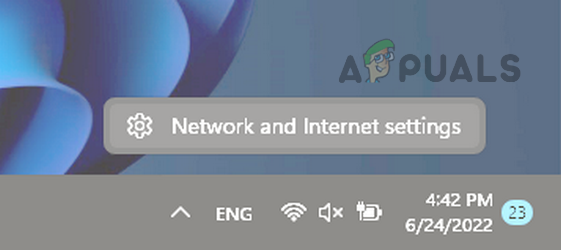
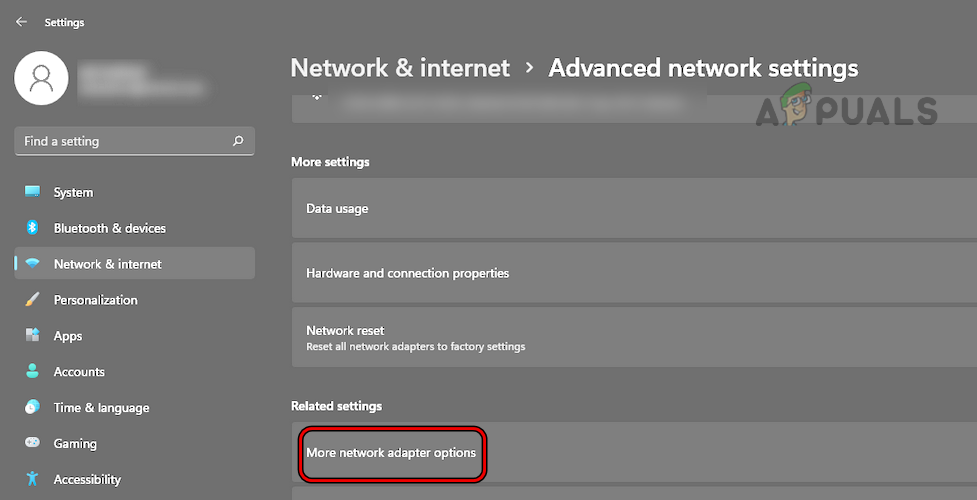
Open Network and Internet Settings of Your Windows PC - Now scroll down to the bottom and open Advanced Network Settings.

Open Advanced Network Settings of Your Windows PC - Again, scroll down till the end and select More Network Adapter Options (under Related Settings).
Open More Network Adapter Options in the Windows Settings - Then, right-click on your network connection (Wi-Fi or LAN) and select Properties.
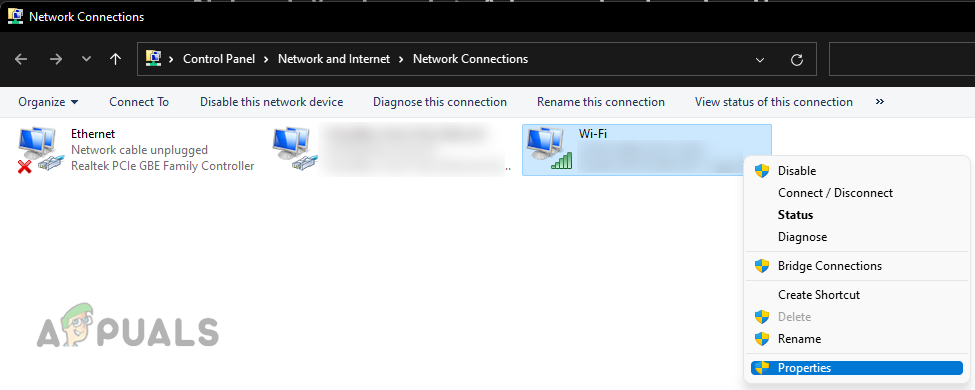
Open Properties of the Network Adapter - Now select Internet Protocol Version (TCP/IPv4) and click on Properties.
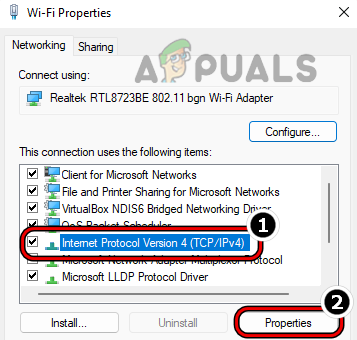
Open Properties of Internet Protocol Version 4 (TCP IPv4) - Then select the radio button Use the Following DNS Server Addresses and enter the following for the Preferred DNS Server:
8.8.8.8
- Now enter the following for the Alternate DNS Server:
8.8.4.4
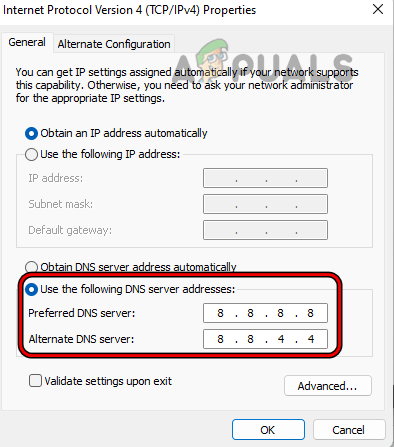
Set the Windows System’s IPv4 DNS to Google DNS - Then click on Apply/OK and afterward, launch Warzone to check if it is operating fine.
- If not and you are already using a non-default DNS, check if reverting to the default DNS servers of your system resolves the issue.
11. Roll back System’s Graphics Driver
If the issue started to occur after a graphics driver update, then incompatibility of the updated graphics driver with your system could be the root cause of the problem. In this context, rolling back the system’s graphics driver may clear the connection lost issue.
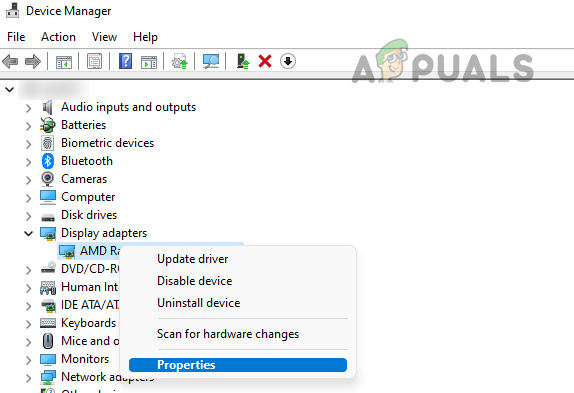
- Right-click Windows and open Device Manager.

Open Device Manager Through the Quick Access Menu - Now expand the Display Adapter tab and double-click on your graphics card.
Open Properties of the Graphics Card in the Device Manager - Then, in the driver’s Properties window, head to the Driver tab and click on Roll Back Driver.
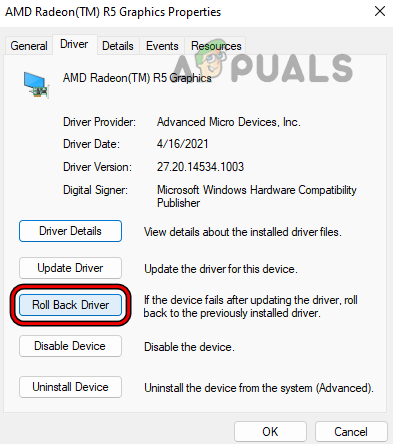
Roll Back the System’s Graphics Driver - Afterward, confirm to roll back the graphics driver and wait till the process completes.
- Once done, launch Warzone and check if it is operating fine.
- If that did not work, head to the OEM website (like Nvidia or HP) and download an older version of the graphics driver as per your system specs.
- Now install the older driver as an administrator and afterward, check if the Warzone is clear of the lost connection error.
12. Disable the System’s Antivirus and Firewall
If your PC’s firewall or antivirus is hindering the communication between Warzone and its servers in such a way that the client/server fails to parse the data packets corrupted by firewall/antivirus interference, then that could result in the problem at hand. In this context, disabling the system’s antivirus/firewall may clear the Warzone connection issue. For better interpretation, we will go through the process of disabling the ESET Internet Security.
Warning:
Advanced at your own risk as disabling the system’s antivirus or firewall could be risky at times and may expose your network, system, and data to threats.
- Expand the hidden icons of your system’s tray and right-click on the ESET icon.
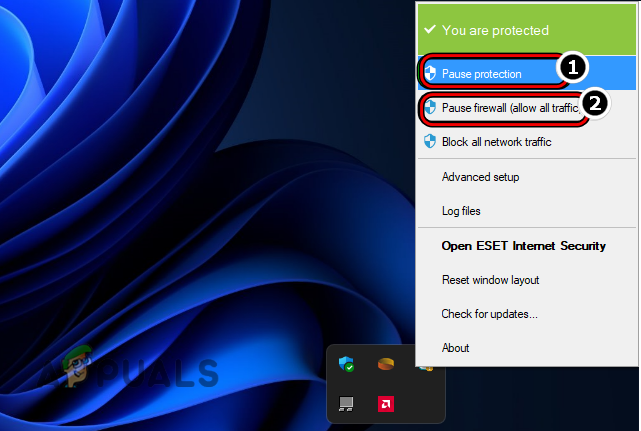
Pause ESET Protection and Firewall - Now select Pause Protection and if a UAC prompt is shown, click Yes.
- Then set the time for which you want to disable the protection (like 20 minutes) and again, right-click on the ESET icon in the hidden icons of the system tray.
- Now select Pause Firewall and afterward, confirm to pause the firewall of your PC.
- Once done, launch Warzone and check if it is operating fine.
- If not, check if disabling the router’s built-in firewall clears the lost connection to host error.
13. Disable the Router’s QoS Feature
A router’s QoS feature is used to prioritize the web traffic and quickly pass the traffic that the router “thinks” is critical while holding data packets from other sources. If the router’s QoS feature is holding the Warzone data packets while prioritizing other data packets, then that could result in the network problem under discussion. In this case, disabling the router’s QoS feature may clear the Warzone connection issue.
- Launch a web browser and steer to the management portal of your router. If asked to, make sure to log in by using your credentials.
- Then head to the Advanced tab of the router’s management portal and afterward, expand QoS Setup.
- Now, in the right pane, untick Turn Internet Access QoS On.
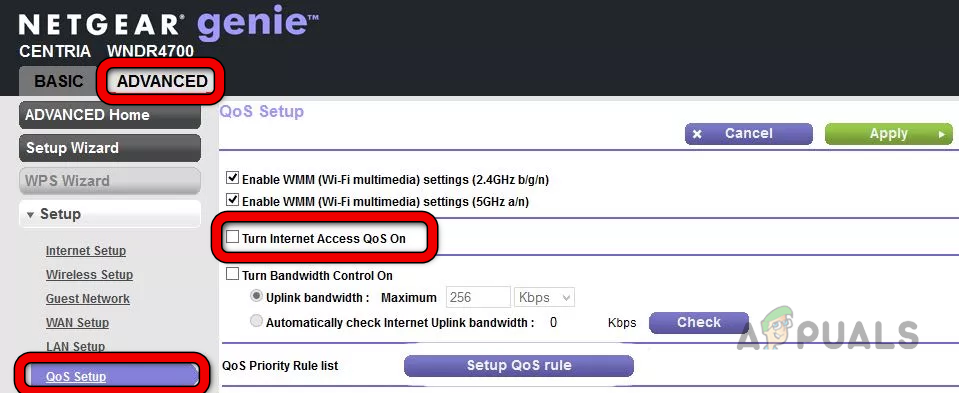
Disable QoS in the Router’s Settings - Then Apply the changes made and afterward, launch Warzone to check if it is clear of the lost connection problem.
- If you do not want to disable QoS and your router has a WMM (WIFI Multi-Media) feature, check if disabling WMM (under Advanced > QoS > WMM) resolves the Warzone issue.
14. Try Another Network
Warzone may show the “lost connection” error message if your ISP is limiting the Warzone’s access to essential online resources. In this case, trying another network may clear the Warzone connection problem.
- If you are using a Wi-Fi connection, check if using the LAN connection (or vice versa) resolves the issue.
- If not, disconnect your system, console, or device from the current network and connect it to another network. If no other network is available, you may opt to use a hotspot from your mobile phone.
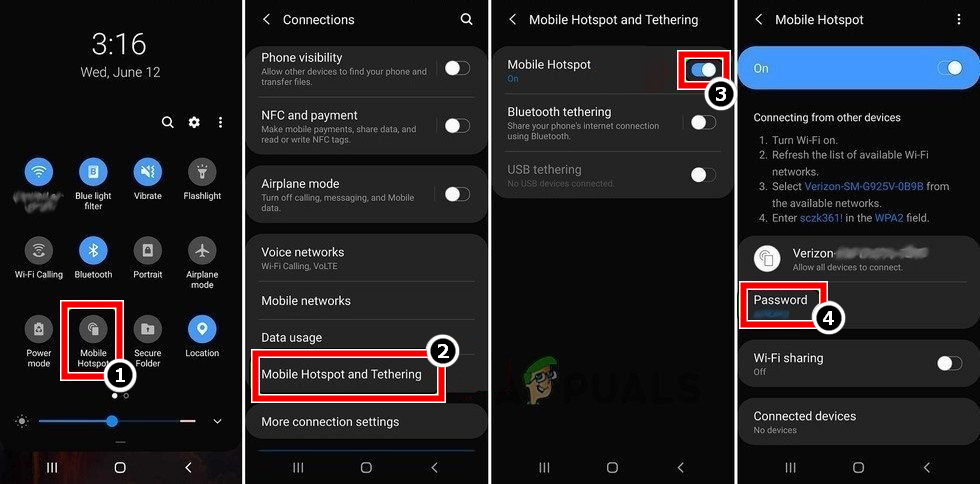
Enable Hotspot of Your Phone - Now launch Warzone and check if it is operating fine. If so, then you may contact your original ISP to get the issue resolved or edit the different router configurations discussed in this article.
- If the issue persists, download and install a VPN client.
- Now connect to a preferred location (like the USA) and launch Warzone to check if it is working normally.
15. Delete Warzone’s Saved Data on the Console
If the saved data of the game on your console has gone corrupt, then due to this corruption, the game may fail to access resources essential for its operation. Here, deleting the Warzone’s saved data on the console may solve the problem. For illustration, we will go through the process of deleting the Warzone’s saved data on an Xbox.
- Launch My Apps & Games on Xbox and select Warzone.
- Now press the controller’s Menu button and open Manage Game & Add-ons.

Open Manage Game & Add-ons of Warzone on Xbox - Then select the Saved Data option and delete the saved data (everywhere).
- Once done, restart your Xbox console, and upon restart, launch Warzone to check if it is working fine. If asked to, make sure to use the cloud save.
16. Reset the Router to Factory Defaults
There is also a possibility that the router’s firmware is corrupt or that any customization to the router’s settings is not letting the game properly communicate with its servers. In this scenario, resetting your router to the factory defaults may clear the connection problem. Before proceeding, make sure to note down the configurations/info required to set up your router after resetting it.
- Firstly, locate your router’s reset button. It may be on the back or bottom of the router.
- Once found, press/hold the router’s reset button with a pointy object (like a paperclip) and wait till the router restarts (around 30 seconds).

Reset Your Router - Now release the router’s reset button and wait till the router powers on properly.
- Then set up the router as per the ISP instructions and afterward, check if Warzone is clear of the lost connection issue.
- If that did not work, check if connecting directly to the Internet (bypassing your router) resolves the issue. If so, then you may try another router to resolve the Warzone connection problem.
If the issue persists with the router, make sure the Warzone required ports are properly forwarded (you may need to set up a static IP on your system/device) and then check if that solves the connection problem.
17. Reinstall Warzone
If none of the above worked for you, then a corrupt installation of the game could be the root cause of the error message. In this case, reinstalling the Warzone (not an ideal solution) may clear the connection host issue. For illustration, we will discuss the process of uninstalling the Warzone game on a Windows PC. Before moving on, make sure to back up the essential info/data of Warzone.
- Launch the Battle.net app and in the games’ list, choose Warzone.
- Now expand the Warzone’s Options and in the sub-menu shown, click on Uninstall.
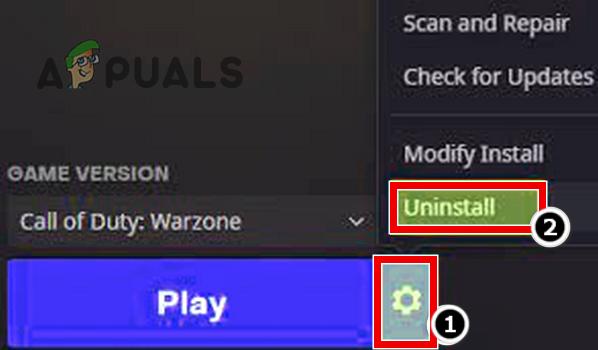
Uninstall Call of Duty Warzone - Then confirm to uninstall Warzone and wait till Warzone is uninstalled.
- Once uninstalled, restart your PC and upon restart, right-click Windows and select Apps & Features.
- Now find Warzone in the apps’ list. If so, uninstall Warzone and restart your system.
- Upon restart, delete the Warzone’s leftovers from the following locations (where C is your system drive):
%temp%

temp
C:\Windows\Temp

C:\Program Files\

C:\Program Files (x86)\

C:\Program Files\Common Files\Blizzard Entertainment

C:\Users\Public\Games\

C:\Users\Public\Public Documents\Blizzard Entertainment\
- Once leftovers are deleted, restart your PC and upon restart, reinstall the Warzone game. During the reinstallation process, make sure the game’s download does not interrupt or your PC goes to sleep during the game’s download, otherwise, you may encounter the lost connection error again.
- Once reinstalled, launch the game and hopefully, it will be clear of the connection lost problem.
- If that did not work, then you may reinstall the Battle.net launcher and reinstall Warzone to check if that clears the connection error.
If the issue persists and the error is occurring on a system, check if disabling/uninstalling all the overclocking utilities and reverting the system to the stock values clears the connection error. If that did not work, check if resetting your system, device, or console to the factory defaults solves the connection problem. If that also fails, then you may either contact Activision support or set up a DMZ Host (strictly not recommended) on your router, pointing to your system/device.