How to Locate Inactive and Expiring User Accounts in Active Directory?
With the daily increase in the amount of networks, Active Directory is sure to be populated with users and more network resources. In a network, there are tons of users that constantly access and utilize the network resources per their permissions that have been determined by the IT admins. Managing the access rights of the various user groups in a network is very important as it helps you prevent any security leaks.
As data becomes more and more valuable, network administrators have to make sure that the required actions have been taken to ensure that your data is safe at all times. One of the ways data can often be stolen is through inactive accounts that lie dormant in the Active Directory. One of the worst things about this is that it is usually not detected and thus you don’t know how the data was made public. That is why, having an access management software in place is very important that offers functionalities like these so that you can always delete the accounts that have been lying dormant for a while and are no longer needed.
If you neglect this and keep up with the normal management, your Active Directory structure will be a mess, which as a result affects the performance of the network. Unfortunately, most of the organizations do not consider using an Access Rights Manager even though it helps in so many different ways. From identifying inactive accounts to improving the overall security of the network, ARM has so many advantages. In this guide, we will be walking you through the process of finding inactive and expiring user accounts that exist in your Active Directory.
Downloading the Solarwinds Access Rights Manager
Having a clear guideline of who can access and view what resources in a network is really beneficial. That is one of the importances of an Access Right Manager. There are, without a doubt, many vendors that offer access right management software, however, the one that stands out the most is the Solarwinds Access Rights Manager.
Solarwinds Access Rights Manager (download here) is hands down an industry favorite when it comes to managing the access rights of the various user accounts and groups that you have in your Active Directory. Not only limited to AD, you can also manage OneDrive and many other file servers with the help of Access Right Manager. The tool also keeps track and manages your file server so you will be notified whenever there is an unauthorized access to the file servers. With a simple and instinctive user interface, every new IT admin feels at home and can easily start using the software to its fullest.
We will be using the Solarwinds Access Rights Manager in this guide so make sure to download and install the software on your system. You can avail the trial period if you wish to evaluate the product for yourself. During the installation, if you wish to use an existing SQL server, make sure to select Advanced Installation instead of the default Express Installation option. Once you have installed the tool, you will have to configure it which we will be showing down below.
Setting up Access Rights Manager
After you install the Access Rights Manager tool on your system, you will have to configure it for when you run it the first time. During the configuration, you will have to provide Active Directory details, provide an existing database or create a new one along with other details. Other than that, after the configuration wizard, you will have to go through the scan wizard in which the tool scans your Active Directory so that it has all of the details when you try to use it.
When you run ARM for the first time, you will be automatically taken to the configuration wizard where you will have to login. Here, provide the details of the user account that was used to install the tool to login. After that, the configuration wizard begins through which you will be guided. Just follow the instructions given down below.
- First of all, on the Active Directory tab, provide the AD credentials that will be used by the ARM server to access the Active Directory.
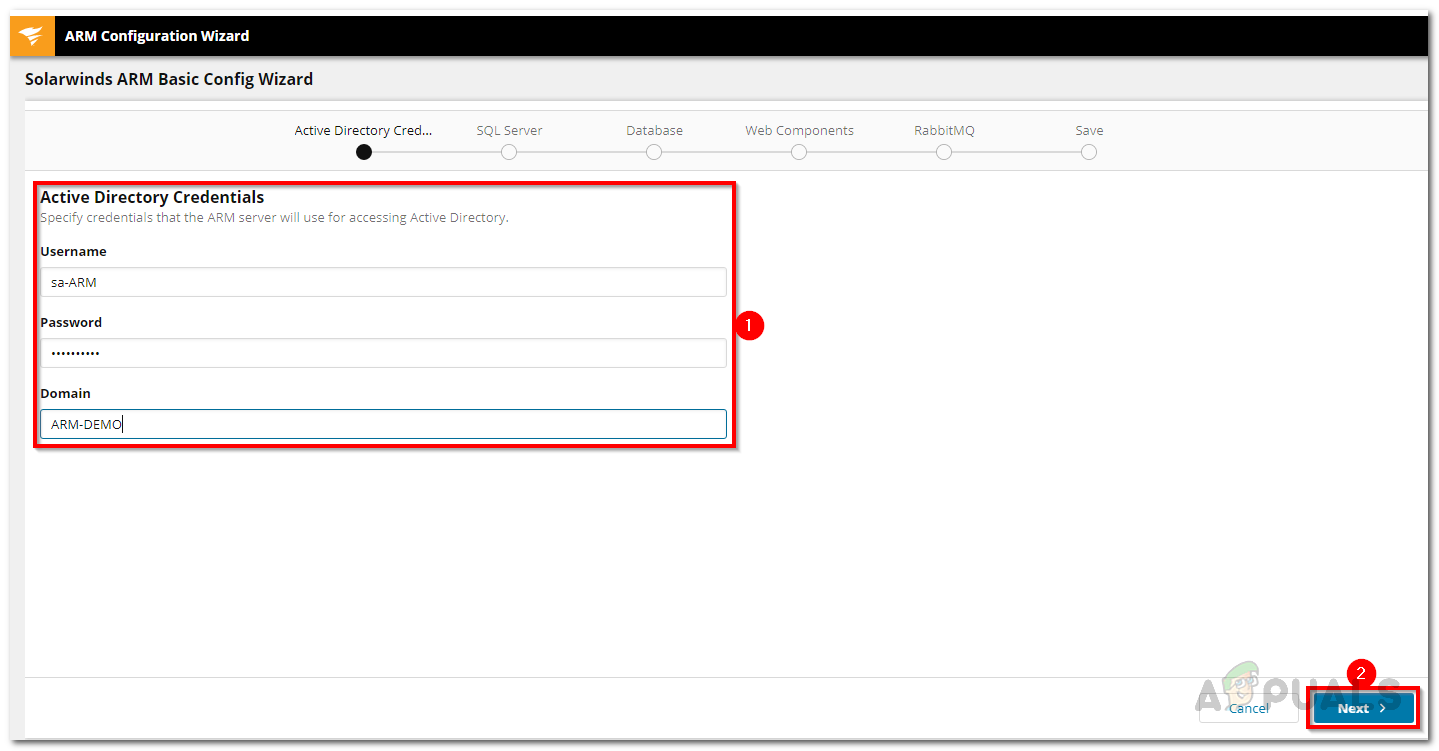
Active Directory Credentials - After that, provide the SQL server details as well as selecting an authentication method and then click Next.
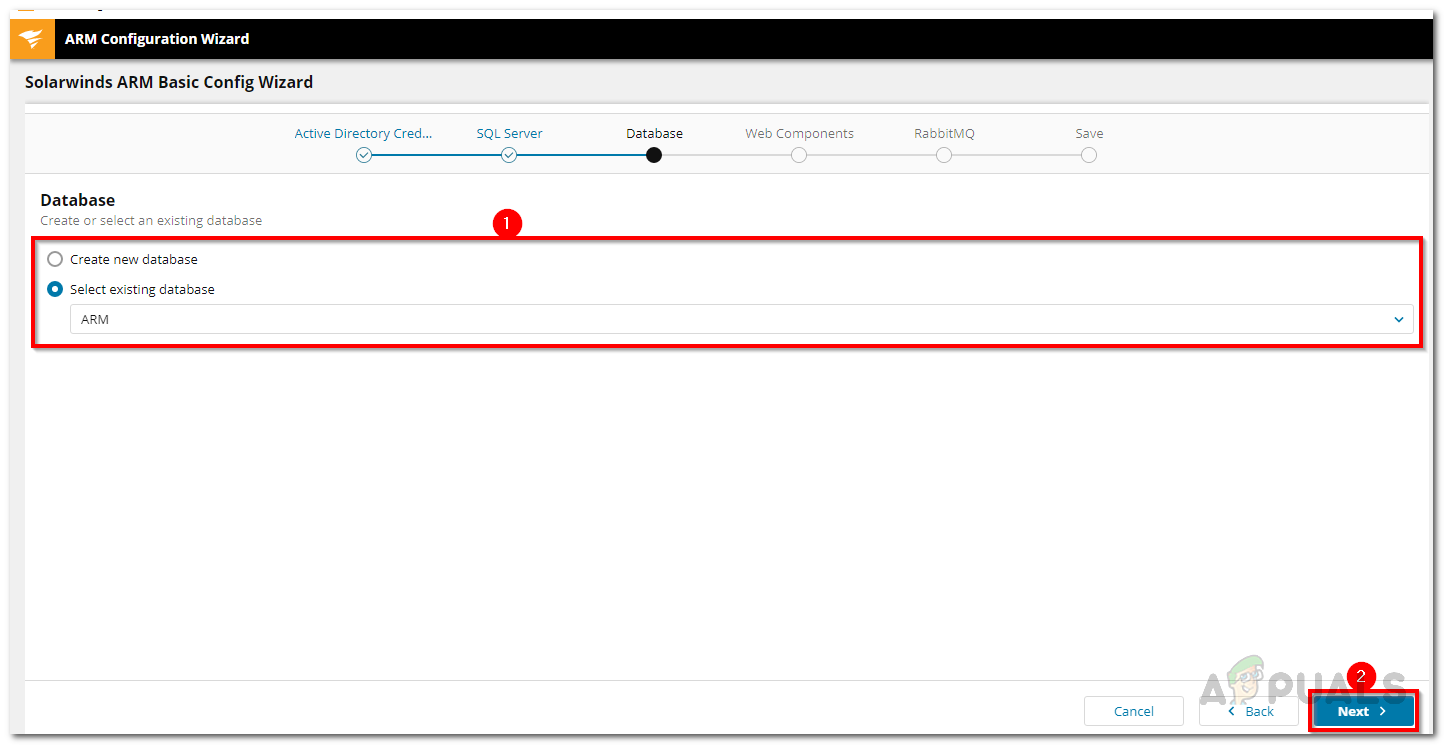
- On the database tab, choose if you wish to create a new database or select an existing one.
ARM Database - On the Web Components page, you can change the web console of the ARM server where it will be accessed. It is recommended that the components be run on the server itself.
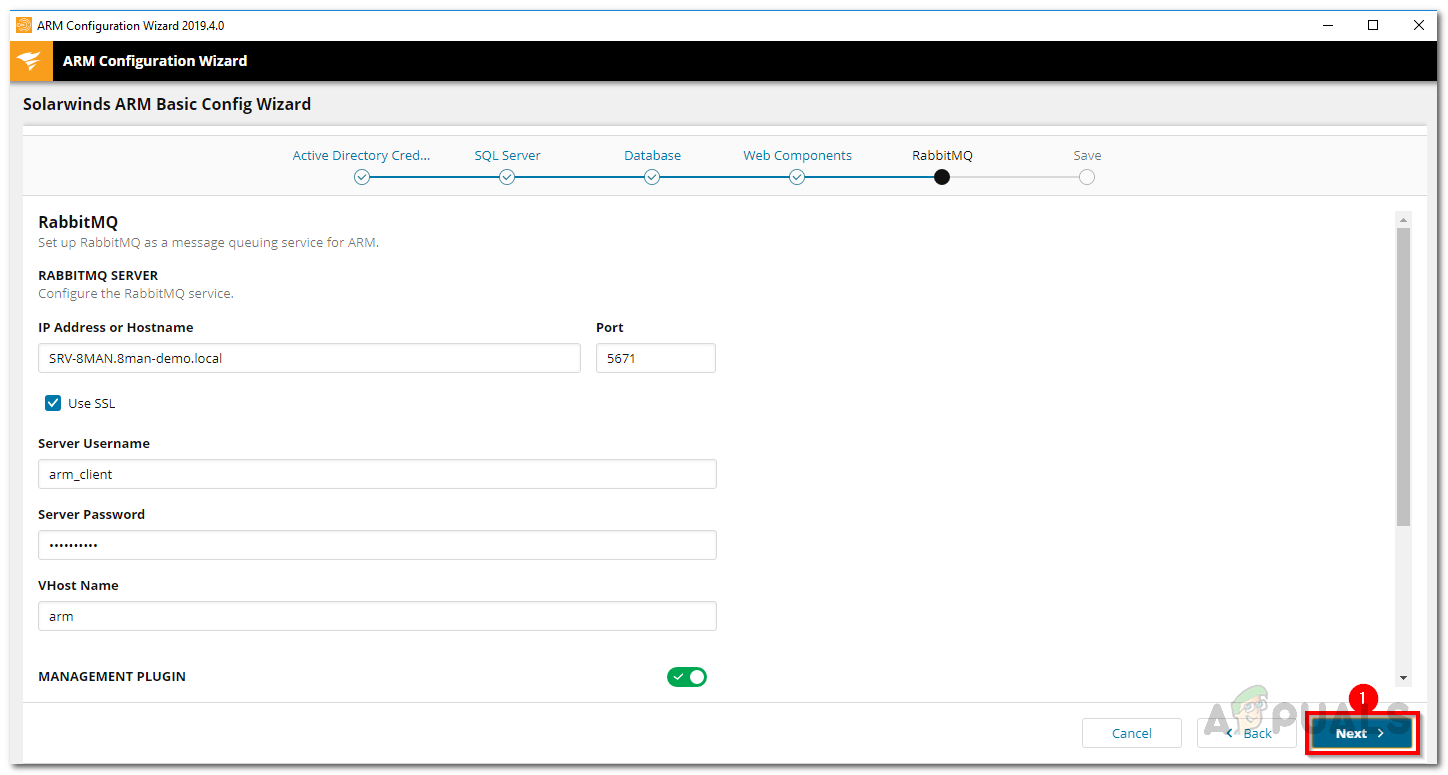
- You can change the RabbitMQ settings if you wish but it is recommended that you go with the default values.
RabbitMQ Settings - An overview of the settings will be displayed. Go through the settings and then click on the Save button.
- The service will be restarted and you will be shown a Server not connected message. This is fine and normal so do not worry.
- After that, the scan wizard should be initiated.
- Provide the Active Directory credentials that will be used to scan it and any file server.
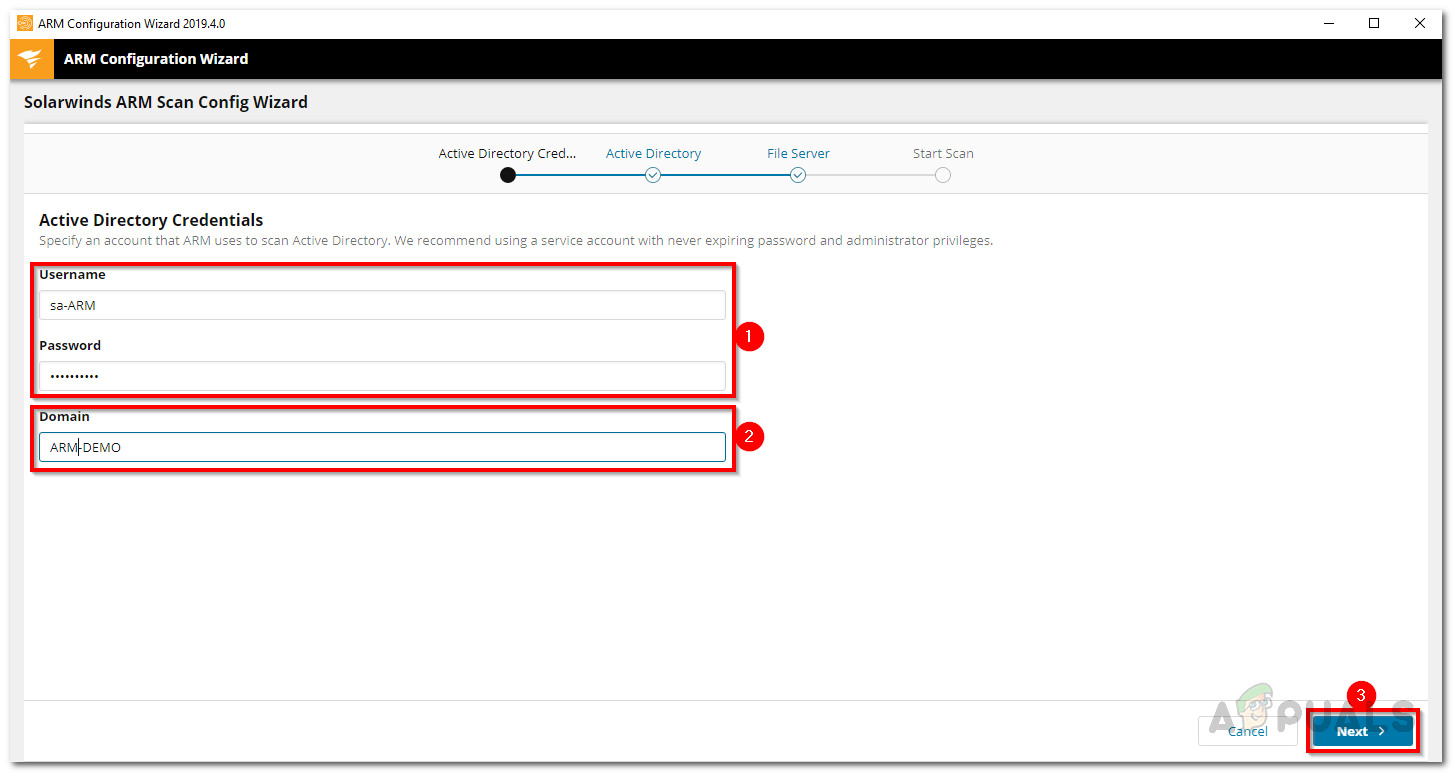
Active Directory Scan Credentials - Also, make sure to select the domain where the account is coming from.
- Then, on the tab, select the tab that is to be scanned and then click Next.
- You can also select a file server to scan on the File Server tab. Do not select any if you don’t wish to do it.
- Finally, go through the scan settings and then click the Save Scan button to initiate the scan.
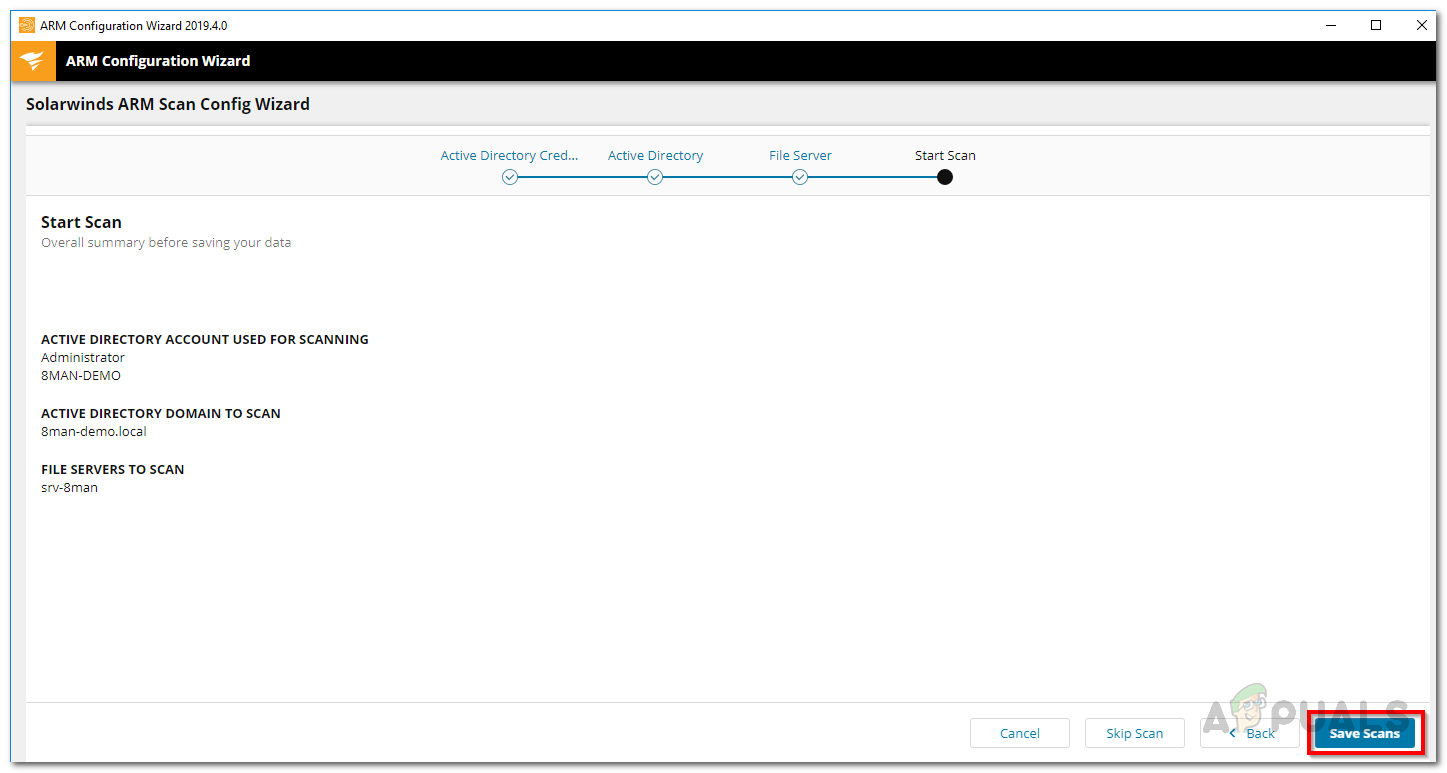
Scan Settings
Locating Inactive Accounts in Active Directory
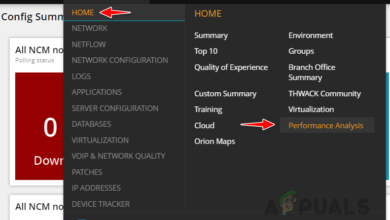
Once the ARM server has started and you are done with the configuration wizard, you are ready to use the Access Rights Manager tool. Now, we can use the tool to find any inactive accounts. These accounts are often the cause of security leaks and many more anomalies so it is important that you are aware of them and can delete any if they are no longer needed. This can be very easily done thanks to ARM. This method is per the web client so make sure you are using the web client. If you don’t know how to access the web client, just open up the Configuration Wizard by searching for it and then go to Server. It will show you the URL and other related stuff. Here’s how to find inactive accounts:
- First of all, go to Analyze and then click Risk Assessment Dashboard.
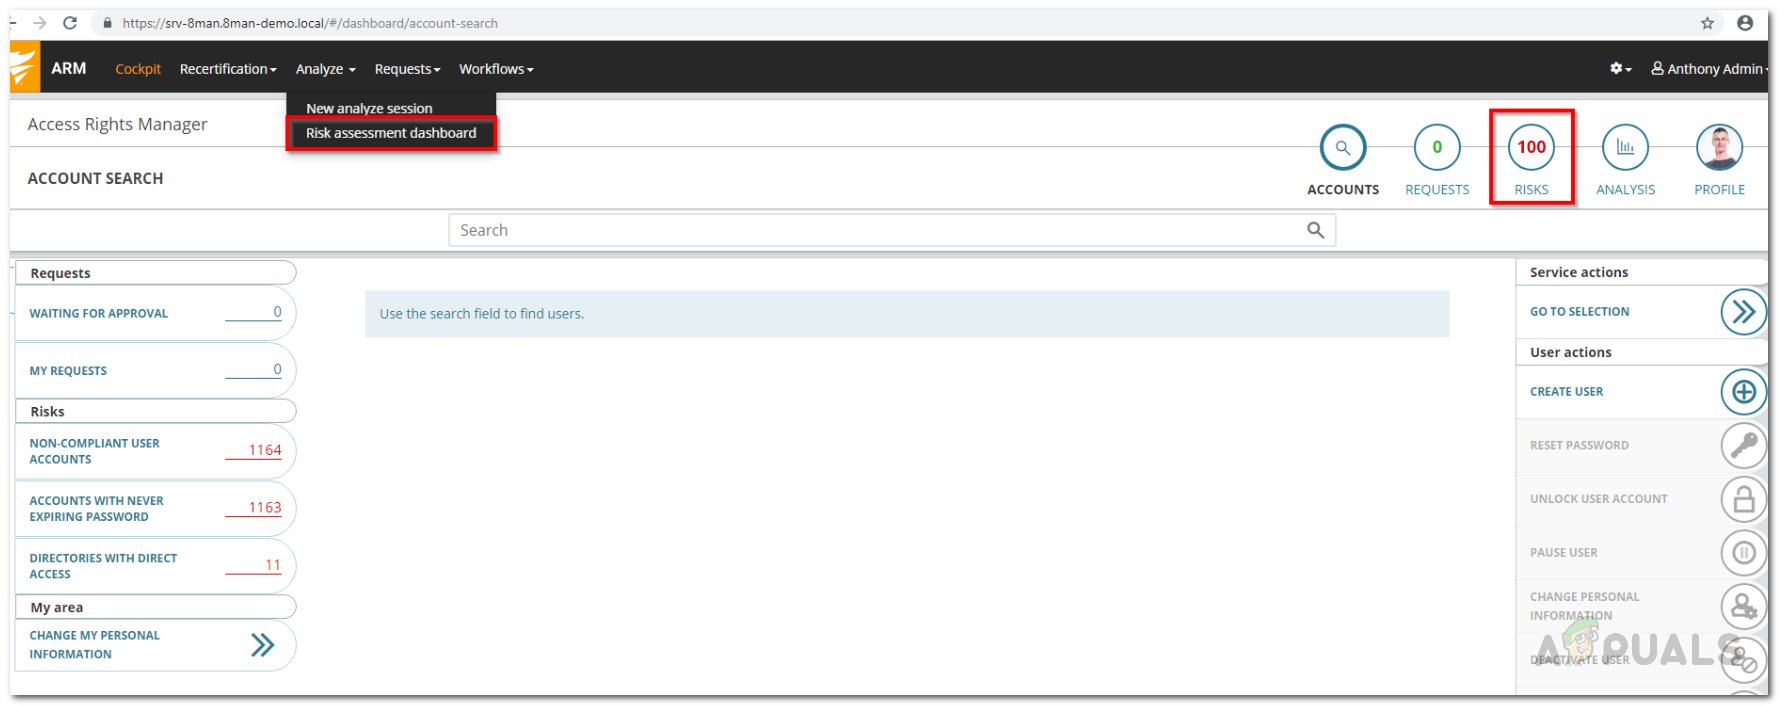
ARM Web Client - You will be shown some information about the risk due to the inactive accounts. Click on the Minimize Risks button.

Risk Assessment Dashboard - Here, Access Rights Manager will list all the inactive accounts.
- You can use the different sorting, filtering or grouping options to go through the data.
- Other than that, you can also export the results into an excel sheet or create a report in PDF of CSV format.
Locating Expiring User Accounts in Active Directory
With the help of Access Rights Manager, you can keep an eye on the accounts that are going to expire soon. These usually are the accounts given external employees or in some cases, interns. For this, you do not need the web client and can be done on the desktop version of the product. Here’s how to locate any expiring accounts:
- First of all, go to the Dashboard page.
- Then, under Reporting on the left-hand side, click on Users and Groups.
- Select the range to be included in the report by clicking and dragging it.
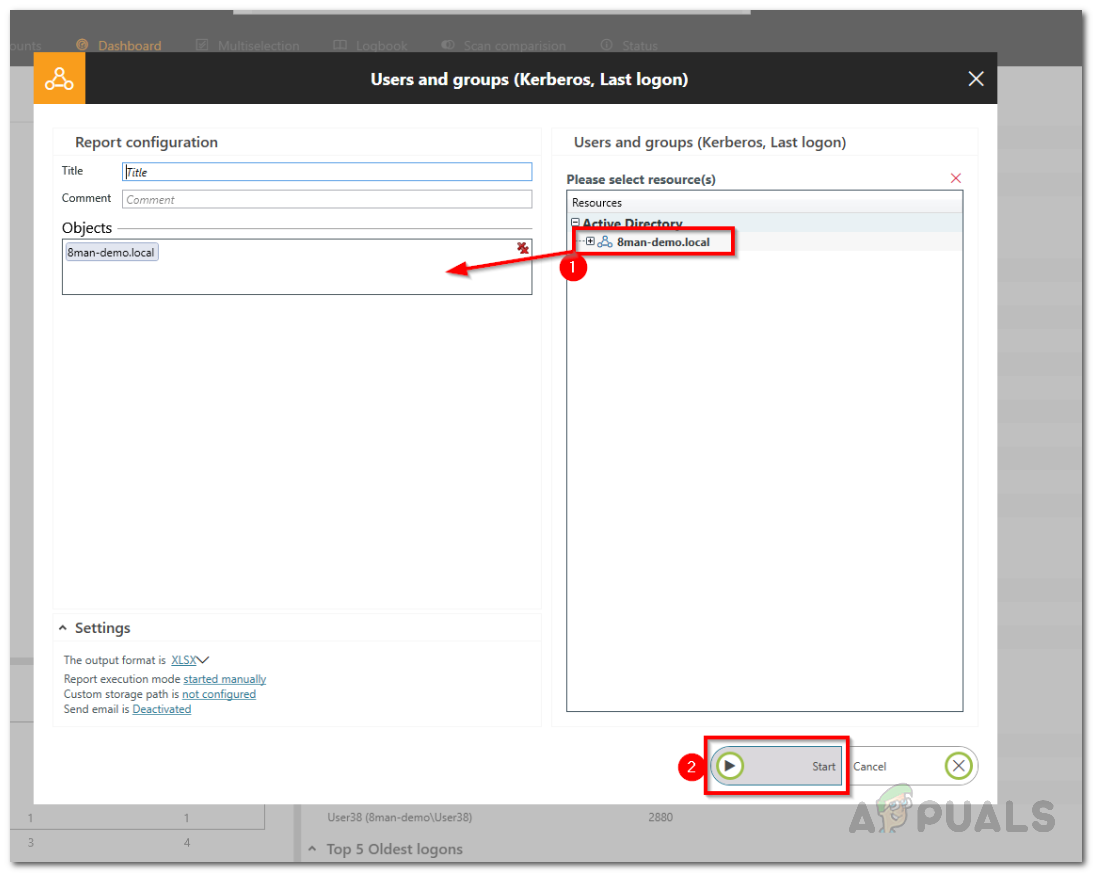
Creating Users and Groups Report - Once you are ready, click the Start button to run the report.
- After the report has completed, open it up in your spreadsheet application.
- Go to the User tab and there you will be able to see the accounts that are expiring soon.
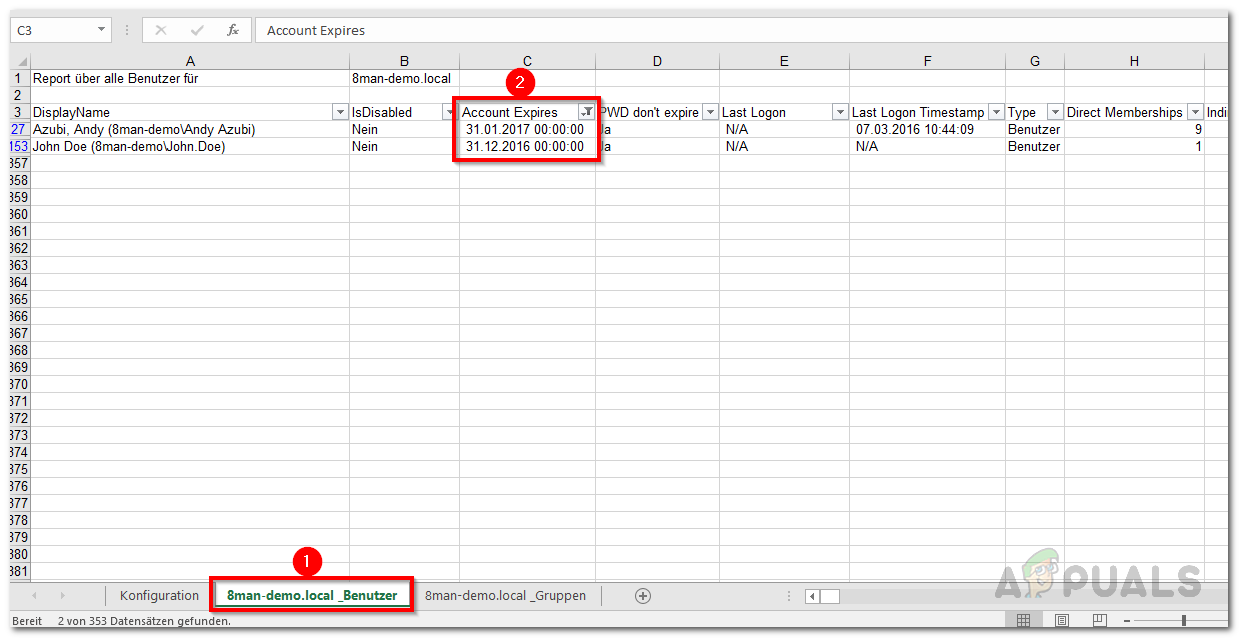
Expiring Accounts