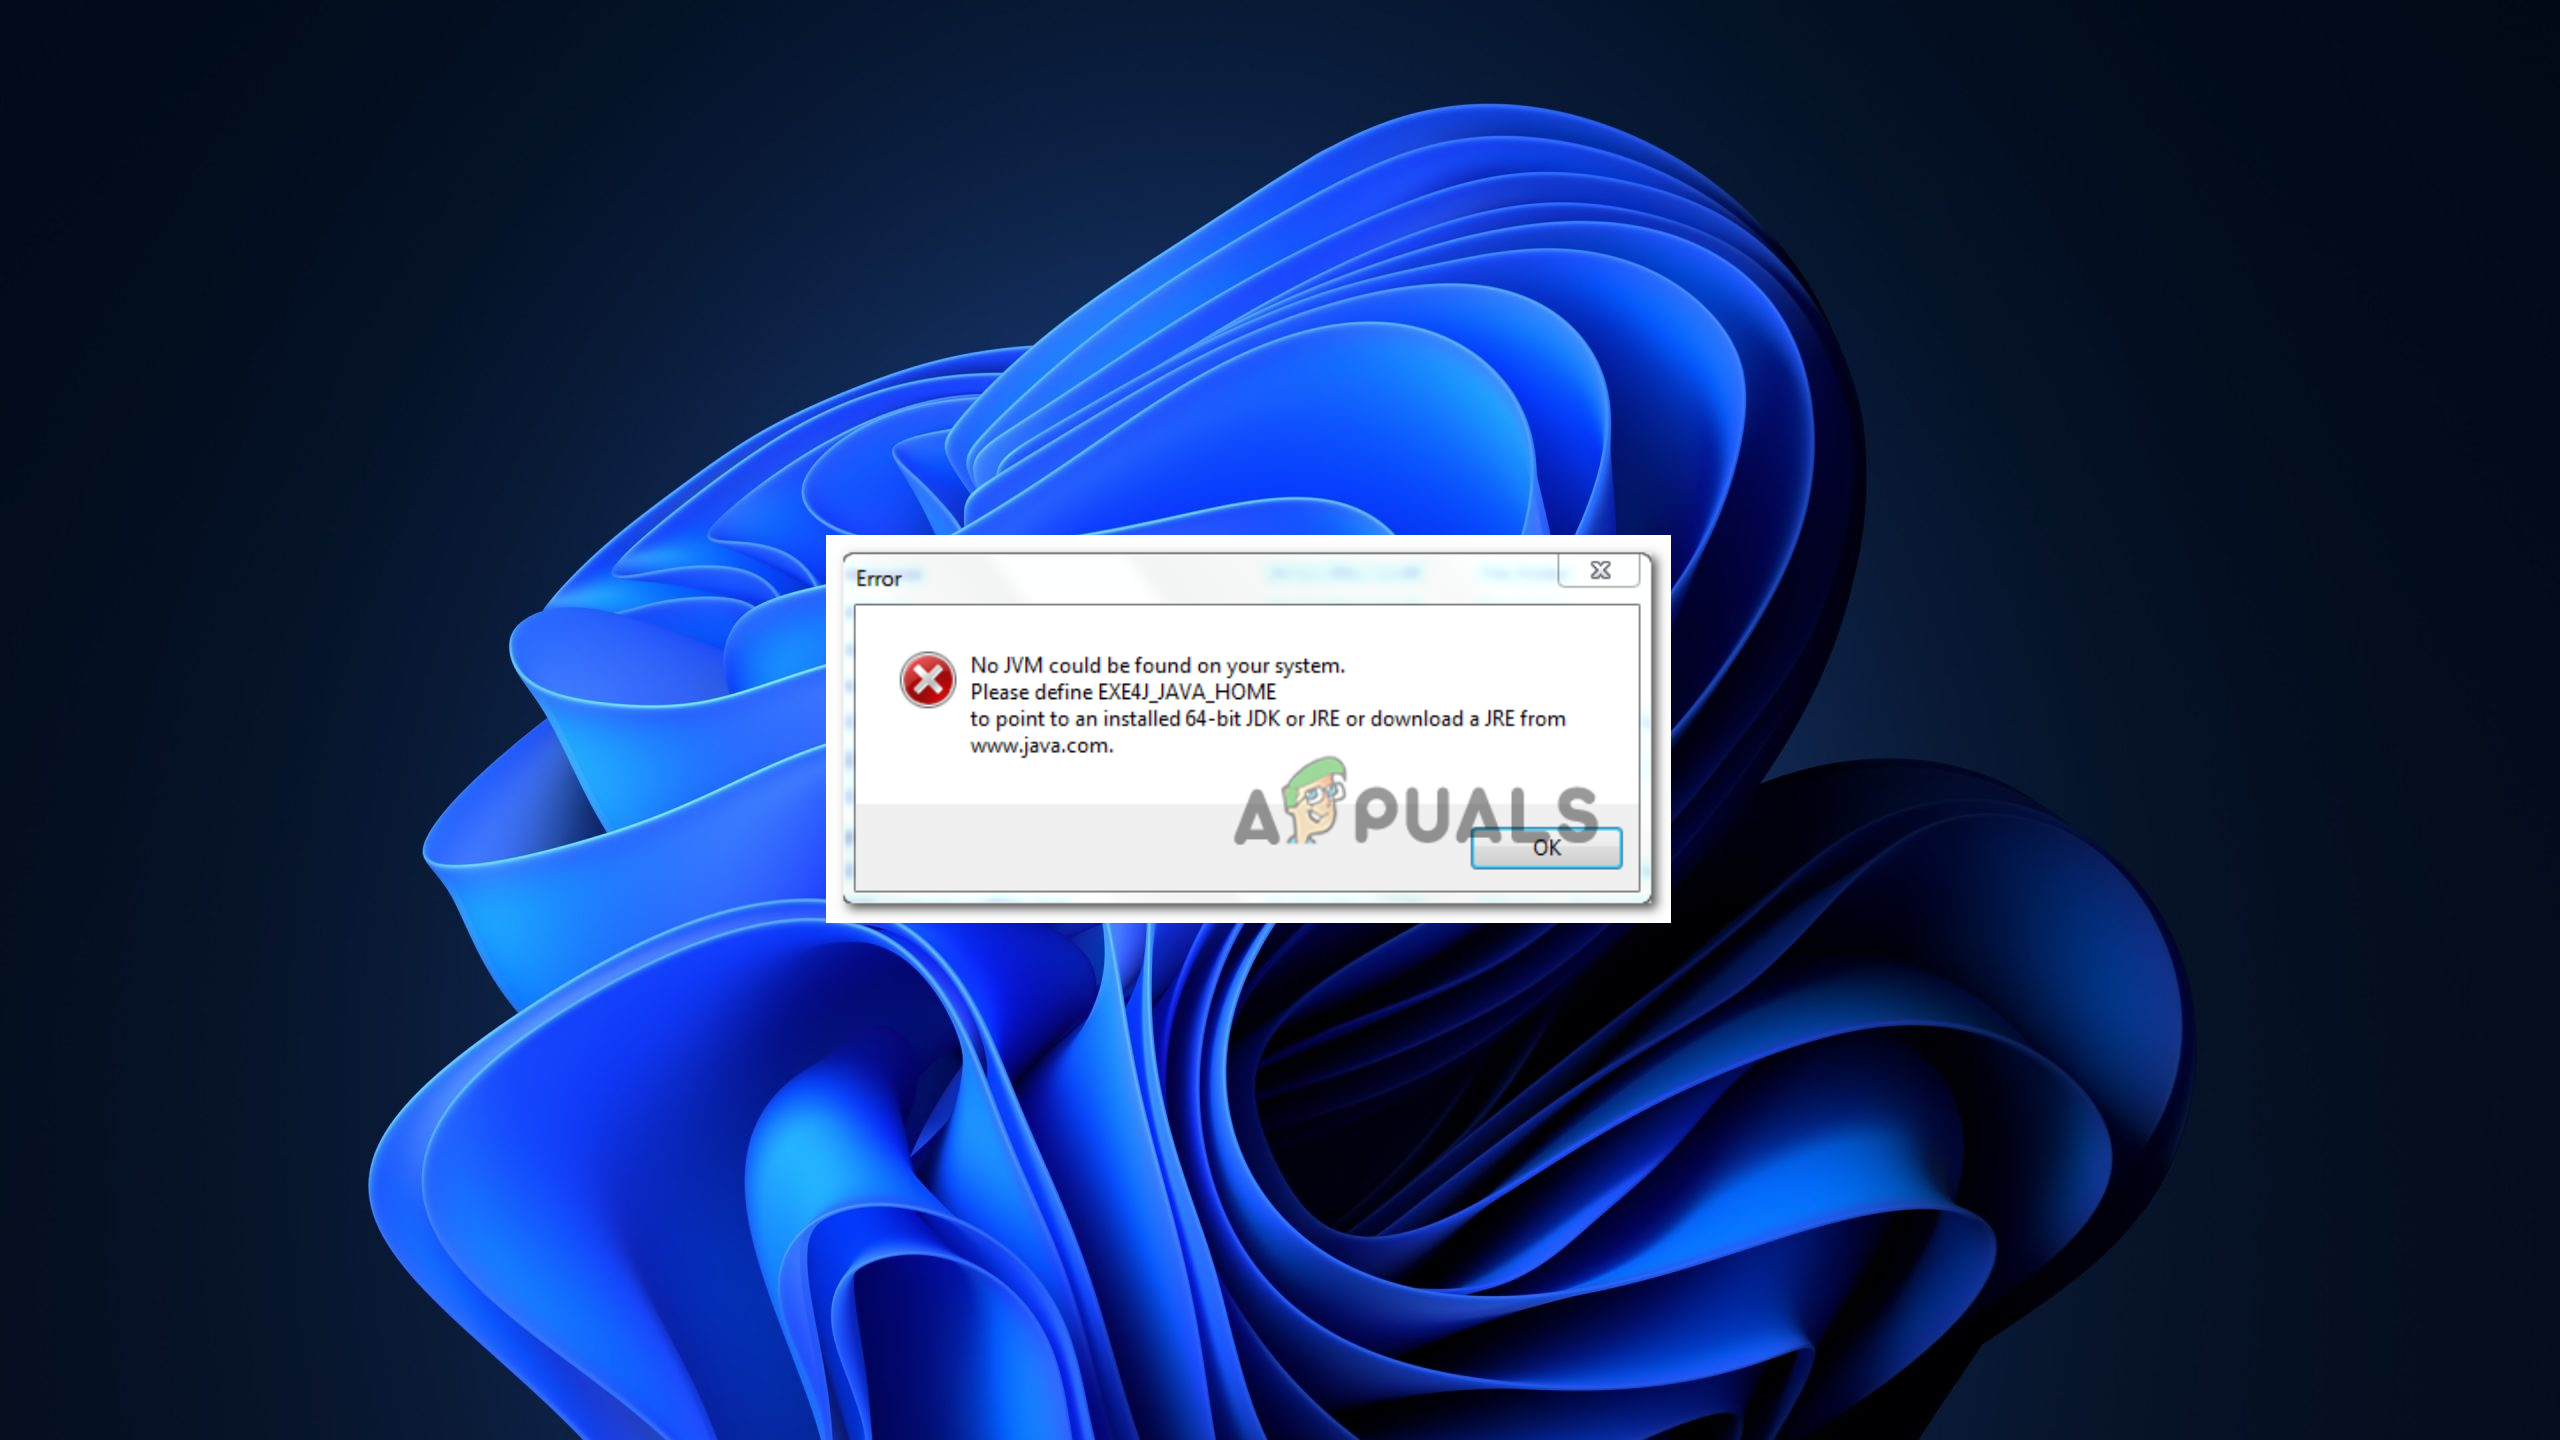
How to Fix “No JVM Could be Found” Error on Windows?
The ‘No JVM could be found on your system (Exe4j_Java_Home)’ error usually appears when users attempt to install DbVisualizer, when launching an exe4j executable, or when trying to launch Minecraft—or any other game or application that uses the Java environment.
In most cases, this issue occurs due to an incompatible Java version. The error may also be caused by an incorrect Java environment variable setting.
If you’re encountering this issue in connection with an Openfire server, it is likely due to a bug that has been resolved in Java releases newer than Java 8 Update 161.
Note: Refer to our guide on fixing the ‘javac is not recognized’ error.
1. Install a Compatible Version of DbVisualizer
By installing the correct bit-version of Java that corresponds to the DbVisualizer version being used, the error can be resolved. This makes sure that the Java environment matches the requirements of the application, allowing it to function properly.
- Click here to navigate to the Java website, and under the Windows section, click on the bit version you need to begin the download. Choose Windows Offline or Windows Offline (64-bit) based on your version of DbVisualizer.
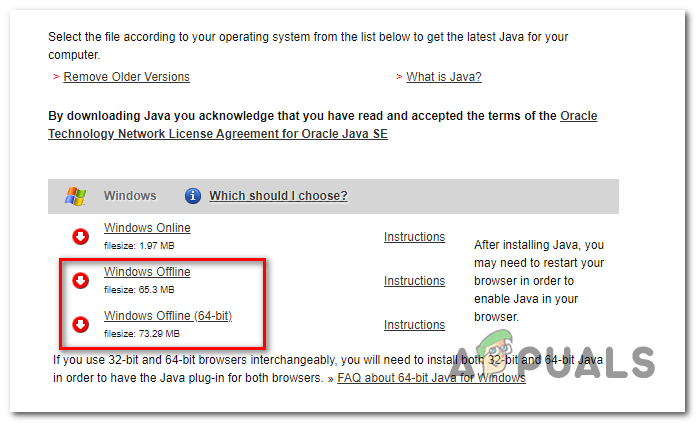
Downloading the correct Java environment version Note: ‘Windows Offline’ refers to the 32-bit version among the three available options.
- After the download finishes, double-click the installer’s executable file and complete the installation by following the on-screen instructions.
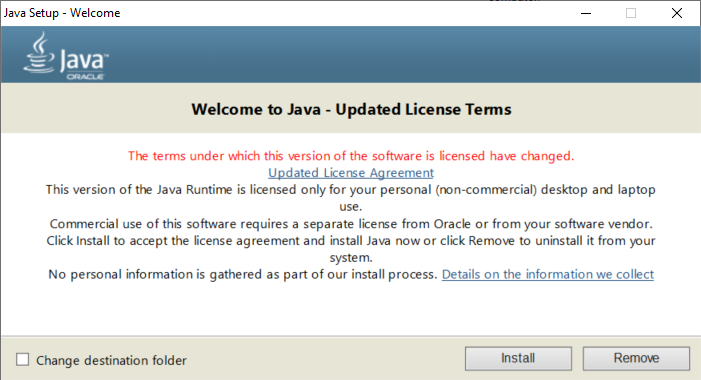
Installing the correct Java environment - Close the installation wizard and restart your computer once the installation is finished.
- Upon restart, try the action that previously caused the error and see if the issue has been resolved.
2. Fix the Java Environment Variable
You can make sure that the system is directed to the correct location of the Java installation by fixing the Java Environment variable. This allows the system to effectively locate and use Java when running applications.
To resolve the issue, you need to locate your Java installation path and make sure the Java Environment variable points to this exact location. This fix has been confirmed as effective by several users who faced this problem.
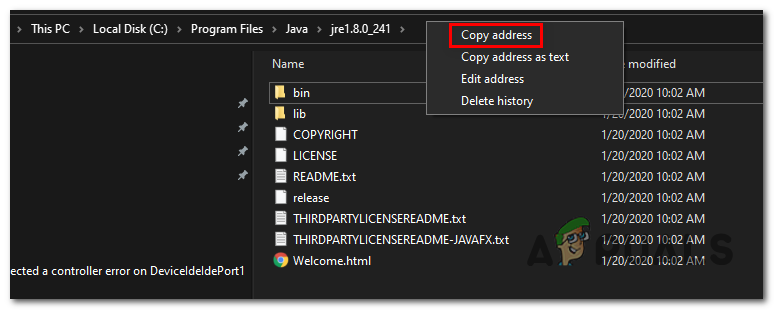
- Navigate to your Java installation directory using File Explorer. By default, you should find it in these locations unless you selected a custom path during installation:
C:\Program Files\Java\*Java version* - for the 64-bit version
C:\Program Files (x86)\Java\*Java version* - for the 32-bit version
- Once in the correct directory, right-click the navigation bar and choose Copy Address from the context menu that appears.
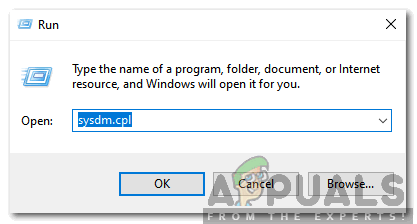
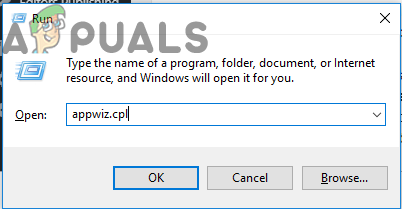
Copying the Java address from the correct location - Copy the Java installation path to your clipboard, then press Windows key + R to open a Run dialog box. Type ‘sysdm.cpl’ and press Enter to access the System Properties window.
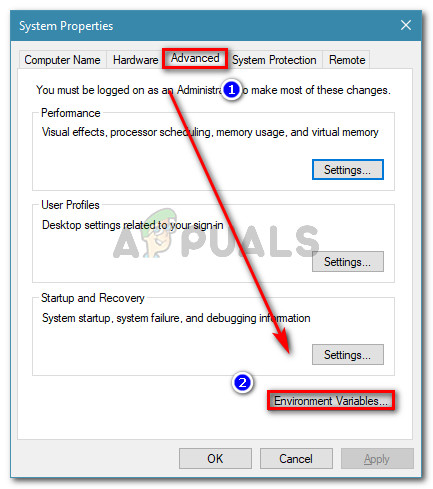
Typing in “sysdm.cpl” and pressing “Enter” - In the System Properties window, select the Advanced tab and then click on Environment Variables.
Navigating to the Advanced tab in System Properties and clicking on Environment Variables - In the Environment Variables window, under System variables, select Path and click Edit.
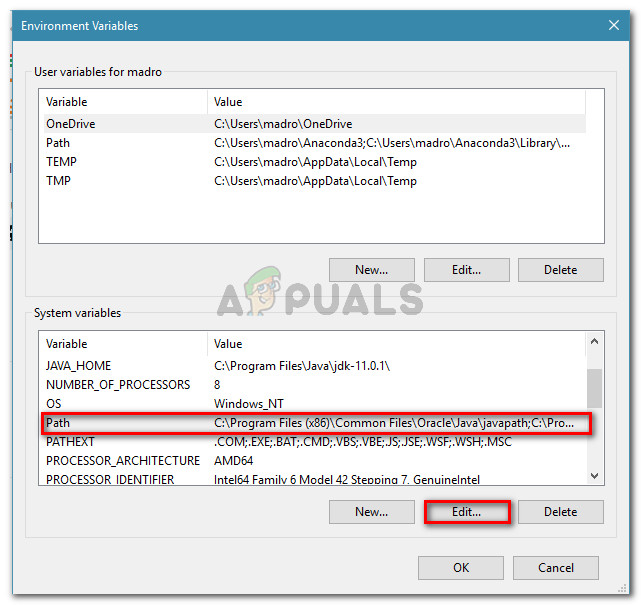
Editing the Path variable - Look for the environment variable that references Java in the next window. When found, update its value with the correct path you copied in step 2.
- Restart your computer to see if the problem is fixed upon the next system boot.
3. Reinstall the Current Java Environment
By reinstalling the current Java environment, you can potentially resolve the error, particularly if it’s related to an Openfire server. This step is effective because it replaces any corrupted or outdated Java installations with the latest versions, including bug fixes and improvements that may fix the issue.
- Open a Run dialog box by pressing Windows key + R. Type ‘appwiz.cpl’ and hit Enter to go to the Programs and Features window.
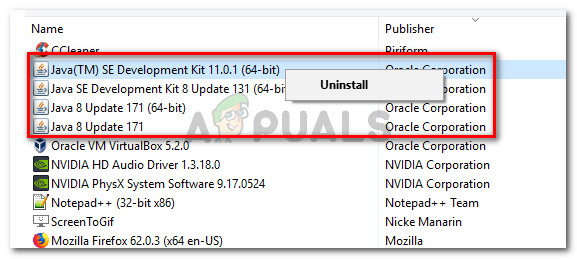
Entering “appwiz.cpl” into the Run prompt - Scroll through the list of installed programs in the Programs and Features window and locate your Java versions. Right-click each and select Uninstall.
Uninstalling Java installations - Follow the same process to uninstall any additional items (Java updates, NodeJs, etc.). To ensure you remove all related installations, click the Publisher column header to sort the entries.
Note: This makes it easier to identify all Java-related components. - Restart your computer after uninstalling all Java installations and associated components.
- Following the restart, visit this link to download and install the latest Java Runtime Environment (JRE) version. Afterwards, reinstall any other components you previously uninstalled.
Downloading the latest Java environment version - Perform a final restart and check if the issue has been resolved on the next startup.