How to Install Presets in Lightroom?
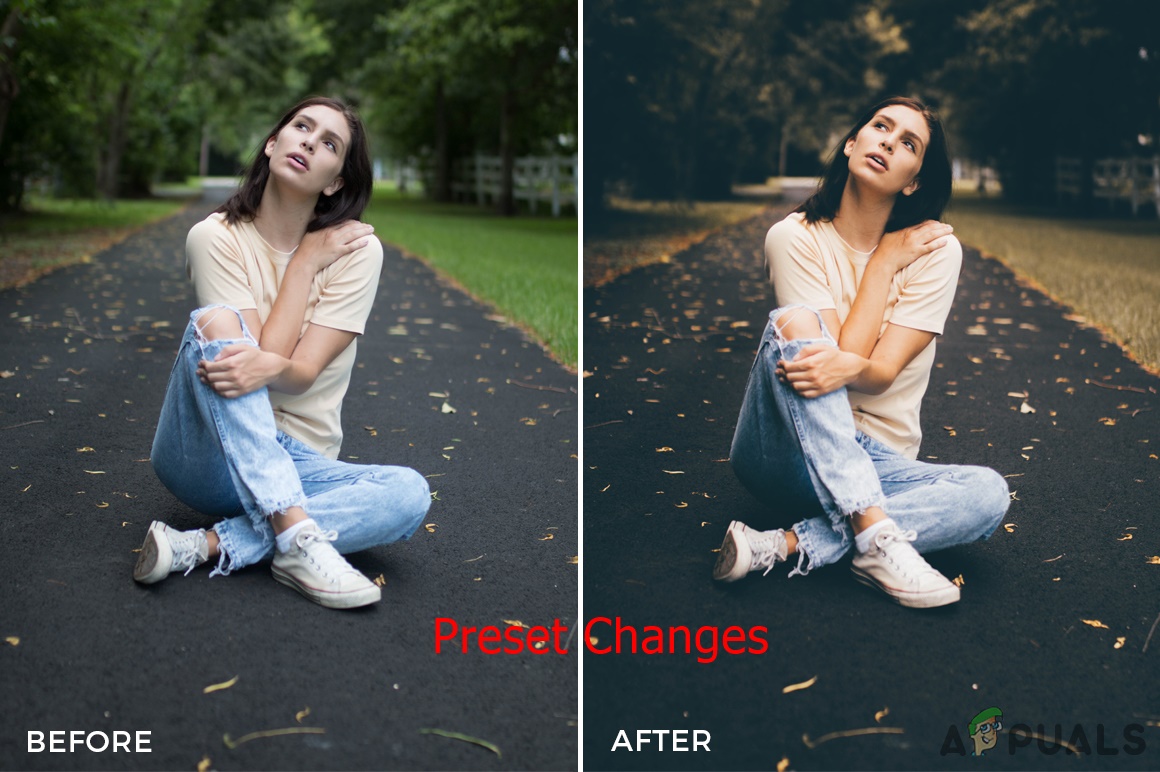
Photo editing is a popular feature these days and the Lightroom is one of the top software for it. Presets are most commonly used for editing photos quicker and better. However, Lightroom has only limited presets installed by default and users may need to install more from the internet. In this article, we will show you how to install presets for your Lightroom on a different platform.
What is Preset in Lightroom?
Presets are the combination of editing adjustments that you can easily reapply to any photo. All the settings that are stored in a preset file will be applied to the new photo with one click. Preset is a time-saving feature for many photographers and it creates amazing results. You can use the default presets, downloaded presets or create your own presets.
Installing Presets in Lightroom
There are several methods for installing the presets in Lightroom. Users can use the available options inside the Lightroom to add the presets or use the copy/paste operations to install the presets in their Lightroom.
Important: Before trying these methods, you must have downloaded the preset files that you want to install in Lightroom. Photonify, Fix the Photo, Look Filter, and Free Presets are some websites that you can check for free presets or you can just Google search to find thousands of presets for Lightroom.
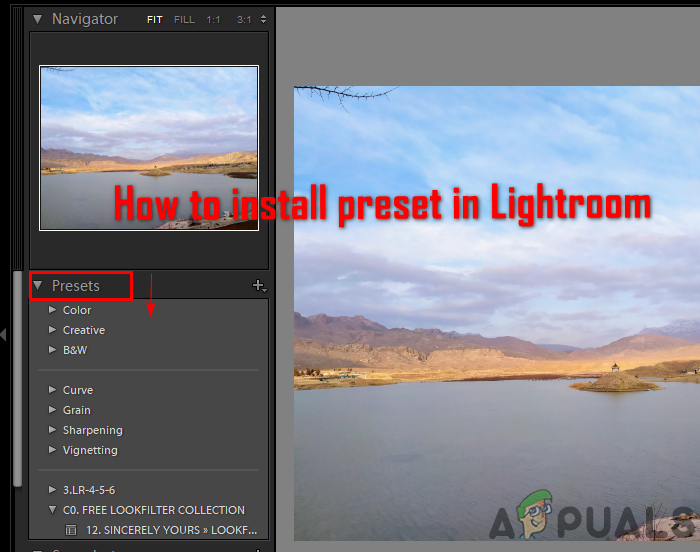
Method 1: Importing the Downloaded Presets in Lightroom
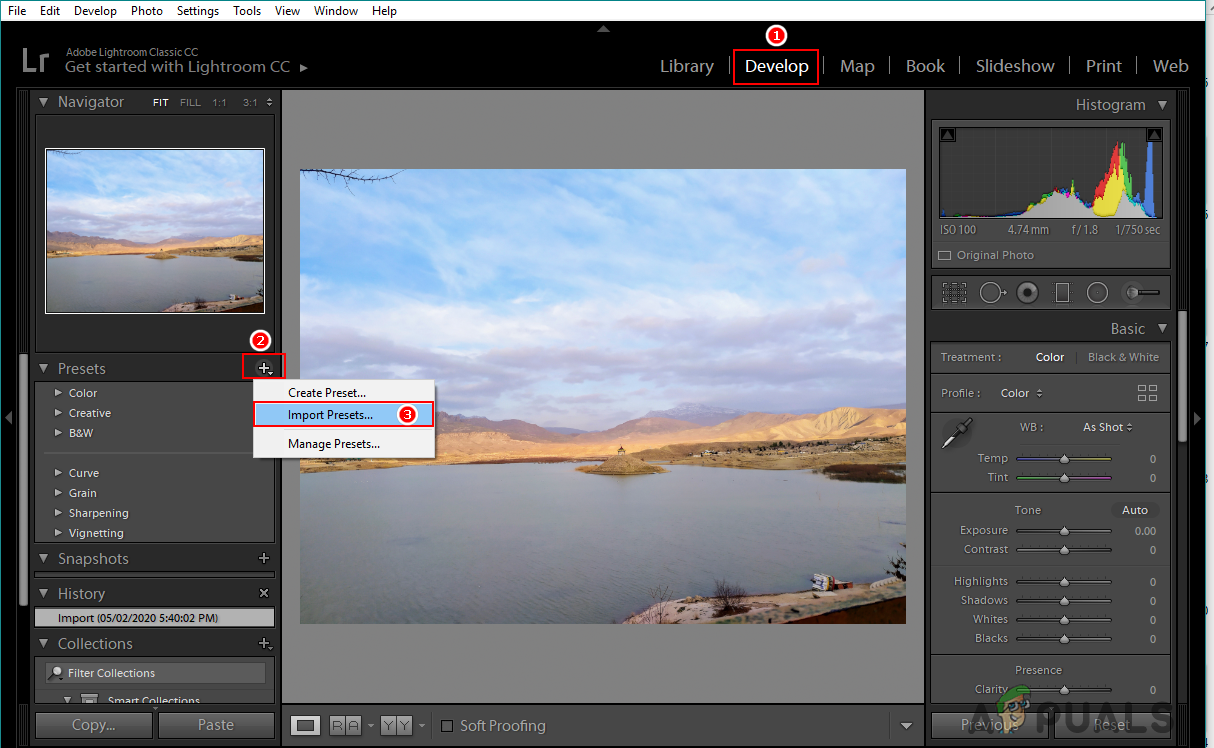
In this method, we will be using the import feature available in the Develop mode of Lightroom. Using import is the easiest way of installing presets in Lightroom. The feature of importing presets is similar to importing photos from the phone to the PC. Follow the below steps to install presets using the import feature:
- Open Lightroom by double-clicking the shortcut on your desktop.
- Click on the Develop mode button on the top. Click on the plus icon on left and choose the Import Presets option.
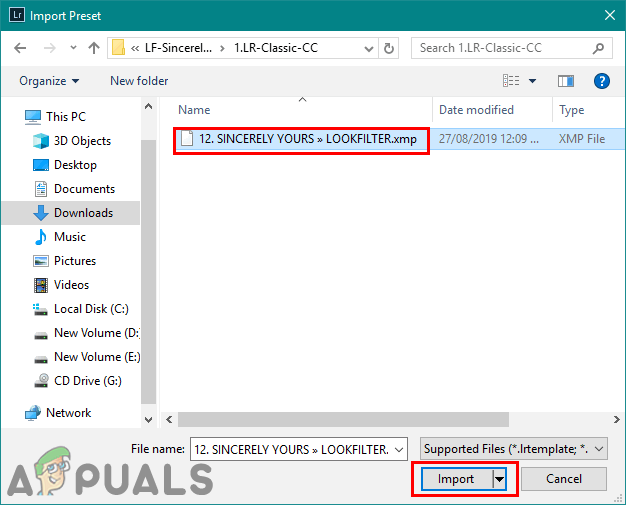
Choosing the import preset option - Locate your downloaded preset files and select them. Press the import button to import them in your Lightroom.
Importing preset files to Lightroom - Restart your Lightroom. Now you can choose any preset in the list to apply to your photos.
Method 2: Copying the .lrtemplate Presets to the Lightroom Folder
.lrtemplate is the older version of presets for Lightroom. It saves the modified settings that users can apply to any photo by using that preset. .lrtemplate has a specific folder in Lightroom directory where the user can copy the downloaded preset files to install them as shown below:
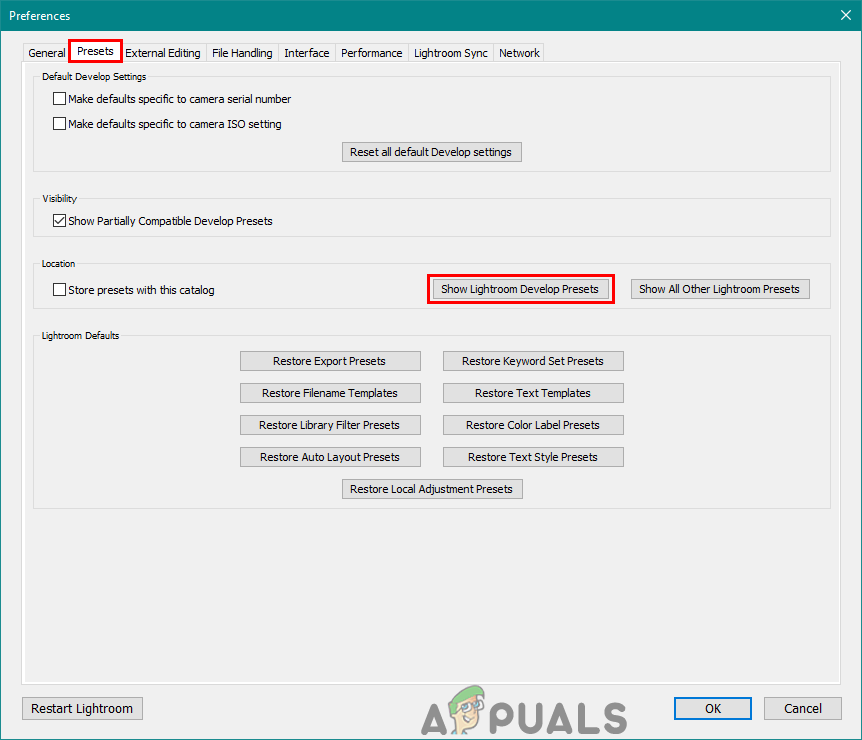
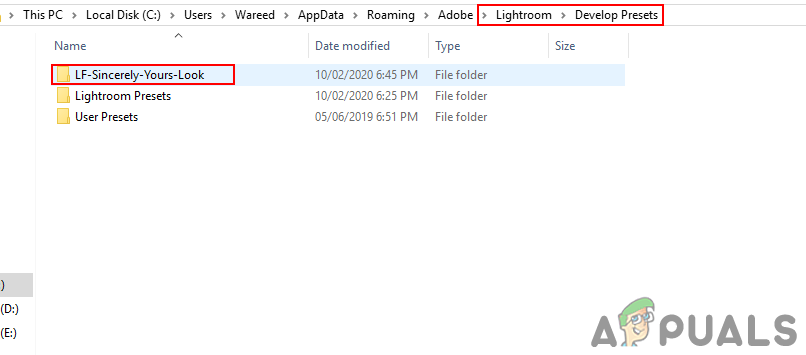
- Open Lightroom, click on Edit in the menu bar and choose Preferences. Now select the Presets tab and click on Show Lightroom Develop Presets button.
Opening Lightroom presets folder through Preferences - Open the Lightroom folder and then open the Develop Presets folder. Paste your .lrtemplate folder in here to install them.
Paste the .lrtemplate folder into the develop presets folder - Restart your Lightroom to see the presets in the list that you just added.
Method 3: Copying the .xmp Presets to the Lightroom Folder
.xmp is another type of version for Lightroom presets. It is similar to .lrtemplate and is most commonly used in the latest versions of Adobe Lightroom. .xmp saves the data similarly, but it is the latest technology. However, the .xmp have a different folder where the user can copy the downloaded files as shown below:
- Open Lightroom and click on Edit in the menu bar to choose the Preferences option. Go to the Presets tab and click on the Show All Other Lightroom Presets button.
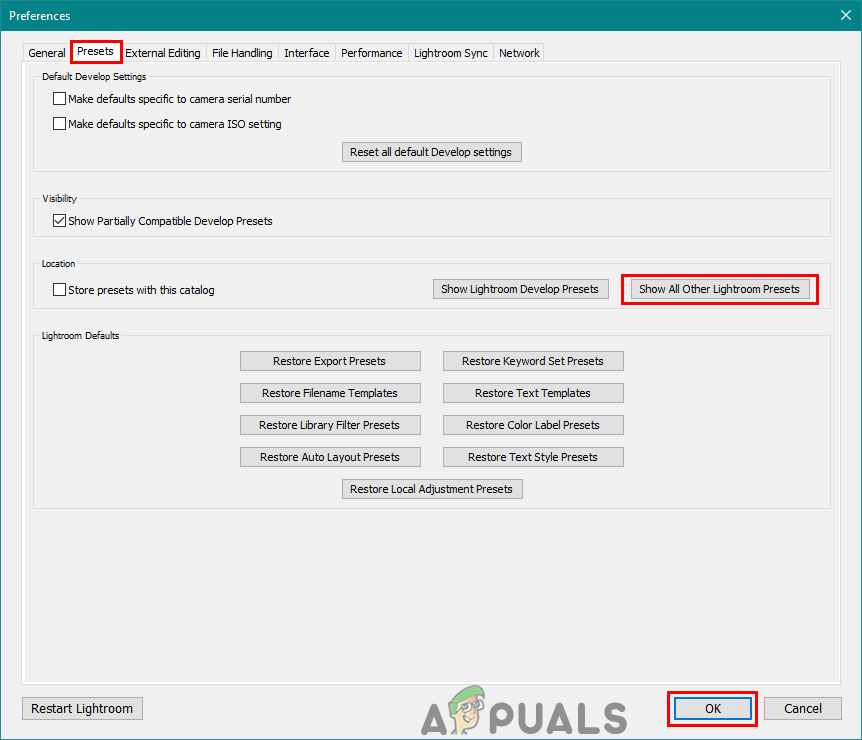
Opening all other Lightroom presets folder through preferences. - Open the Settings folder and paste the .xmp folder in this folder to install them for your Lightroom.
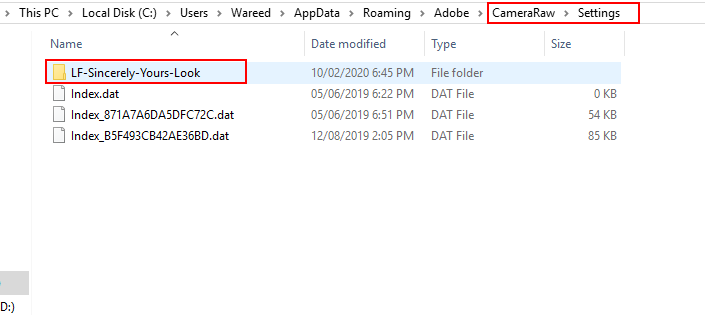
Pasting the .xmp folder to the Settings folder. - Go ahead and restart your Lightroom to find the presets in the list.
Installing Presets in Lightroom Mobile
In this method, we will be adding presets to your Lightroom mobile version. Nowadays, most people edit their photos directly on their phones for the quick edit. It works the same as the Lightroom version on a PC. Lightroom mobile presets will be in the format of .dng (Digital Negative). DNG files have additional information about the photo which we are going to use as presets as shown below:
- Download the free Lightroom mobile presets from any site. It will be in a zip file so extract them on your phone.
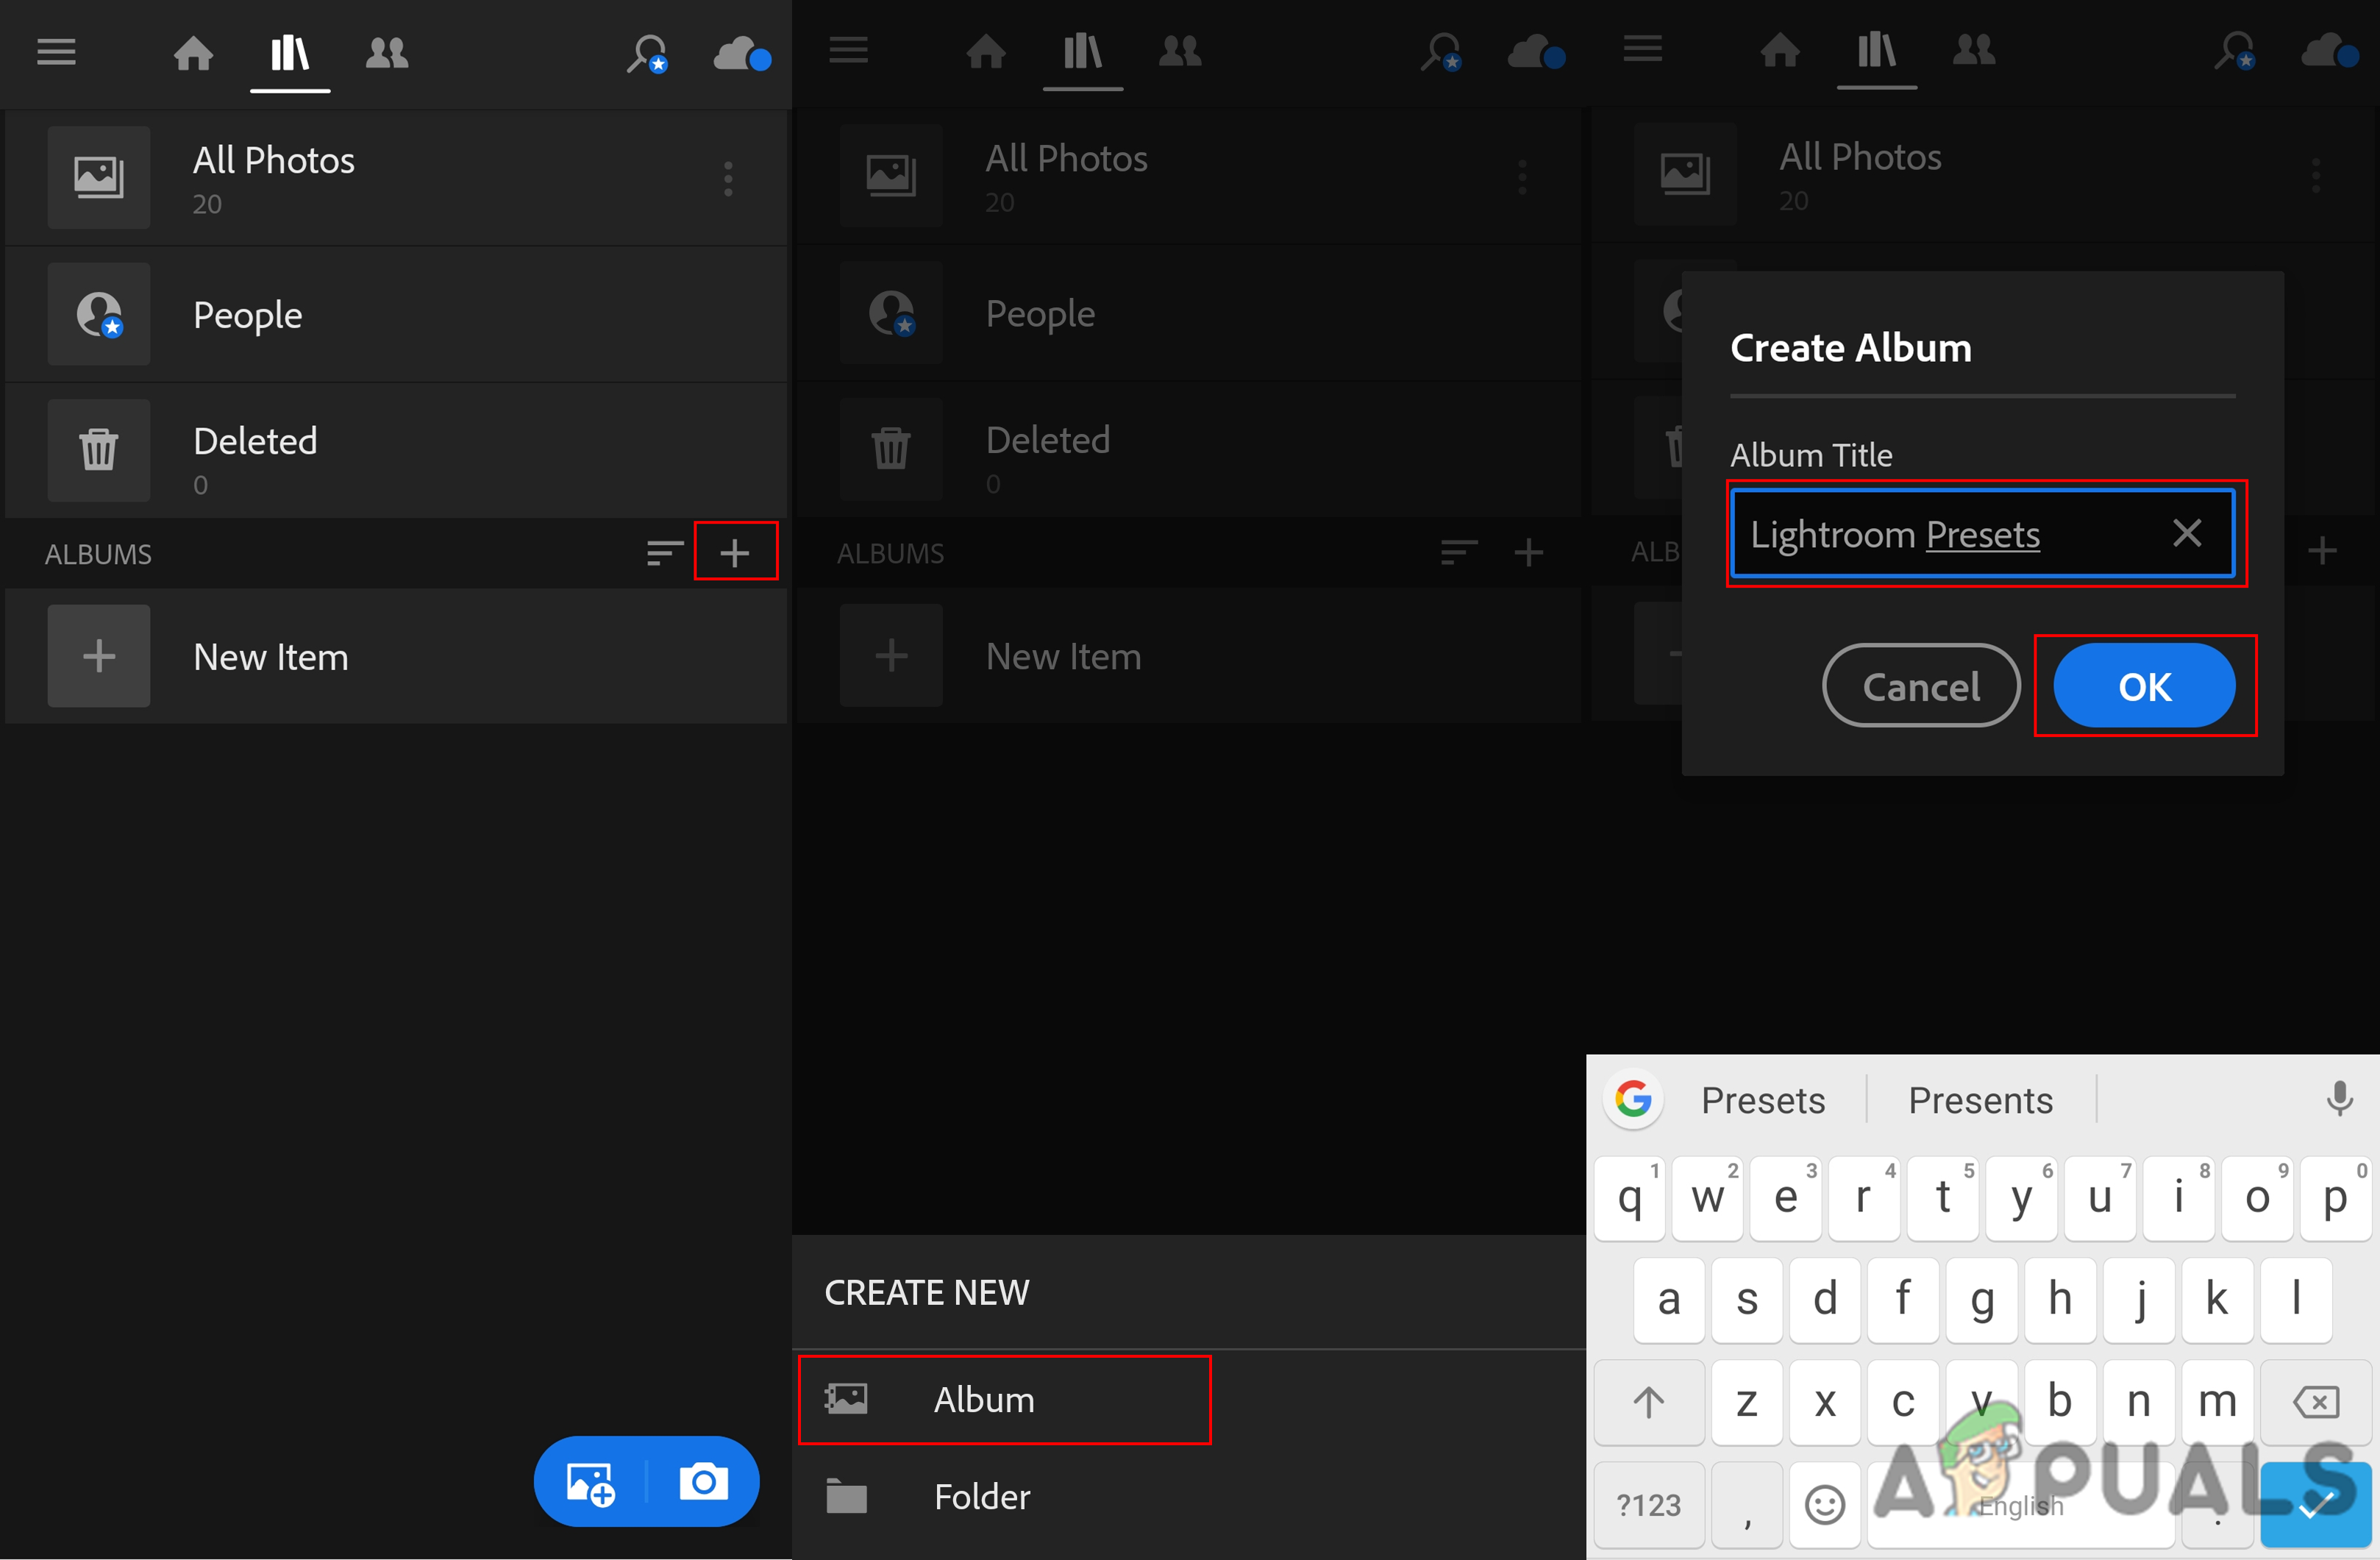
- Open Lightroom application on your phone. Tap on the plus button and choose the create an album option. Give the album a name and tap on the OK button.
Creating an album in Lightroom - Go to the album that you just created and press the add photo button down below. Choose the Files option.
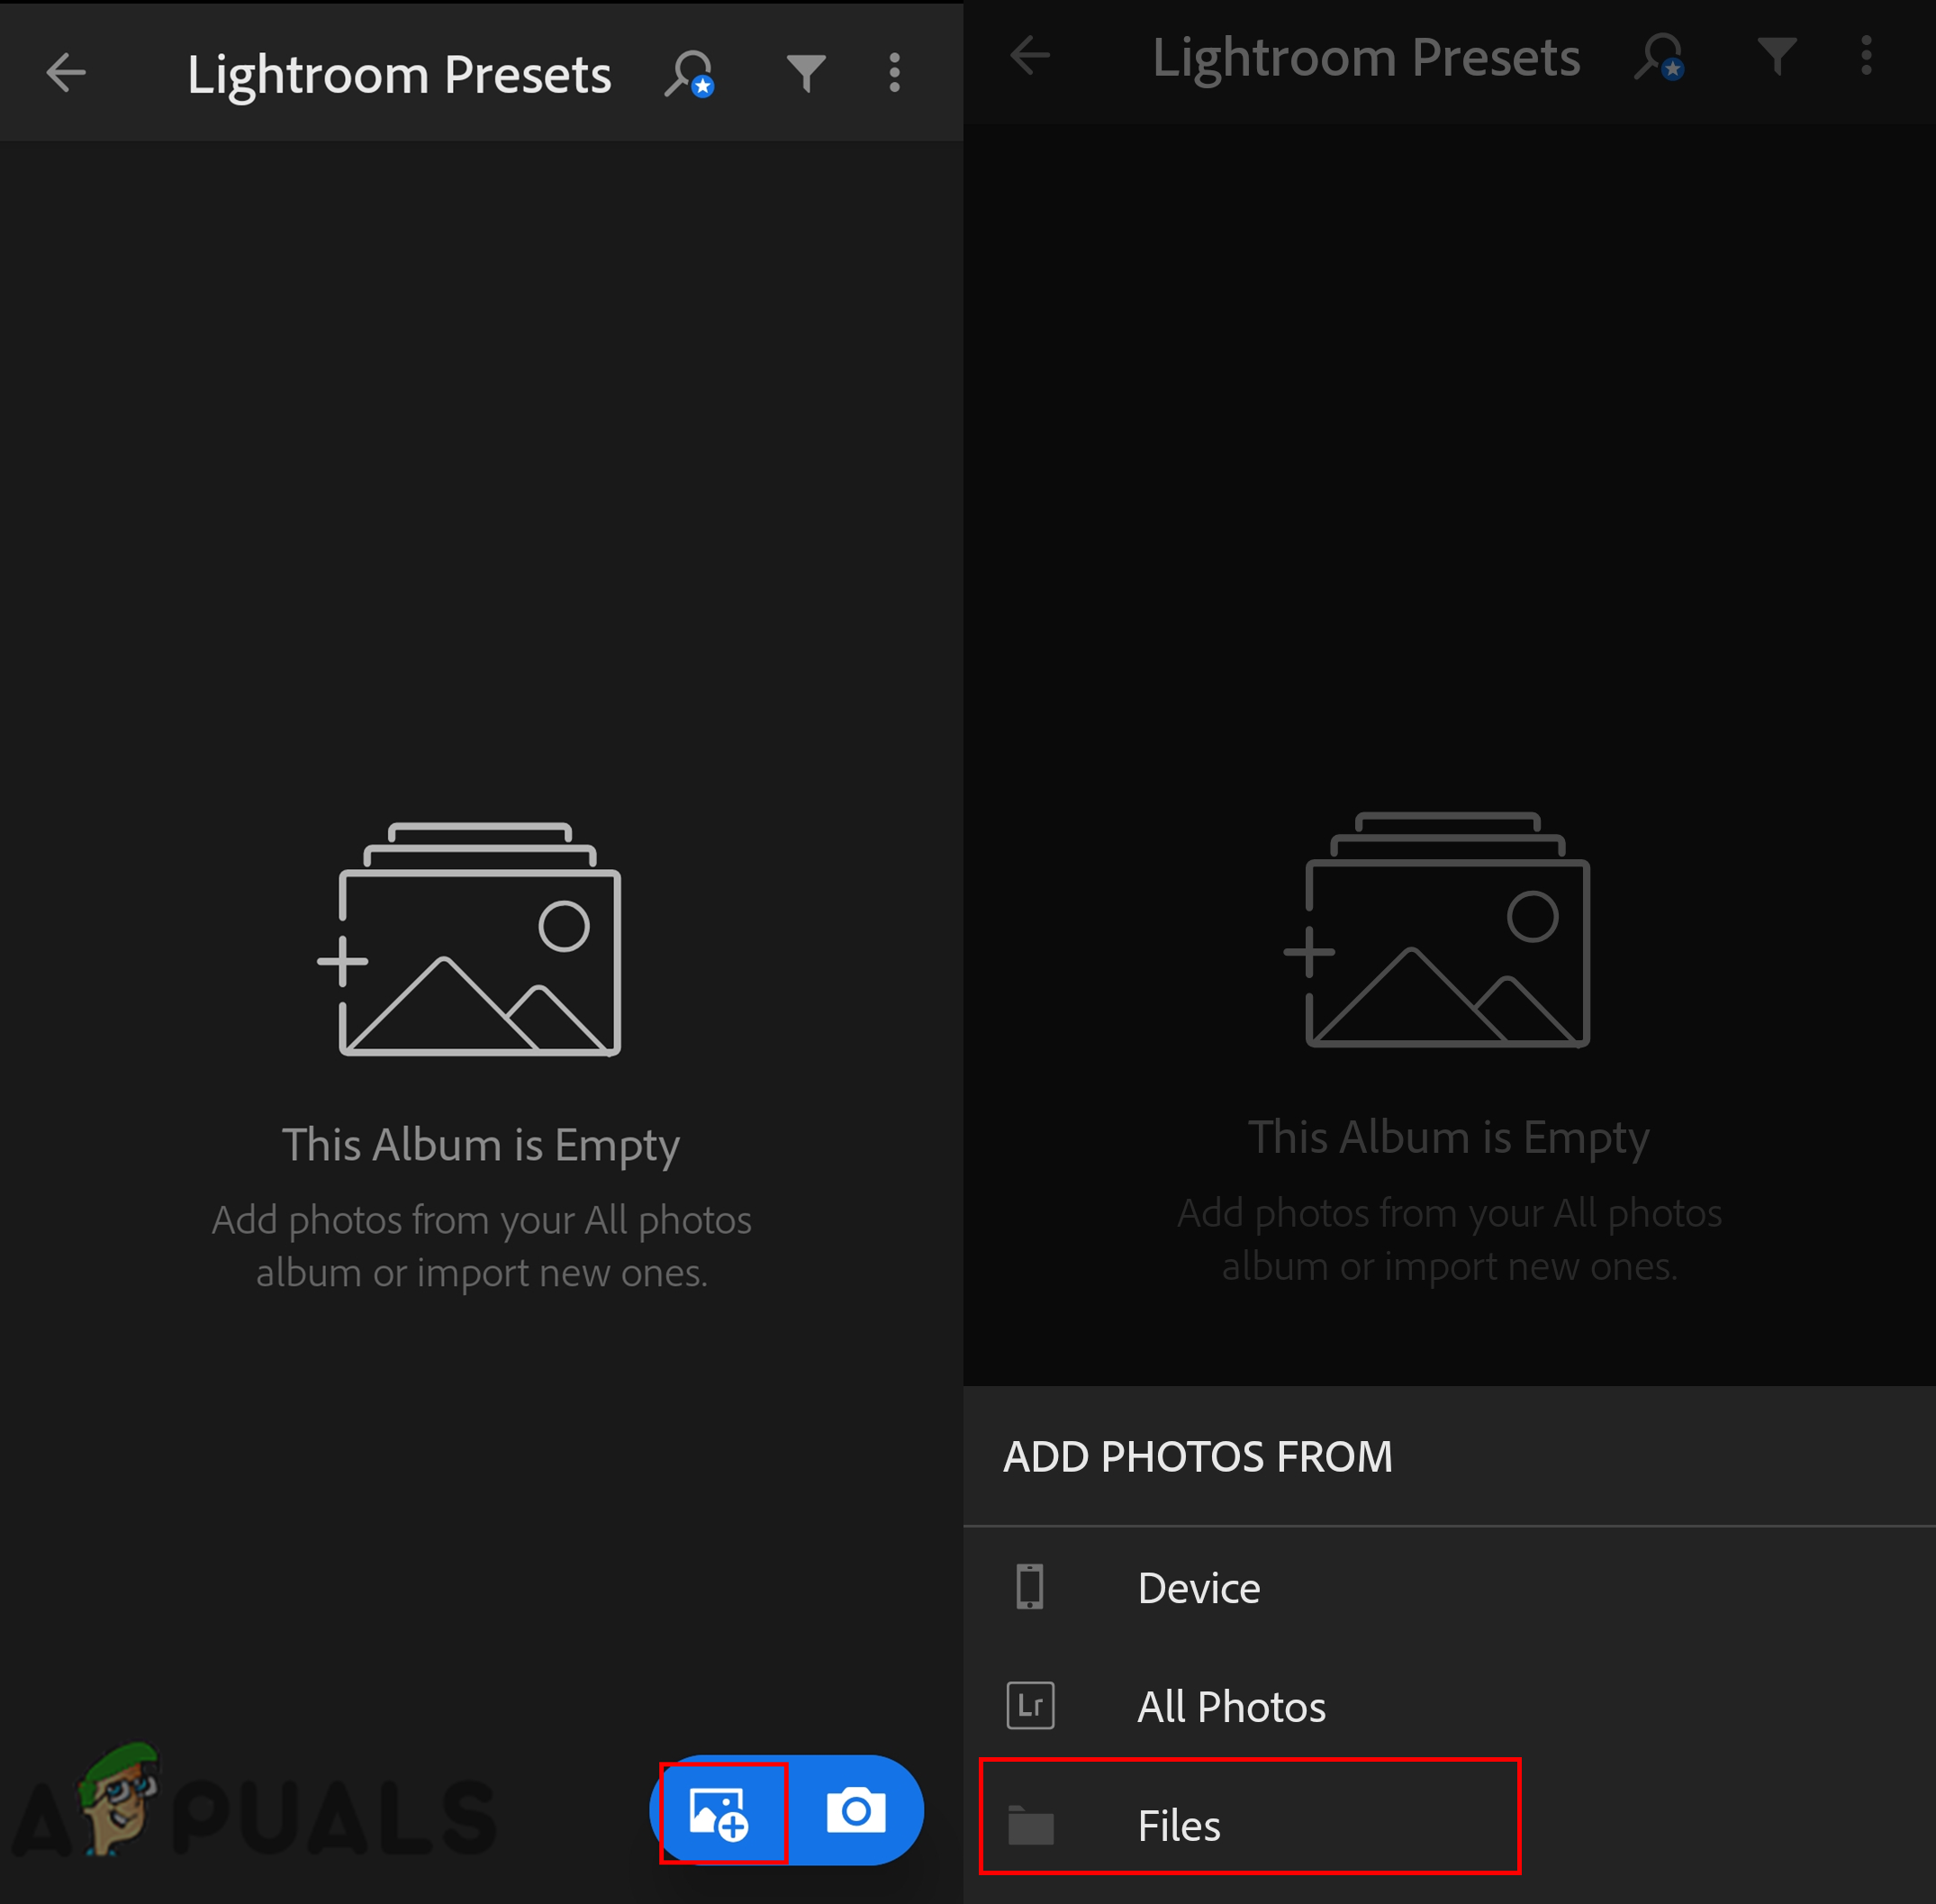
Adding files to the album - Now go to the extracted folder and tap on the preset files to add them. Open the photo that you added to your album.

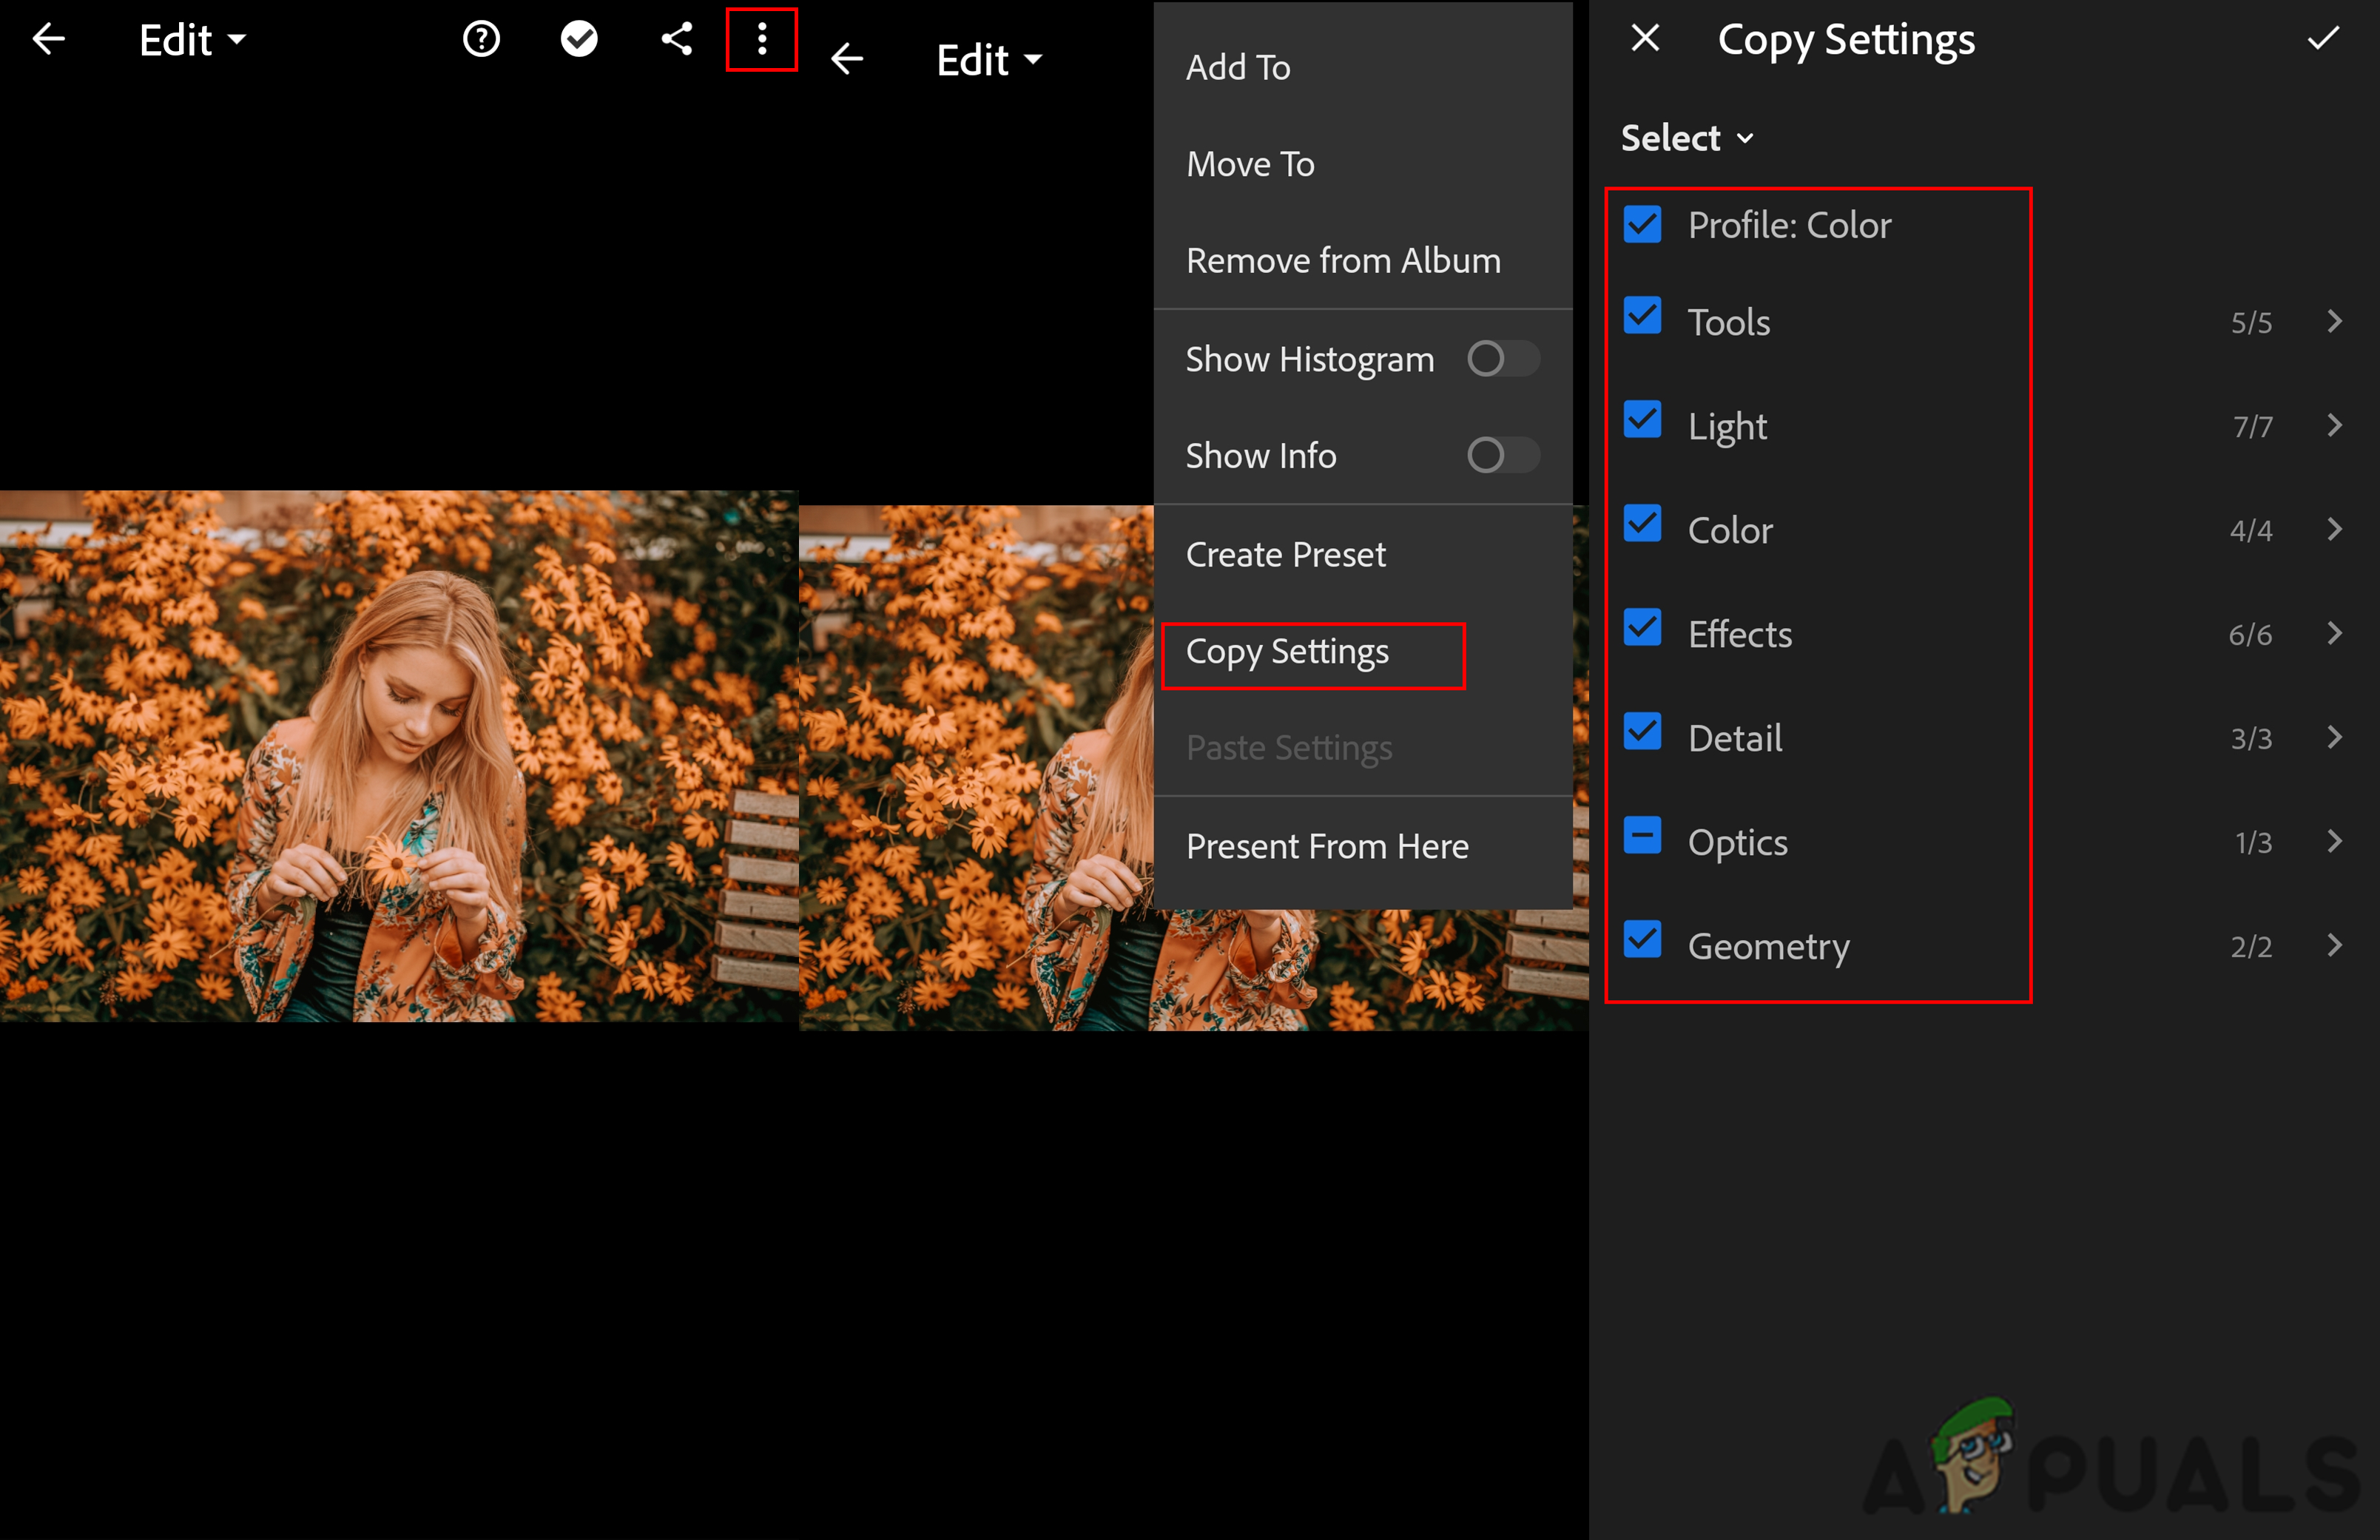
Adding the DNG file to the album - Tap on the menu icon on the top and choose the save settings option. Here you need to select all options and press the Ok button.
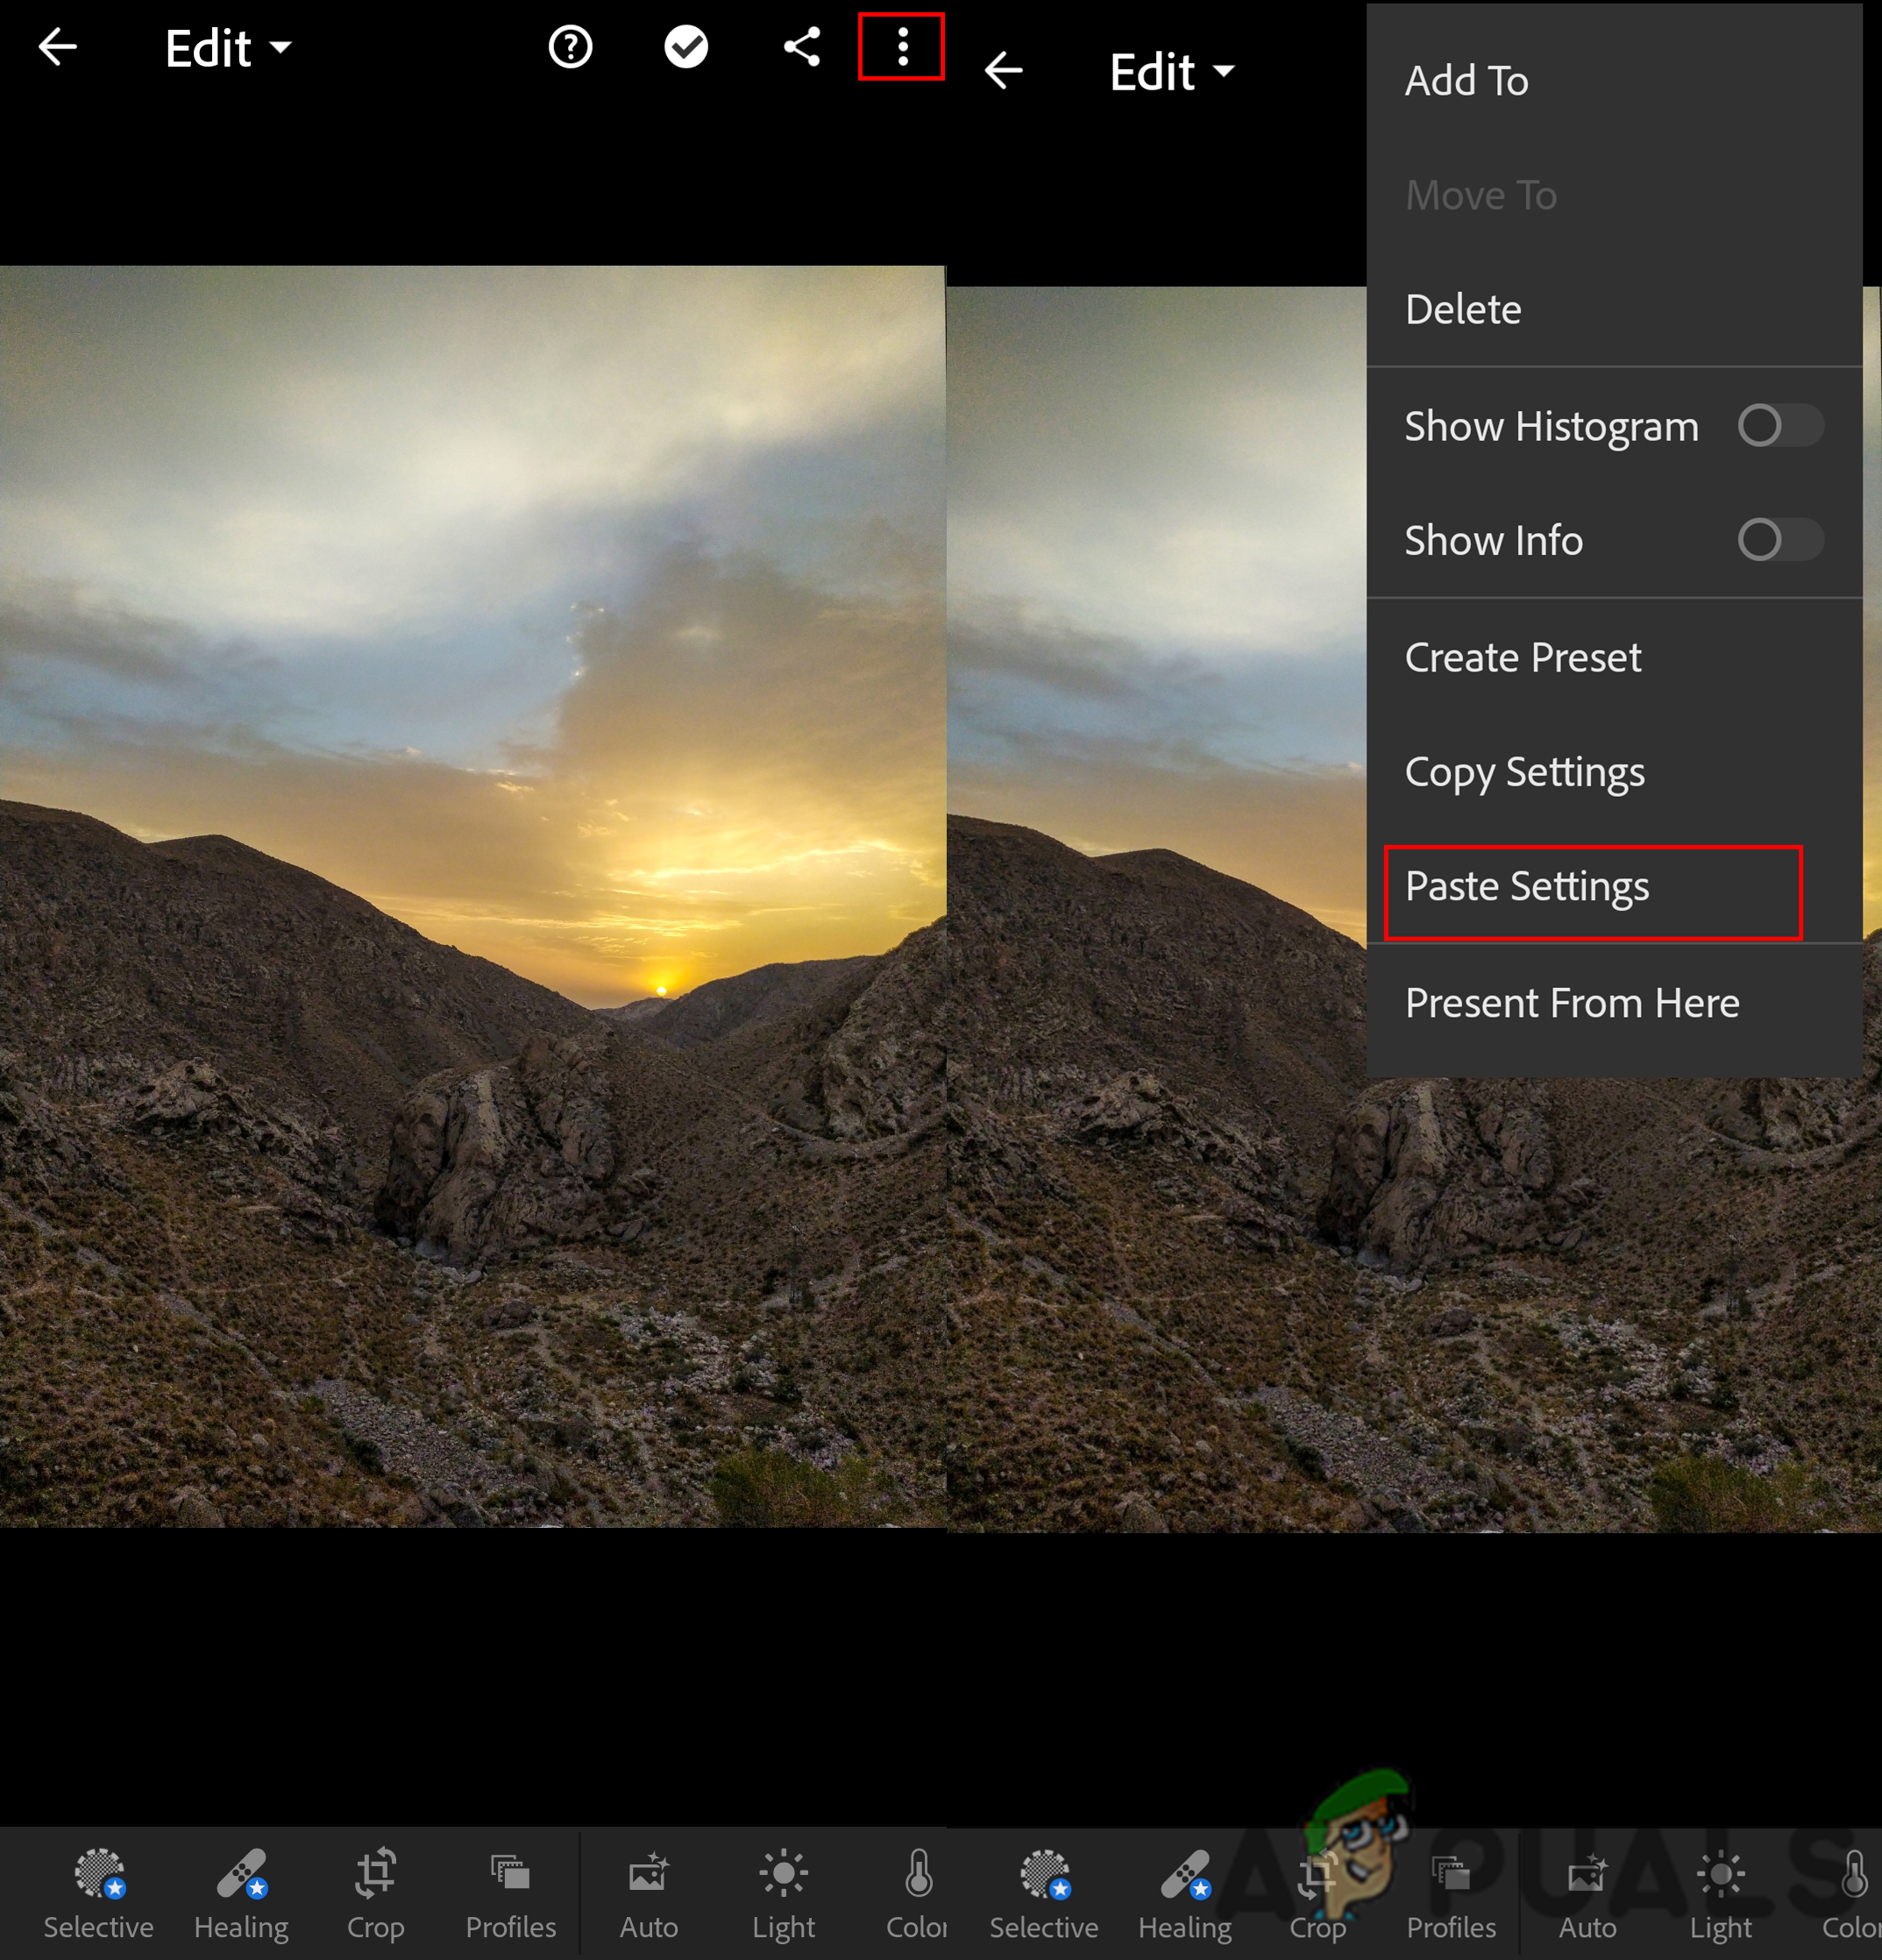
Copying the settings - Go back to the main menu of Lightroom, find a photo and tap on the menu icon on top. Now choose the Paste Settings option and the preset settings will be applied to your image.
Pasting settings to the new photo