[FIX] HughesNet Usage Meter JavaScript Error
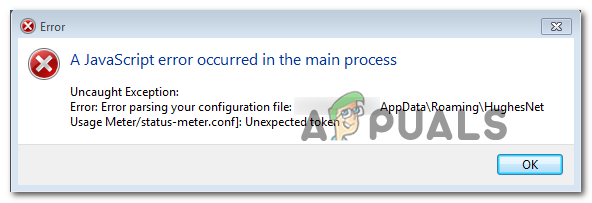
Some Windows users are reporting that although the HughesNet Usage Meter app installed on their systems without issues, they get the ‘JavaScript error occurred in the main process (Error Passing Configuration File)’ every time they attempt to access the Status Meter.
As it turns out, there are several different causes that might end up causing the JavaScript error occurred in the main process (Error Passing Configuration File) issue:
- Corrupted installation – As it turns out, you might expect to see this problem due to a corrupted installation or after a security suite ended up quarantining some items or dependencies belonging to the HughesNet Usage Meter app. If this scenario is applicable, you should be able to fix the issue by uninstalling the current app and then installing the latest available version from the official website.
- Inconsistent AppData – If the same problem persists in between reinstallation of the HughesNet Usage Meter app, it’s very likely that the issue is being facilitated by a selection of temporary files that are being stored in the AppData folder. In this care, clearing those temporary files will resolve the issue.
- Reinstalling the Java environment – As some affected users have confirmed, this problem can also be facilitated by a problem with your current Java installation. If this scenario is applicable, you will be able to fix the problem by reinstalling the whole JDK environment ensuring that there are no inconsistencies that might cause this problem.
Method 1: Reinstalling the application
As the majority of affected users have reported, this issue is caused by inconsistency with how the application was coded. It has nothing to do with the Java environment, as the error message appears due to a bad internal file that uses Javascript.
Fortunately, some affected users have confirmed that they managed to fix the issue by reinstalling the application and ensuring that they also cleaned any leftover files in between installations.
If this scenario is applicable, follow the instructions below to reinstall the application:
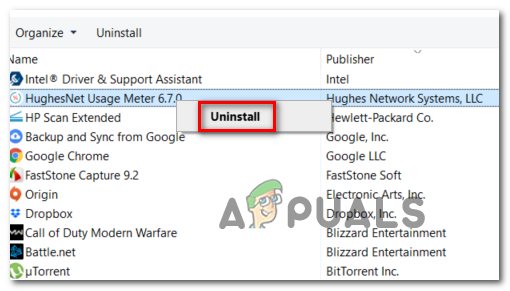
- Press Windows key + R to open up a Run dialog box. Next, type ‘appwiz.cpl’ and press Enter to open up the Programs and Features app. In case you are prompted by the UAC (User Account Control), click Yes to grant admin access.

Type appwiz.cpl and Press Enter to Open Installed Programs List - Once you’re inside the Programs and Features tool, scroll down through the list of installed applications and locate the HughesNet Usage Meter app. Once you see it, right-click on it and choose Uninstall from the newly appeared context menu.
Uninstalling the HughesNet Usage Meter app - Inside the uninstallation screen, follow the on-screen instructions to complete the uninstallation process. When asked to remove temporary data, ensure that you consent it.
- After the uninstallation procedure is complete, reboot your computer and wait for the next startup to complete.
- Once your computer boots back up, access this link (here) to download the latest version of the app.
- When the download is complete, double-click on the installer, click Yes at the UAC prompt, then wait for the installation to complete.

Installing the HughesNet Usage Meter app - As soon as the installation is complete, open the HughesNet Usage Meter app and see if you’re still encountering the same JavaScript Error while attempting to bring up the main interface from your taskbar menu.
In the event that you’re still dealing with the ‘JavaScript error occurred in the main process’ error, move down to the next potential fix below.
Method 2: Clearing the AppData folder
If the first method didn’t work, the next step should be to access the AppData folder of the Usage Meter app and clear its contents in order to ensure that there aren’t any temporary files that might contribute to the apparition of the JavaScript Error Passing Configuration File issue.
However, the folder holding temporary data related to this application is hidden by default, so you’ll need to make it visible first. But after doing so and clearing the contents of the HughesNet Usage Meter directory, the issue should be resolved.
Follow the instructions below to clear the AppData folder of the HughesNet Usage Meter app:
- Ensure that HughesNet Status Meter is completely closed (and not running in the background).
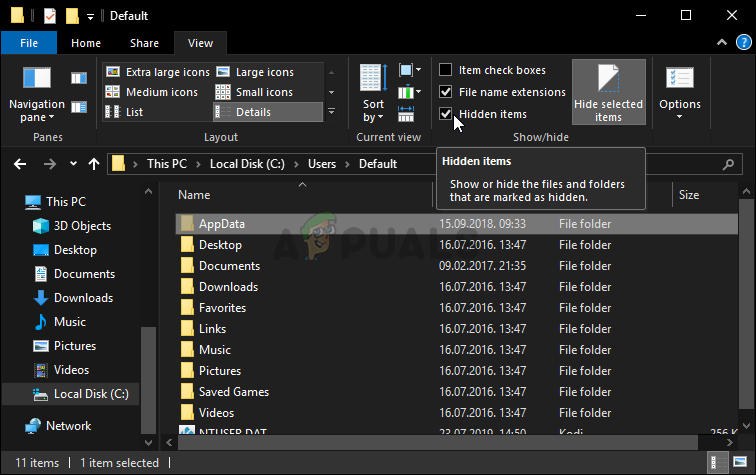
- Open File Explorer (My computer on older versions) and click on the View tab from the ribbon bar at the top.
- Once the View settings are visible, ensure that the box associated with Hidden Items is checked.
- Now that you made the Hidden Items visible, use File Explorer (My Computer) to navigate to the following location:
C:\Users\*your User name*\AppData\Roaming\
Note: Keep in mind that *your User name* is simply a placeholder. Replace it with your own machine name.
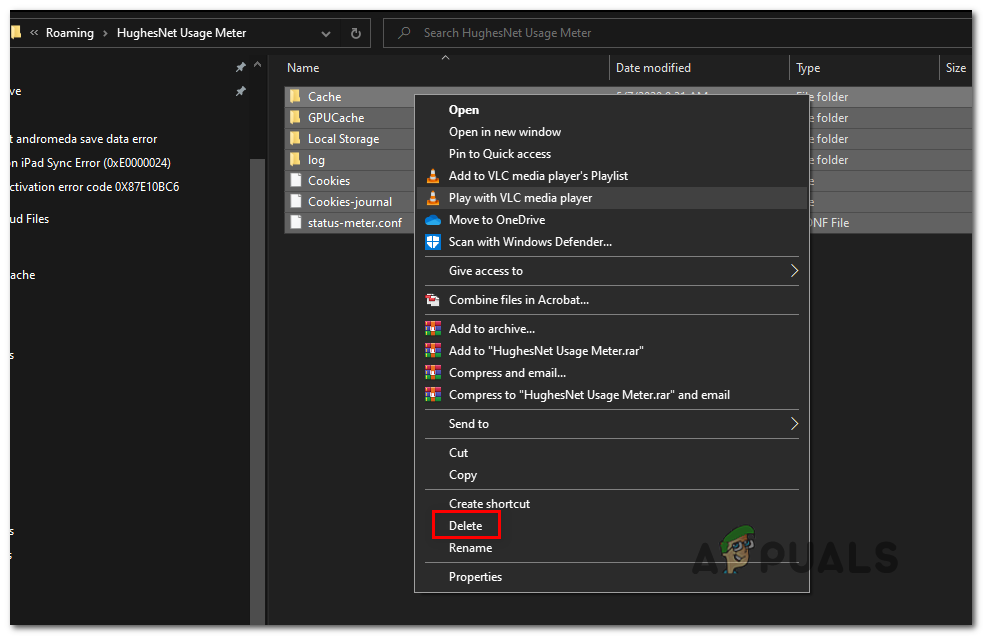
- Once you’re inside the Roaming folder, double-click on HughesNet Usage Meter. Once inside, press Ctrl + A to select everything, then right-click on a selected item and choose Delete from the context menu.
Deleting the HughesNet Usage meter folder - Launch the HughesNet Usage Meter application once again and see if the issue has been resolved.
In case the same error message is still occurring, move down to the next potential fix below.
Method 3: Reinstalling the Java environment
If the two methods didn’t work for you, it’s very likely that the problem you’re dealing with is actually rooted in the Java installation that the HughesNet Usage Meter program is using. Some affected users that we’re encountering the same issues have confirmed that they managed to fix the issue after reinstalling the entire java environment – this is indicative that the problem occurred due to an inconsistency with the Java installation.
If this scenario is applicable to your current situation, follow the instructions below to reinstall the Java environment:
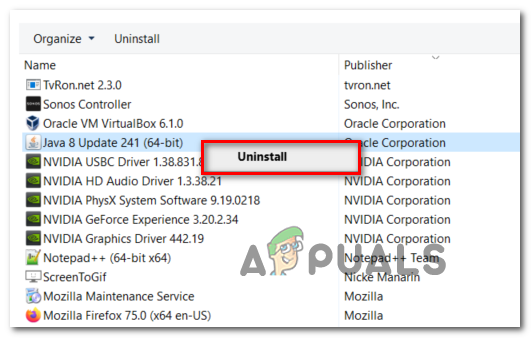
- Press Windows key + R to open up a Run dialog box. Next, type ‘appwiz.cpl’ and press Enter to access the Programs and Features menu.
Type appwiz.cpl and Press Enter to Open Installed Programs List - Once you’re inside the Programs and Features menu, scroll down through the list of installed applications and locate your current Java installation. When you see it, right-click on it and then click on Uninstall from the newly appeared context menu.
Uninstalling the Java Installation - Inside the uninstallation screen, follow the on-screen instructions to complete this process, then restart your computer and wait for the next startup to complete.
- After your computer boots back up, visit this link (here) from your preferred browser and click on the Agree and Start free Download button.
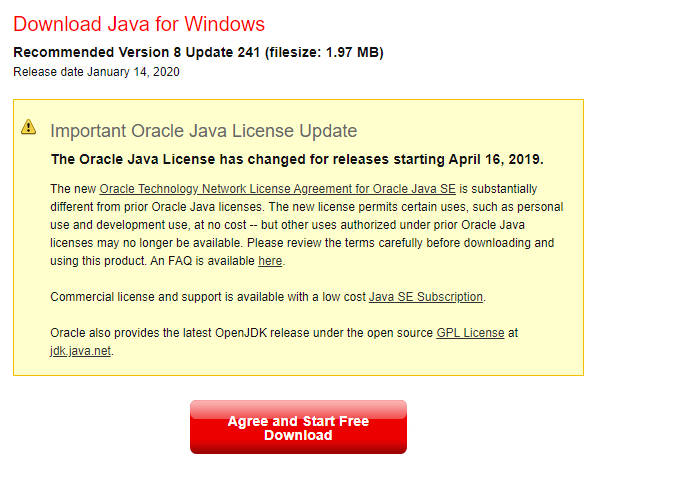
Download the latest version of Java - Once the download is complete, double-click on the JavaSetup installer, then follow the on-screen prompts to install the latest version of Java.
- After the operation is complete, restart your computer and see if the problem is resolved at the next system startup.


