How to Unlock and Root the Google Pixel 2
The Google Pixel 2 and Pixel 2 XL are fantastic, pure Android phones. Despite being released in 2017, the Pixel 2 devices still receive steady updates directly from Google, including the latest updates to Android 9.0 Pie.
In this guide, we will show you how to unlock the bootloader on your Pixel 2 / Pixel 2 XL, and root it using Magisk. It’s a very simple process, so just follow our guide carefully, and comment if anything goes wrong (it shouldn’t).
Requirements:
- ADB & Fastboot on your PC (see Appuals guide How to Install ADB on Windows)
- Magisk Manager APK
Unlocking the Pixel 2 / Pixel 2 XL Bootloader
Please be aware that unlocking the bootloader will wipe your phone (factory reset). You should backup any important data before proceeding.
- Open your Settings > About Phone > tap Build Number 7 times to activate Developer Mode.
- Go to Settings > Developer Options > enable both USB Debugging and OEM Unlocking.
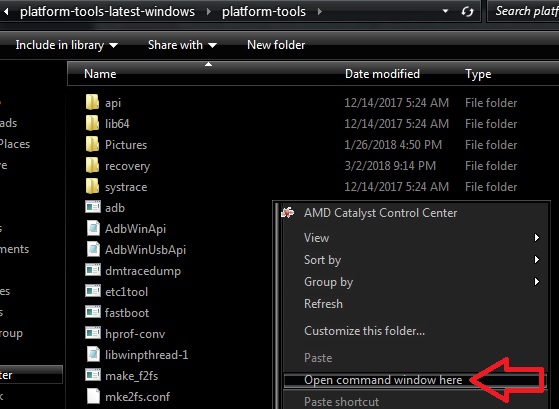
- Connect your Pixel 2 to your PC via USB, and launch an ADB terminal on your PC (hold Shift + right click and choose ‘Open a Command Window Here’).
- To make sure your Pixel 2 is recognized by ADB, type in the terminal: adb devices
- This should display your device’s serial number in the output prompt – if it says your device is not recognized, device offline, or displays no device at all, you may need to try reconnecting the USB, or troubleshooting your USB drivers (also accept the ADB pairing dialogue on your Pixel 2 screen).
- If your device is successfully recognized by ADB, type the following command into ADB terminal: adb reboot bootloader
- Your Pixel 2 should immediately reboot into Bootloader Mode. Now you need to decide if you want to do a standard or critical unlock. The difference is that a critical unlock will allow you to directly flash bootloader files, and changes the ADB commands you will use.
- So you will enter in the ADB terminal either fastboot flashing unlock or fastboot flashing unlock_critical
- You now need to follow the prompts on your Pixel 2 – when its all done, reboot the device.
- You may now proceed through the Android setup wizard.
Root the Pixel 2 / Pixel 2 XL
- Download the Magisk Manager APK onto your device. Also grab one of the latest boot images for the Pixel 2 or Pixel 2 XL. Place both of these files on your SD card.
- Go through the steps to enable USB Debugging, and also enable Unknown Sources on your device.
- Install the Manager Manager APK on your Pixel 2, and launch it.
- In Magisk Manager app, press the Install button, then choose Patch Boot Image File.
- Choose the boot image you want Magisk to patch (the one you transferred to your SD card, of course!).
- After Magisk has patched the boot image, you need to pull it off your device. You can use ADB for this. Just open an ADB terminal on your PC, and type: adb pull /sdcard/MagiskManager/patched_boot.img
- This will send the patched boot image to your main ADB folder.
- Now in ADB, type: adb reboot bootloader
- Now flash the patched boot image with: fastboot flash boot patched_boot.img
- Reboot the Pixel 2 with: fastboot reboot
- Now when you’re back in the Android system, you can open the Magisk Manager app, and it should confirm your root status!