How to Remove Padlock or Lock Icon from Files on Windows 10
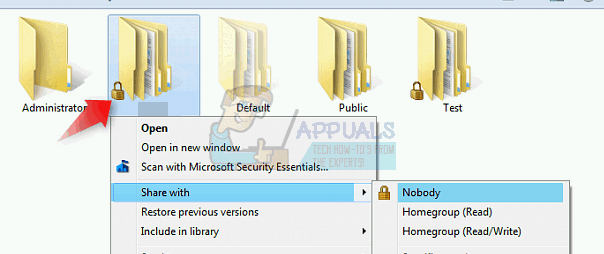
If you see a lock icon overlaid on your files or folders, it means the sharing or security options have been tampered with, either by you or a software or when changing operating systems and migrating data or when tweaking the HomeGroup settings. The padlock icon means that the file or folder is not shared with anyone. The padlock usually appears on PC’s with HomeGroups.
To solve this problem, you either need to take ownership of that folder or change your user’s access rights. You need to be an administrator in order to make this kind of change. This can be done by changing the security settings on the folder to allow the Users group to, at the very least, read from the folder.
In this article, we’ll provide solutions on how to how to remove the lock icon from folders. You can try just one method or both if the first doesn’t work. Note that this issue spans from Windows Vista all the way to Windows 10.
Method 1: Taking Ownership
- Right-click on the item you want to modify and select Properties.
- In the Properties windows, select the Security tab and click Advanced.
- If you are not part of the list of users or groups under the Permission entries, click on Add. Click on Select a principal and type your user account or group in field and click Check Names. If the user or group was found on your computer, you will see that the text you typed was changed to [Your PC Name]\[User] or [Your PC Name]\[Group]. If so, press on OK. If the user or group was not found you will receive a Name Not Found error window. Make the necessary corrections and try again.
- You’ll be taken back to the previous window with the permission entry. Check the Full control box, check the box at the bottom to Replace all child object permission entries with inheritable permissions… and then click OK. If you receive the confirmation that you have taken ownership of the folder. Press on OK to confirm and that’s it.
Method 2: Changing Permissions
- Right-click on the file/folder you want to modify and select Properties.
- In the Properties window go to the Security tab and click on Edit.
- If don’t see “Everyone” or you are not on the list of users or groups that have permissions defined, click on Add. But if your user or group is on that list, select it, click on Allow Full Control and then press OK.
- Type your user account or group in the field and click Check Names. If the user or group was found on your computer, you will see that the text you typed was changed to [Your PC Name]\[User] or [Your PC Name]\[Group]. If so, click OK. If the user or group was not found you will receive a Name Not Found error window. Make the necessary corrections and try again.
- In the Security/Permissions window, select the user/group you just added and then check the Full Control box and click OK.
Method 3: Reset Permissions Using the Reset Utility
If you are resetting a folder and you find the steps above difficult or lenghty to follow you can use a Reset Utility. click (here) to download. After it has been downloaded, open and run it. You will see a small window pop-up as shown below. The password to extract the app is lallouslab
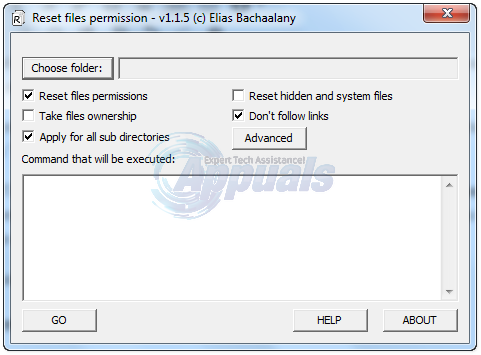
From here, choose the folder or the drive and click GO. Once done, check again to see if you can now access the folders or the drive, if not then run the utility again with “Take files ownership” option checked.