How To Perform Time-Lapse Photography Operations Using Raspberry Pi?
To capture the glamour of nature without spending much time, time-lapse photography is the best technique. It is a technique in which the speed at which the video frames are captured is a lot lower than that which will be utilized to play the arrangement back. We can make time-lapse videos using DSLRs, camcorders, etc. but these devices are not economical. An average model of DSLR costs around $400 and it can’t be purchased by one who has a limited budget. Hence, keeping it in view today we will perform time-lapse photography operations using a Raspberry Pi that is a low cost, pocket-sized computer that requires some fundamental equipment for making fascinating projects like this one. It can do all that you would anticipate that a work station should do, like playing a superior quality video, making spreadsheets, FM radio stations and gaming, etc. The Pi camera would be placed at a fixed position and it would take pictures itself in a time span that is set by the user. At the point when it is played at a typical speed, the time seems to be moving quicker.
How To Setup Pi Camera For Time-Lapse Photography?
The best approach to start any project is to make a list of components because no one will want to stick in the middle of a project just because of a missing component.
Step 1: Components Required
Step 2: Selecting the Raspberry Pi Model
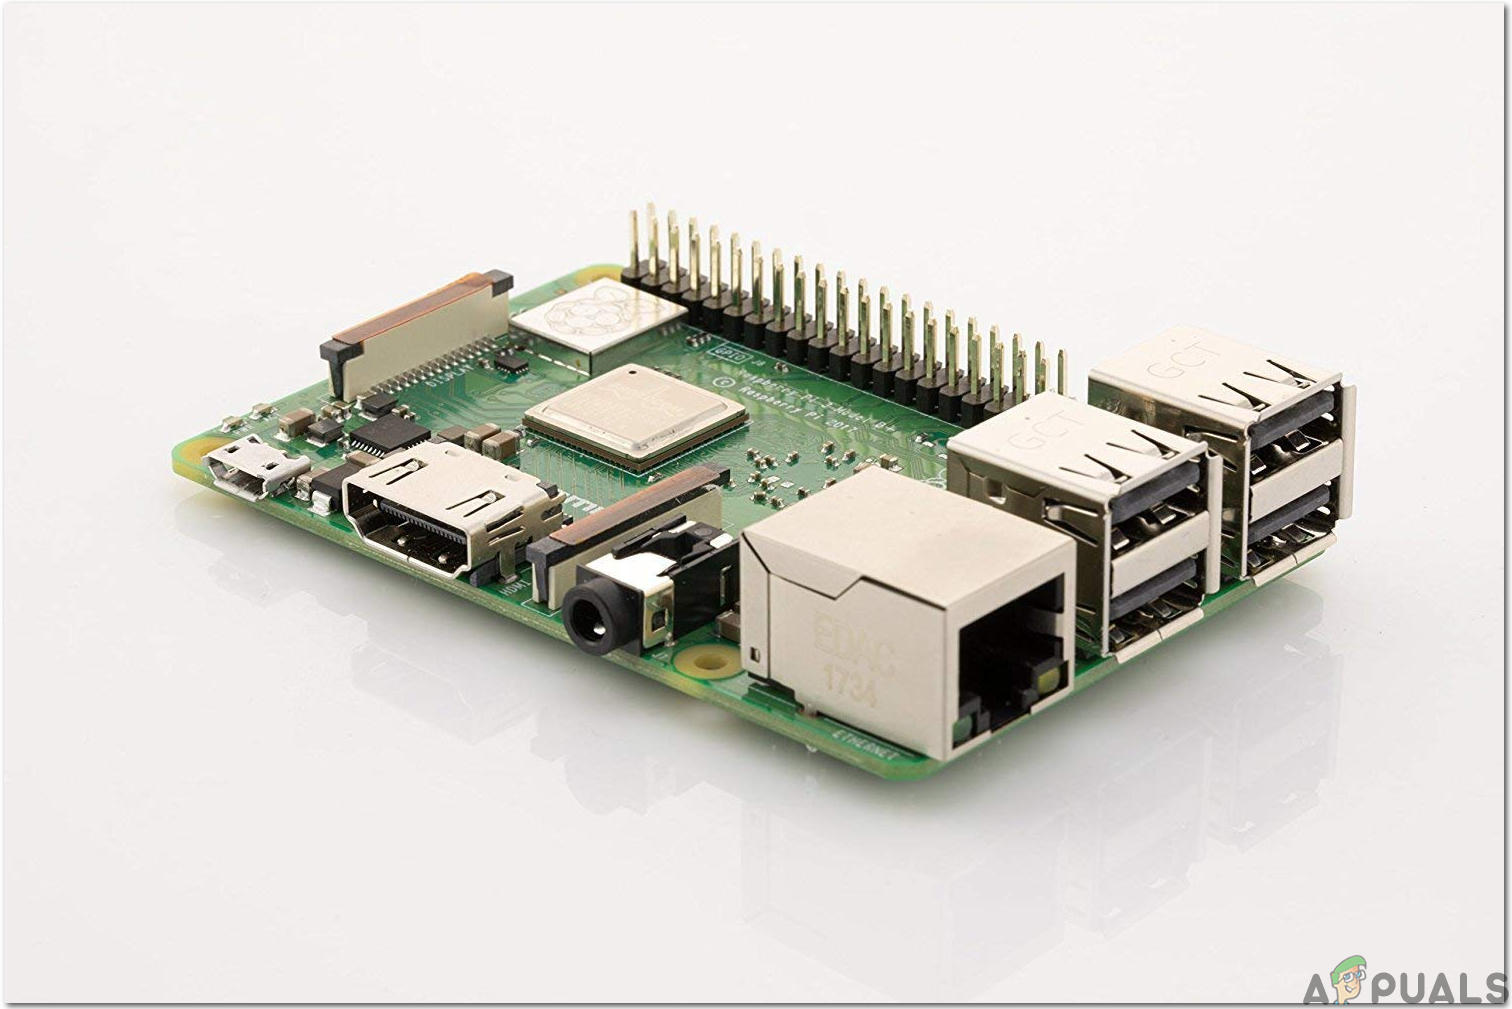
The selection of Raspberry Pi is a very technical task and it should be done carefully so that you don’t suffer in the future. The Raspberry Pi Zero is not preferred because it is the oldest model available in the market with a limited amount of specifications and setting up a network on it is a very tiring job. The latest models like 3A+, 3B+ can be purchased. The Raspberry Pi 4 is the quickest and most dominant gadget the Raspberry Pi Foundation has released to date but the Raspberry Pi team hasn’t shared it’s hardware issues after release. It doesn’t boot well because it’s USB-C port doesn’t provide enough power for booting. So, in this project, we will use the Raspberry Pi 3B+.
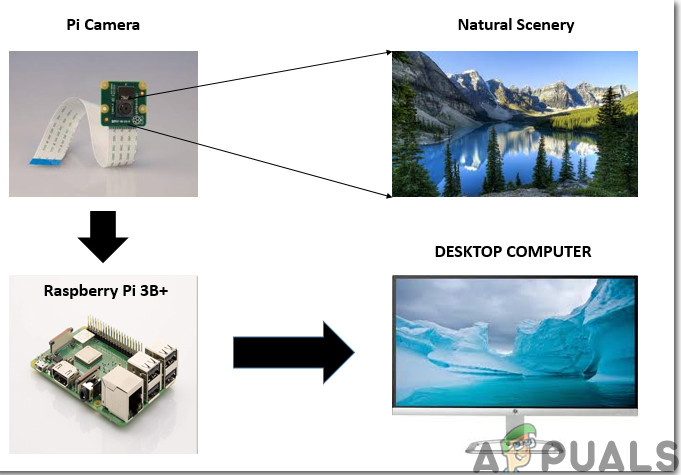
Step 3: Block Diagram Of The Project
I have included the Block Diagram of the project in the article for a better understanding of the working principle of this project.
Step 4: Setting Up Raspberry Pi
There are two options for setting up Raspberry Pi. First, one is to connect your Pi with LCD and connect all the necessary peripherals and start working. The second one is to set up Pi with the laptop and access it remotely. It depends on the availability of LCD, if you have it at home then you can set up your Pi by using an LCD. Connect the LCD to the HDMI port of the Raspberry by using HDMI to VGA adapter. If you want to access your Pi remotely follow my article named “How To Access Graphical User Interface (GUI) Of Raspberry Pi Using SSH And VNC Viewer?”. In this article, a detailed setup of Pi with a laptop is described and after logging in you would be able to gain the remote access to Pi.
Step 5: Understanding The Working Principle
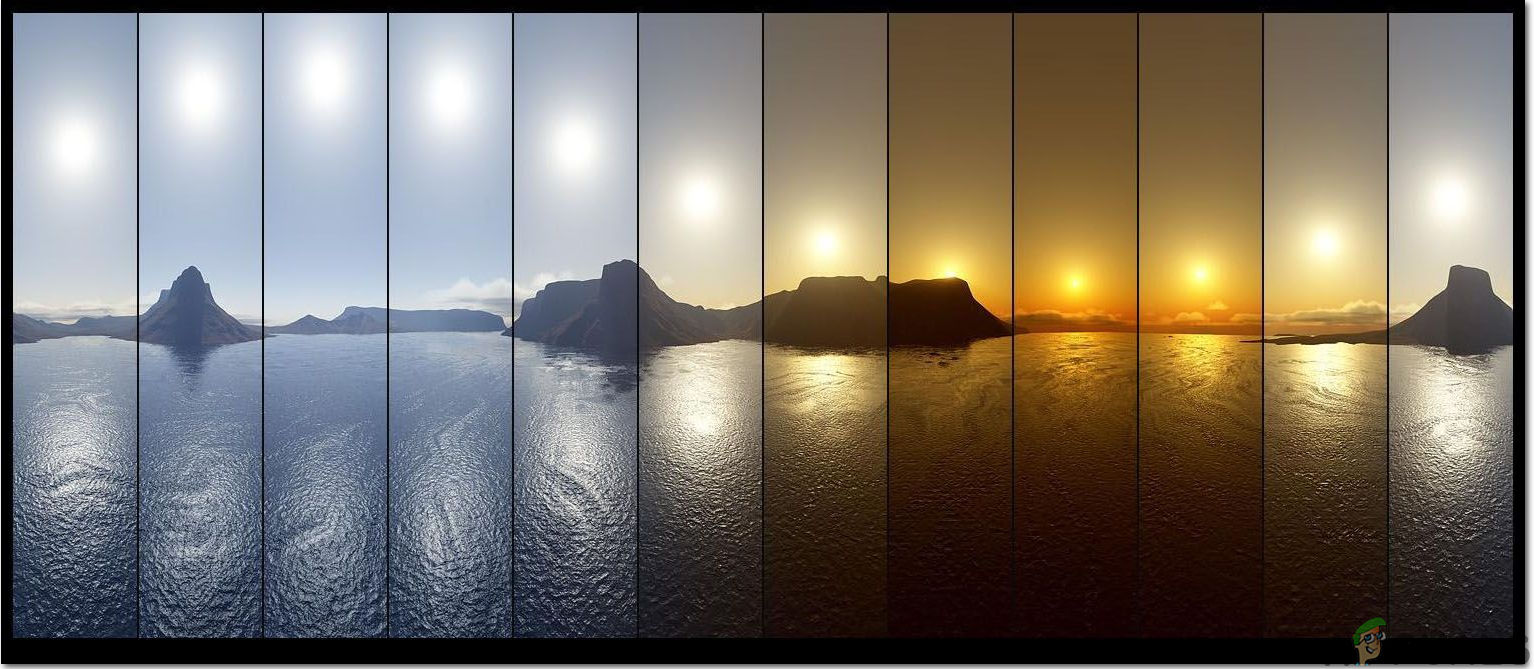
The working principle of the project is quite simple. A camera is placed in a suitable position for example. If you want to capture the sunset, mount the camera at the roof and rotate it to the suitable angle at which it will capture the scenery and set the time for which it will keep capturing the pictures. There are two types of frame rates that are set for time-lapse photography today. The first one is 24 fps and the second one is 30 fps hence if you’ve set a time span of one hour i.e. 3600 seconds and you need a 10-second video, divide 3600 seconds/30 frames and you would get a 12-second interval. It’s totally up to you, you can set your time interval by applying a simple formula mentioned above. After the camera has completed the process of taking photos for the preset interval, you can download all pictures into your PC and observe the progression of photos with respect to time. After downloading those photos you may select the photos of your choice from the collection that you’ve saved and performed further image processing operation on that or you may combine them to make a video and observe how the natural scenes change with respect to the time.
Step 6: Connecting The Peripherals
After choosing Raspberry Pi we will connect keyboard and mouse to the Raspberry Pi. After connecting them use the HDMI cable to connect Pi with the Television. After making these connections we are ready to proceed further.
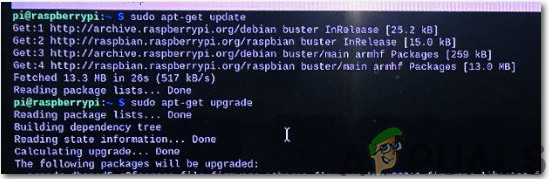
Step 7: Make Sure That Raspberry Pi Is Up To Date
After setting up Raspberry Pi we would ensure that our Pi is working fine and all the latest packages are installed on it. Open the Command Window and type the following two commands to update Pi.
sudo apt-get update
Then,
sudo apt-get upgrade
If any updates are installed, press Y and then press Enter to continue downloading updates.
Step 8: Enabling The Raspberry Pi Camera Module
We need to enable the Raspberry Pi camera module before using it. Close the command window after updating the packages and click on the Raspberry icon on the top left corner of the Desktop Screen. Scroll down to the Raspberry Pi Preferences, click on the Interfaces option and enable the Camera from there.
It can also be enabled by typing the following command in the Terminal window:
sudo raspi-config
After typing this command we will see that the Raspberry Pi Software Configuration Tool is opened and scroll down to Interfacing Options and press Enter.
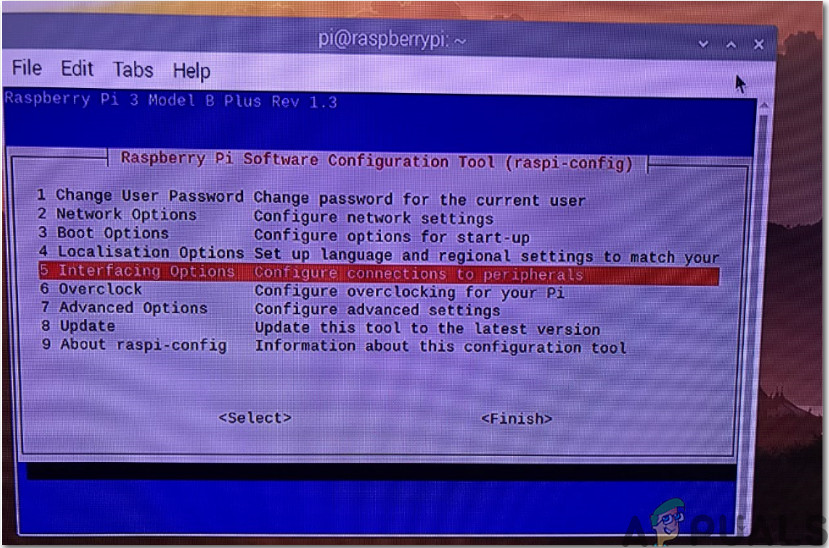
A new screen will appear and we would see the Camera mentioned at the top. Press Enter:
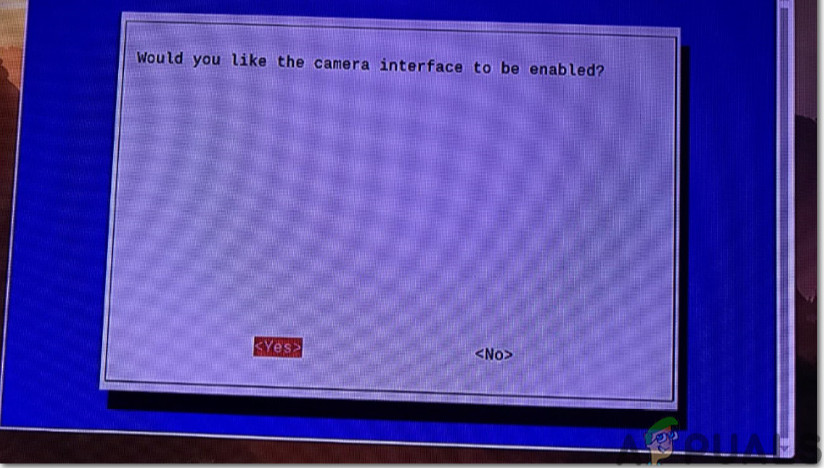
After enabling the camera the Pi needs to be rebooted for the changes to take effect. We will reboot our Pi before proceeding further and it can be done by typing the following command.
sudo reboot
Step 9: Installing Python Support
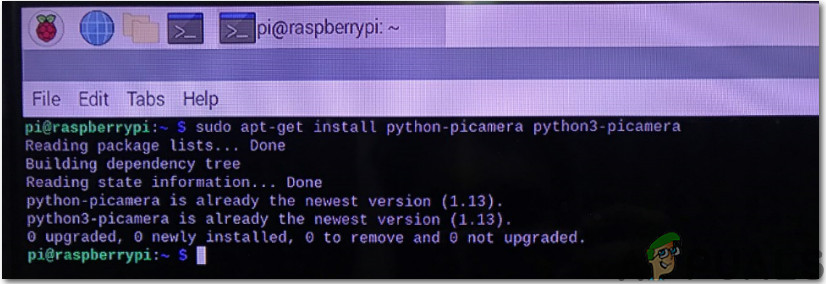
Now we need to install Python Support for our Raspberry Pi camera. As we are using Raspbian Buster as an Operating System hence Pi camera isn’t installed by default in it, we would have to install it manually. To introduce Pi camera on Raspbian, it is ideal to utilize the system’s package manager named as apt. This will help us to install and delete the latest packages of Pi camera on our board. It will likewise make Pi camera accessible for all users that are available on the network. For installing it run the following command:
sudo apt-get install python-picamera python3-picamera
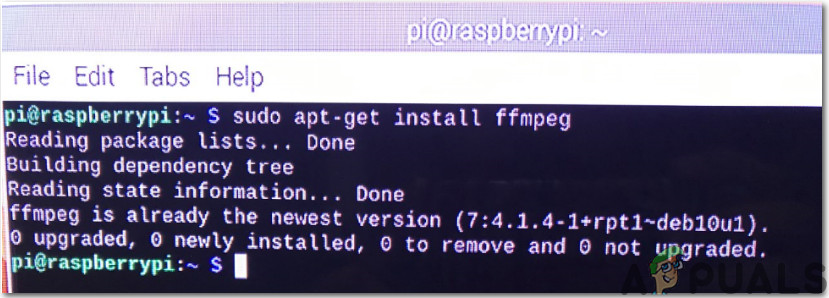
After installing the python support, run the following command:
sudo apt-get install ffmpeg[/stextbox]
We want to work in python environment hence we will write the following command for entering into python environment:
sudo idle &[/stextbox]
Now, we will navigate to the File menu in the Python environment and click on New File. A blank python environment will open and then we would open CameraTest.py code for testing the camera.
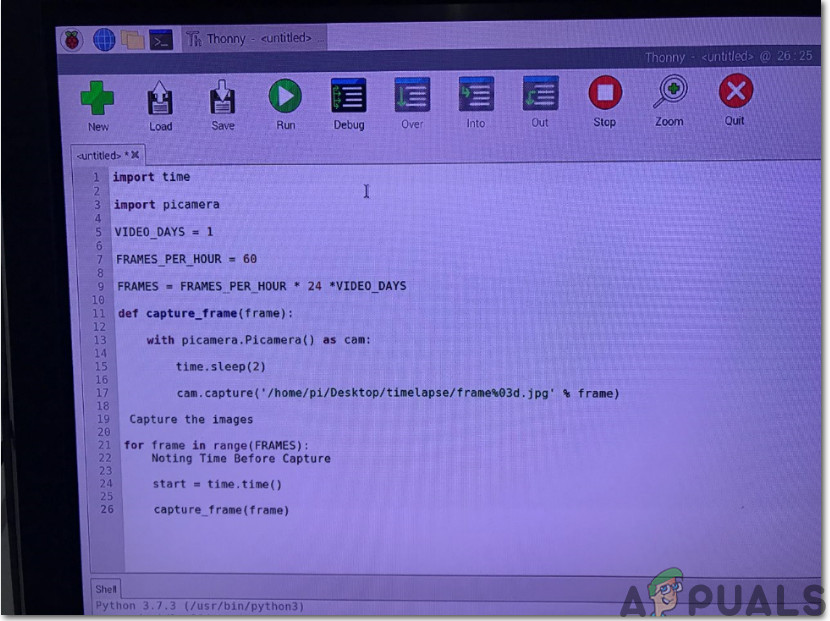
Save it and then press the F5 button. After a couple of moments, we would observe that a.png file would be saved on desktop and if this file is saved we have enough evidence to claim that our camera module is working properly. If it doesn’t, then repeat the whole procedure mentioned above carefully. Open the terminal window and against [stextbox id=”info”] command type the following command:
sudo idle &[/stextbox]
We will click on the file menu and in the Python environment, we would open the Timelapse1.py code. Save it and then for executing it press Alt+F5. If you want to stop executing it press Ctrl+F6. Now, we would see the captured images in the destination folder. All of the photos would be arranged in order and you can view them and perform image processing operations on it if you want to.

Step 10: Finalizing The Hardware
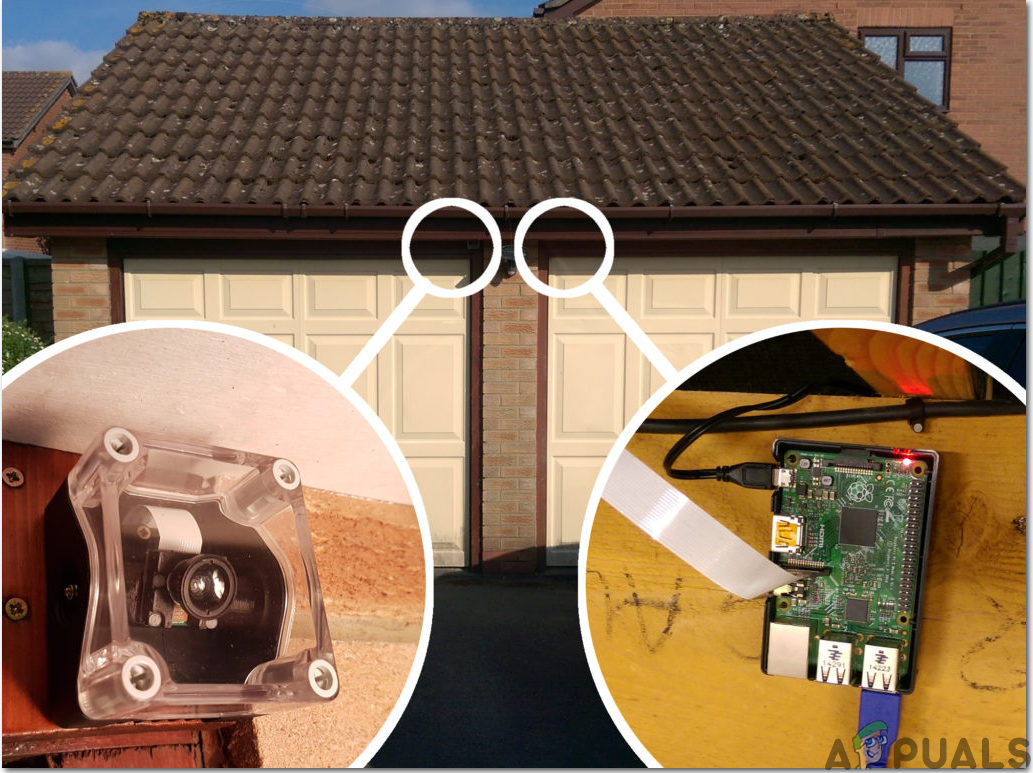
As we have tested our project now all that we need is to install the hardware at a suitable place. If you have made this project for your home and want to capture the sunset, place the raspberry pi into its casing, fix the camera module with it and put it at an appropriate place so that it could capture the sunset in the evening. Later you can extract all of the images.
Applications
- It can be used to capture the sunset.
- If you are constructing the house then you can view all of the work going on even if you are not present at the site.
- It can be used to capture the plant growth.
- It can be used as a monitoring system in any organization.