How to Mount UDF Volumes in Ubuntu
Universal Disk Format (UDF) refers to the ISO 13346 and ECMA-167 vendor-neutral specification for computer data storage. While in practice it’s used to author DVDs, there’s nothing stopping someone from actually formatting a fixed disk as UDF. More practically, it’s used for optical media like CD-RW and DVD-RW/DVD+R to allow users to add and remove files from them. Some professional high-end digital camcorders also use the less common DVD-RAM format, which also uses this.
Any of these formats can be easily opened in Ubuntu, and generally, any UDF volume will mount automatically. A user simply needs to insert the optical disc and the file system should mount. Occasionally you might find that a DVD you authored yourself won’t automatically mount in Ubuntu even if it will in Microsoft Windows, OS X or macOS Sierra. This is because Windows will make guesses at what the DVD contains until it gets it right. Fortunately, a simple bash command might be all you need to get it working in Ubuntu again.
Mounting UDF Volumes to the Ubuntu File Structure
Insert the optical disc into the optical disc drive and then open your file manager and see if it’s already mounted. If it has, then you don’t need to go further. If it hasn’t, then make a quick check in the /media directory to see if the operating system put it there. Ubuntu performs all automatic optical disc mounts to this location rather than the /cdrom directory used by older Linux distributions.
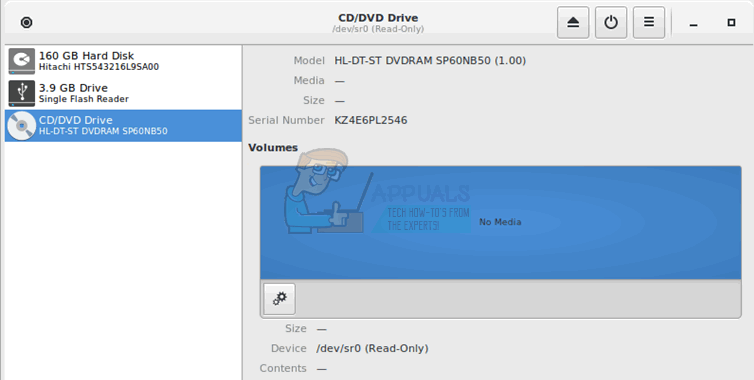
If it’s not there, then open up the Disks utility from the Dash menu or the Whisker menu if you’re using Xubuntu. Lubuntu users will find it on the LXDE menu under Accessories. Click on the CD/DVD Drive icon in the left-hand panel and then look in the volumes graph. If there’s something there yet not mounted, then try clicking on the right-facing play button underneath the graph. This might mount the volume.
Disks Utility might report that there’s No Media in the drive even if you know the disc is there. Take the disc out and gently clean it before reinserting it. Open a CLI prompt by holding down Ctrl, Alt and T at the same time. Try issuing the command sudo mount -t udf /dev/sr0 /cdrom and pushing enter. You may be asked for your administrator password. If you have more than one optical drive, your device file may not mount to /dev/sr0, and you’ll need to use the name given in the Disks Utility in order to do so.
This command would mount the UDF file structure to the unused /cdrom directory in your root. When you’re done working with it, make sure to unmount it with umount /cdrom before ejecting the disc. If you got a bad superblock error when attempting to mount it, then your disc might not really be UDF formatted. If that’s the case, then try sudo mount -t iso9660 /dev/sr0 /cdrom instead and see if it mounts as a regular CD-ROM. Sometimes even a DVD+R will actually boast the regular ISO 9660 system instead of the UDF format depending on how it was written. None of these optical volumes will mount as anything other than read-only in terms of access restrictions.
These steps should also work when instead of a physical DVD you have a disk image that you downloaded from somewhere. If that’s the case, then merely replace /dev/sr0 with the actual name of the disc image. In this case, it’s possible to mount a disk image on a system that doesn’t even have an optical drive.

Theoretically it’s possible to create disk images that use neither the UDF nor ISO 9660 standards. You can type more /proc/filesystems to find many of the file systems that your particular installation of Ubuntu supports. The most common you’ll find outside of UDF and ISO 9660 include ext2, ext3 and ext4, which are the standard Linux storage formats that you’re more than likely familiar with. You’ll also sometimes find images that use a vfat file system, which means they support the FAT12, FAT16 or FAT32 standards that MS-DOS once promoted. Keep in mind that if you mount with the -t vfat option, that you’re not by definition mounting a virtual file system. While vfat does mean Virtual FAT, this refers to something other than the fact that you’re working with a disk image.
You could theoretically come across NTFS images as well, though these are comparatively rare. If none of the options seem to work, then try sudo mount -t intfs ~/Downloads/theImageName.img /cdrom while replacing theImageName.img with the actual downloaded image. It’s rare that this will work since NTFS is technically a FUSE extension under Linux, so you may also wish to try that command with the -t fuse option as well.
Since NTFS, the various FAT systems and the ext# systems aren’t read-only by definition, you’ll probably want to add either the -r or -o ro options to your mount command. This will prevent you from writing to the image, but it isn’t necessary if your image was a genuine UDF or ISO 9660 image, since you can’t write to optical discs in the same way that you could to a fixed disk or a memory stick.
It’s highly unlikely and quite possibly not realistic to think you would ever find a genuine optical disc with anything besides UDF, ISO 9660 or the various forms of CDFS for audio CDs. It’s actually not possible to create some types of file systems on optical discs. Therefore, if you continue to get bad superblock errors after trying both -t udf and -t iso9660 then the optical disc drive or the disc itself is probably dirty.