How to Make a Flowchart on Microsoft Word
Flowcharts are used to display a relation between the content or to show a certain direction. A flow chart can be altered in whatever direction you like if you make it yourself from the scratch. The alternate way on Word , to create a flowchart with an already existing format, is to add ‘SmartArt’ which is a tab under ‘Insert’. Select a template of your choice and make a flow chart.
Or, you can simply design your own flow chart, according to your requirements and make changes accordingly. Here is how you can make a flowchart on MS Word from the scratch.
- Open your MS Word file, Go to the Insert tab and Click on the Shapes Icon.
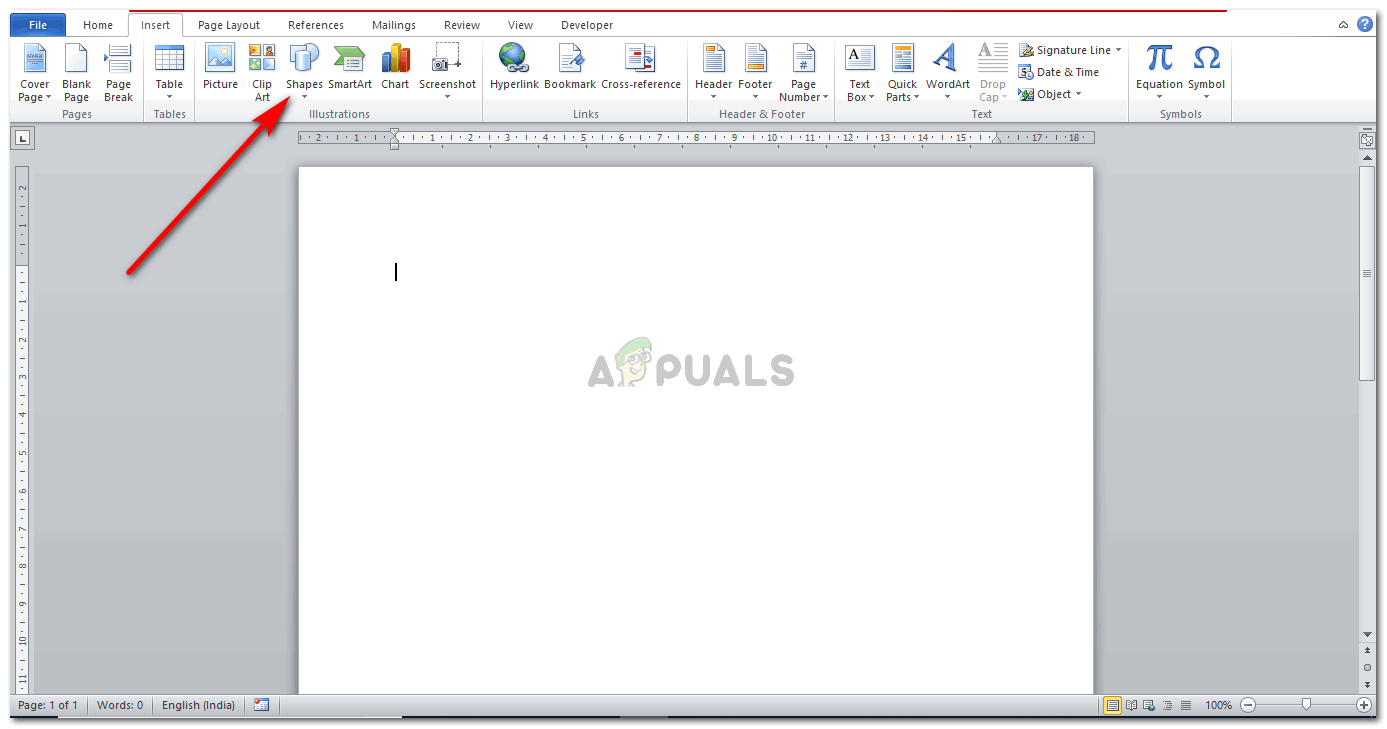
Starting from the beginning - Clicking on the shapes icon will show you all the shapes that you can add for any work on MS Word. Right at the end of this window,you will find the option for ‘New Drawing Canvas’. Click on that to create a canvas on your word file.

Draw a canvas for your drawing 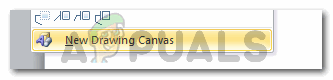
The option for ‘drawing Canvas’ on Word The purpose of a drawing canvas is to adjust all your content within a boundary. This will help you adjust your flowchart in a more symmetrical manner.

Your canvas will appear like this. You can alter the size of the canvas by bring the cursor the end of the canvas and when the arrow-like cursor appears, click the corner and expand. - Once you create the drawing canvas, you need to add the gridlines. Gridlines will help you in placing all the shapes in alignment, and in the right position. For this, you need to click on View. There, you will find an option for ‘Gridlines’ with an un-checked box next to it.
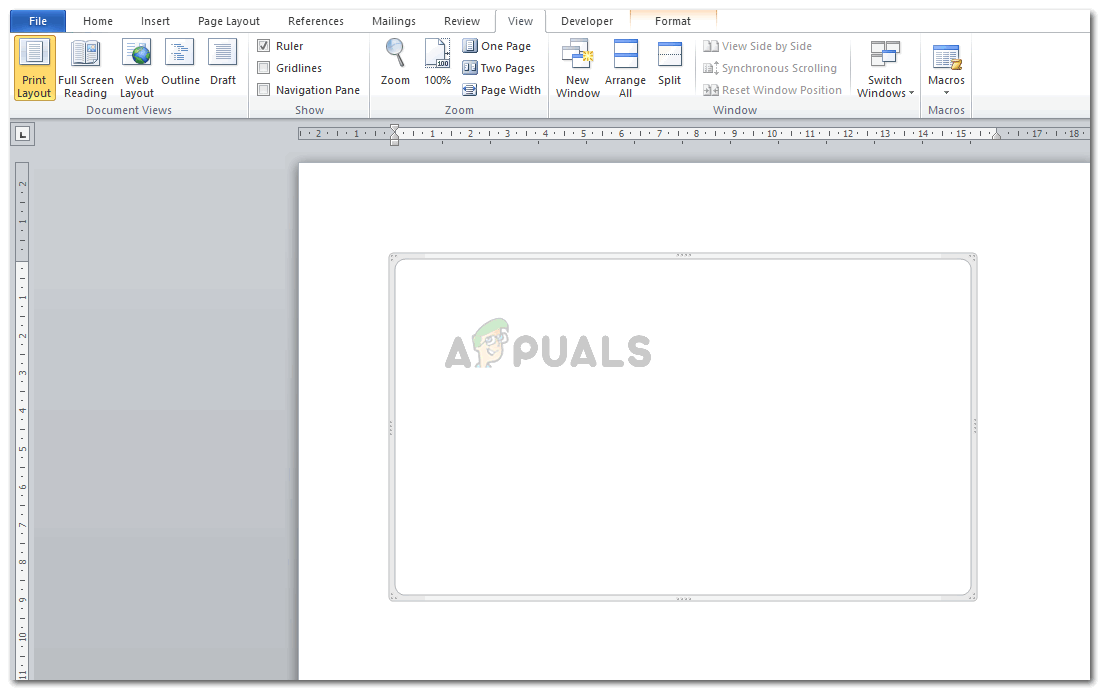
Adding the gridline The minute you select that box, the grids will appear all over your Word file.
The Grids will spread over your page The second way to get gridlines for a word file is to click on the canvas, and click on the format tab next which appears on the top tool bar.
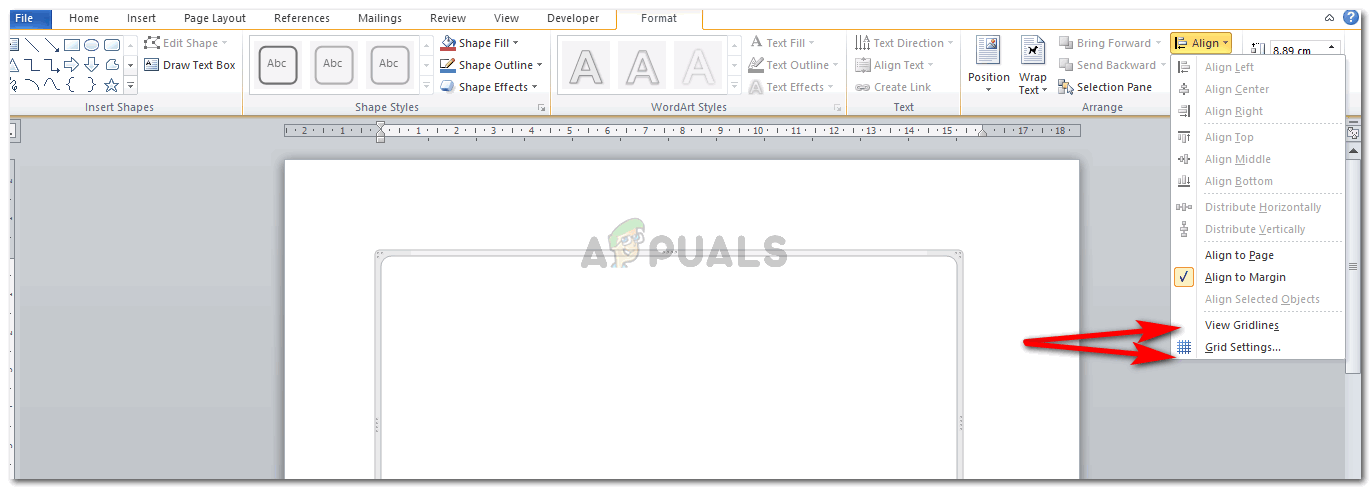
Method 2 to add grids Under Format, you will locate the option for Align,which is what you need to click next.Click on ‘View Gridlines’ to make the gridlines on your screen visible. You can edit the gridlines by clicking on the ‘Grid Settings…’ which is right under ‘View Gridlines’.
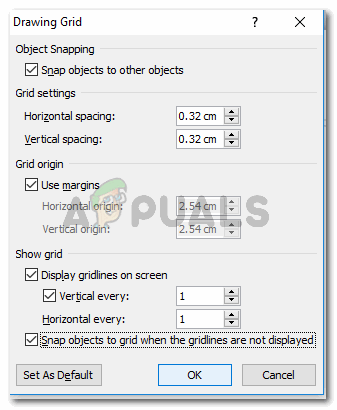
edit the grid by using the Grid Settings 
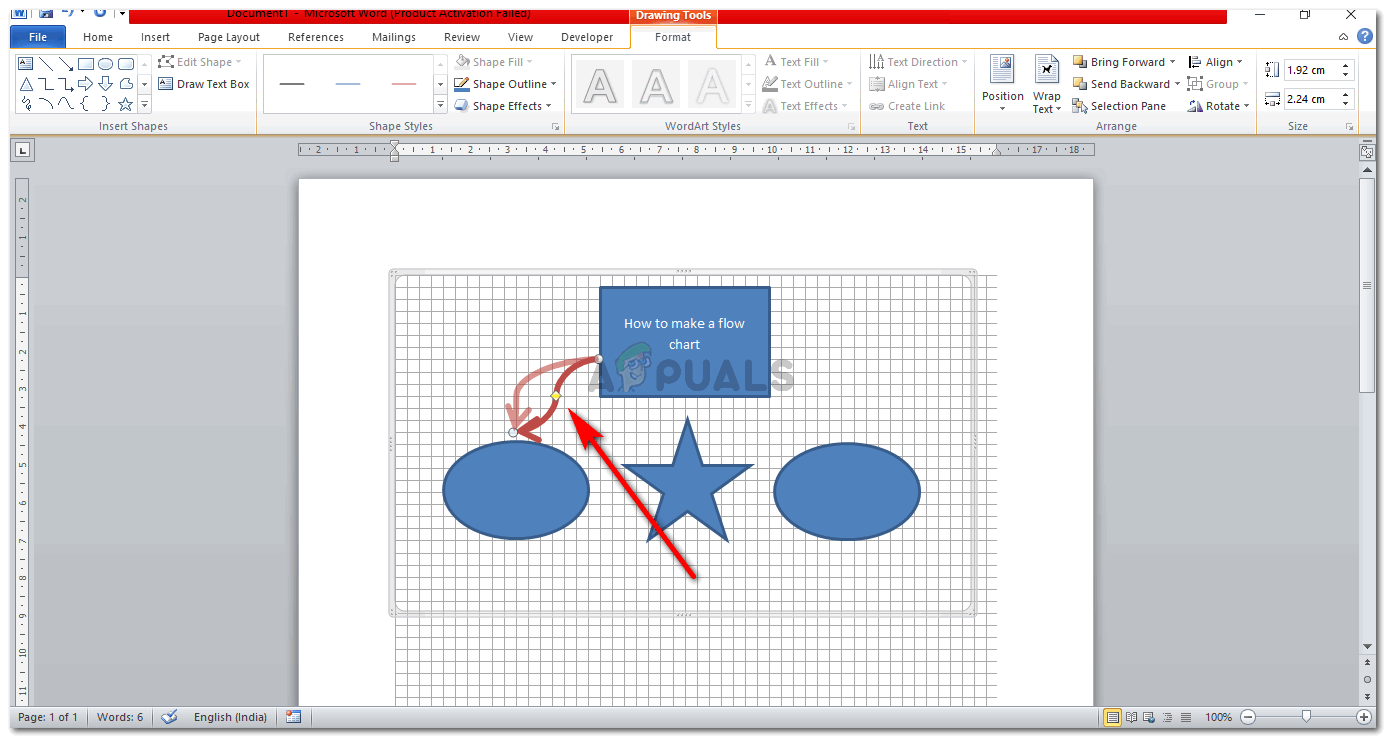
And the grids reappear - The next step is to add shapes for your flow chart. You can click on ‘shapes’, which we used to make a drawing canvas. But instead of drawing a canvas, you are going to draw shapes here. Or, when you simply click on the canvas once, and find the format tab which appears right on the top, on the left side, there will be a box for shapes. Select a shape and draw it with in the canvas. Place it where ever you like it.
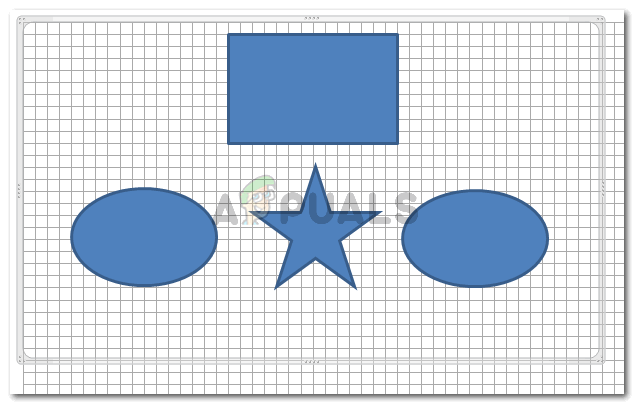
Add shapes. Use different shapes for different levels of information. - To add text to these shapes, right click on the shape. You will be shown the following options out of which you need to click on ‘Add Text’.
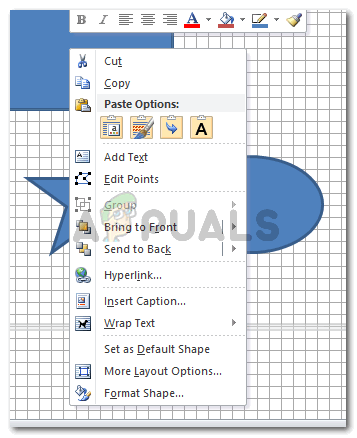
For each shape that needs to have text in it. You need to follow the same step of adding text. By clicking right on the shape and choosing the option for Add Text. 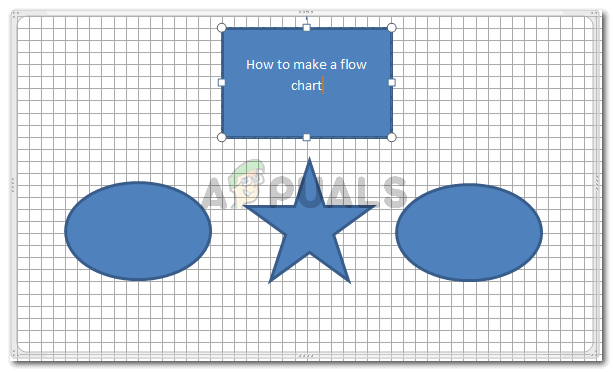
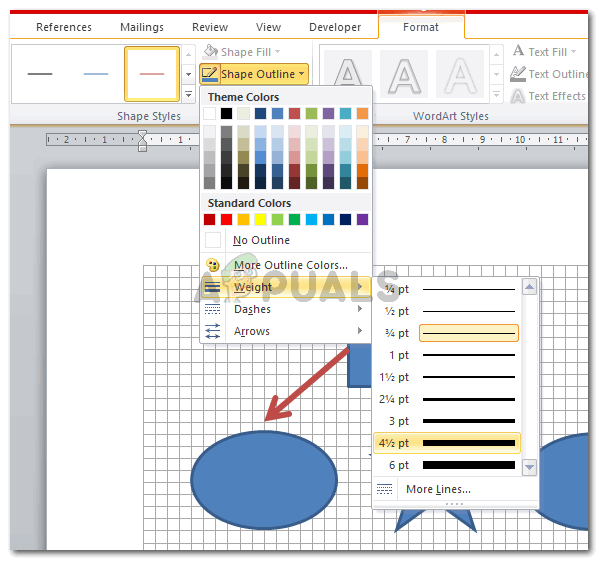
You can edit the text side by side. It is better to edit the text when you add the text as it will help you save time. - Another important aspect of a flow chart is the arrow which directs the dialogue in each text box. The arrows can be added by selecting he ‘ARROW’ shape and drawing it between the shapes. You can add weight to the arrow, change the color and even add curves to the arrow.
add arrows to connect the text boxes. Arrows add a direction to your flow chart. So use them wisely. After drawing the arrow,you can change the type of the arrow shape by right clicking on it, and clicking on ‘Connector Types’. Out of the three, you can choose any to create the following arrows.
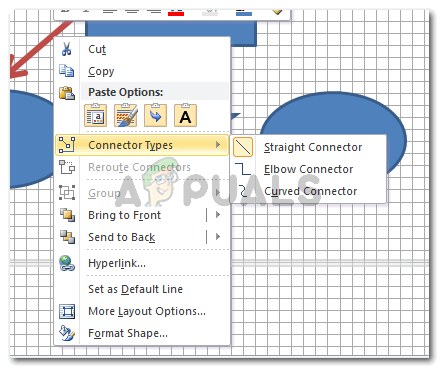
Straight Connector, Elbow Connector,Curved Connector. Choose the one that you think will look good with your shapes 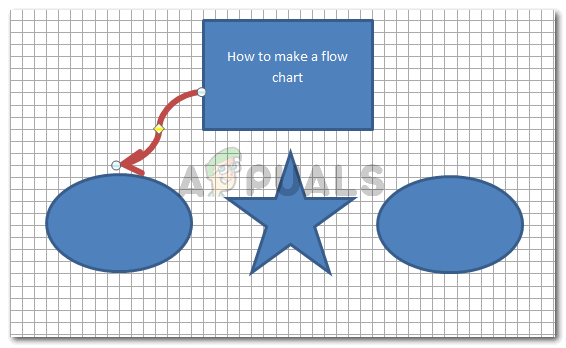
Shaping the arrows makes your work look good. Use the yellow diamond (connector) on the arrow to bring a curve or adjust the curve.
you can see how you are pulling your connector and how your arrow will change 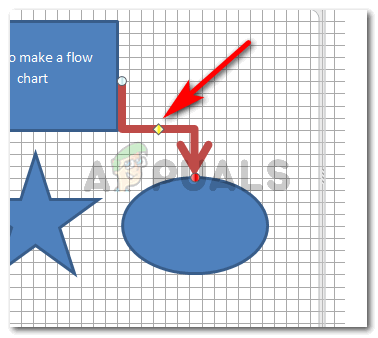
Elbow connector 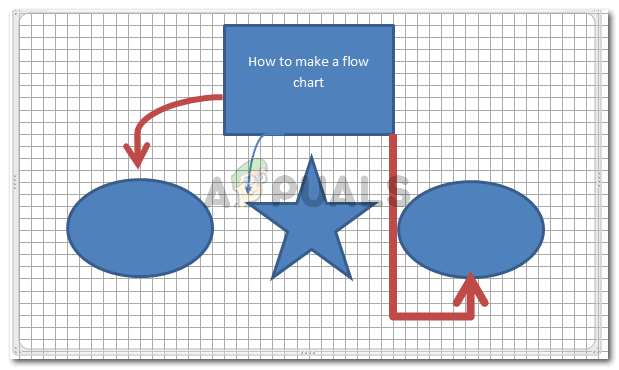
Finalizing the arrows This is how it will all look once the arrows have been edited, the shapes have been placed. If you like, you can also alter the border for your canvas just how I have through the shape outline option under format. The trick to edit a shape is to select or click that shape once. This will make the format tab appear where you will see all the editing options.
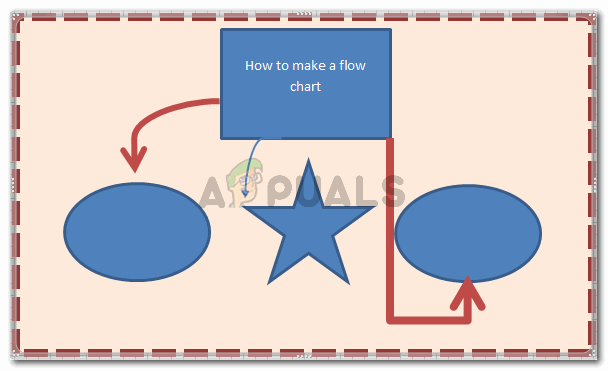
Your flowchart