How to Fix Destiny 2 Stuck on Initializing
Destiny 2 is an online multiplayer shooting game which is developed by Bungie. It is available on several different platforms i.e. Xbox, PS4, and Windows. The game gained a lot of traction in the release days and continues to be one of the best online shooting games in the world with a great storyline.
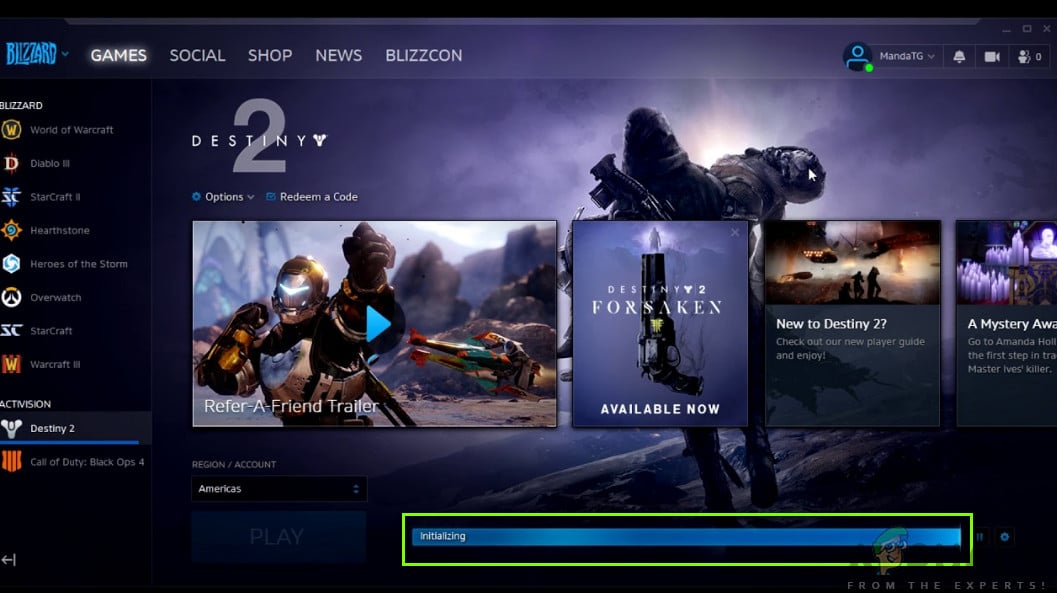
Despite the popularity of the game, we got to know several cases where Destiny 2 was causing issues and one of them was where the game was stuck in the ‘Initializing’ screen while updating.
In this article, we will go through all the reasons as to why this issue occurs and also the workarounds which can be used to fix the problem.
What causes Destiny 2 to get stuck in ‘Initializing’ Screen while updating?
After the initial reports of the problem, we started our investigation and listed the results as to why this issue occurs. Some of the reasons as to why your update might get stuck in Initializing screen are but not limited to:
- Corrupt installation files: There are numerous instances where the installation files of Destiny 2 are either corrupt or have missing files. When this occurs, the Blizzard client gets confused as to why the files are not present and go into an infinite loop.
- Client in an Error state: Destiny 2 is hosted by the Blizzard application. Like all other games hosted in Blizzard, Destiny 2 also has some issues when running in the client. Restart the client completely fixes the problem.
- Bugged Blizzard Update Settings: We also came across update settings in Blizzard which seemed to be corrupt. Corrupt update settings are known to cause problems during the update process. Here, resetting the Settings or changing them forces the module to restart which in turn fixes the problem.
- Lack of administrator privileges: Like all other games, Destiny 2 also requires extensive resources to function properly. If it doesn’t have adequate permissions, it will not be granted the resources on your computer and will most likely get stuck in a stage.
- Antivirus software: Antivirus software are known to flag a trusted file as malicious (hence the term of false positive). Here, disabling the Antivirus software and then trying usually resolved the problem.
- Bad network connection: Another issue which can arise during the update process is a bad connection. A good internet connection is required to update Destiny 2 properly. If you don’t have a stable internet connection, the updating will not work and you will get stuck as discussed in this article.
- Low download space: Another interesting scenario which we came across was where there was low download space for the game to be installed. Destiny also doesn’t prompt the user that there is less space available which makes the troubleshooting harder.
- Bad Battle.net cache files: There might also be instances where there are corrupt cache files of Battle.net on your computer. When this is true, the client will not work as expected and cause bizarre issues like the one under discussion.
Before we move on to the solutions, make sure that you are logged in as an administrator on your computer. Furthermore, you should also have a valid Blizzard account logged in.
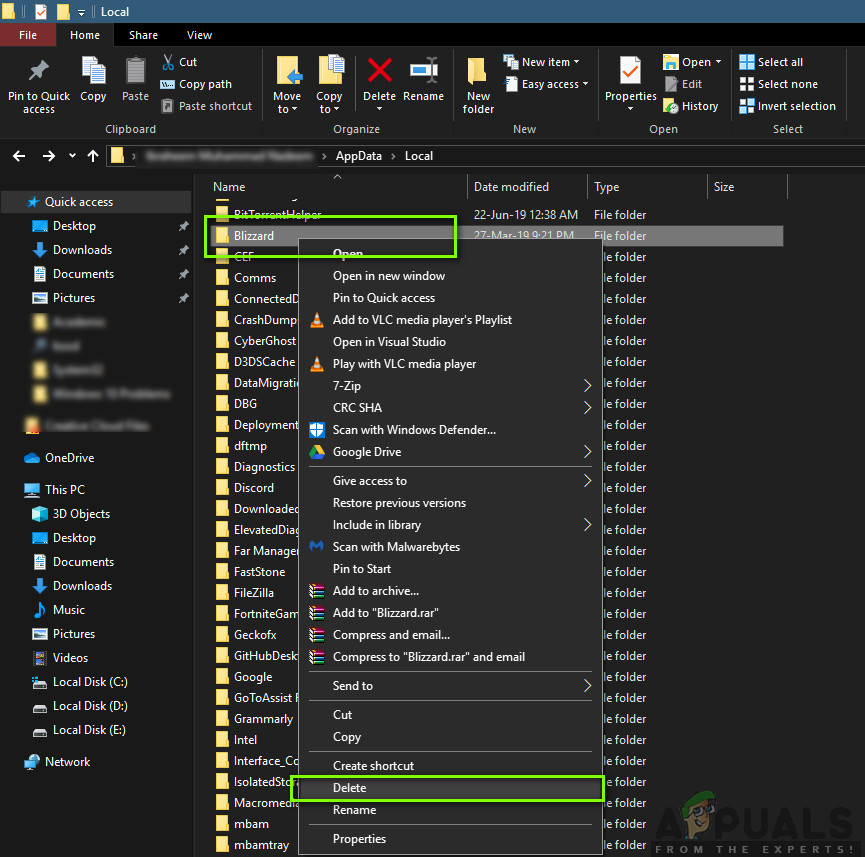
Solution 1: Removing Destiny 2 from Installation Directory Temporarily
The most effective method which we came across was where we removed Destiny 2’s installation folder temporarily. Blizzard installer automatically detects this anomaly and then prompts the user to install the game. Here you can bring Destiny 2’s installation files back. Here the installer will again detect that the files are present and will resume the updating process. Even though it might seem to the naked eye that nothing happened, in reality, the installer just got refreshed.
Note: Make sure that you are logged in as an administrator and have an active internet connection running.
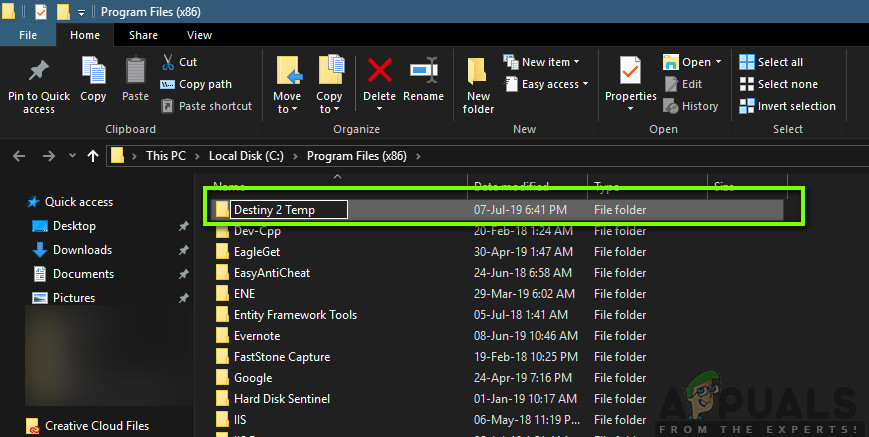
- Close the Battle.net client completely. Now press Windows + E to launch the Windows Explorer and navigate to the following directory and locate Destiny 2 folder. :
C:\Program Files (x86)
- Instead of removing the folder, we will rename it to something like ‘Temp Destiny 2’.
Renaming Destiny 2 Folder - Now open Battle.net and navigate to Destiny 2. Here, instead of Update, you will see the option of Install. Click it.

Installing Destiny 2 – Blizzard - When the installation process begins, change the folder’s name back to Destiny 2. Now navigate back to the client and select Start Install.
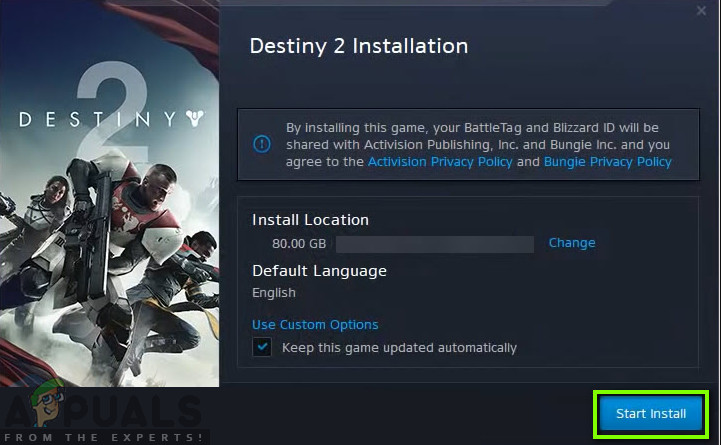
Starting the Installation process – Destiny 2 - The process will move on and after detecting the files, the updating process will proceed again. Make sure that you are patient and wait for the process to complete entirely. After the game is updated, launch it and check if it works properly.
Solution 2: Ending all Battle.net Processes
Another workaround that works for users is reinitializing Battle.net completely. When you close the Battle.net window, it shuts down the window but its main process is still running in the background. The temporary configurations still stay in the RAM and you will still experience the same stuck issue when you launch the launcher again. A good workaround is navigating to the task manager and manually ending all the processes from there. When we launch after that, Battle.net will reinitialize all the temporary configurations and hopefully, the issue will be resolved.
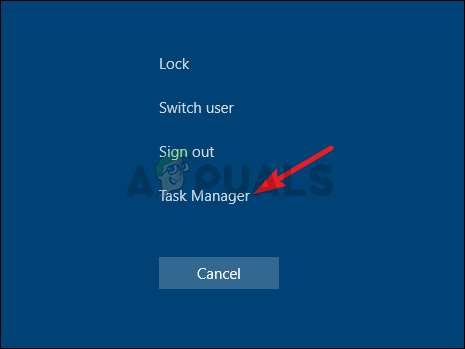
- Press Windows +R, type “taskmgr” in the dialogue box and press Enter.
- Once in the task manager, search for all Blizzard-related processes running. Click on each one of them and click End task.
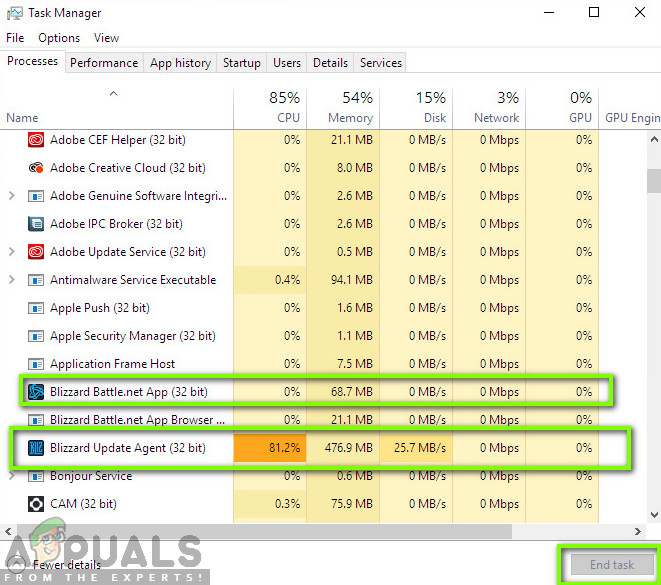
Ending Blizzard processes – Task Manager - After ending all the tasks, launch the Blizzard application and start the updating process. Check if the issue is resolved.
Solution 3: Power Cycling and Checking your Internet Connection
If you have a bad internet connection on your computer, Blizzard will not be able to complete the update process (obviously). This is a very common scenario and users tend to ignore this scenario and keep trying to troubleshoot what the problem is. On top of the internet connection, there are several instances where routers get into an error configuration. If they are not transmitting the network properly, the client will not be able to communicate with the remote servers and hence cause bizarre behavior.
In this solution, you should first check your internet connection. Try connecting other devices to the same network and see if you can access the internet. If you cannot, you can try to power cycle the router and your computer and see if this does the trick.
- Take out the main power cable of the router and your computer (after shutting it down) from the socket. Now, press and hold the power button for around 4-6 seconds.
- Now, wait for around 3-5 minutes to make sure all the power has been drained completely.
- After the time has elapsed, re-plug everything back and then wait a few minutes so the network is broadcasting again properly and your computer starts up.
- Now check whether the issue is solved and you are able to update Destiny 2.
Solution 4: Clearing Storage Space
Another thing which you should make sure is that you have enough space in your hard drive where Destiny 2 is installed. This is usually Local Disk C (unless you have installed it to a custom directory). You should have at least 8 – 10 GB of free space in your drive.
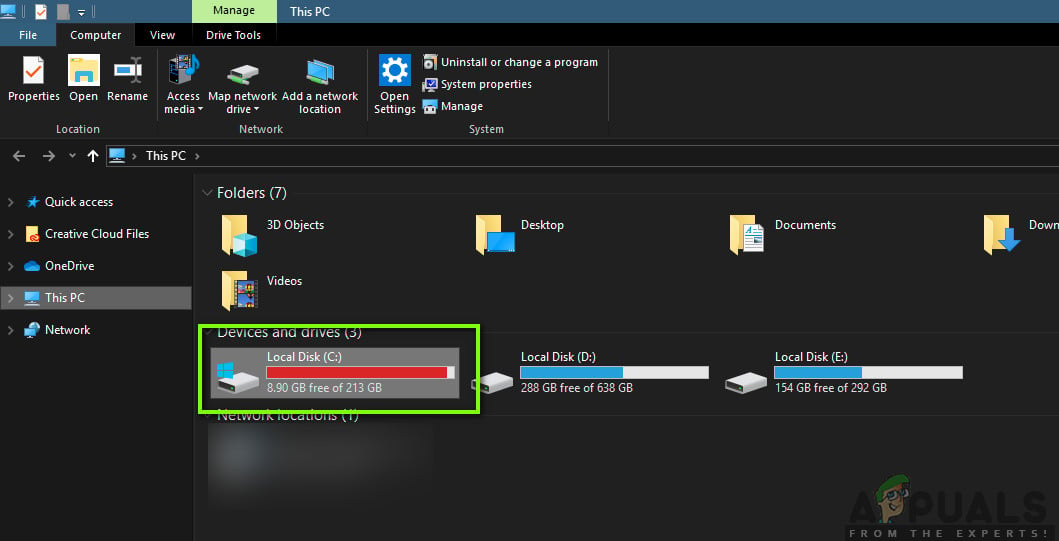
Press Windows + E to launch the File Explorer and click on This-PC at the left navigation bar. Now check from the information under each drive whether there is ample space. If there isn’t, you can clean junk and remove excessive programs. You can also launch the Disk Cleaner by right-clicking the drive and clicking the option. Once you have created the additional space, restart your computer and launch Battle.net launcher again and check if the issue is resolved for good.
If you still face Destiny 2 download stuck on initializing problem after you tried the solutions above, you need to check if your hard drive is running out of space. You should make sure there is at least 8-10 GB of free space in the drive where Destiny 2 is installed to run the game correctly. Usually, Destiny 2 is installed on Local Disk C by default. If you have installed it in another drive, you need to check that drive.
There are basically two options that we can explore in regards to clearing out some disk space. One of them is to run disk cleanup and the other is to simply start uninstalling unnecessary applications from our computer. Therefore, we will list both of them for you below.
Disk Cleanup:
- Open the File Explorer and select “This PC” from the left pane.
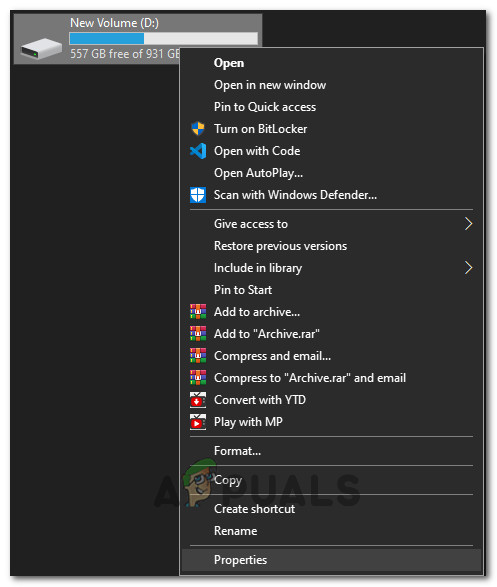
- Right-click on the “Partition” on which the game has been installed and select “Properties”.
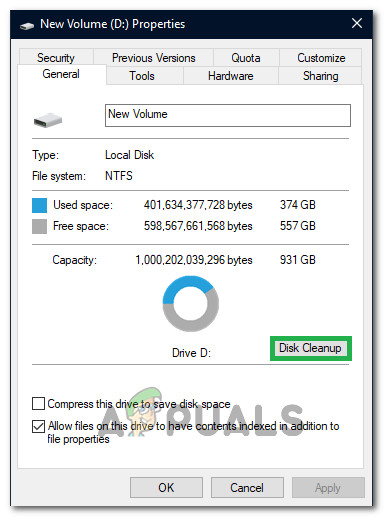
Selecting Properties from the list - Click on the “Disk Cleanup” button under the “General” tab and then click on the “OK” button.
Selecting Disk Cleanup from the list - Let the Disk Cleanup run and if it doesn’t free up much space, you can choose to clean up system files from the third step as well.
- After running Disk Cleanup, ensure that there is at least 4 GB of free space in your system drive.
- If there isn’t, you can try to clean up more files.
- Check and see if running the Disk Cleanup helps in getting rid of this issue on Destiny 2.
Uninstalling Applications:
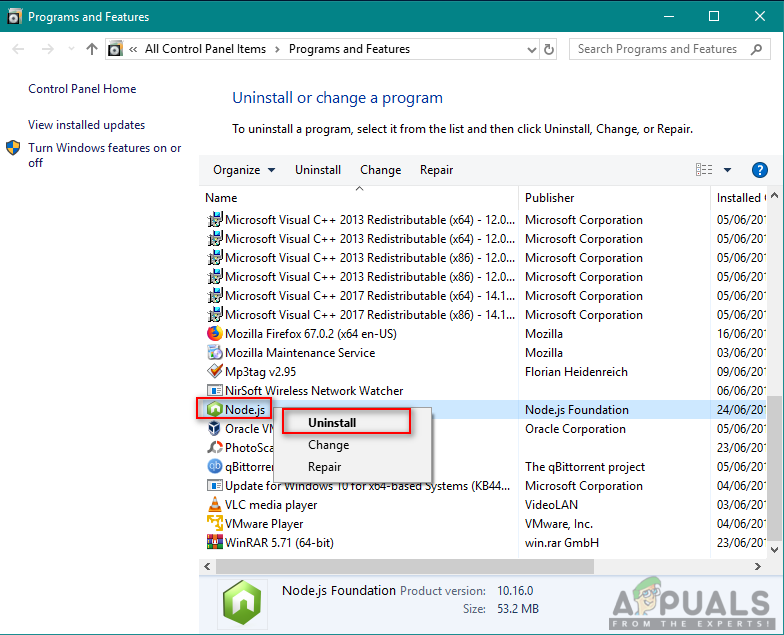
- Press “Windows” + “R” to open the Run prompt and type in “appwiz.cpl”.

Type appwiz.cpl and Press Enter to Open Installed Programs List - Press Enter to launch the app management window and scroll through until you find any program on the list that you feel comfortable to uninstall.
- Right-click on this program and select “Uninstall” to remove it from your computer.
Uninstalling the program from Programs and Features - Follow the on-screen prompts to remove the program completely.
- Make sure to do the same for any other program that you see in this list because we are aiming to be able to free up as much space as we can.
- Make sure to also clear out the program’s directories as well if there are any left.
- Check to see if doing so has fixed this issue on your computer.
Solution 5: Disabling Antivirus/Firewall Software
Antivirus software is well known to flag valid applications as threats. This is true for a lot of different suites and is usually fixed by either adding an exception or disabling the Antivirus software temporarily. A scenario where an antivirus flags a valid program as malicious is known as a false positive.
You should try disabling your Antivirus software at first and see if this works for you. After disabling your Antivirus, restart your computer and try launching the update process again. If disabling the Antivirus doesn’t work, you can try uninstalling it and see if it does the trick for you.
Solution 6: Granting administrator access to Blizzard
Another thing which we can try is granting the Blizzard applications administrator access in its properties. This step must be replicated to Destiny 2’s executable as well. Games like Destiny 2 require a lot of CPU resources and it is of no surprise that the operating system blocks these actions by default in some cases. Here, you must be logged in as an administrator yourself to perform all the following steps.
- Navigate to the directory where your Battle.net is installed on your computer. It can be the default location in Program files in C or some custom path that you selected before the installation.
- Once in the Battle.net directory, right-click on the following entries, and select Properties.
Battle.net Launcher

Battle.net
- Once in the properties, select the Compatibility tab and check the option Run this program as an administrator.

- Do this for all the entries mentioned. Now enter Destiny 2 folder and on exe, perform the same operation. Save your changes and exit. Restart your computer and play the game. Check if the crashing is resolved.
Solution 7: Deleting Blizzard Configurations
Every game out there has temporary configurations stored in the computer. These temporary variables hold the initial settings and parameters which the game uses to launch. If these configurations are missing or are corrupt, you will have issues like the one under discussion. If you are having similar problems for quite a while now, it is an indication that your locally saved configuration files are corrupt and need to be refreshed.
In this solution, we will navigate to the local directories and manually delete the configuration files. When Blizzard starts up, it will notice that the files are not present and will automatically create default ones.
Note: When you launch the game for the first time after deleting the files, there might be a delay. Be patient and let the launcher/game launch itself in due time.
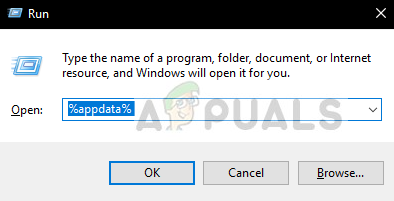
- Press Windows + R, type “%appdata%” in the dialogue box and press Enter. A directory will open. Move a step back and you will see three folders namely:
Local

LocalLow

Roaming
- Navigate into each directory one by one and delete the Blizzard This will delete all the temporary configurations of the game.
Deleting Blizzard Local Data - Restart your computer after you have deleted all the temporary configurations and launch the Blizzard app. Now launch the game and check if the issue has resolved.
Solution 8: Reinstalling your Game
If none of the above methods work and you still stranded with the issue, we can go ahead and reinstall the entire game package. If need be, you can also reinstall the Blizzard application and see if this does the trick. This process will probably remove all the games which you have already downloaded which is why we have left this solution for the end. Make sure that you have your login details as you will be required to re-enter them later on.
There are two ways you can reinstall; either you can uninstall the game from the application or you can uninstall it directly from the game manager.
- Press Windows + R, type “inetcpl.cpl” in the dialogue box and press Enter.
- Now locate Destiny 2 from the list, right-click on it and select Uninstall.
Uninstalling Destiny 2
If you have to uninstall the game from Blizzard client, open it and navigate to the game. Click on the gears icon and then click on Uninstall. You should also navigate to the folder where the game was installed and delete all the files/folders manually. Follow Solution 5 as well here.
After you have uninstalled the game, restart your computer completely (follow solution 3 here as well). After you have power cycled your computer, navigate back to Destiny 2 in the client and launch the game. Check if the issue is resolved with the fresh install.
Solution 9: Update Your BIOS
A Bios comes preinstalled onto your motherboard and it is responsible for all the input and output functions of the computer. Not only does it handle all the power coming into and out of the computer, but it also recognizes, initializes, and handles the CPU, GPU, and memory connected to the motherboard. It not only powers your PC but helps protect it, too. If the BIOS isn’t updated regularly it may result in lagging of several programs that include destiny 2 also. Follow the guide indexed below to update your BIOS:
- Before you upgrade your BIOS, make sure you’re actually installing a new version. The easiest way to find your BIOS version is:
Press “Windows’ + “s” to open the Search window, type in “MSINFO” and press “Enter” to launch the computer’s information panel. Inside the information panel, on the right side, the Bios Version should be listed which should contain the exact BIOS that your computer is currently using. - Enter the UEFI BIOS: When you boot up your PC, you’ll see text that informs you which button to press to enter the UEFI BIOS. Press it. (The exact button needed, and the design of every motherboard’s actual UEFI control panel differs, so these instructions will be more guideposts than step-by-step instructions.)
- Boot into the UEFI control panel (when possible): Although not all motherboards offer this feature, on certain models you can boot into the UEFI control panel and use a built-in update utility to connect to the internet and flash the latest firmware from the manufacturer’s server. This extremely nice feature makes updating to newer firmware revisions as painless as possible.
- Find the latest BIOS update from your motherboard’s support page: Go to your motherboard’s support page on the manufacturer’s website. The latest BIOS update should be in the support and downloads section.
- Download and unzip the BIOS update file
- Transfer update file onto a USB flash drive
- Reboot your computer into the UEFI control panel
- Launch the UEFI’s firmware update tool or flashing tool and back up your PC’s existing firmware to your flash drive. This protects you in case something goes wrong.
- Use the same UEFI utility to select the new firmware image you saved on the flash drive. Running the firmware update utility should take just a couple of minutes, but make sure not to shut off your PC during this process.
- Once the flashing process finishes, restart your computer. Your updated PC BIOS is ready to rock and hopefully, the initializing problem would be rectified now.
Solution 10: Diagnose Background Applications
Exit Destiny 2 and the Battle.net app. Then close and exit all unnecessary programs running on your PC, including background and taskbar application. One user reported that for him, closing the following 5 applications were what finally fixed the initializing issues for him. With them running he had regular crashes every 20 or so minutes. This was tested repeatedly over many hours and in different sessions. After closing all of them he played for the first time for hours with no issues hence close / Exit these programs if you have them on your system:
- Ultramon / Ultramon x64
- Roccat Power Grid (Connectivity app to display PC status on another device)
- Brother Printer status monitor and software
- Dell Printer status monitor and software
- Epson Printer software
Once you’ve closed all of the applications you can, especially the ones listed above, launch Destiny 2 and check whether the initialization error still persists. It appears that there is a conflict of some sort, our best guess is there is a video conflict with the application Ultramon or the Roccat Power Grid. It’s important to note that these programs have never caused instability or crashes in a wide variety of other games over several years, so we believe it is an issue with Destiny 2 itself.
In most cases, the error is caused due to an issue with a third party application, therefore, we will also be diagnosing which application is causing this error, for that, we will be preventing them from being able to launch at startup and then we will check by enabling a handful and diagnosing which one makes the issue come back. In order to do that:
- Press “Windows” + “R’ to launch the Run prompt.
- Type in “MSCONFIG” and press “Enter” to launch the configurations window.
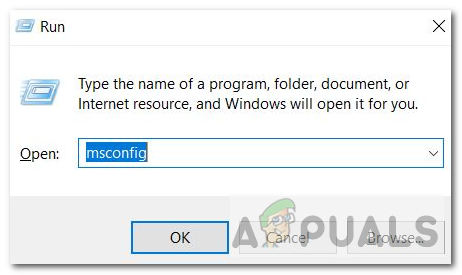
msconfig - Click on the “Services” tab and uncheck the “Hide all Microsoft Services” option.
- After unchecking this option, click on the “Disable All” button and then click on “Apply” to save your changes.
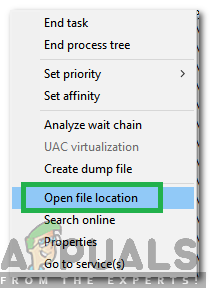
- After that, click on the “Startup” tab and then click on the “Open Task Manager” button to launch the task manager.
Opening Task Manager - In the Task Manager, click on each application that has been enabled and then click on the “Disable”.
- This will prevent the startup applications from launching on your computer, now that we have sorted out the applications and have prevented them from running in the background, restart your computer.
- After restarting, try to launch the game and check to see if this issue is still triggered. If it isn’t triggered, it means that the issue lies with a third-party application or service.
- Try to enable a handful of applications and services one-by-one using the same method as above and check which ones make the issue come back.
- Diagnose the ones that cause this error, and either keep them disabled or uninstall them.
Solution 11: Temporarily Lower Destiny 2 Video Settings
In some cases, it is possible that the error is being triggered because you are overkilling your hardware by selecting settings that are beyond the limit of what your hardware is capable is handling. Due to setting the configurations really high, the hardware might act up and prevent the game from being launched altogether. Therefore, in this step, we will be lowering the video settings. For that:
- Launch Destiny 2 on your system.
- Navigate to Destiny 2’s video options menu.
- Cap your frame rate at 30 or 60.
- Set all options to LOW or
- Disable things like HDR, Wind Effects, Motion Blur
- Turn OFF and/or lower Antialiasing, Ambient Occlusion, Anisotropic Filtering
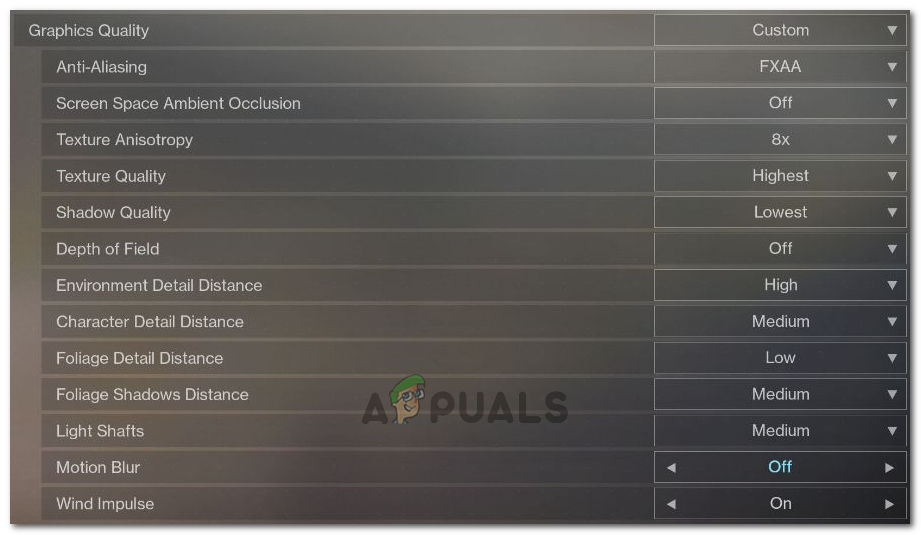
Lower These Settings - Launch destiny 2 now and check to see if the issue is fixed.
Note: You may also want to monitor your graphics card temperature while playing Destiny 2 to see if overheating may be an issue.
Solution 12: Turn off GPU/ CPU/RAM Overclocking
This is a general troubleshooting tip and should be one of the first things you try if you ever have problems with game or system stability. Temporarily turn off all of your Overclocking settings. For CPU, RAM, and other system overclocking that has probably been done from your Bios or a third-party app that you are using. You will need to reboot your computer, hit the key when prompted to enter the BIOS, then find the Overclocking options. Modern computers have pretty good BIOS interfaces so it should be easy to turn off and on.
For GPU overclocking, this is probably done by software in Windows using a GPU program like MSI Afterburner or another software offered by your specific graphics card manufacturer like Gigabyte, EVGA, etc. If you have overclocked the GPU beyond its factory defaults, it is recommended to start lowering the overclock and checking after every point and analyze which setting works best for you.
It also might be a good idea to monitor your GPU and CPU temperatures while playing Destiny 2. If they overheat it can definitely cause crashing. Recommended temperatures vary by GPU and CPU so you will need to do more research on that elsewhere.
Also, in some cases, you might actually be experiencing this issue because your GPU comes overclocked from the factory defaults. This happens usually with enthusiast cards and some companies also do this to get an edge on performance. Therefore, it is recommended to also lower the GPU Clock below the factory defaults a little and check if that makes the game work correctly.
Solution 13: Delete game’s Custom Player Settings File
When players encounter issues like stuck on initializing, key binding, graphics, or other settings, deleting their CVARS.xml file can sometimes end up being the remedy for them. In addition to this, you should also be making sure that all your drivers are properly installed and updated and most users have recommended that deleting this file should get rid of this error with Destiny 2. In order to do so, follow the guide below.
- Closeout of Destiny 2 and also make sure to stop the BattleEye Launcher from running in the background.
- Press Windows + E and navigate to the following location from the File Explorer.
C:\\Users\USER_NAME\Appdata\Roaming\Bungie\DestinyPC\prefs\
Note: The AppData folder is hidden in Windows by default. A quick way to open it is to click the Start button in Windows, in the search bar type in “%appdata%” without the quotes. Then you will be able to see the Bungie and other folders.
- Make sure to click on the “View’ tab on the tab when in the “User_Name” folder and then check the “Hidden Items” option to actually be able to view the “Appdata” folder.

View Hidden Items option is checked - Right-click on the CVARS.xml file located in the folder and select the “Delete” option to completely remove it from your computer.
- Note deleting this file will delete any key binds and other custom settings you set in Destiny 2 such as video options.
- After deleting this file, launch Destiny 2 and it should automatically replace it with a new file.
- Check to see if the issue still persists.
Solution 14: Re-Locate The DLL File
A DLL is a library that contains code and data that can be used by more than one program at the same time. For example, in Windows operating systems, the Comdlg32 DLL performs common dialog box related functions. Therefore, each program can use the functionality that is contained in this DLL to implement an Open dialog box. This helps promote code reuse and efficient memory usage. It is beneficial to relocate the DLL file of Destiny 2 to get rid of this issue:
- Right-click on the Destiny 2 icon on the desktop and select the “Open File Location” option.
Selecting the “Open File Location” option - This should take you to the Destiny 2 installation folder.
- In the Destiny 2/bin/x64 folder, right-click on the “GFSDK_Aftermath_lib.dll” DLL file and select the “Copy” option.
- Paste this file inside the following location.
C:\Program Files\Destiny 2\
- Make sure to confirm any prompts that pop up on the screen.
- Check to see if doing so has fixed the issue.
Solution 15: Set Windows Secondary Logon To Automatic
Windows Secondary Logon allows administrators to log on with a non-administrator account to perform administrative tasks without logging OFF. This service is sometimes vital for the game to be able to run properly therefore, in this step, we will be launching the service management window and enabling its automatic log on. In order to do so, follow the guide below.
- Press the Windows key+ R to open the Run box.
Pressing Windows+R to open the Run Prompt - Inside the Run prompt, type in “services.msc” and press “Enter” to launch the service management window.
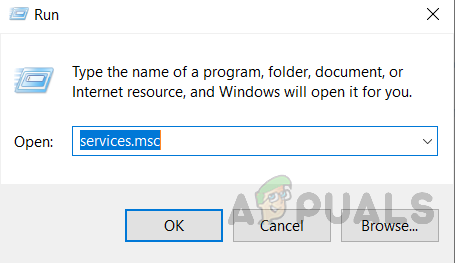
Opening services by typing “services.msc” in the RUN command. - In the service manager, locate and double click on the Secondary Logon service from the right pane.
- Click on the “Startup Type’ dropdown and select the “Automatic” option from the list of available ones.
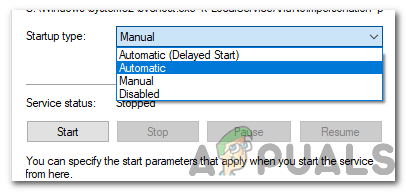
Selecting Automatic as the Startup Type - Click on “Apply” to save your changes and then on “OK” to exit out of the Window.
- Check to see if doing so has fixed the issue.
Note: Some security programs may turn the secondary logon service off. If the service is disabled again after you’ve switched it to automatic, you must configure your security program to stop disabling the service. Contact your security program’s manufacturer if you need assistance with configuring your security software.
Solution 16: Tweak Blizzard Settings
When you encounter Destiny 2 download stuck on initializing or Destiny 2 update stuck on initializing, you might need to change some download settings in Blizzard, which may help you increase the download speed. Hence, for changing some settings follow the steps indexed below throughout:
- In the Blizzard application, click the BLIZZARDlogo from the upper right side and select the “Settings” option.
- In the left panel of Settings, select “Game Install/Update”. In the right pane, scroll down and find “Network Bandwidth” from the list.
- Change the value of “Latest updates and Future patch data” to 0 KB/s.

Changing the Future Patch Data Network Setting - Click “Done” to save the changed settings.
- After making this change, check to see if the issue still persists.
Solution 17: Lower the CPU Clock Speed
A clock speed of 3.5 GHz to 4.0 GHz is generally considered a good clock speed for gaming but it’s more important to have good single-thread performance. This means that your CPU does a good job of understanding and completing single tasks. High clock speeds of your hardware components can undermine the stability of your running programs. And that can be the reason why your game is stuck on initializing. To see if that’s the cause:
- If you have overclocked your CPU, GPU or RAM, set their clock speeds back to the default.
- If you haven’t overclocked them, decrease their clock speeds by about 10 percent.
- For most computers, this is done from the Bios and it can be brought back to default anytime so you do not need to worry about any side-effects and it should get your game back to work in most cases.
- Ryzen processors are the most affected by this and you should make sure to reconfigure this setting on Ryzen.
Solution 18: Disable Any Video/Gameplay Recording Programs
Right at launch, the Destiny 2 player community was in an uproar because some players were getting banned. In the end, it looked like those banned players were actually few in number and had been using exploits. However, during this time it became clear there was a possible issue of a conflict between Destiny 2 and any sort of “Overlay” or “Hook” software. The Destiny 2 devs state this is intended to stop cheating. They state-certain programs may cause crashing, hence we suggest you to close any Overlay / Hook programs and/or disable their Overlay features.
- OBS
- Xsplit
- Geforce Experience
- AMD Gaming Evolved / Raptr
- MSI Afterburner
- Steam overlay
- Discord overlay
- FRAPS
- Any other program that overlays something on top of your games, like FPS counters or system data.
- Any other video recording software such as Twitch or Youtube streaming applications.
Solution 19: Restart Download
In some cases, the issue might be triggered because the game installation has been glitched and if you are getting this error while attempting to update or download the game, we might be able to fix it by initiating a restart on the download which should prompt us to try redownload the game and doing so should rectify our computer of this issue completely. In order to do so, follow the steps below.
- Stop the downloading process within the Blizzard app.
- Navigate to C: Program Files (x86) and drag the game‘s installation folder to the Desktop background.
- Open the Blizzard app and navigate to the Destiny 2 game.
- Click ”Install” and leave it at the Location selection screen.
Installing Destiny 2 – Blizzard - This will initiate the application to restart the download.
- Attempting to restart the download should refresh the game files and you might be able to fix this issue.
Solution 20: Flush The DNS
DNS flushing is the mechanism where the user can manually make all the entries in the cache invalid, this automatically prompts the computer to regenerate this cache which can help you get rid of any corrupted or invalid cache. The steps below guide you through releasing, renewing, and flushing your DNS information, which is used to address networking issues. Follow the steps carefully and after completing them, restart the installation procedure and check to see if doing so helps.
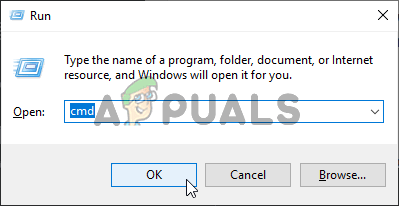
- Press the “Windows” + “R” key to launch the Run prompt.
- Type in “cmd” and press “Shift” + “Ctrl” + “Enter” to open with admin privileges.
Running Command Prompt - Type in the following command in the command prompt and press “Enter”.
ipconfig/ release
- After this, type in the following command to trigger an IP renewal.
IP config /renew
- In the end, trigger the following command to flush the DNS cache completely.
ipconfig /flushdns
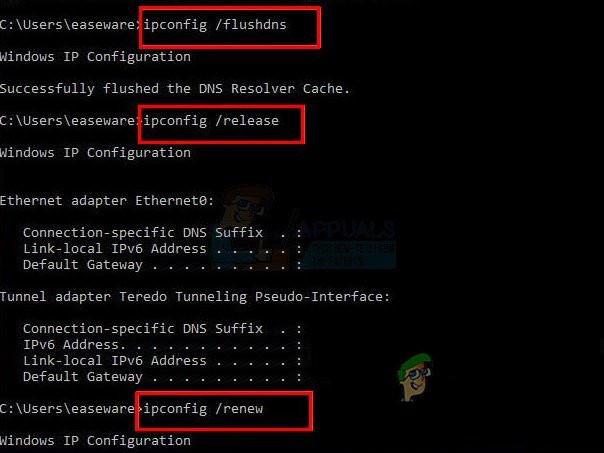
Typing in the IP config commands to flush the DNS completely - After initiating all of these commands, check to see if doing so has fixed the issue.
Solution 21: Run Windows update
In some cases, it is possible that you are running into this issue because your operating system and the Battle Eye laucher are generating a conflict and that is preventing the game from being able to run properly on your computer. Therefore, in this step, we will be checking to see if there are any available updates that we can install on our computer to fix this issue.
- Open Windows Update by clicking the Start button in the lower-left corner. In the search box, type Update, and then, in the list of results, click either “Windows Update” or “Check for updates” option.
- Alternatively, press “Windows” + “I” to open the windows settings.
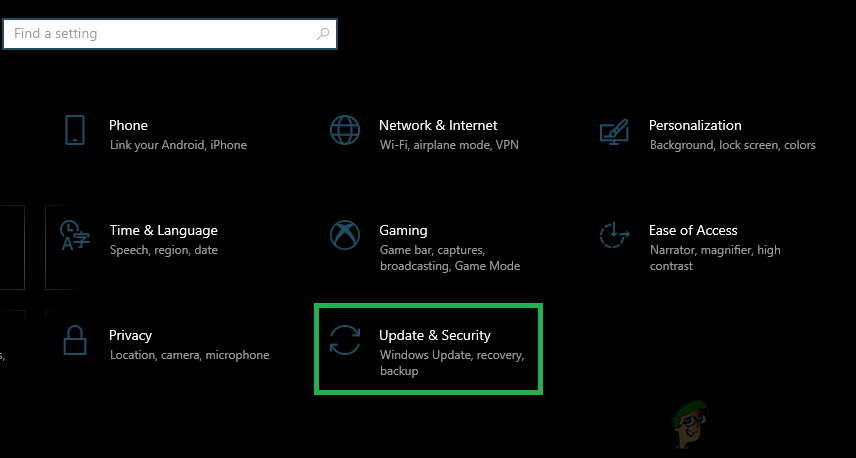
- In the settings, click on the “Update and Security” option and from the left side, select the “Windows Update” button.
Clicking on the “Update and Security” option - Click the “Check for updates” button and then wait while Windows looks for the latest updates for your computer
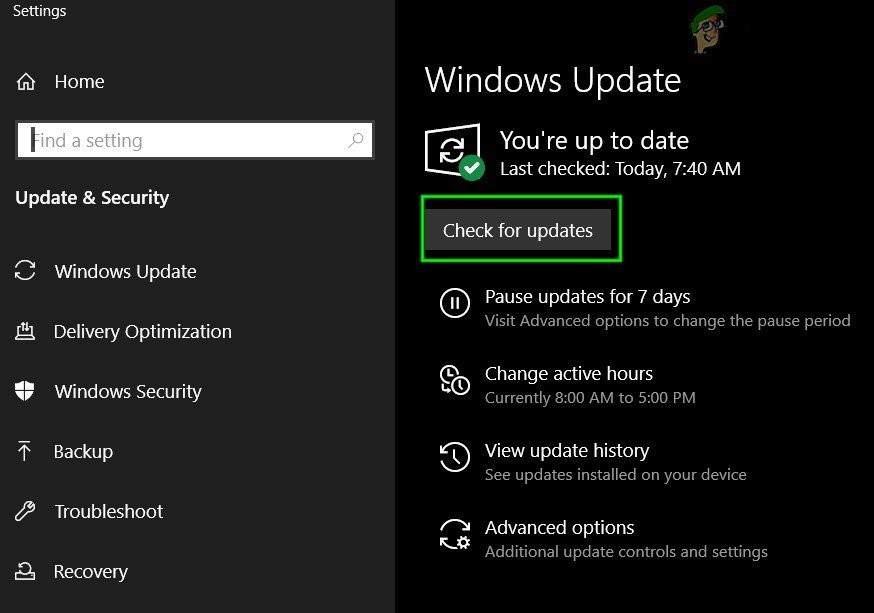
Check For Updates in Windows Update - If you see a message telling you that important updates are available, or telling you to review important updates, click the message to view and select the important updates to download or install
- In the list, click the important updates for more information. Select the checkboxes for any updates that you want to install, and then click on the download button.
- Click Install updates.
- The system should now automatically start installing updates on your computer.
- Check to see if installing updates has fixed this issue on your computer.
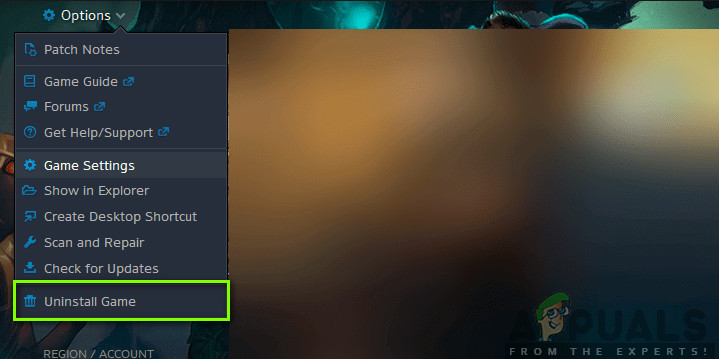
Workaround: If none of the methods worked for you then the last thing you can try is the Scan and Repair option present in the Blizzard App. Proceed to the Destiny 2 Games page, find the Options button above the marquee and select Scan and Repair. Afterward, choose Begin Scan option and then wait to see if Blizzard finds any problems and automatically resolves them. Finally, if none of the previous solutions worked, we can only advise you to keep your Blizzard application up-to-date and wait. We’re aware that Blizzard is being sloppy sometimes, but, eventually, the problems like the one with the Destiny 2 initialization, will be sorted out shortly.


