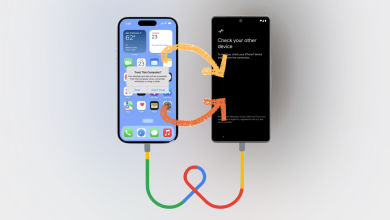
‘Control electrical appliances using Arduino and 4 Relay Module’
The concept of automation is getting popularity among people these days and many of them control their lighting, climate, etc remotely at their homes. Several microcontrollers or microprocessors can be used for automating the appliances and when we integrate all these appliances through microcontrollers, it becomes very easy and low-cost to control all these appliances by giving just one command through your computer or any other device.
So here is the simplest way to control most of your home appliances, without getting up and moving to the switchboard, through Arduino.
How to Automate Your Home Appliances using Arduino?
Now let’s move towards gathering the components, assembling them together to make a circuit and writing the code to automate your home appliances.
Step 1: Collecting the Components
It is always better to know about the components in detail before starting the project in order to avoid any inconvenience in the middle of the project. Below is the list of components that we are going to use :
- No products found.
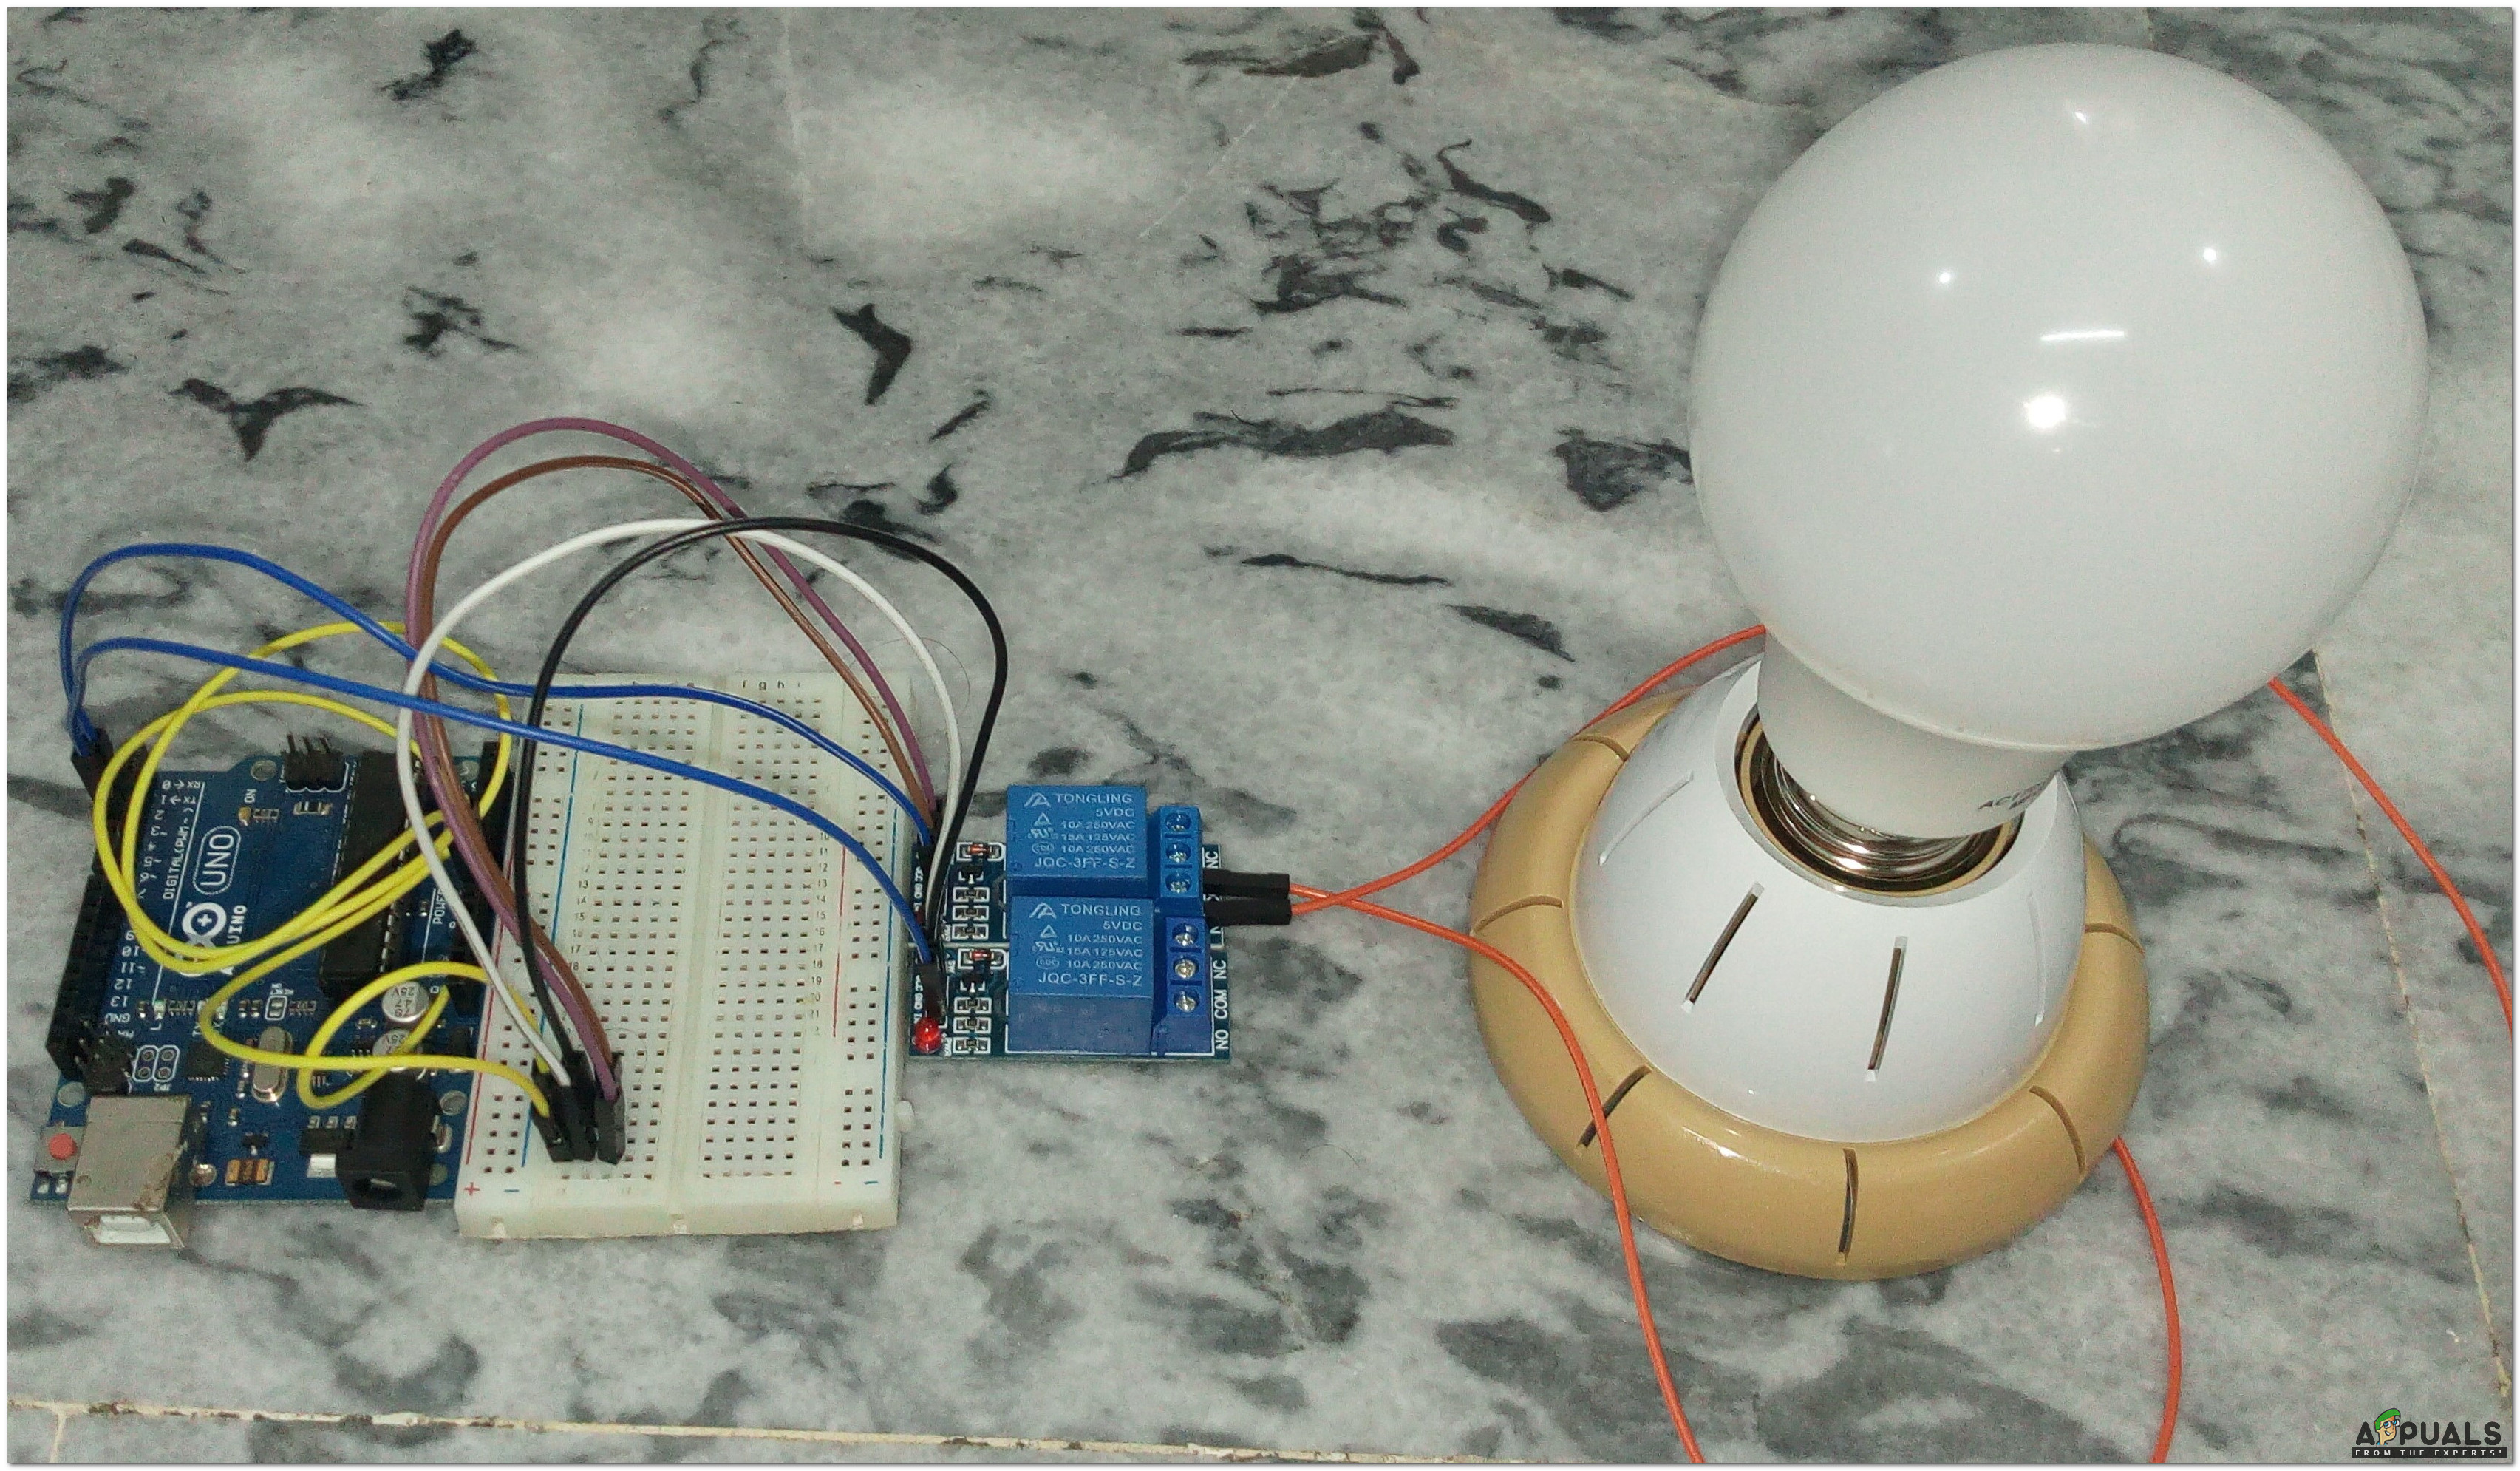
- 4 Relay Module
- No products found.
- No products found.
Here, we are using a 4 relay module because we will only control four appliances. If you want to automate a different number of appliances, you can use a different relay module. There are many relay modules available in the market for example, single, 8-relay, 12-relay, etc.
Step 2: Setting up the Apparatus
Now, as we have all the components, let us move towards assembling them together and making a circuit :
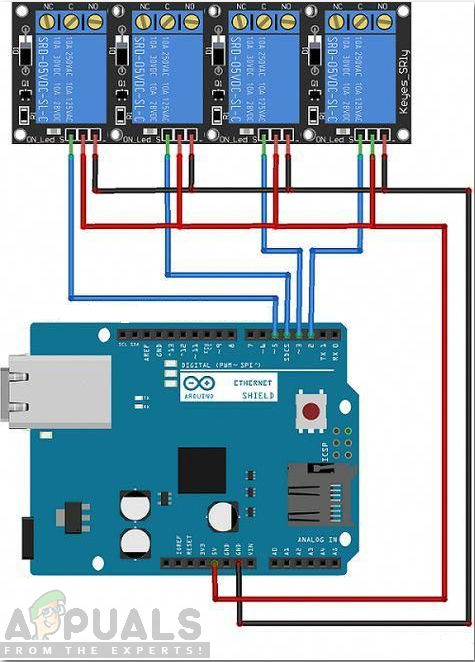
A relay is used in different circuits for switching purposes. It works in two different modes, Normally Open (NO) and Normally Closed (NC). in our project, we will use it in Normally Open mode which means when the relay is switched off the circuit will be broken. The relay module will need 5V from Arduino to power up and will get input from four different digital pins of the Arduino.
Now let’s connect the relay module to your home appliance. Take the positive wire of the appliance and cut it. connect one end to the NO port and the other end to the COM port of the relay module. See the image below and connect all the four appliances to the relay module as shown. Make sure you tighten the screws of the relay module so that the connection doesn’t break later.
Step 3: Getting Started with Arduino
If you are not already familiar with the Arduino IDE, download the latest version from Arduino
- Connect the Arduino board to your computer. Go to “Control Panel” and click on “Hardware and Sound”. Then go to “Devices and Printers” and check the name of the port to which your Arduino is connected. Here it is “COM14” but it is different on different computers.
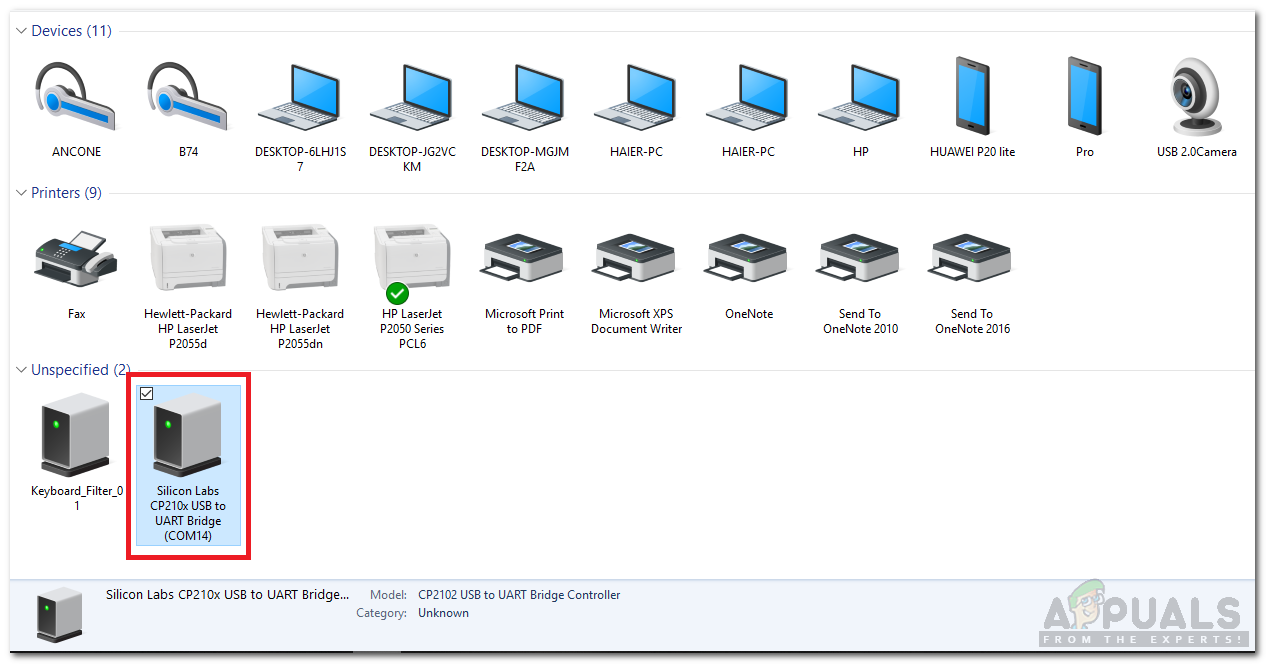
Finding Port Number - Open the Arduino IDE and set the board to “Arduino/Genuino Uno”
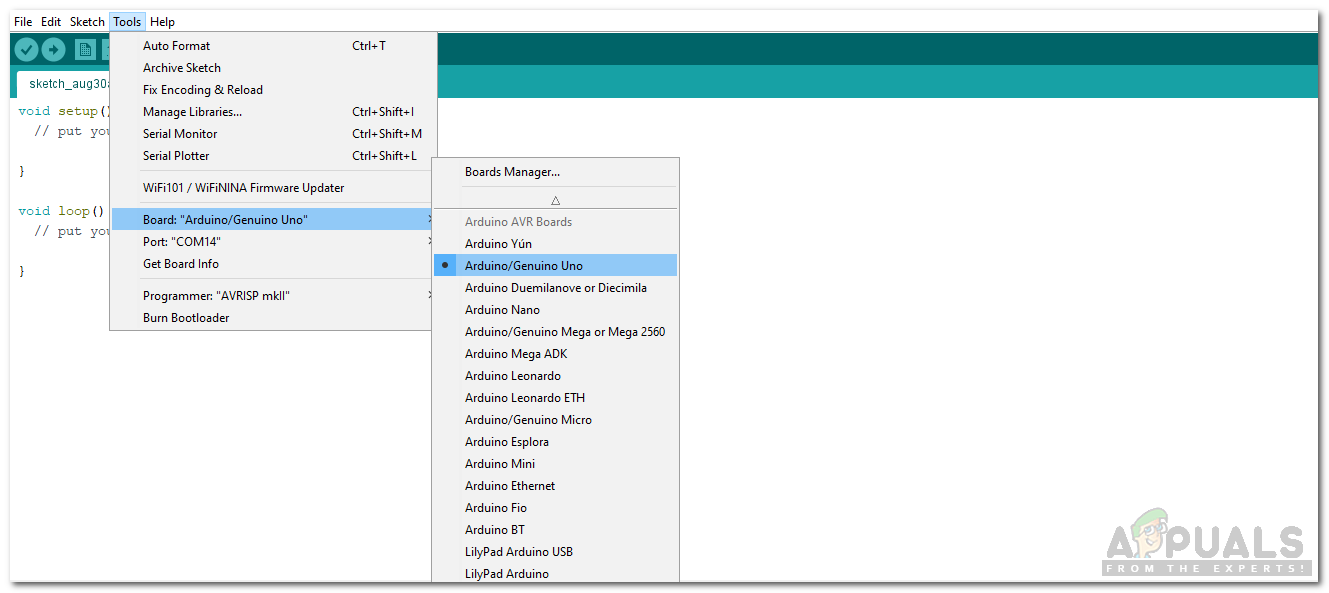
Setting Board - Now set the port number as
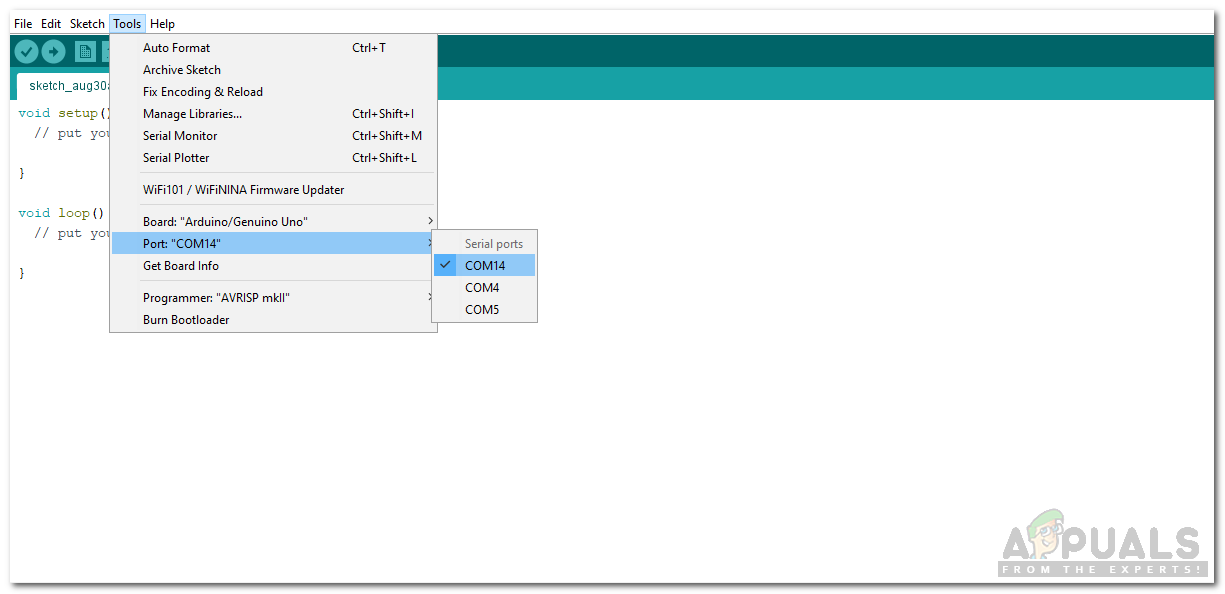
Setting Port - Download the code attached below and copy it to your IDE. To upload the code, click on the upload button
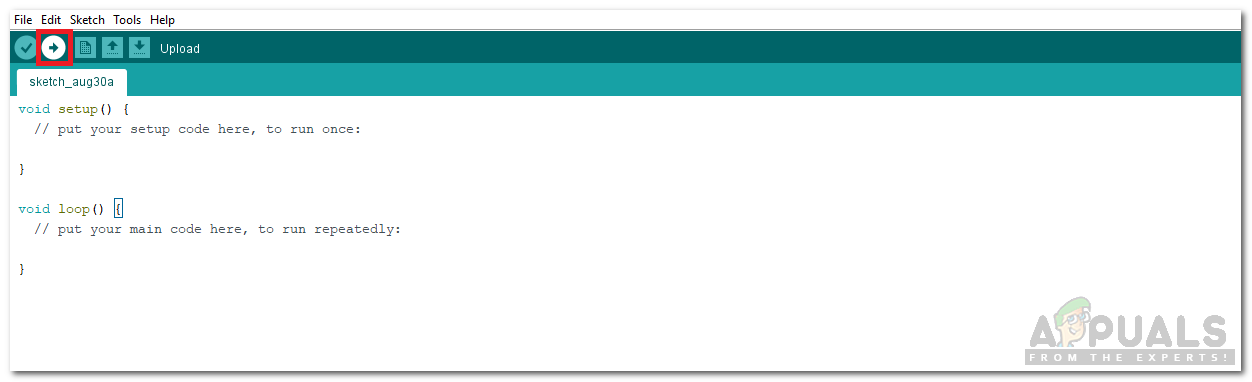
Upload
Click the download button to download the code Download
Step 4: Code
The code is self-explanatory but here is some general explanation of the code for your ease
- In the start, al the pins that will give input to the relay are initialized. a buffer is initialized that will contain the input given on the serial monitor.
int R1 = 6; // Relay 1 int R2 = 7; // Relay 2 int R3 = 8; // Relay 3 int R4 = 9; // Relay 4 // intializtion for serial input String y = " "; char buffer[] = {' ',' ',' ',' ',' ',' '}; int p; void setup() { Serial.begin(9600); pinMode(R1,OUTPUT); pinMode(R2,OUTPUT); pinMode(R3,OUTPUT); pinMode(R4,OUTPUT); } - void setup() is a function that sets the baud rate and initializes all the pins as OUTPUT or INPUT. Here baud rate is 9600 which is the speed at which the microcontroller will communicate and all the pin modes are set as OUTPUT because it will tell the relay to switch on or off.
- void loop() is a function that runs again and again in a loop. This function takes the input from the serial monitor and sends an output signal to all the relays.
- Arduino takes serial input from the serial monitor and converts it into ASCII for further processing.
while(Serial.available()>0) // Taking input on serial monitor
{
int x = Serial.readBytes(buffer,6);
p = atoi(buffer);
Serial.println(p);
}
This is the most important loop in the code. When an integer number is entered on the serial monitor. This input is converted to ASCII but ” p = atoi(buffer) “ converts the ASCII to integer and saves it into the variable p.
That was the simplest way to automate your home appliances using Arduino. Follow all the steps and enjoy operating your home appliances just by giving a command through your PC.