How to Adjust Screen Brightness on Windows 10
If you own a laptop or tablet, you might occasionally change the screen brightness to suit your needs. For example, if you want to use your laptop outdoors on a sunny day, you might want to set the brightness to maximum. If you are using your machine at night, the increased brightness can strain your eyes and sometimes, cause a headache.
Full brightness also consumes much more power and thus, decreases battery life. We have listed down all the methods through which you can change your screen brightness in Windows 10. Take a look!
Method 1: Using your Keyboard
Some keyboards have shortcut keys available which let you change your brightness directly without opening any other tools/applications. Mostly, the key “Fn” + a brightness icon present at the top of your keyboard can be used to change your brightness.
Here is an example for a keyboard which supports changing the brightness directly. Press both, the Fn key and the hotkey simultaneously. Press the “Brightness +” button to increase the brightness and the “Brightness –“button to decrease.
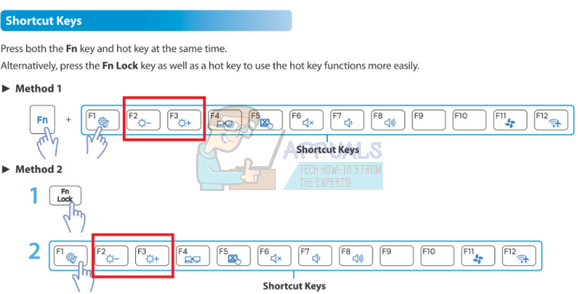
Some keyboards have an additional key which locks the function of Fn and doesn’t allow the function to be completed. You have to un-toggle the “Fn lock” for the function to be available. After unlocking the function, follow the normal steps to increase or decrease the brightness.
Method 2: Using Power Icon
Windows 10 has an option where you can check details about your battery percentage, enable Power Saving mode and adjust the screen brightness. This is a very easy-to-use tool where technicalities will be avoided.
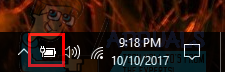
- Press the battery icon present on your notification bar (bottom right side of the screen). If you don’t see the icon, press the arrow pointing upwards to expand the notifications. It will be present there.
- Now a new small window will pop up. Click on the brightness icon to vary your brightness accordingly. You can click it multiple times to change the brightness according to your need. The values that you can change to are 0%, 25%, 50%, 75% and 100%.

Method 3: Using the Action Center
Windows 10 introduced an Action Center where you can find your application notifications as well as different tools to help you access quick settings on your computer. The action center also pertains all the past notifications until you clear them manually. This is very useful if you missed some notification and want to revisit it later on. We can also change the brightness using the action center.
- Press the message icon present at the bottom right side of your screen.
- Once the action center is opened, click on the brightness icon to toggle between 0%, 25%, 50%, 75% and 100% brightness levels.

Method 4: Using Display Settings
You can also change the brightness settings using the Settings application. This method is particularly useful if you don’t want to set the brightness level to the ones already defined. This method includes a slider from where you can easily set the level according to your exact need.
- Press Windows + S to launch the search bar of your start menu. Type “Settings” in the dialogue box and open the first result.
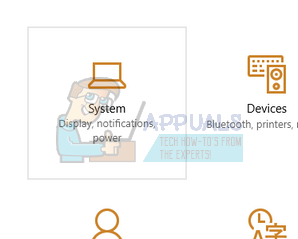
- Now select System (first entry) from the list of sub-categories available.
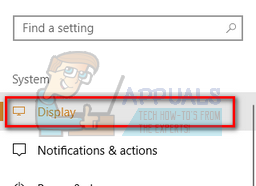
- Once in System, click on “Display” using the navigation pane on the left.
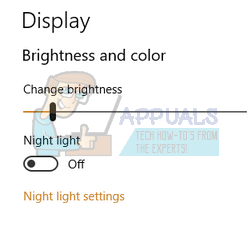
- Now you can easily change the brightness using the slider present under the heading of Display. There is also an option of “Night Light” which optimizes your screen to be used at night without putting a strain on your eyes.
Method 5: Using Power Options
You can also change your brightness similar to method 4 using the power options. We will discuss how to set specific brightness levels for different plans in method 6.
- Press Windows + R to launch the Run application. Type “control panel” in the dialogue and press Enter.
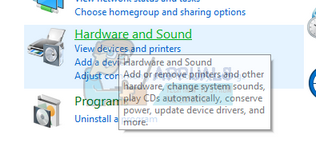
- Click on “Hardware and Sound” from the list of subcategories in the control panel.
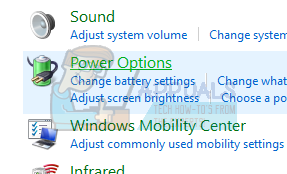
- After getting in the Hardware category, click on “Power Options”.
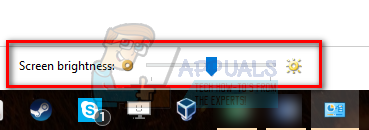
- Now at the bottom of the Window, you will see a slider used for adjusting screen brightness. Move the slider to adjust the brightness according to your need.
Method 6: Using Edit Plan Settings
Windows has a feature where you can predefine brightness values for each power plan you have in your computer. Power plans are configurations which define the way your computer performs, for example, in Power Saver plan your computer will maximize your battery life but at the expense of some performance drawbacks.
We can change the brightness settings in the Power Plan settings for each profile. Whenever you switch to another power plan, the predefined brightness value will be implemented. This is a very handy feature saving you the hassle to change the brightness settings each time you switch.
- Press Windows + R to launch the Run application. Type “control panel” in the dialogue and press Enter.
- Click on “Hardware and Sound” from the list of subcategories in the control panel.
- After getting in the Hardware category, click on “Power Options”.
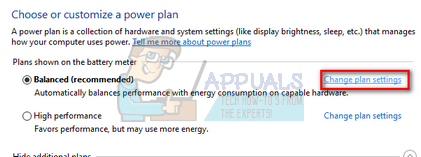
- Now you will see different power plans listed in front of you. Click on “Change plan settings” to edit the configurations saved for that profile.
- In the next window, look in front of “Adjust plan brightness”. These are the defined values for your power plan. You can change the brightness for both the cases (On battery and Plugged in).
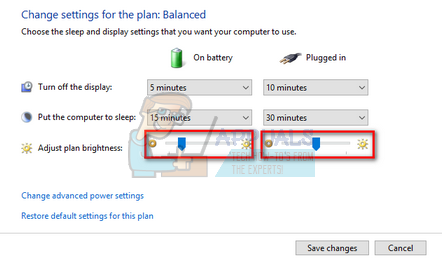
- Click on Save changes and exit the window.
Method 7: Using Advanced Power Settings
If you prefer setting percentages for each power plan, you can use the Advanced Power Settings. These settings allow you to set the predefined brightness value for both the cases (On battery and Plugged in).
- Press Windows + R to launch the Run application. Type “control panel” in the dialogue and press Enter.
- Click on “Hardware and Sound” from the list of subcategories in the control panel.
- After getting in the Hardware category, click on “Power Options”.
- Now you will see different power plans listed in front of you. Click on “Change plan settings”.
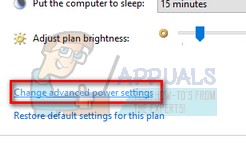
- Select “Change advanced power settings” option present in the near middle of the screen.
- A new small window will pop up in front of you. Navigate through the option until you find Display. Expand it and click on “Display brightness”. Now you will be given the option to set percentages for screen brightness values. Make the necessary changes and press Ok to implement the changes.
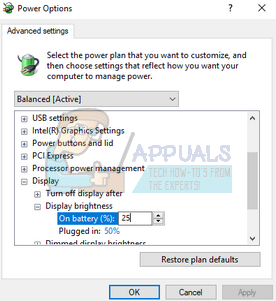
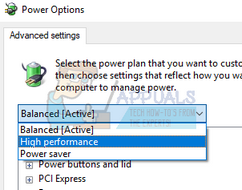
Note: You can also change the brightness settings for other plans by clicking on the current plan present at the near top of the window.
Method 8: Using PowerShell
You can change your current brightness directly from PowerShell as well. This method is convenient if you want to set your screen brightness to a specific percentage but don’t want to open so many menus to do so.
- Press Windows + S and type “PowerShell” in the dialogue box. Open the application after it returns in the results.
- Once in the PowerShell, copy and paste the following code.
(Get-WmiObject -Namespace root/WMI –Class WmiMonitorBrightnessMethods).WmiSetBrightness(1,<Brightness Level>)
The value of <Brightness Level> is to be replaced by the percentage ranging from 0 to 100. After changing the value, press Enter for the command to be executed.
