Wireless Keyboard Not Working? Try these solutions
A wireless keyboard might not work on Windows due to hardware issues with the keyboard or issues in the keyboard’s configuration in the Windows system. The hardware issues may range from a stuck key on the keyboard to a malfunctioning circuit board of the keyboard. Problems usually arise when a wireless keyboard stops working on Windows or shows extreme lag. The issue occurs on different makes/models of the wireless keyboard and systems.
A wireless keyboard might not work due to many factors but the following can be easily considered as the main ones:
- Fast Startup of Your System: A wireless keyboard might fail to work if the Fast Startup feature boots the system without a resource essential for the operation of the wireless keyboard.
- Conflicting Application: If an application on your system (like an anti-keylogger) is not letting the keyboard register its keystrokes in the system’s input modules, then that may cause the keyboard issue at hand.
- Corrupt Wireless Keyboard Driver or Wireless Utility: You may encounter the wireless keyboard issue if the installation of the keyboard’s driver or the OEM wireless utility is corrupt as they may not let the essential keyboard modules execute.
- Outdated Firmware of the Wireless Keyboard: If the firmware of your wireless keyboard is corrupt, then its incompatibility with the latest OS modules may hinder the keyboard operation.
1. Check Ports
The first thing you should do is check your system ports. Sometimes the issue might simply be in the port that you are plugging your keyboard receiver in. Try plugging your keyboard receiver in different ports and see if the issue is solved or not. Also, verify that there isn’t a power surge on any USB port.
Note: Make sure you are connecting directly to your PC port. If you are using a USB hub then that might be faulty. So, try connecting your receiver directly.
2. Resynchronization
Resynchronizing the connection between your receiver and keyboard solves the problem as well. In many cases, the problem gets solved by reestablishing the connection of your keyboard.
Here are the steps that need to be performed to resynchronize your keyboard and receiver.
- Look for a button on your receiver device (that needs to be plugged into your PC). If you don’t have a button on your receiver device (some devices don’t have one) then skip the next step.
- Press the button on your receiver and insert it into the PC port
- If a dialogue or setup screen comes up on the screen then follow the on-screen instructions
- Now locate a button on your keyboard. It should be on the bottom or aside. Press this Connect button
- You should see a green light on the receiver or a notification on your screen once the connect button is pressed. This means that the synchronization is successful. If you don’t see anything then that means the connection didn’t establish between the receiver and your keyboard. You should repeat all the steps given above.
The problem should be gone once the receiver and keyboard are successfully resynchronized.
3. Check Batteries
Check the batteries on your keyboard. If you just bought the keyboard then make sure that there are batteries inside the keyboard. On the other hand, if you have an old keyboard then try putting a new set of batteries as the old ones might be dead.
4. Remove Interference
There are a lot of things that can cause interference between the connections of your keyboard. This should be noted especially if your keyboard connects and disconnects randomly.
The things that might interfere include wireless routers, radios, big metal objects, cellphones, electrical devices, fluorescent lights, and lots more. Generally, you would want to keep electrical and metallic devices at least 8-10 inches away from the keyboard or any other wireless device. Also, make sure that you aren’t putting the keyboard or mouse on a metallic surface. Big metallic objects should be kept at least 3 feet away from wireless devices.
5. Run the Hardware Troubleshooter
If you have ruled out all the hardware connectivity issues then it’s time to use the Windows own troubleshooter to try to solve the issue. This troubleshooter will automatically detect any problems you might have.
- Hold the Windows key and press R.
- Type control.exe /name Microsoft.Troubleshooting and press Enter.

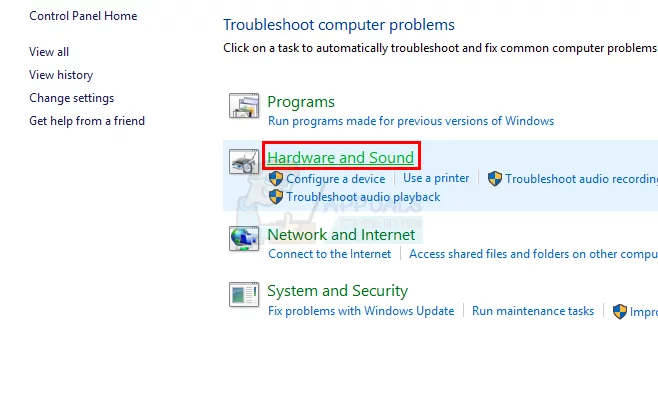
Open Hardware Troubleshooter Through the Run Command Box - Select Hardware and Sound.
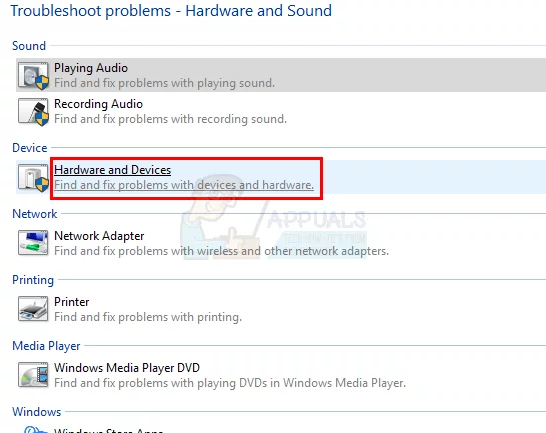
Open Hardware and Sound - Select Hardware and Devices.
Open Hardware and Devices - Click Advanced.
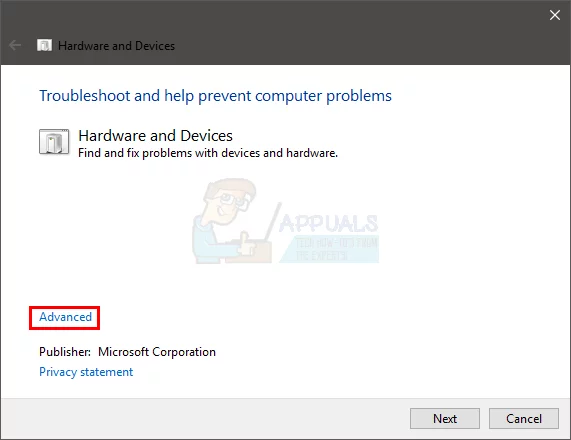
Open Advanced in the Hardware Troubleshooter - Make sure the option Apply repair automatically is checked.
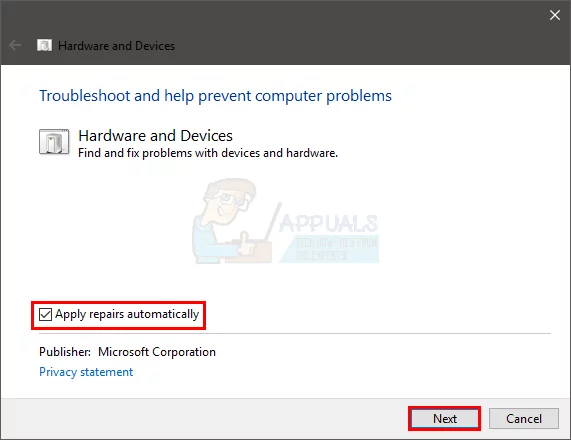
Select Apply Repairs Automatically in the Hardware Troubleshooter - Click Next.
Wait for the system to search and detect any problems. It will automatically find and resolve any issue that might be causing these problems. Once it is done, follow any additional on-screen instructions. If the troubleshooter gives you an error then you can look up the solution for that too.
6. Release the Stuck Keys on the Wireless Keyboard
If a key on your wireless keyboard is stuck in its press position, then that continuous signal from the pressed key may cause the wireless keyboard issue at hand. In this case, releasing the stuck keys on the wireless keyboard may solve the problem.
- Gently press every key on your keyboard to check if any key is stuck in its pressed position like the F9 key or PrtScn key.
- If so, try to release the stuck key and once it is released, check if the wireless keyboard is working normally.
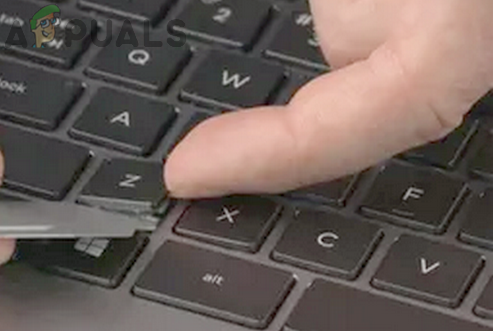
Release the Stuck Key on Your Keyboard
7. Re-plug the Wireless Dongle into the System
A temporary communication glitch between the wireless keyboard and its USB dongle may cause the non-functioning of the keyboard. Here, re-plugging the wireless dongle into the system may solve the problem.
- Firstly, unplug the wireless USB device (like a Logitech dongle) from the system.
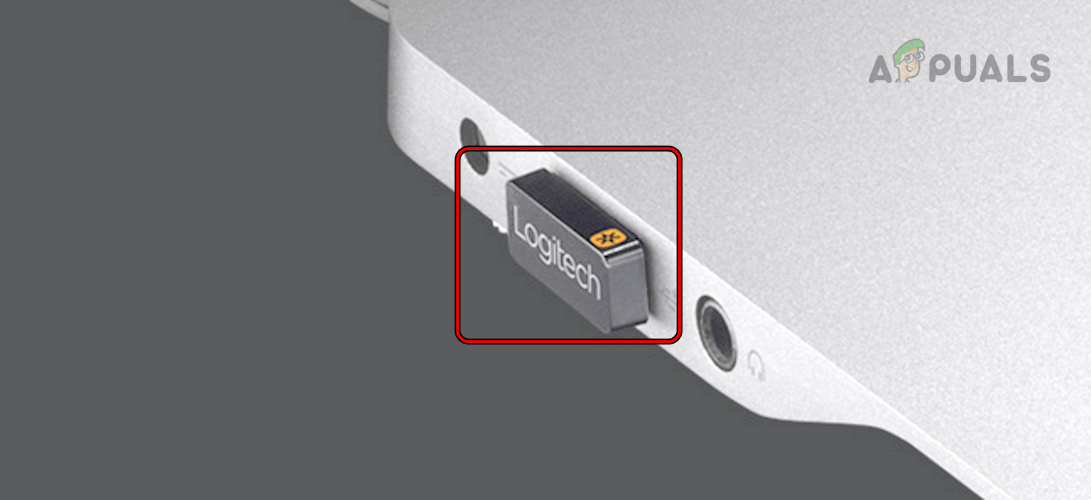
Unplug Wireless USB Dongle from the System - Then right-click on Windows and select Task Manager.
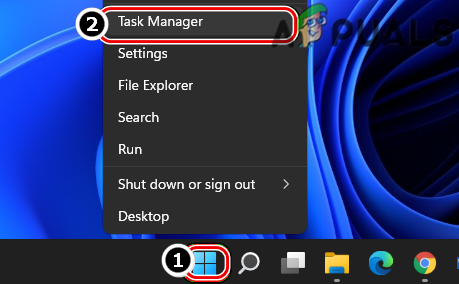
Open the Task Manager of the System Through the Quick Access Menu - Now end all the processes related to the OEM keyboard utility (like Logitech).

End Logitech Processes in the System’s Task Manager - Then plug back the wireless USB dongle into the system and afterward, check if the wireless keyboard is working fine.
- If not, check if plugging the wireless USB dongle into another USB port (preferably, USB 2.0) resolves the problem.
8. Perform a Cold Restart of the System
If a glitch occurs between the system and keyboard communication but the static current present on the system is not letting the related modules reset properly, then that could result in the wireless keyboard issue under discussion. In this case, performing a cold restart of the system may remove the static current from the PC’s components and thus solve the problem.
- Power off the system and unplug all the peripherals from it (printer, mouse, keyboard dongle, etc.).
- Now unplug the system’s power cable from the power source and in the case of a laptop, remove its battery.
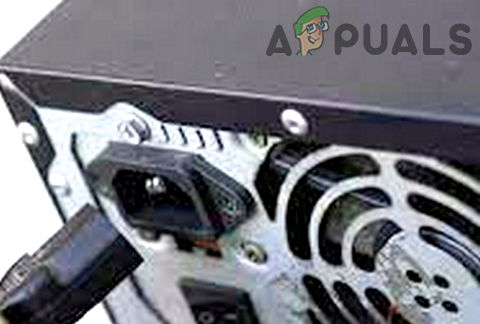
Unplug the Power Cable of the PC - Then press and hold the system’s power button for 30 seconds.
- Now remove the batteries of the wireless keyboard and wait for 5 minutes.
- Then plug back the wireless USB dongle to the system and afterward plug back the system’s power cable.
- Now put back the batteries of the wireless keyboard and then power on the system.
- Then boot the system into BIOS and check if the wireless keyboard is working fine in BIOS. If not, then make sure the wireless keyboard is not faulty by using it on another system.
- If the keyboard was working fine in the system’s BIOS, boot the system into Windows and check if the wireless keyboard is operating normally.
- If the issue was resolved but returns, then you may be generating a type of static current (certain types of shoes on a particular type of carpet can cause this phenomenon) that is causing the issue. Here, simply touch a metal object that is properly grounded, and afterward, check if the keyboard has started to work.
9. Disable Filter Keys in the Control Panel
Your Windows system is equipped with the Filter Keys accessibility option which helps people for whom it is difficult to hold multiple keys at once. To do so, this feature adjusts the response of your keyboard and ignores the repeated key presses. A wireless keyboard may glitch out and stop working properly if the system’s Filters Keys feature is hindering its operation. In this scenario, disabling the Filter Keys feature may resolve the keyboard issue.
- Right-click Windows and open Settings.

Open Windows Settings Through the Quick Access Menu - Now, in the left pane, head to the Accessibility tab, and the right pane, scroll down till the end.
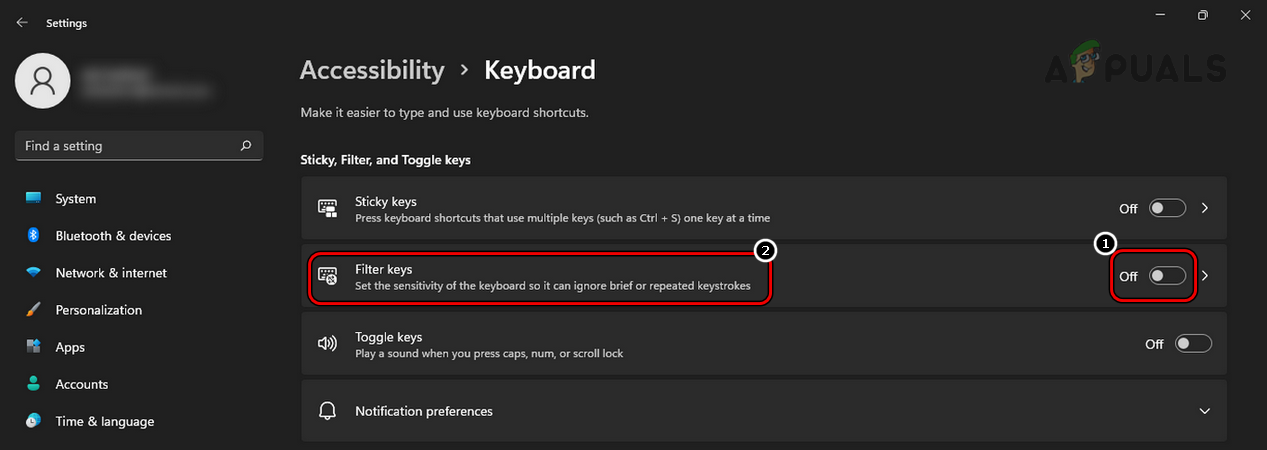
- Then, in the Interaction section, open the Keyboard, and afterward, select Filter Keys.

Open Keyboard in the Accessibility tab of the Windows Settings - Now disable Filter Keys by toggling its switch to the off position and afterward, click on Filter keys.
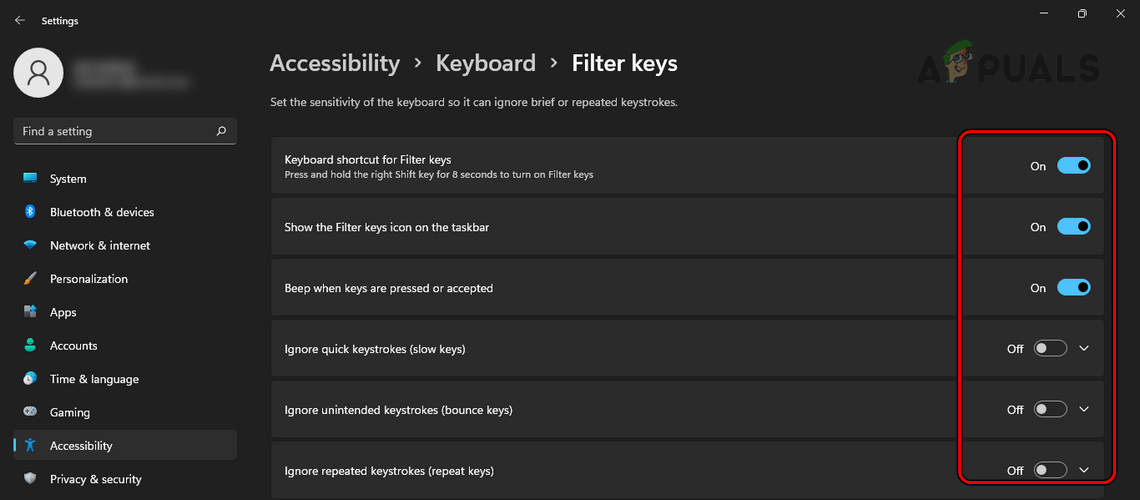
Disable Filter Keys and then Open Filter Keys in the Keyboard Accessibility Settings - Then disable all the options shown there and close the Settings window.
Disable All Filter Keys Options - Afterward, restart your PC and upon restart, check if the wireless keyboard has started to work normally.
10. Remove and add back the Wireless Keyboard to the System’s Devices
If the Device’s modules of your Windows system are glitched out and are not letting the input components of the OS work properly, then that may cause the keyboard issue at hand. Here, removing and adding back the wireless keyboard to the system’s devices may solve the problem.
- Right-click Windows and open Settings.
- Now, in the left pane, head to the Bluetooth and Devices tab.
- Then, in the right pane, open Devices and check if the keyboard is shown there, like Microsoft Nano Transceiver.
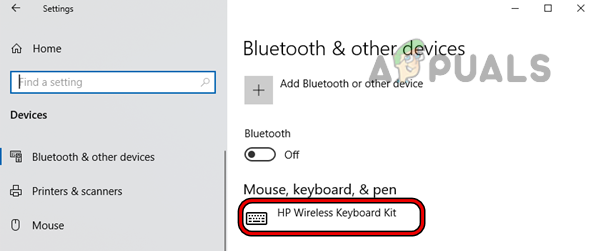
Remove HP Wireless Keyboard in the System’s Devices - If so, click on it, and near the top right-click on Remove Device.
- Now unplug the wireless USB dongle and wait for a few seconds.
- Then plug back the wireless USB dongle into the system and check if the wireless keyboard is working fine.
11. Disable the Fast Startup Feature of Your System
Your Windows system is equipped with a Fast Startup feature which reduces the boot time of the system by powering off the system in a mixed state of hibernation and sleep. If this feature is enabled (usually, enabled by default on Windows), then a glitch that caused the issue can carry on to multiple restarts, resulting in the issue under discussion. In this context, disabling the Fast Startup of the system may solve the wireless keyboard issue.
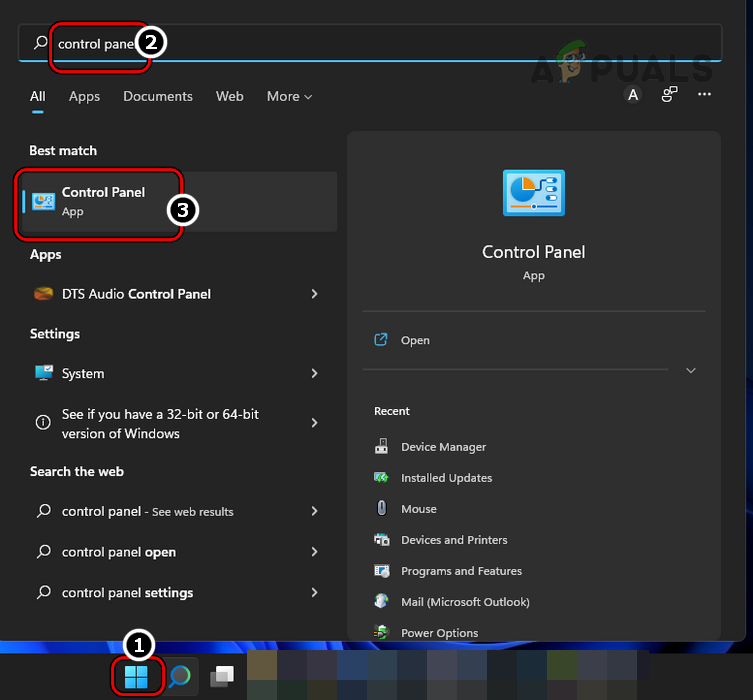
- Click Windows, type, and open Control Panel.
Open Control Panel - Now select System and Security and open Power Options.
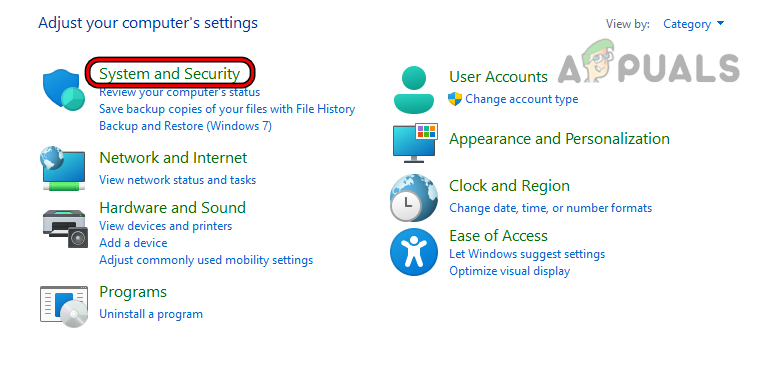
Open System and Security in the Control Panel - Then in the left half of the window, click on What the Power Buttons Do, and afterward, in the right half of the window, click on “Change Settings That Are Currently Unavailable”.
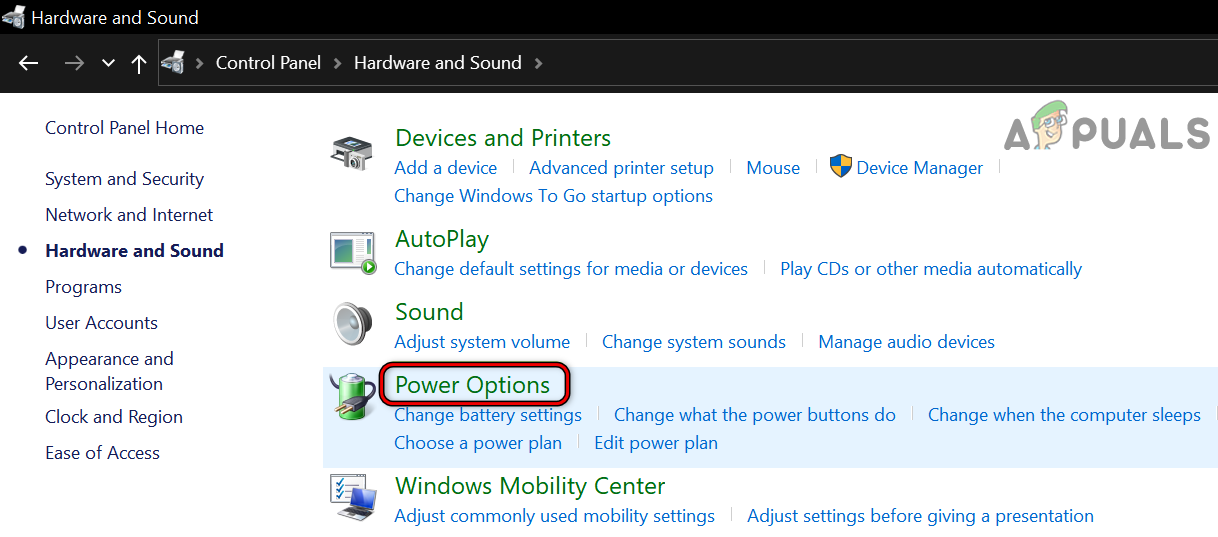
Open Power Options in the Control Panel - Now untick Turn on Fast Startup and click on Save Changes.
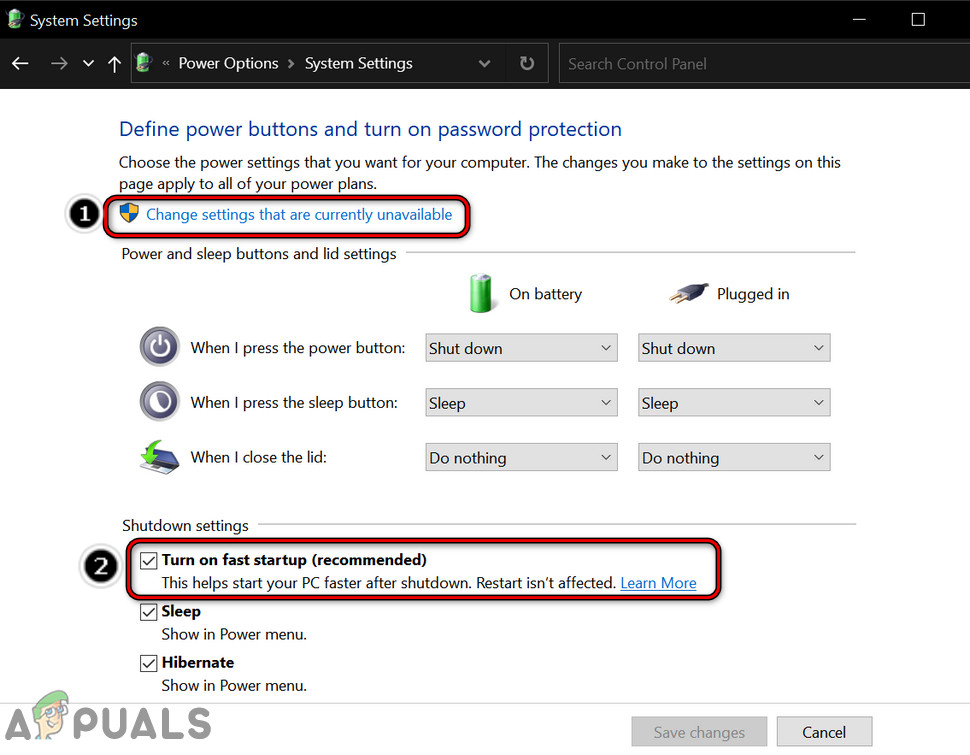
Disable Fast Startup - Then power off your system and unplug its power cable.
- Now wait for a minute and plug back the system’s power cable.
- Then power on the system and check if the Wireless keyboard issue is resolved.
12. Perform a Clean Boot of the System and Uninstall the Conflicting Applications
Your wireless keyboard might fail to work if another application (like an anti-keylogger on your system is hindering the system’s input modules. Here, performing a clean boot of the system may solve the keyboard problem.
- Perform a clean boot of your Windows system and make sure the application and drivers required by the wireless keyboard are enabled during the clean boot process.
- Afterward, check if the wireless keyboard has started to work.
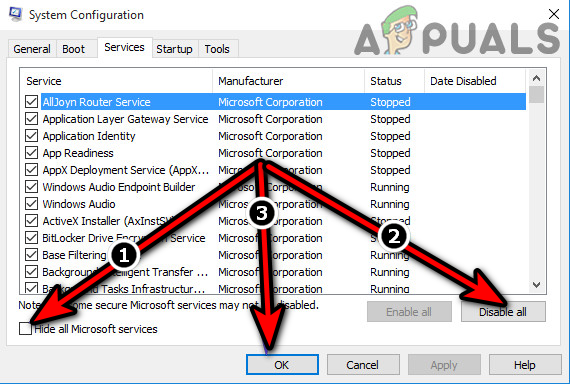
Clean Boot the Windows 10 PC - If so, then find the conflicting application or process by enabling (one by one) the applications or processes disabled during the clean boot process. Once the conflicting application is found, you may keep it disabled at the system’s startup or uninstall it.
Comcast’s Constant Guard, especially, its anti-key logging component GuardedID is a reported culprit causing the non-functioning of wireless keyboards. If you have it (or something similar) installed on your system, then uninstalling it may clear the keyboard problem.
- Right-click Windows and select Apps & Features.
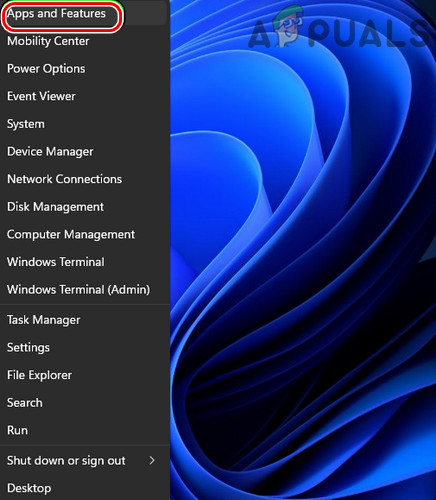
Open Apps & Features - Now expand the Constant Guard options and select Uninstall.
- Then confirm to uninstall Constant Guard and follow the prompts on the screen to uninstall it.
- Once done, restart your PC and upon restart, check if the wireless keyboard is functioning normally.
13. Reinstall the Wireless Keyboard Driver
The wireless keyboard may not work if its drivers on your system are corrupt as the keyboard modules may fail to execute properly. In such a case, reinstalling the wireless keyboard driver may solve the problem.
- Right-click Windows and open Device Manager.

Open Device Manager Through the Quick Access Menu - Now expand the Keyboard tab and right-click on the wireless keyboard.
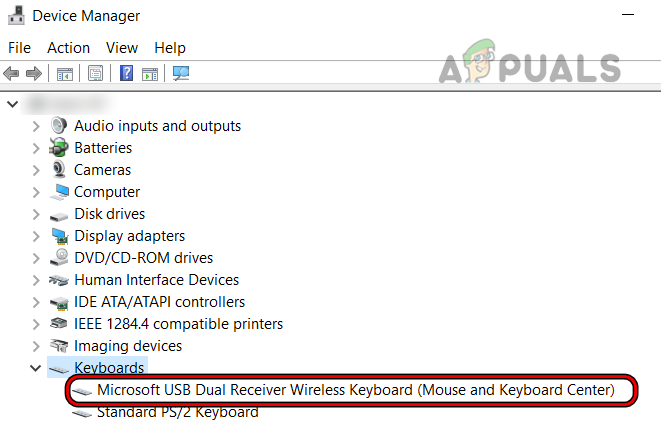
Uninstall the Wireless Keyboard in the System’s Device Manager - Then select Uninstall Device and confirm to uninstall the wireless keyboard device.
- Once done, restart your system and upon restart, check if the wireless keyboard is working fine.
- If not, download and install the latest driver from the OEM website.
- Then restart your PC and upon restart, check if the wireless keyboard is clear of the issue.
- If that fails, check if installing an older version of the wireless keyboard drivers resolves the issue.
- If that did not work, check if using the OEM utility (like Logitech Options) to pair the wireless keyboard with your system resolves the issue.
14. Reinstall the OEM Wireless Utility
If the installation of the OEM wireless utility (like Logitech software) is corrupt, then that may cause the keyboard problem under discussion as that may not let the system’s input modules function properly. In this context, reinstalling the OEM wireless utility may solve the problem. For illustration, we will discuss the process for Logitech software.
- Disconnect the OEM USB dongle from the system and exit the Logitech software from the system tray (if shown).
- Now, right-click on Windows and select Apps & Features.
- Then expand the options of the Logitech software and select Uninstall.
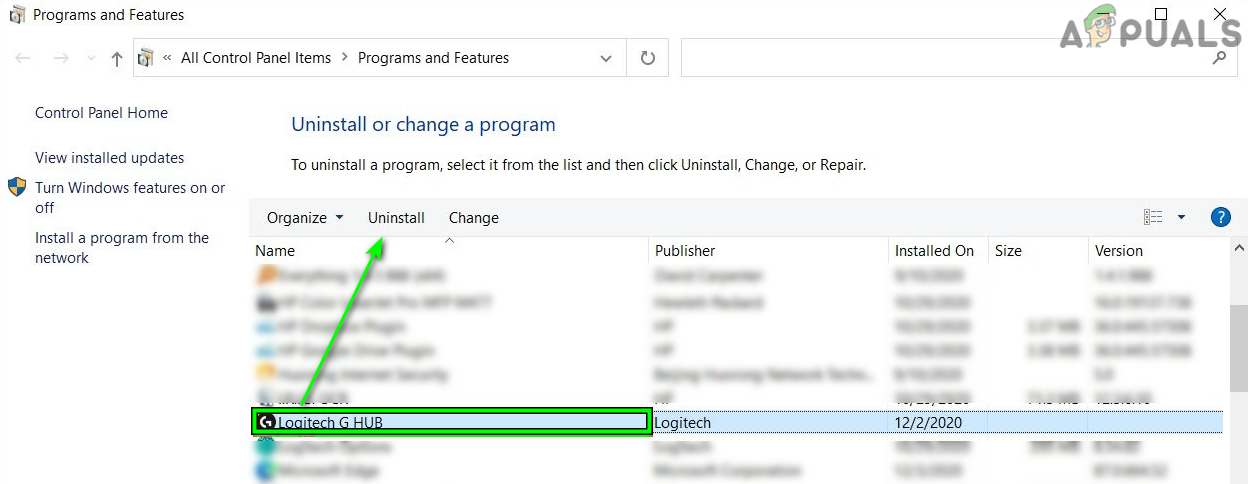
Uninstall Logitech G Hub - Then confirm to uninstall the Logitech software and follow the prompts on the screen to uninstall it.
- Now restart your PC and upon restart, download the latest version of the Logitech software.
- Then launch it as administrator and follow the prompts on your screen to complete the installation of the Logitech software.
- Once done, restart your PC and upon restart, launch the Logitech software as administrator and follow the prompts on your screen to pair it with your wireless keyboard. Keep in mind to connect the USB wireless dongle when asked by the application.
- Afterward, check if the wireless keyboard is working fine.
15. Disable Power Management of the Keyboard in the Device Manager
If the system’s Device Manager is powering off the keyboard or the USB hub where the wireless USB dongle is connected, then that may not let the keyboard work properly. In this case, disabling the power management of the wireless keyboard or USB hub by the Device Manager may solve the problem.
- Right-click on Windows and open Device Manager.
- Now expand the Human Interface Devices tab and right-click on the first wireless device.
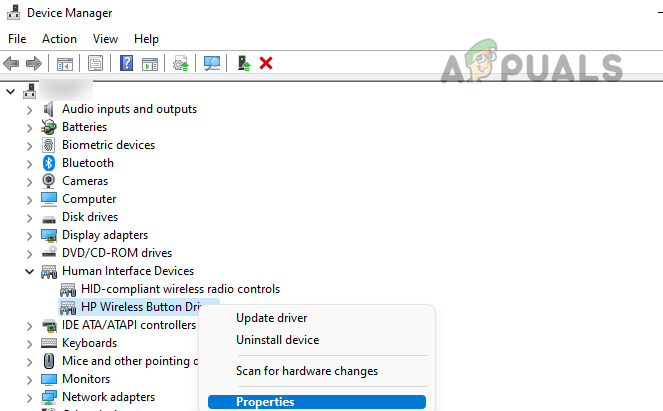
Open Properties of the Wireless Device in the Human Interface Devices of the Device Manager - Then select Properties and head to the Power Management tab. If no Power Management tab is shown, repeat the same on the second device and keep on repeating till the one is found with the Power Management tab.
- Now, in the Power Management tab, untick Allow This Computer to Turn Off This Device and click on Apply/OK.

Uncheck Allow This Computer to Turn Off This Device in the Power Management tab of the Wireless Device - Afterward, repeat the same to all the devices in the Human Interface Devices tab, and once done, restart your PC.
- Upon restart, check if the wireless keyboard is working without issue.
- If not, expand the Universal Serial Bus Controllers in the system’s Device Manager and right-click on the first USB Root Hub.
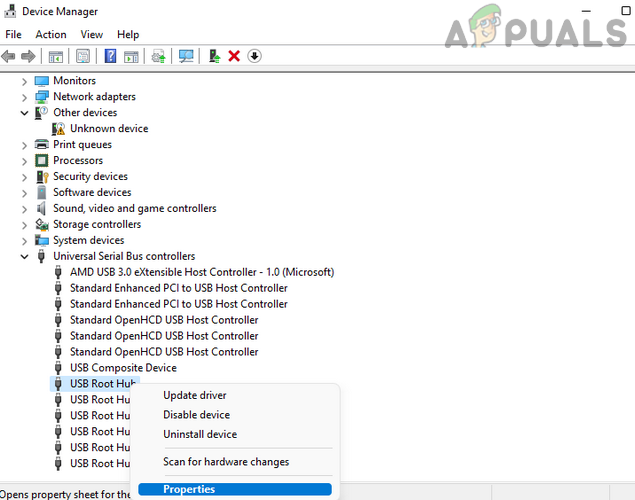
Open Properties of the USB Root Hub in the Device Manager - Now select Properties and head to the Power Management tab.
- Then untick the option of Allow This Computer to Turn Off This Device and click on Apply/OK.
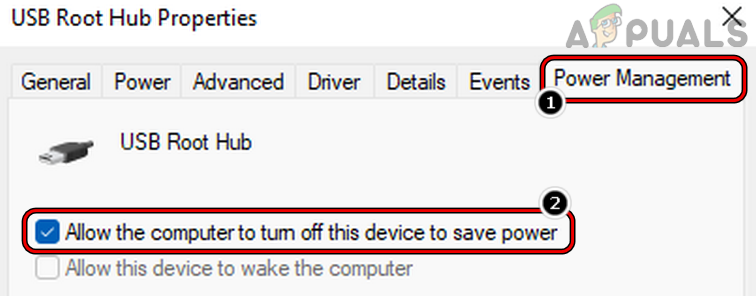
Uncheck Allow This Computer to Turn Off This Device in the Power Management Tab of the USB Root Hub - Now repeat the same on all the USB Root Hubs in the Device Manager and then restart your PC.
- Upon restart, check if the wireless keyboard has started to work fine.
16. Update the Firmware of Your Wireless Keyboard
If the firmware of your wireless keyboard is outdated, then its incompatibility with the updated OS might not let the keyboard work properly. In this context, updating the firmware of your wireless keyboard may solve the problem. For illustration, we will discuss the process through the Unifying Software utility.
- In your system’s tray, right-click on the Logitech icon and select Keyboard and Mouse Settings.
- Now, in the navigation bar of the Logitech Settings Panel, click on the asterisk-looking icon and click on Open Unifying Software.
- Then, head to Advanced in the Unifying Software and select Keyboard.
- Now, click on the Update Firmware button (if no update is available, then the button will be disabled) and follow the prompts on your screen to complete the firmware update of your wireless keyboard.
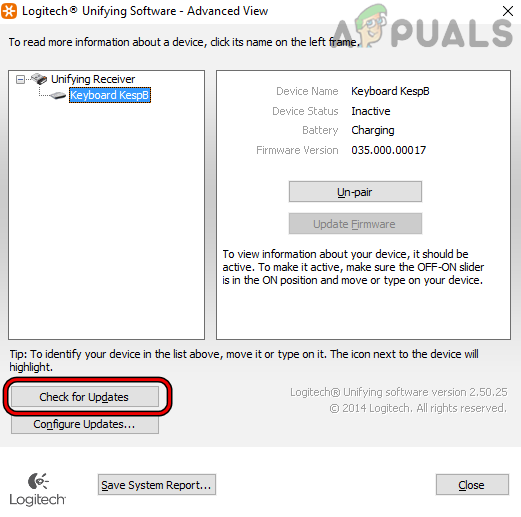
Check for Firmware Updates in the Logitech Unifying Software - If you are also using a wireless mouse, make sure to update its firmware as well.
- Once the firmware of the mouse and keyboard is updated, restart your system and upon restart, check if the wireless keyboard is operating fine.
17. Create Another Windows User Profile
Your Wireless keyboard might not work on your system if your user profile is corrupt as it may not let loading of the essential input modules. In this context, creating another Windows user profile may solve the keyboard problem.
- Create a new user account (preferably, an administrator one) on your Windows system and log out of the current user account.
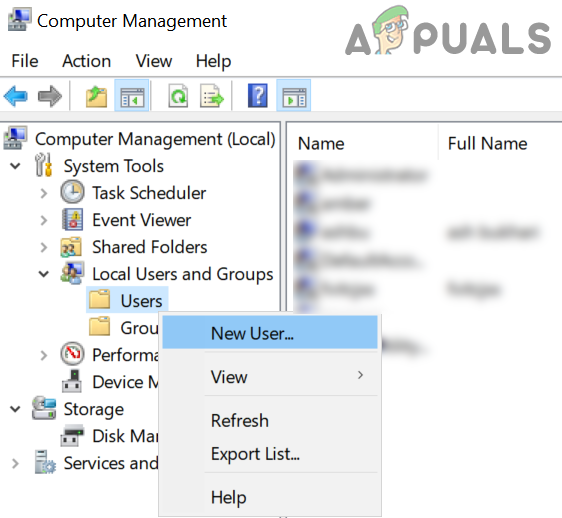
Create a New User in Local Users and Groups - Now log in to the new user Windows account and check if the wireless keyboard is working fine. If so, then you may transfer all your old account data to the new account (a tedious task).
18. Reset The Circuit Board of The Wireless Keyboard
If the circuit board of your wireless board has malfunctioned, then that may lead to the non-working of the wireless keyboard, and resetting the same may solve the keyboard issue under discussion.
Warning:
Advance at your own risk and with extreme care as resetting the circuit board of a wireless keyboard involves disassembling the keyboard hardware and if not done properly, you may damage the keyboard circuitry and may make it useless.
- Firstly, remove the batteries of the wireless keyboard and wait for a minute.
- Then reinsert the batteries (preferably, a new pair) and if the power LED of the wireless keyboard does not light, then the circuit board has malfunctioned and you are required to reset it.
- After confirming the issue is with the circuit board, arrange a screwdriver PH1, a paper clip or small electrical wire, and a magnifying glass (you can skip magnifying glass if it cannot be arranged).
- Now remove the keyboard batteries and unscrew all the back screws of the wireless keyboard.
- Then remove the back cover of the keyboard by unlocking the retaining notches of the keyboard. Be careful, not to break the notches, unlock them.
- Now remove the screws of the plate holding the small circuit board and turn over the circuit board.

Disassemble the Wireless Keyboard - Then locate the contact node labeled as Reset. You may need to use the magnifying glass to locate the Reset node.
- Once found, reinsert the batteries after remounting the battery compartment.
- Now use the electrical wire or paperclip to connect the keyboard’s reset node to the ground (the black wire coming from the batteries) and wait for a second.
- Then release the connection and the power LED on the board should light up.
- Afterward, remount the circuit board and tighten its screws.
- Now properly close the back cover of the wireless keyboard and tighten the screws.
- Then unplug the wireless USB dongle from the system and wait for 10 seconds.
- Now insert back the USB dongle and hopefully, the wireless keyboard would be operating fine.
If the issue persists, then you may have to reset the PC to the factory defaults or perform a clean installation of the Windows.