Fix: Windows 10 Won’t Boot
Windows 10 boot process is very simple. Whenever you start your computer, the UFEI or BIOS firmware is loaded. These perform a short series of steps on your hardware called Power on Self Test (POST). After performing the test and if no errors were found, the BIOS scans the master boot record, which in turn loads an essential file to your RAM (the file is called Winload.exe). After the file is loaded, it kicks off the startup process by loaded NTOSKRNL.EXE and HAL (NT Kernel is the heart of Windows and HAL stands for Hardware Abstraction Layer).
If you are unable to boot your Windows, it probably means that your computer is unable to load Winload.exe. This is probably not a good thing and not always can you get your operating system back on track. What we can do is enter the Recovery Environment (RE), and try checking if the boot files are corrupt. If they are, we can try fixing them using the command prompt. Furthermore, we can also check if there is any problem with your hard drive.
Solution 1: Repairing Corrupt Boot files
The first and foremost thing you should check if you are having problems booting your computer is your boot files. Boot files usually get corrupt after a potential Windows update. If the update was complete halfway or it got stuck, there are chances that your boot files have become corrupt. We need to run the chkdsk command to fix any discrepancies. We will be running the command prompt in RE and try doing all the operations from there. Windows cannot repair itself because the boot parameter is corrupt. No recovery will fix it for some reason even though the recovery tools are present.
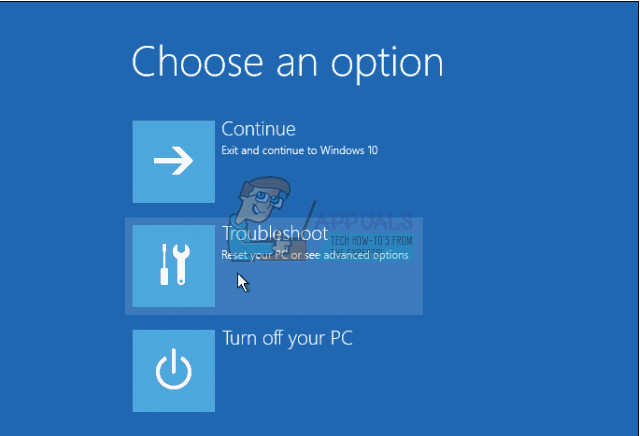
- Restart your computer and upon booting, press F11 to go into the recovery environment. Now select Troubleshoot.
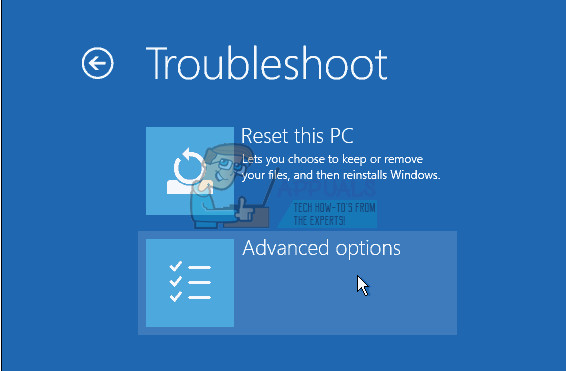
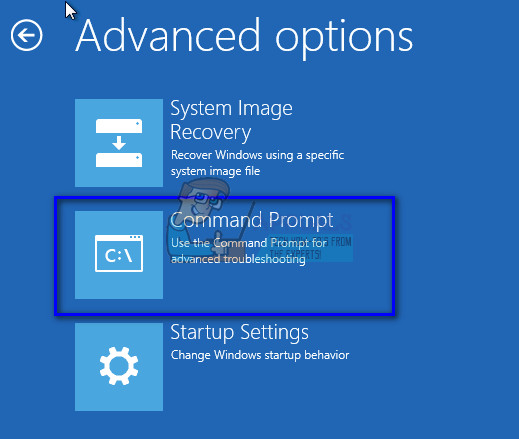
- Click on Advanced from the list of options available and select command prompt.
- Once at the command prompt, execute the following command. If you have Windows installed to some other directory, you can replace “c” with the name of the drive.
chkdsk c: /r /x
If check disk utility only scans your computer and doesn’t perform any fixes, you need to execute the following command:
sfc /scannow
System file checker (SFC) is a utility in Windows which allows users to scan and restore corruptions present in their operating system. It is integrated with Windows resource protection, which protects folders, registry keys, and critical system files as well.
- Wait for the process to complete and do not cancel at any stage. After all the operations are performed, restart your computer and see if you can boot as expected.
Solution 2: Using Bootrec (bootrec.exe)
Bootrec is tool provided by Microsoft in Windows recovery environment (also called Windows RE). When your computer fails to boot successfully, Windows automatically starts in RE. This environment has several tools that can potentially fix your computer such as Command Prompt, Startup Repair etc. We will try using Bootrec using the command prompt and see if this fixes the problem for us.
- Restart your computer. When your computer loads up (when Windows logo appears), press F8 or F11.
- Navigate to the command prompt like we did in the first solution.
- Now execute the following commands in the window and wait for each one to complete:
bootrec /fixmbr
bootrec /fixboot
bootrec /scanos
bootrec /rebuildbcd
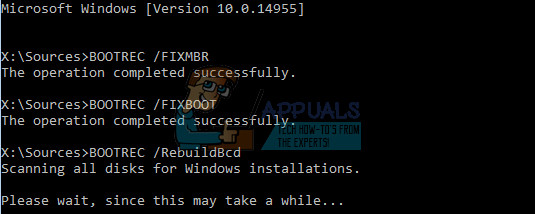
Each command should give you a confirmation that the operation completed successfully. Now reboot your system and hopefully, the problem will be solved.
Solution 3: Disabling Network Drivers
A recent update to the Windows operating system in early 2018 broke many network drivers in many devices across the globe. The reason why this happened is unknown. The users faced the same problem under discussion that they were unable to boot their operating system successfully. What you can do to solve this problem is to boot your computer in safe mode and disable ALL the network drivers. When you have successfully booted up, you can revert the drivers to a previous version.
- Boot your computer in Windows 10 Safe Mode Command Prompt.
- Once in Safe Mode, press Windows + R, type “devmgmt.msc” in the dialogue box and press Enter.
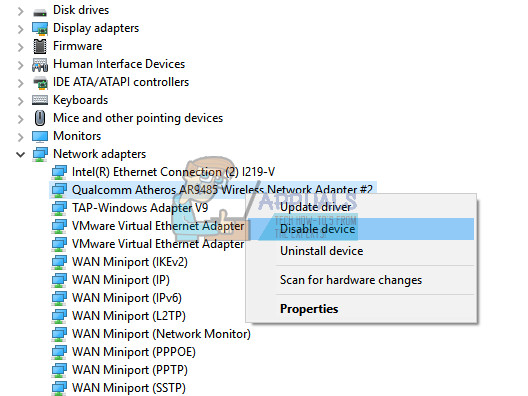
- Expand the category of Network adapters, right-click on each network adapter one by one and select Disable.
- Once you have disabled all the network drivers on your computer, boot your computer out of safe mode and attempt booting in the normal way.
- After you have booted normally, navigate to the device manager, right-click on the adapter and select Properties. Here you will see an option to Roll-back driver. If you don’t, you can download the older driver from the internet and store it in an accessible location on your computer. Then you can click Update, and after choosing to update manually, choose the driver to install.
Note: If you already know which software caused this mess, you can boot into Safe Mode, uninstall/disable the software and then try booting the normal way.
Solution 4: Using Command Prompt to Restore
If all the above solutions don’t work as expected, you use the command prompt to restore your Windows. We will first backup some files and then proceed. We have listed down each step comprehensively. Make sure you follow each and every step and do not even skip a single one as it can render the PC unusable.
- If Windows is stuck in an infinite boot loop after an update fails to install, cut the power of the computer by pulling the plug. If you own a laptop, remove the battery. If you are using a laptop where you cannot remove the battery, holding the power button for 5 seconds should turn off the computer instantly.
- After you start your computer again, you should an automatic repair dialogue. If you don’t, close your computer like mentioned above again and the third time, you will see it. Now navigate to the command prompt as explained earlier in the article.
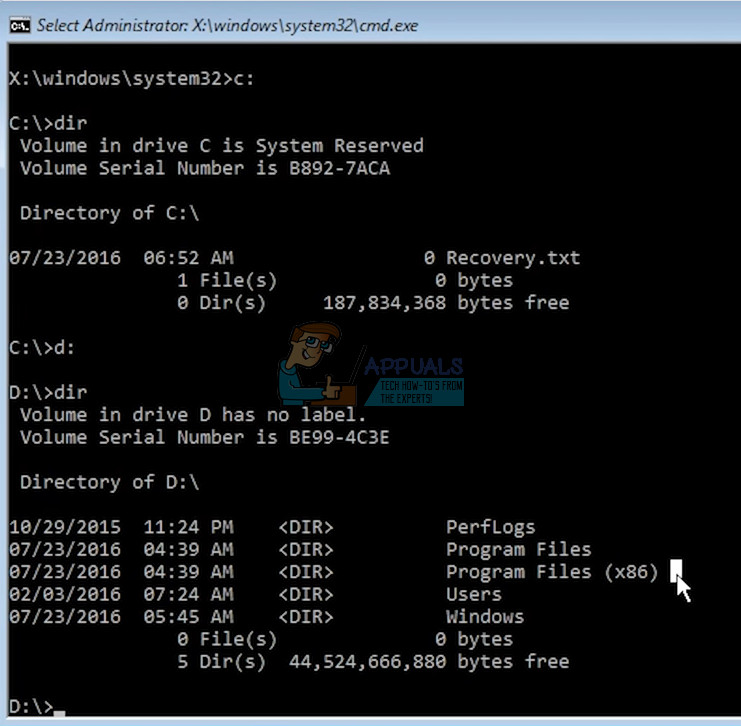
- Once in the command prompt, type “c:” We are doing this to check where your Windows is installed. Type “dir” to list all the contents. If you see Program files in the result, it means that Windows was installed here. If it wasn’t, type some other drive’s name such as “d:” As you can see in the example below, the installation files are present in drive ‘D’.
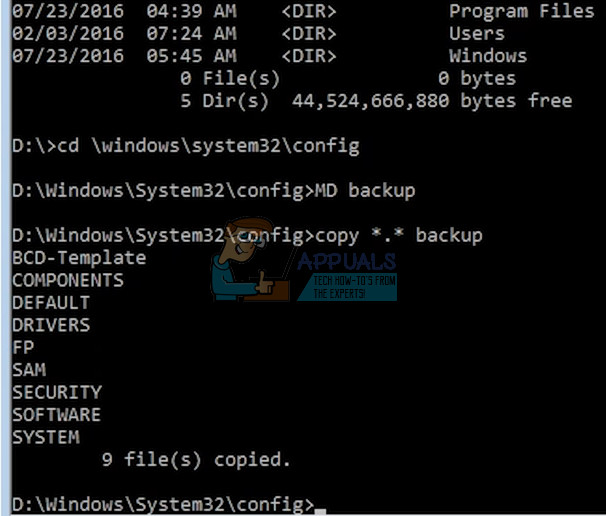
- Once you are on the correct drive where Windows is installed, type the following command:
cd \windows \system32 \config
MD \backup
If you have already used this solution before, make sure you use another name instead of ‘backup’ such as ‘backup1’.
- Now type the following command to back up your files:
copy *.* backup
Make sure that you use the same name which you initialized in step 4. In this case, we are using the name ‘backup’.
- Now type the following commands:
CD regback
dir

You will see a bunch of items with numbers before them. If you don’t see numbers and there is a string of zeroes, you cannot continue with this solution. Instead, you have to use System Restore.
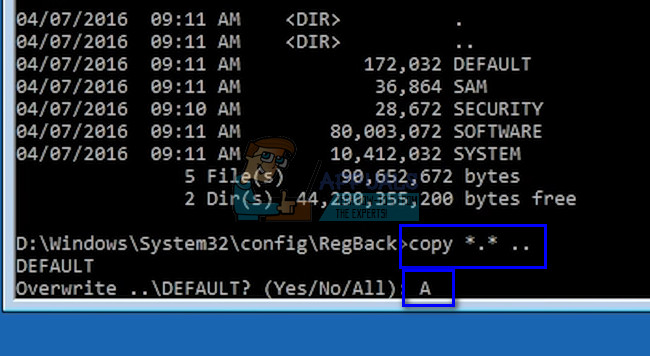
- After doing all the steps above, type the following command:
copy *.* ..
The above command has copy following with (star dot star), then a space and then (dot dot).
When prompted, type “A” to indicate All.
- Now Windows will reboot. Do note that the booting might take quite a while depending on how many files were operated. Let it complete and do not cancel at any step. Hopefully, after a while, you will be able to log into your computer once again without any problems.
Note: Do note that this method might render a ‘few’ features of Windows. This is very rare but if it happens, you can always search our forums for fixes. The problems are mostly very minute, nothing of critical nature.
Solution 5: Backing up your Data and doing a System Restore
If you cannot restore your computer manually in the solutions mentioned above, you will have to back up your data manually in RE and then do a system restore. Do note that the backup we do will not be automatic and you will an external hard drive or USB to copy the files into.
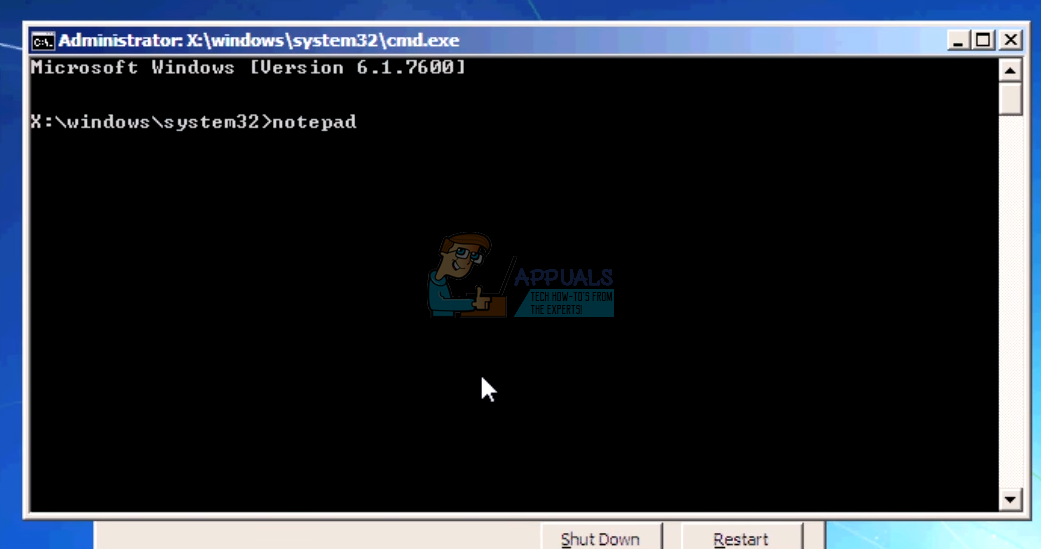
- Open the command prompt in RE as mentioned in the article earlier. Once at the command prompt, execute the instruction ‘notepad’. This will launch the normal notepad application on your computer in RE environment.
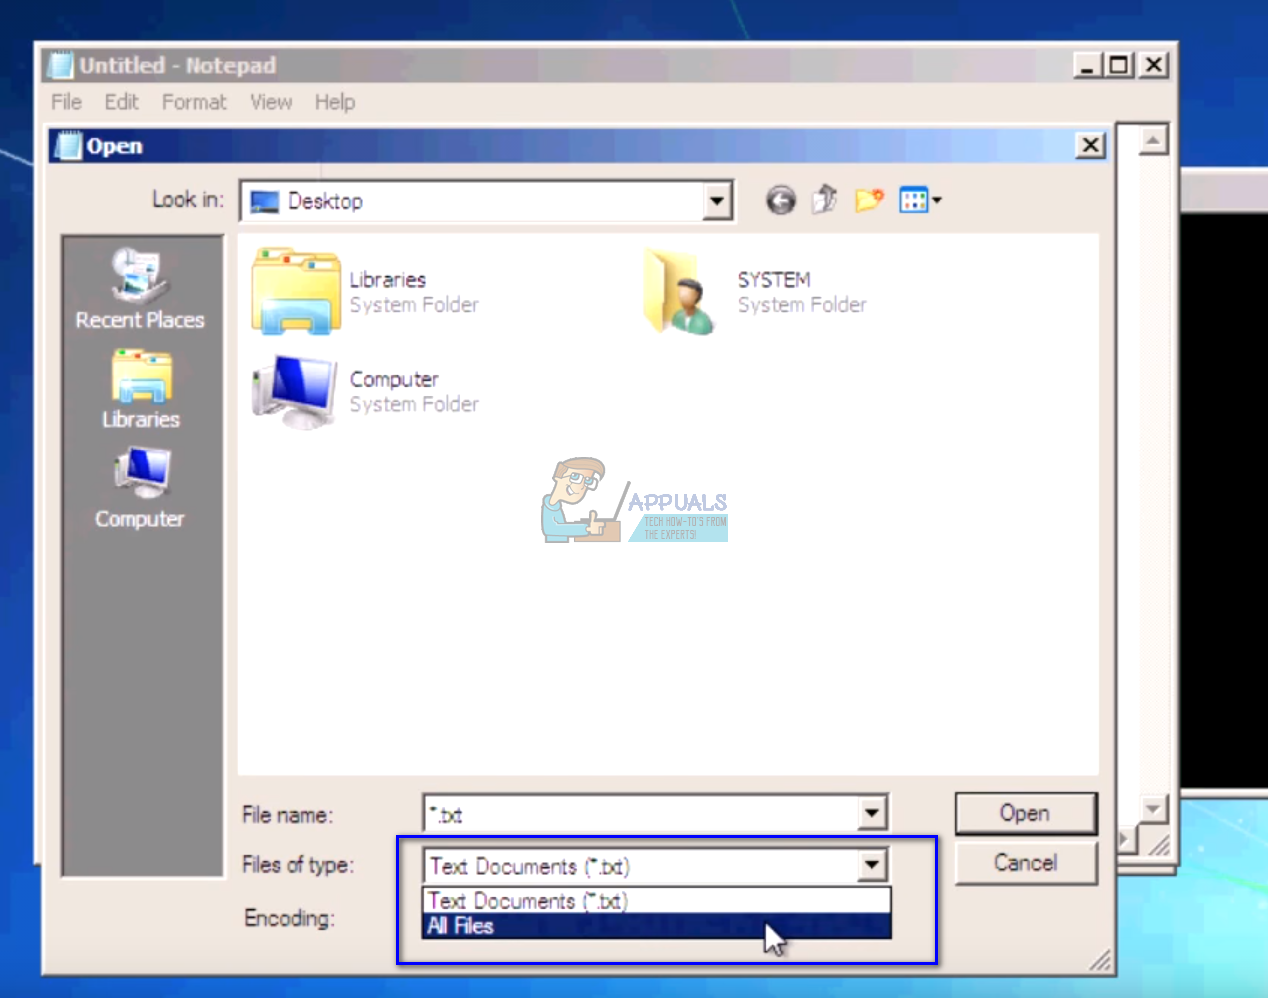
- Press File > Open in the notepad. Now select ‘All Files’ from the option “Files of type”. You will now be able to see all the files on your computer using this explorer.
- Navigate to the data you want to back up. Right-click on it and select ‘Copy’.

- Now navigate to My Computer again, locate the removable hard drive and paste all the contents in it. Repeat the steps until you have successfully backed up all your important data in the external hard drive or USB.
Once you have backup up your data, you can start doing a system restore on your computer. For you to perform a system restore, you must have a restore point configured already. Normally, Windows automatically creates a restore point when there is an update or when you install a new feature.
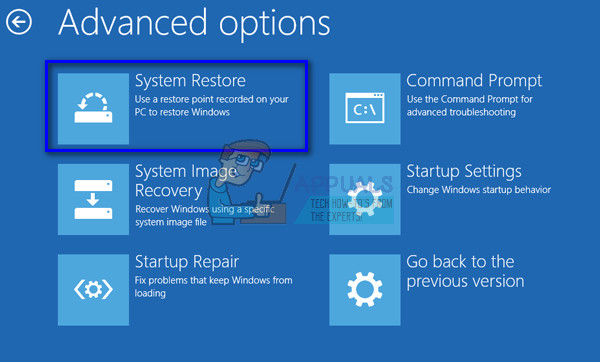
- Navigate to the Advanced options as mentioned earlier in the article. Click the option “System Restore”.
- Select the restore point from the list of options and perform a system restore. Do note that you might lose some data which was entered in the computer after the restore point was created.
Note: As you can see, there is also an option to Go back to the previous version of the update. If you know with certainty that an update broke Windows, you can try going back to the previous version and see if this does the trick for you.
Last Resort: Installing Fresh copy of Windows
If you are not able to boot your computer normally using the steps mentioned, you need to install a fresh copy of Windows on your computer. There is still a way you can keep your information intact.
For Windows to install, it needs a drive where you will be installing the installation files. You can either install Windows on a separate drive when the options comes. This way the old drive will still have the data and if it is accessible later on, you will be able to copy it to the new drive and format it accordingly. You can check out our detailed article on how to install Windows 10.
Tip:
You can enter the recovery environment by inserting a USB or Disk with Windows installation media and selecting “Repair this computer”. This can be used when you are unable to enter RE in the steps above.