How to Fix: ‘Unable to boot – Please use a kernel appropriate’ Error
Most problems that users have with GNU/Linux are well after they’re booted and trying to work with some software package, but what happens if you get a message that reads unable to boot please use a kernel appropriate for your CPU while you’re trying to start? If you’re working with an ISO file, then this usually means you’ve selected the wrong one for your machine’s architecture. There are several major architectures in current use, but more than likely you’ve tried to start your system with x86_64 code when it has a 32-bit Intel or AMD microprocessor inside.
Method 1: Fixing the Unable to Boot Error with a Different ISO
You’ll find these errors vary differently depending on the type of kernel you’re using, but they’re usually start with a message about how the kernel requires a specific processor. For instance, we ran a test ISO of 64-bit Kali Linux on a 32-bit netbook and received the following error message:
This kernel requires an x86-64 CPU, but only detected an i686 CPU.

In this case, the i686 refers to the traditional Intel architecture. If this is the case, then you merely need to download the appropriate kernel to fix the unable to boot error. Code has to be written to execute on certain chips, and this warning is printed to the screen by a bit of protective code designed to run on the type of hardware you’re working with.
Head back to the download page that you were on while you were looking for the the ISO that you downloaded in the first place on a machine that you’re able to boot from. If the machine you were attempting to install Linux on it still has a valid operating system, then you should be able to boot from it and download a new ISO. You could theoretically even use a machine that was running a different non-Linux operating system as long as it could write out an ISO file.
For our test, we poked around on the Kali Linux site and found that they were offering a standard 32-bit ISO. This file will work perfectly fine if you were getting any errors that mentioned only detecting i686 hardware. While the terms i686 and 32-bit aren’t actually interchangeable, because of Intel’s dominance in the personal computer market they essentially have been used this way when selecting ISO files.
You may find that you have complaints about other types of hardware besides merely i686. ARM processors are common in tablets and other portable equipment, and Kali Linux provides ISO files to boot these, which will fix the unable to boot error. PPC errors come from PowerPC equipment, which is common on older Apple hardware. Ubuntu and Debian have supported PPC ISO files. Debian also has ISO files you could use if you had any type of MIPS equipment. Head over to the Debian install package, download one of these ISOs and write it to a microSDXC card or a memory stick. Once you reboot, select the boot option that matches the device you wrote the new ISO to and you should be able to start the GNU/Linux installer.
Keep in mind that if you’re running a virtual machine and have this error, you might want to use the menus to change the type of processor being emulated. Rather than switching to a different type of ISO, you can possibly switch your virtual machine system to a 64-bit processor.
Method 2: Detecting Your CPU Hardware
If you can boot an existing Linux installation but don’t know what architecture it uses, then you can easily find out. Open up a terminal window from your installation or head over to one of the virtual consoles if your X Windows installation isn’t working. From the bash prompt, type arch or uname -m to immediately find out what kind of processor architecture you’re working with.
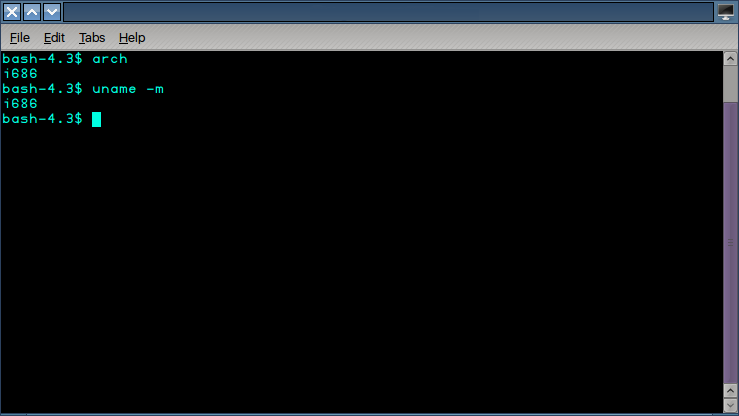
We ran it from inside of a Lubuntu installation on that same test netbook we tried the Kali Linux ISO file on, and it quickly returned i686 as a response. This confirms what we knew about the machine in that it had a standard 32-bit Intel processor and should work just fine with an ISO image file designed to function within this architecture. Simply use dd to write it in the same way that you would have used it to write the original ISO you were working with and reboot.