How to Fix ‘The operation failed as no adapter is in the state’ Error
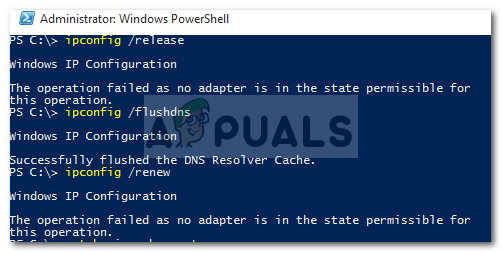
The error ‘This operation failed as no adapter is in the state permissible for this operation’ often occurs when you have manually set a static IP address. Users have reported that they are not able to connect to any network and all they see is a red cross symbol on the network icon on the left-hand side of the taskbar. Afterward, upon trying to release the IP configuration and renew the address using the command prompt or Windows Powershell, they are presented with the said error.
The internet connection is fine as the users are able to use the Wi-Fi on their smartphones, however, they are having trouble connecting to the internet on their system. To circumvent the issue and get rid of it, you can go through the solutions down below.
What causes the ‘The Operation Failed as no Adapter is in the State Permissible for this Operation’ Error on Windows 10?
Well, if you get the said error message upon trying to release or renew the IP configuration, it can be due to the following factors —
- Manually setting static IP address: If you have prior to the appearance of the error manually set a static IP address for your system, it can cause the issue to occur.
- Third-party antivirus: In some scenarios, the third-party antivirus that you are running on your system can also be the root of the issue.
To isolate the issue, there are a few solutions provided down below that you can apply. We recommend following them in the same order as given as it will get you out of the dark quickly.
Solution 1: Running Internet Connections Troubleshooter
Since you are not able to connect to the internet, running the Internet Connections troubleshooter might potentially fix your issue. To run the troubleshooter, do the following:
- Press Windows Key + I to open Settings.
- Go to Update and Security and then navigate to the Troubleshoot pane.
- Select Internet Connections and then click ‘Run the troubleshooter’.
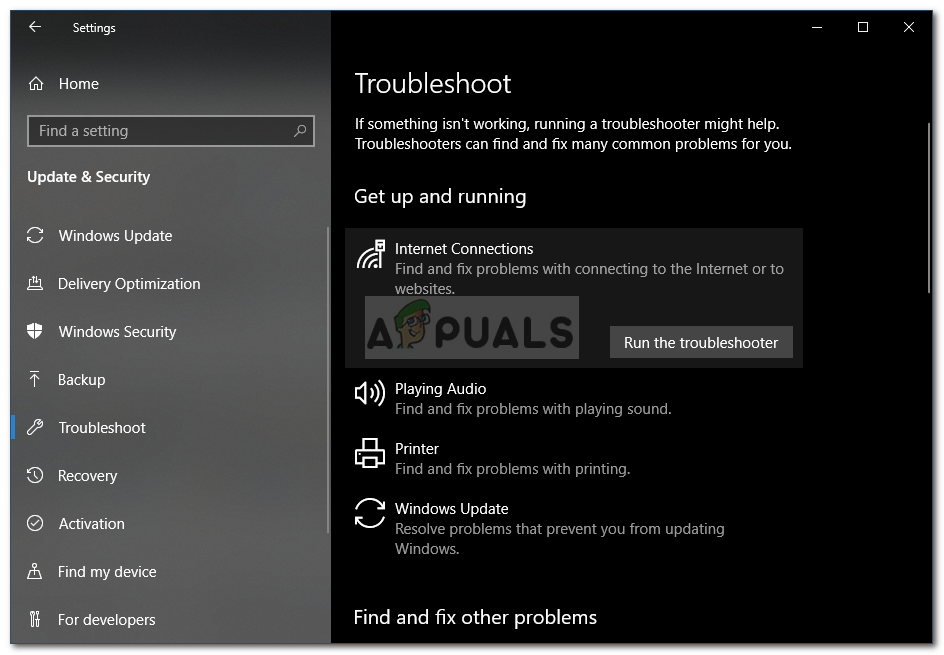
Running Internet Connections Troubleshooter - Wait for it to complete.
Solution 2: Network Reset
Like we mentioned above, the issue is often due to the static IP that you have set. If this case is applicable to you, you can perform a Network Reset to isolate the issue. When you perform a Network Reset, your network configuration will be reset including your IP address. Here’s how to do it:
- Press Windows Key + I to open Settings.
- Go to Network and Internet.
- In the Status pane, scroll down and locate Network Reset.
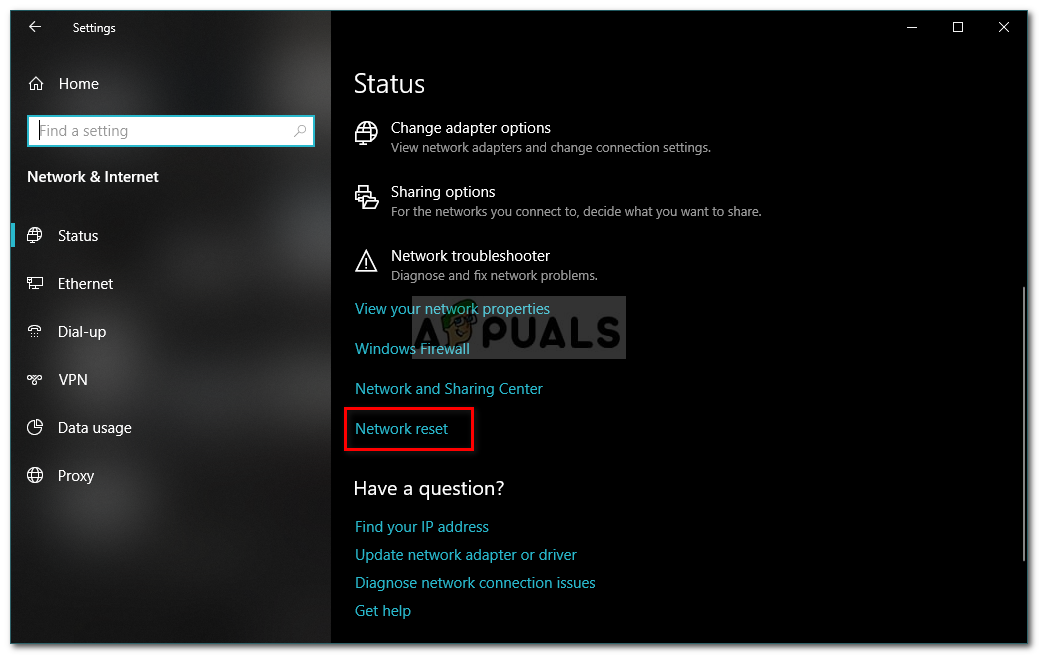
Network Reset - Click it and then click Reset now to initiate the reset.
Solution 3: Uninstalling Network Driver
Another reason due to which you are facing the error can be your network adapter driver. An obsolete or corrupt driver might be causing the issue due to which you are not able to connect to the internet. In such a case, you will have to reinstall the network driver. Here’s how to do it:
- Go to the Start Menu, type in Device Manager and open it up.
- Expand the Network adapters list.
- Double-click on your network driver to open Properties.
- Switch to the Driver tab and then click Uninstall Device.
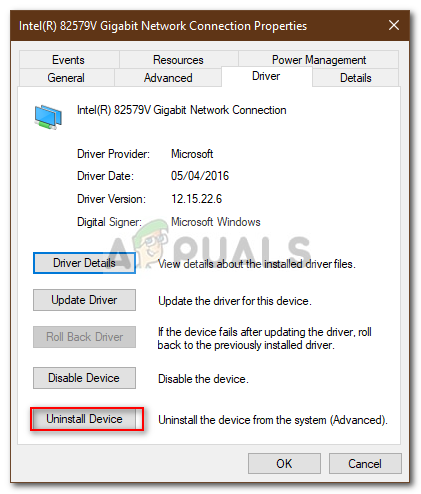
Uninstalling Network Adapter - Once the driver has been uninstalled, restart your system which will install the driver again automatically.
- See if it fixes the issue.
Solution 4: Resetting Winsock and TCP/IP
You can also try to fix the issue by resetting Winsock and TCP/IP entries to the installation defaults. Here’s how to do it:
- Press Windows Key + X and select Command Prompt (Admin) from the list to open an elevated command prompt.
- Once the command prompt loads up, type in the following command:
Netsh winsock reset catalog
- Afterward, enter the following command:
Netsh int ip reset
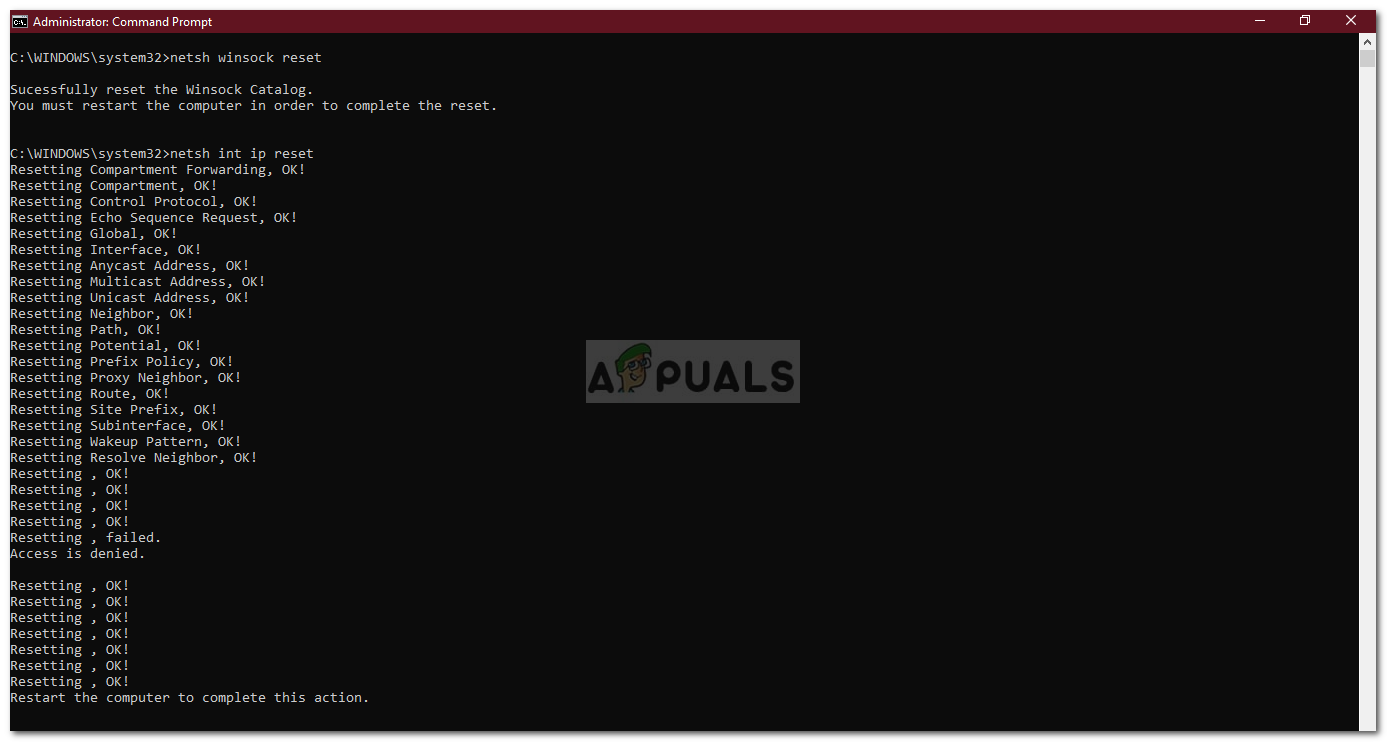
Resetting Winsock and TCP/IP - If you get the Access Denied message, turn off your third-party antivirus and try again.
- Restart your system and see if it resolves the issue.
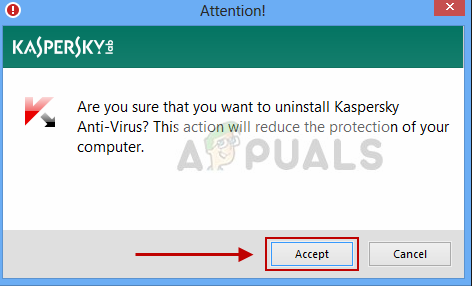
Solution 5: Uninstalling Third-Party Antivirus
There have been some user reports which state that they were encountering the issue because of the third-party antivirus on their system. Mostly, this was caused by the ZoneAlarm antivirus, however, that doesn’t mean that ZoneAlarm is the only culprit. If you are not using ZoneAlarm, you should uninstall any other antivirus that you have installed on your system. Once done, restart the system and see if it fixes the issue.