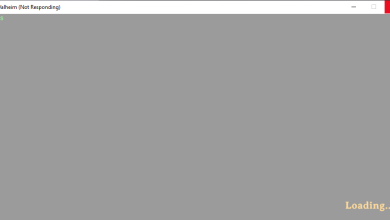
How to Fix Constant Crashing in The Last of Us Part 1
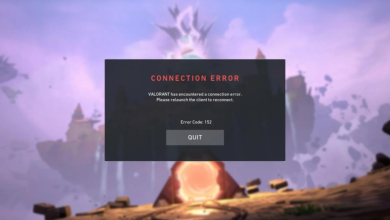
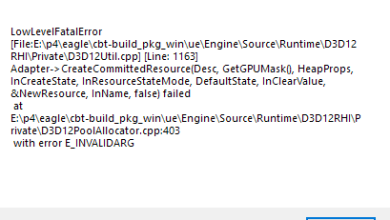
The Last of Us Part 1 on PC has been experiencing persistent crashing issues since its release. Many players report crashes during gameplay, and some even have trouble launching the game. Our investigation has revealed several potential causes, with incompatible GPU drivers, an overloaded RAM cache, and an overclocked GPU being the primary causes of this issue.

Troubleshooting Prerequisite – Check System Requirements
Before attempting the troubleshooting steps provided in this guide, please refer to the screenshot below to review The Last of Us Part 1’s system requirements.
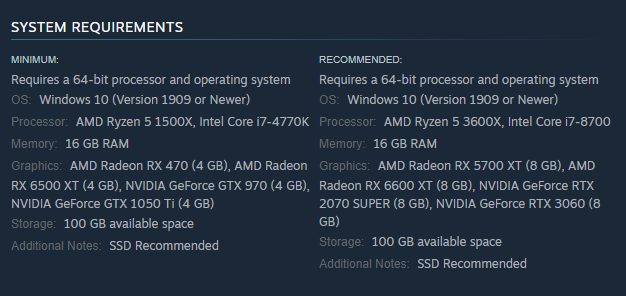
Compare these requirements with your system’s specifications. If your system does not meet or barely satisfies the minimum requirements, weak hardware could be the cause of the crashes. You can potentially decrease the frequency of crashes by adjusting the game’s graphical settings.
1. Decrease Graphics Settings
If the game consistently crashes, it could be because the graphics settings are too demanding for your system. You should adjust these settings to align with your PC’s hardware capabilities.
The settings that significantly affect performance include:
- Display/Render Resolution.
- Framerate Cap.
- Resolution Scaling Mode.
- Animation Quality.
Experiment with these settings, aiming for optimal performance without overloading your system. Use the VRAM Usage bar as a guide to determine the most suitable settings.

If adjusting these settings does not resolve the crashes, proceed to the next potential solution.
2. Clear RAM Cache
The Last of Us requires substantial free RAM to function smoothly on PC. Excess background applications and a full RAM cache can result in frequent game crashes.
First, close any unneeded background applications using Task Manager to free up RAM.
- Download the RAMMap tool and extract it on your computer.
Downloading RAMMap - Run the “RAMMap.exe” file from the extracted folder.
- In the opened window, select the “Empty” menu in the top-left corner.
- Choose “Empty Standby List.”
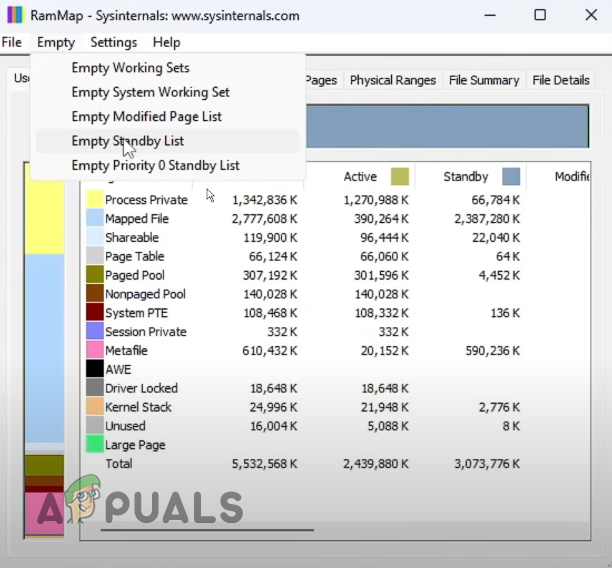
Clearing RAM Cache - Exit the program.
Note: Clearing the RAM cache is safe and only removes temporary files from memory, leaving permanent files and system settings intact.
After clearing the RAM cache, restart the game to see if the crashes persist. If they do, move on to the following solution.
3. Roll Back GPU Drivers (For NVIDIA Users)
Community feedback suggests that the latest NVIDIA GPU drivers may worsen game performance rather than improve it. If you’re using the most recent drivers, consider reverting to an older version. To determine your current driver version, follow these steps:
- Open NVIDIA GeForce Experience.
- Select the “Drivers” section at the top.
- Review your driver version in the “Currently Installed” area.
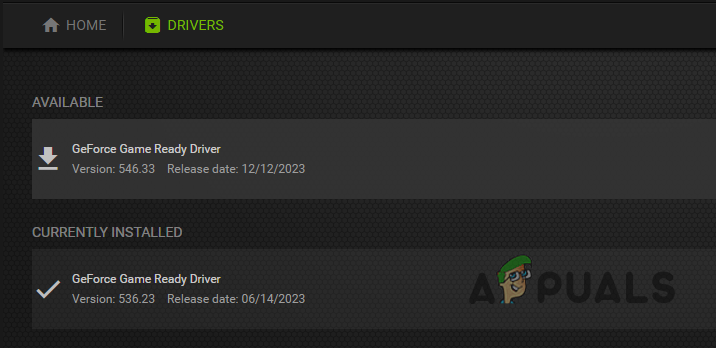
Checking current driver version
You’ll need to uninstall your current drivers using the Display Driver Uninstaller program. Before running the uninstaller, boot your system into Safe Mode to ensure an uninterrupted removal. Follow these steps to enter Safe Mode:
- Press the Windows key to access the Start menu.
- While holding the Shift key, select the power icon, then choose Restart.
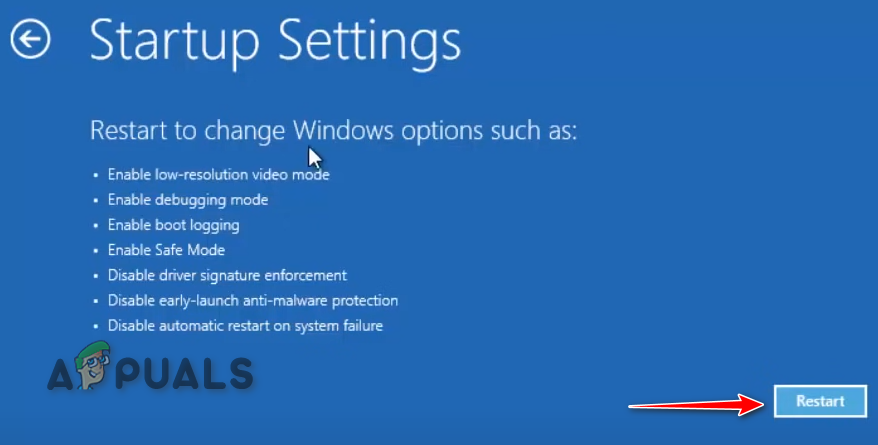
- After rebooting, navigate through Troubleshoot > Advanced Options > Startup Settings.
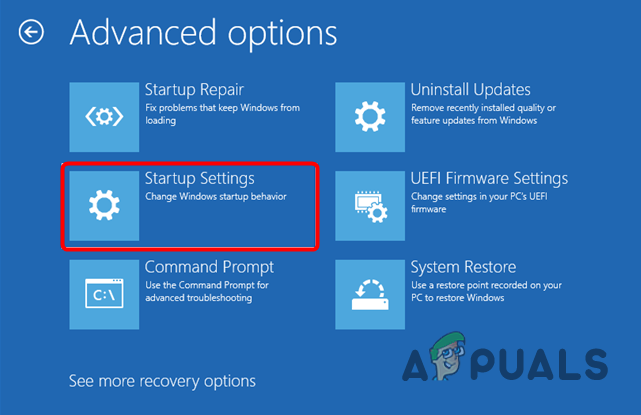
Navigating to Startup Settings - Select Restart.
Restarting your PC - After restarting, press F4 to initiate Safe Mode.
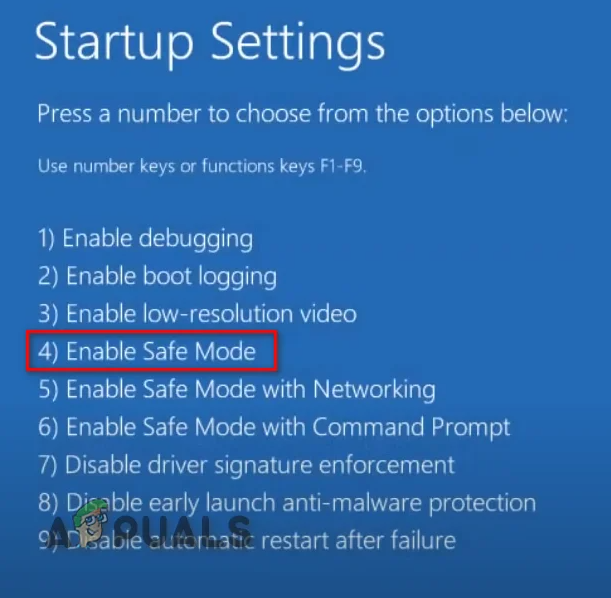
Rebooting into Safe Mode
In Safe Mode, execute Display Driver Uninstaller, choose “GPU” as the device type, “NVIDIA” as the manufacturer, and click “Clean and Restart.”

After removing current drivers, download an older driver version from NVIDIA’s official website. If you’re unsure which GPU you have, consult this guide.
Install the older drivers, then check if the game still crashes. If it does, consider the next solution.
4. Undervolt GPU
Due to sub-optimal optimization of The Last of Us Part 1, the game may not efficiently utilize your GPU, leading to overheating and crashes.
To mitigate this, you can limit the GPU’s power draw by undervolting it. Undervolting decreases the voltage provided to the GPU, allowing it to operate at a reduced power level, avoiding overheating and stabilizing performance.
Start by downloading MSI Afterburner. This software enables you to adjust the voltage and clock speed of your GPU and monitor its temperature.
Once installed, open MSI Afterburner and enable “Unlock Voltage Control” and “Unlock Voltage Monitoring” in the settings. Restart the application for the changes to take effect.
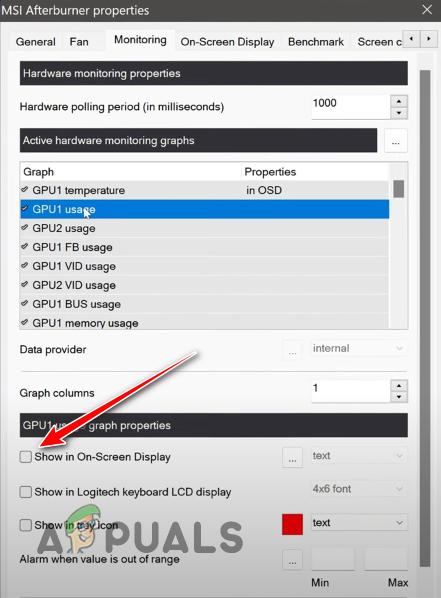
Then, go to the Monitoring tab in Settings and select “GPU1” or “GPU” (avoid GPU2) to ensure you’re modifying the dedicated GPU. Also, enable the “Show in On-Screen Display” option to monitor voltage and speed in real-time while gaming.
Carefully lower your GPU’s clock speed and voltage just enough to eliminate crashes while maintaining performance. This delicate process requires precision, so consider following our detailed undervolting guide for assistance.