How to Fix The connection was denied because the user account is not authorized for remote login?
The error ‘The connection was denied because the user account is not authorized for remote login‘ ususally occurs when the account you are using to remotely connect to the target system lacks the necessary permissions.
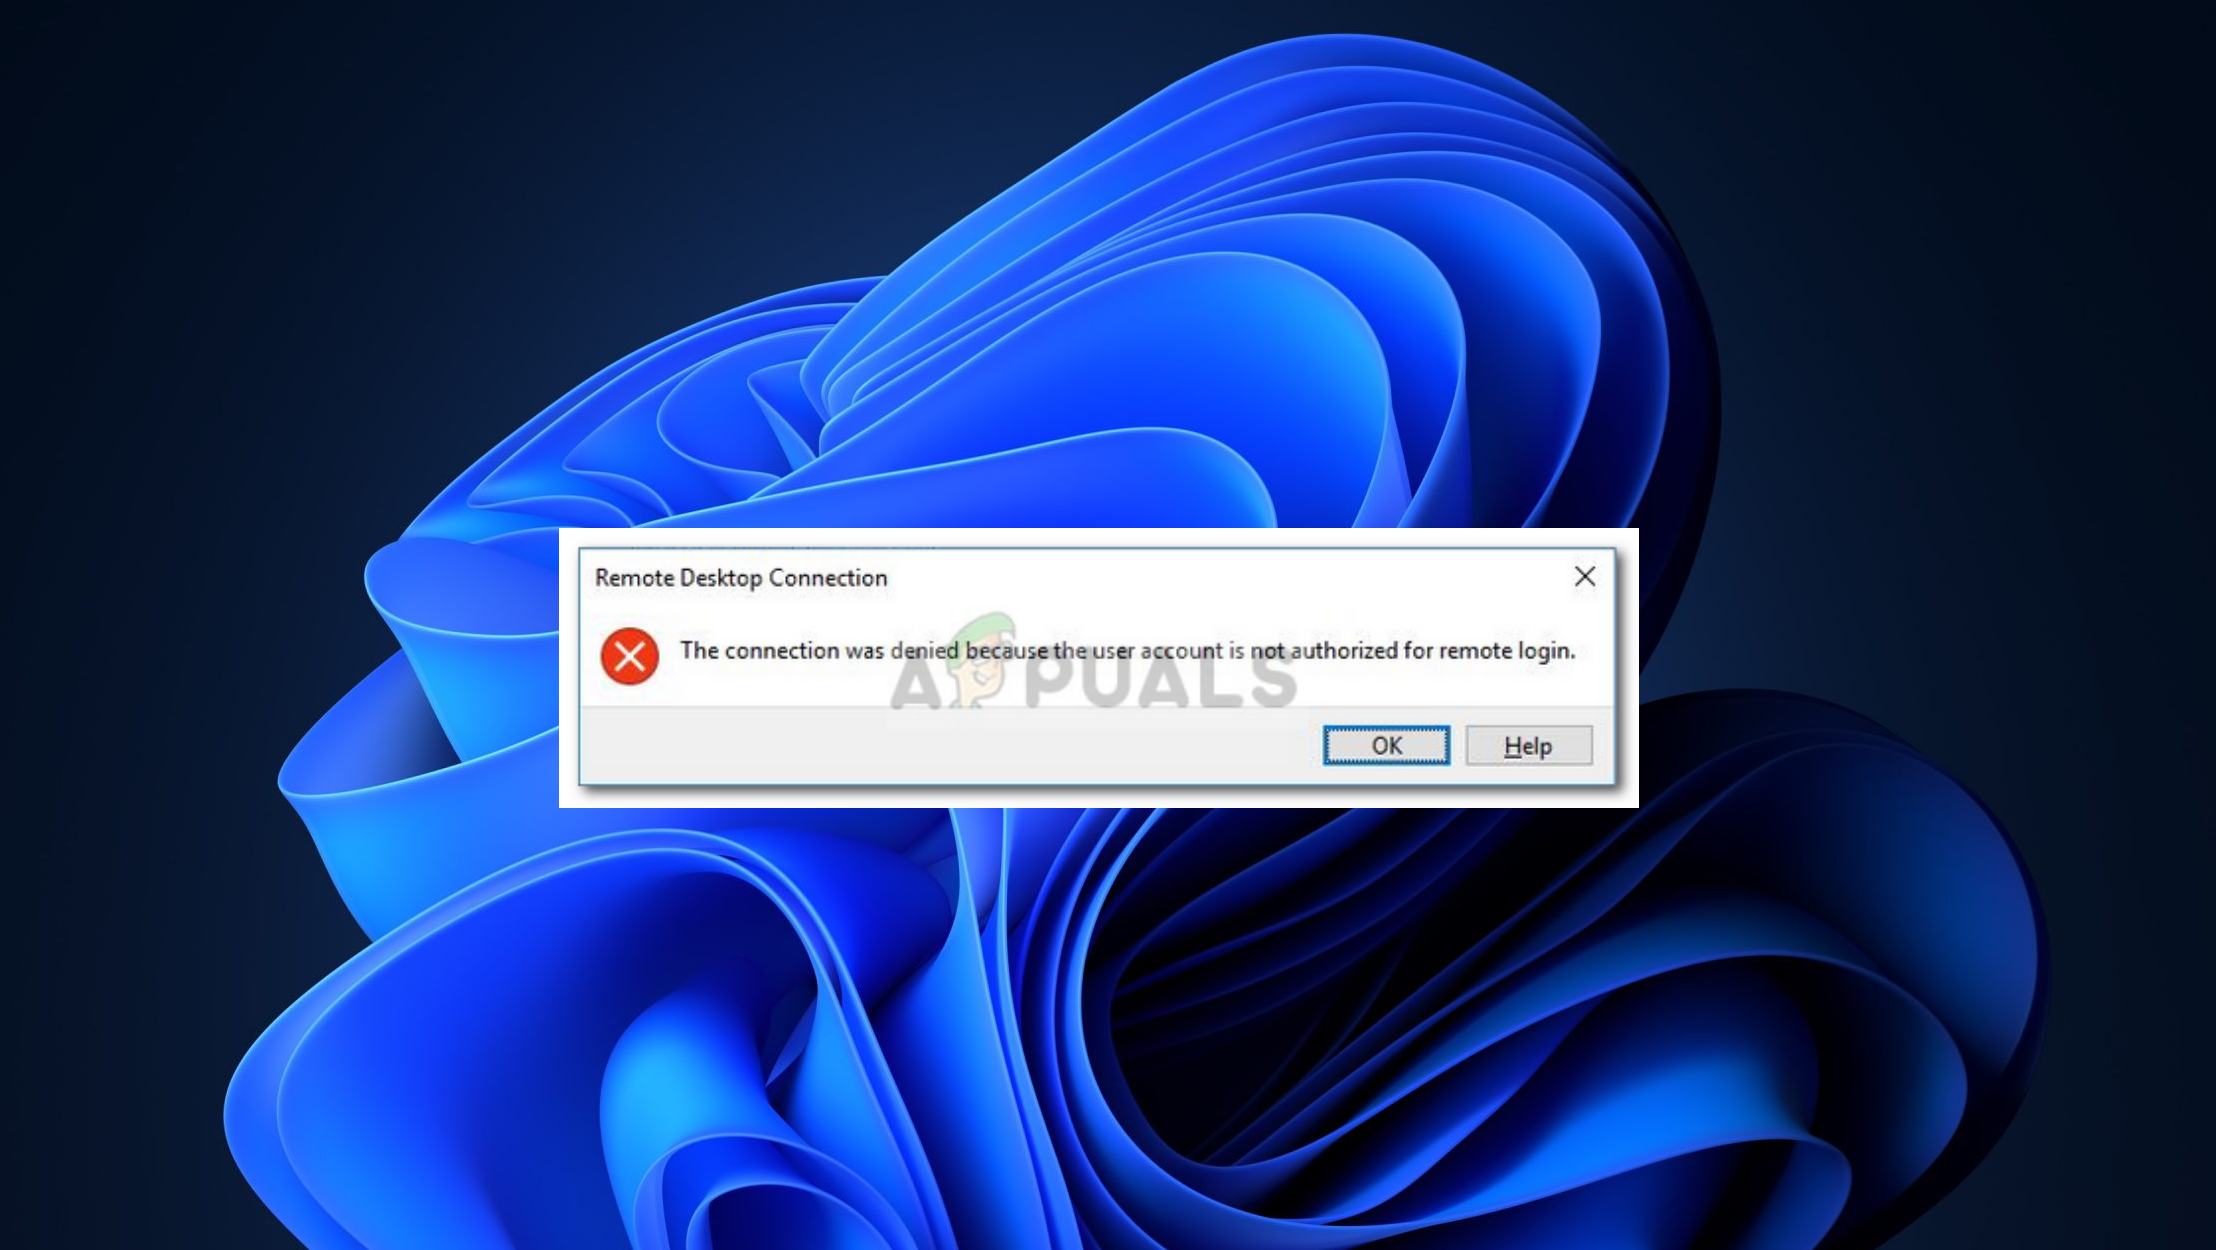
The cause of the error is indicated in the message itself, which is:
- Insufficient permissions: The error occurs because your user account does not have the required permissions to establish a connection with the target host.
- RD service: In some instances, the issue may occur if your Remote Desktop service has the wrong log-on user configured.
To resolve the error, apply the following workarounds using an administrator account:
1. Create a New Security Group
Note: This solution will not work if you’re using Windows Home Edition.
Creating a new security group and assigning it the necessary permissions to log on through Remote Desktop Services makes sure that only authorized user accounts within this group can remotely connect to the system.
By adding users to this group, you grant them the ability to establish a Remote Desktop connection. This resolves the issue for users who were previously blocked due to insufficient rights.
- Press Windows Key + R to open the Run dialog box.
- Type secpol.msc and press Enter.
- Navigate to Local Policies > User Rights Assignment.
- Locate and double-click on Allow log on through Remote Desktop Services.
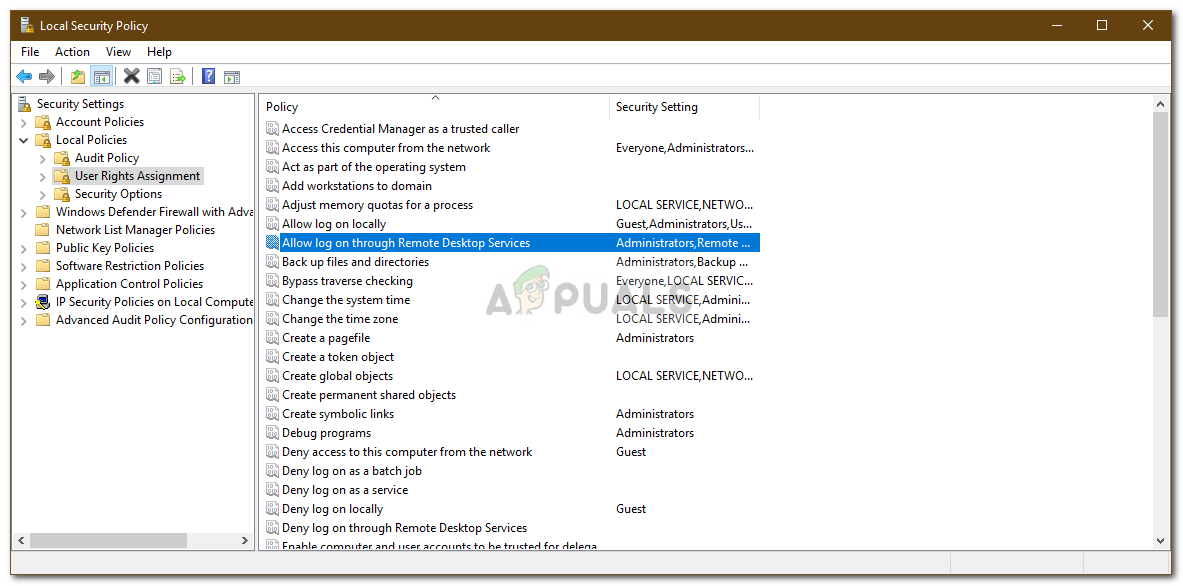
Local Security Policy - If there is no Remote Desktop Users group listed under Administrators, follow the instructions below. If the group already exists, proceed to the next solution.
- Click Add User or Group and input ‘Remote Desktop Users’ in the Enter the object names to select field.
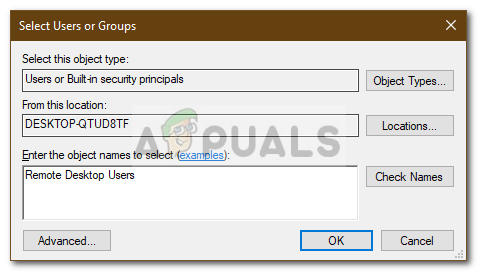
Creating Remote Desktop Users Group - Click OK.
- Restart your system for the changes to take effect, or execute the following command in an elevated Command Prompt:
gpupdate /force

Force Updating Group Policy
2. Grant Access to Your User Account
Granting access to your user account resolves the problem by adding your user account to the “Remote Desktop Users” group. This group has the necessary permissions to establish remote desktop connections.
By being a member of this group, your account is authorized to log in remotely to the computer.
- Press Winkey + R to open the Run dialog box.
- Type lusrmgr.msc and press Enter.
- Select Users and then double-click on your user account.
- Go to the Member Of tab.
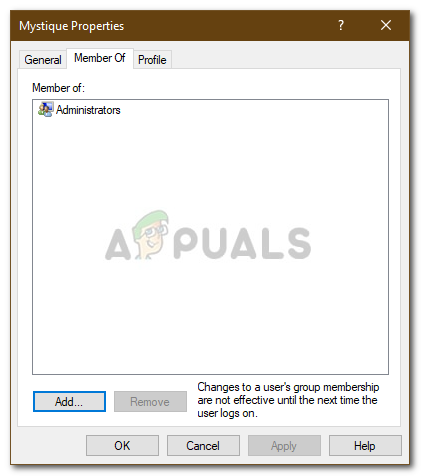
User Groups - If the Remote Desktop Users group is not listed under Administrators, click Add.
- Click Advanced, then click Find Now.
- Double-click Remote Desktop Users from the list and click OK.
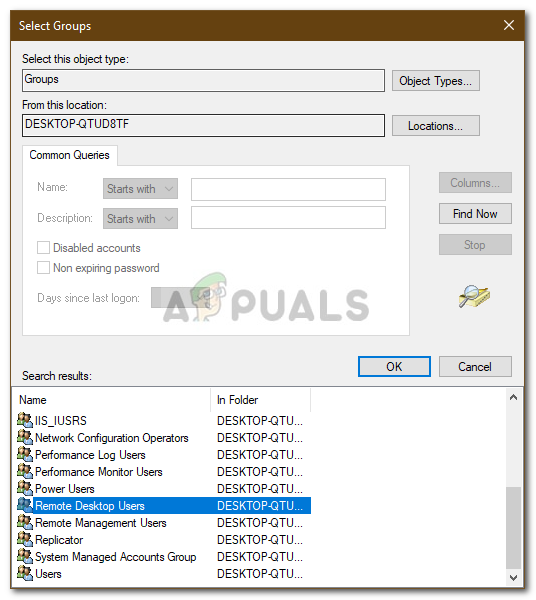
Adding User Account to Remote Desktop Users Group - Your user account should now be a part of the Remote Desktop Users group.
- Attempt to establish the connection again.
3. Check Remote Desktop Service Log On User
In this step, we have to make sure that the service is running under an account with the necessary permissions (e.g., “Network Service”) to facilitate remote connections. If the service is running under an incorrect account (e.g., “Local Service”), it may lack the required privileges to support remote login functions.
Changing the service logon account to the one with the necessary network permissions can resolve this issue, allowing users to establish remote desktop connections.
- Press Windows Key + R to open the Run dialog box.
- Type services.msc and press Enter.
- Find and double-click on Remote Desktop Service.
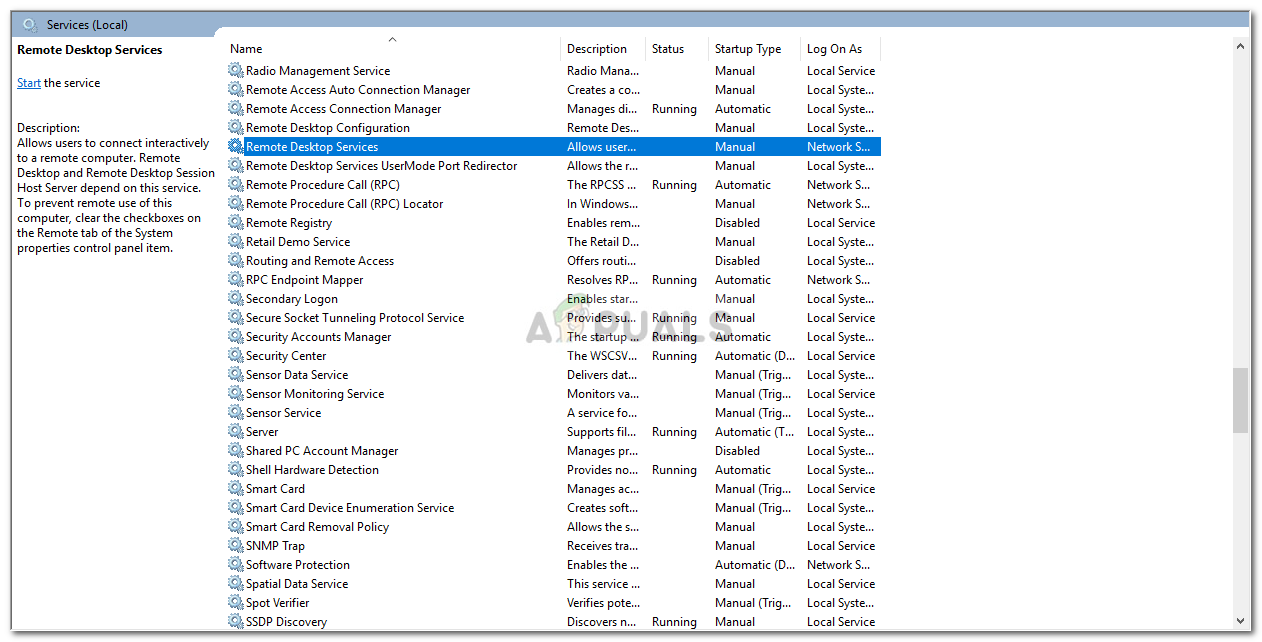
Remote Desktop Service - Switch to the Log On tab.
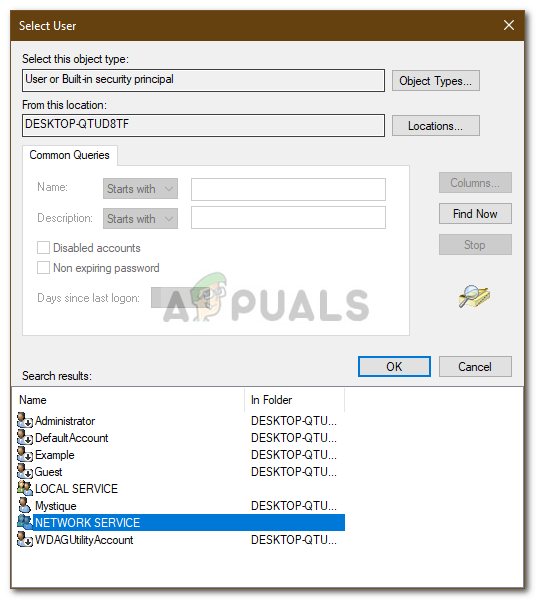
- If the account listed is Local Service, change it by clicking Browse.
- Click Advanced, then Find Now.
- Double-click Network Service from the list and click OK.
Changing Remote Desktop Service Log On User - Restart the service by right-clicking on it and selecting Restart.