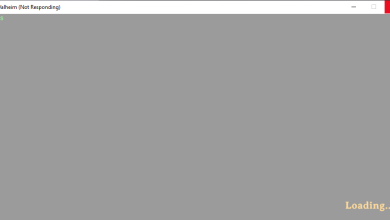
Fix: Fallout 76 Stuck on Loading Screen
This specific issue regarding Fallout 76 predominantly appears when trying to switch servers while playing the game and it causes a long (or sometimes even infinite) loading screen which eventually loads the game but totally ruins the experience for the player.

The error has been around for a long time now but there seems to be little or none reaction from Bethesda regarding any universal solution or method. However, some players were lucky enough to discover various methods of resolving the problem on their own so make sure you follow the methods in this article and hopefully resolve the problem!
What Causes the Fallout 76 Stuck on Loading Screen Error?
The real causes for this problem are generally unknown and even Bethesda has avoided the answer to this question for a long time now. Still, two causes can be recognized and isolated:
- Something might be wrong with the game’s installation and its core files. If that is the case, verifying the game’s files (Steam version) or reinstalling the game might help.
- The framerate is capped by default but some users suggested that undoing so may get rid of long loading screens.
Solution 1: Verify Integrity of Game Files
If you have purchased and installed the game via Steam, you have access to a great option which enabled you to check the game’s installation for missing or corrupt files and the utility will enable you to redownload and replace these files which can indeed solve many problems regarding the game. Make sure you try this out!
- Start Steam by double-clicking its icon on the Desktop or by searching for it in Start menu. Head over to the Library tab in the Steam window by locating the Library tab at the top of the window, and locate Fallout 76 in the list of games you own in your library.
- Right-click on its entry and choose Properties. Navigate to the Local Files tab and click the Verify Integrity of Game Files
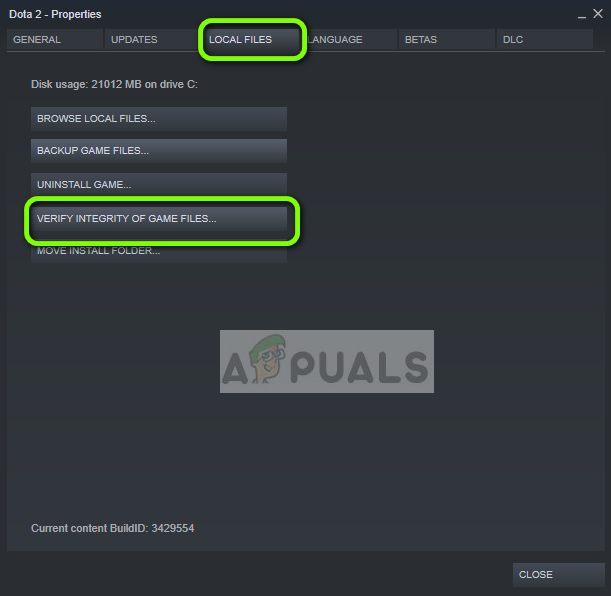
Steam – Verify integrity of game files
- Wait for the tool to finish doing its thing and you should probably see that a couple of files may have been downloaded. Afterward, relaunch the game and check to see if you still encounter Fallout 76 being stuck on the loading screen!
Solution 2: Edit the Game’s Preference File
There is an option to change in the game’s configuration file which will effectively uncap the framerate and hopefully cause the game to stop getting stuck at the loading screen each time players decide to switch servers. However, this method comes with an unwanted side-effect of stuttering frames which can be fixed by turning V-Sync on for the game.
- Navigate to the folder’s location in the File Explorer simply by opening a folder and clicking This PC or My Computer from the left navigation pane or by searching for this entry in the Start menu.

- Anyway, in This PC or My Computer, double-click to open your Local Disk and navigate to Users >> Your Account’s Name >> Documents >> My Games >> Fallout 76. Windows 10 users can simply navigate to Documents after opening File Explorer from the right-side navigation menu.
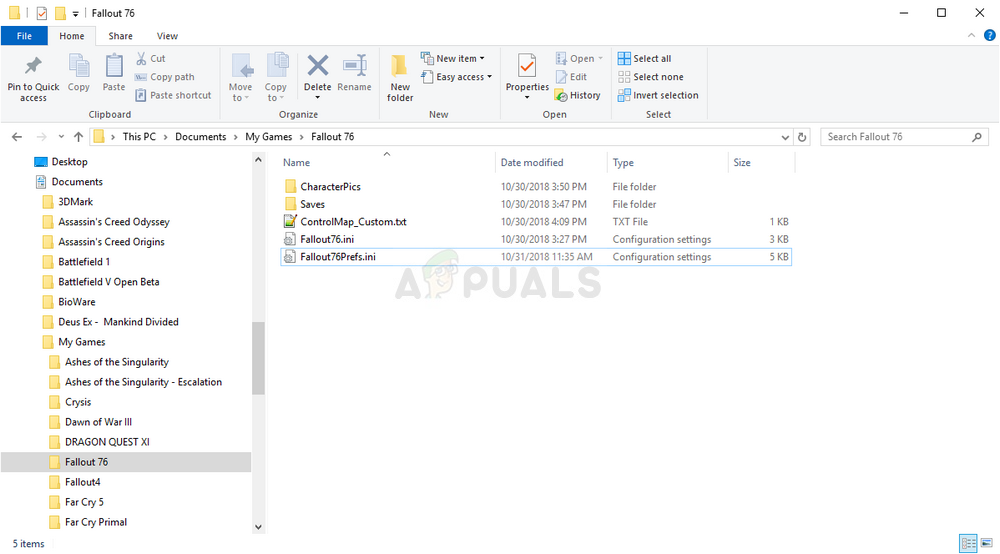
- Right-click the file called named ‘Fallout76Prefs.ini’ and choose to open it with Notepad.
- Use the Ctrl + F key combination or click Edit at the top menu and select the Find option from the dropdown menu in order to open the Search box.
- Type “iPresentInterval” in the box and change the value next to it from 1 to 0. Use the Ctrl + S key combination in order to save the changes or click File >> Save and exit Notepad.
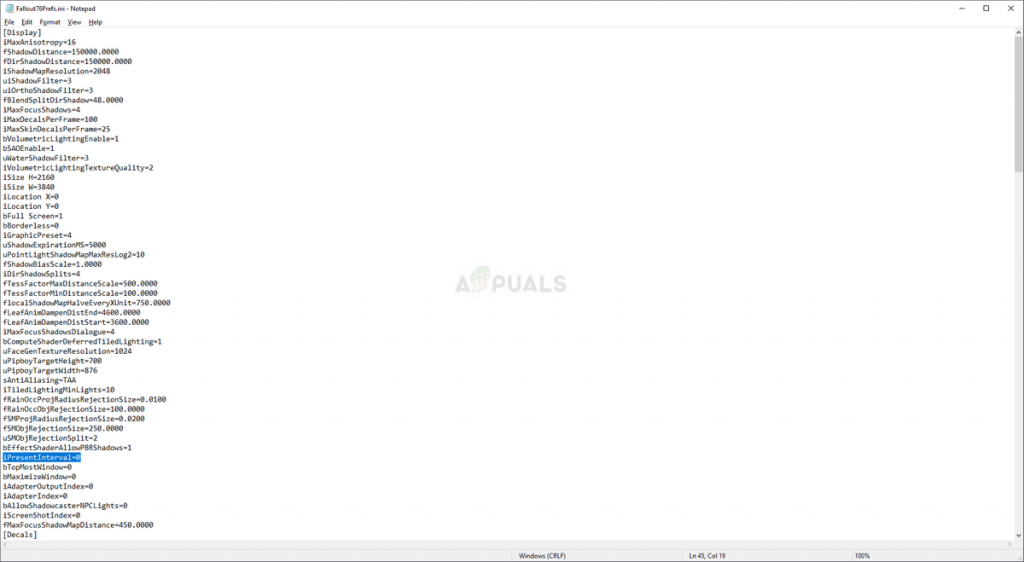
- Try running the game again in order to check if the Fallout 76 stuck on loading screen problem still appears while playing the game!
Note: If you notice that your framerate is stuttering or if the game doesn’t feel natural at all, you might want to consider forcing the game to use V-Sync using the tool provided by your graphics card manufacturer. Below you will find instructions on how to do it for NVIDIA and Radeon users!
NVIDIA:
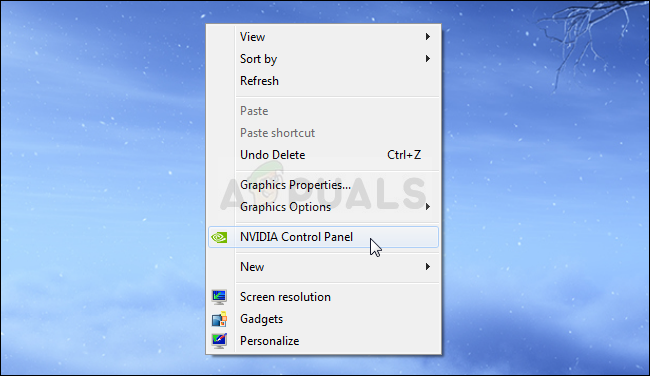
- Right-click on your desktop, at the blank side without icons, and select the NVIDIA Control Panel entry from the context menu which will appear. You can also double-click the NVIDIA icon in the system tray if you see it. NVIDIA Control Panel can also be located in the regular Control Panel by switching to the Large icons view and locating it.
- Under the 3D settings section at the left navigation pane, click on Manage 3D settings at the left navigation side and navigate to the Program Settings
- Click on Add and make sure you browse your PC for the executable which is used to launch Fallout 76. It’s located in the folder where you decided to install the game.
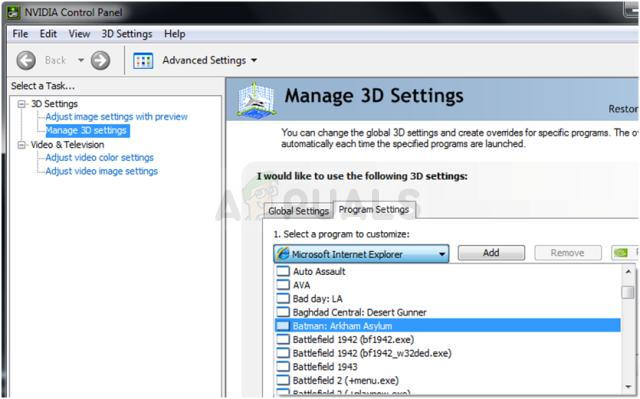
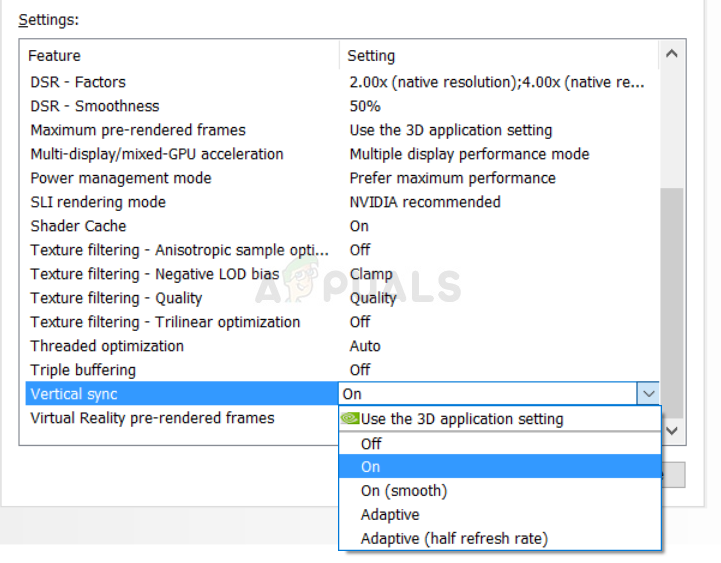
- Under the Specify the settings for this program section, scroll down until you see the Vertical Sync Click the arrow and set it to On. This will force V-Sync for Fallout 76!
AMD:
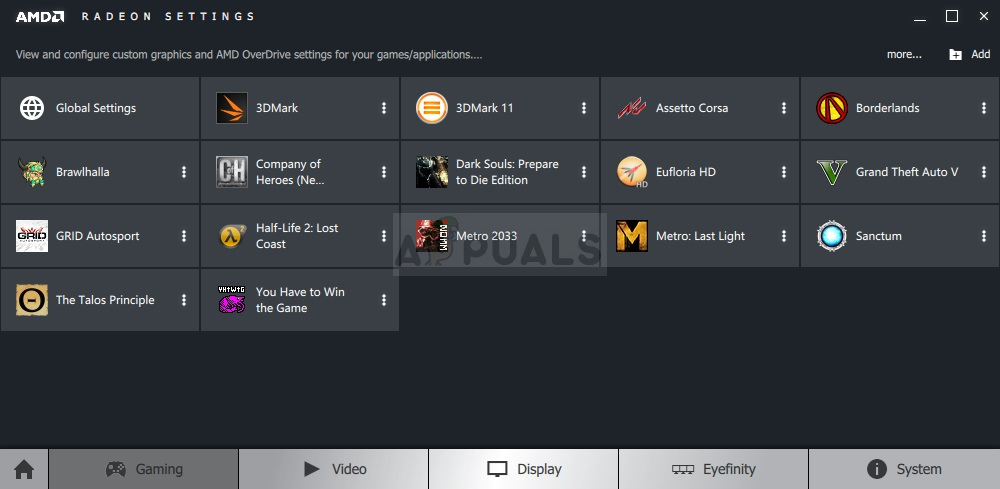
- Right-click the graphics card icon on your taskbar (after choosing to view all apps) and choose Radeon Settings from the context menu.
- Click the Gaming tab in the home screen and choose Fallout 76 from the list of games you have on your computer.
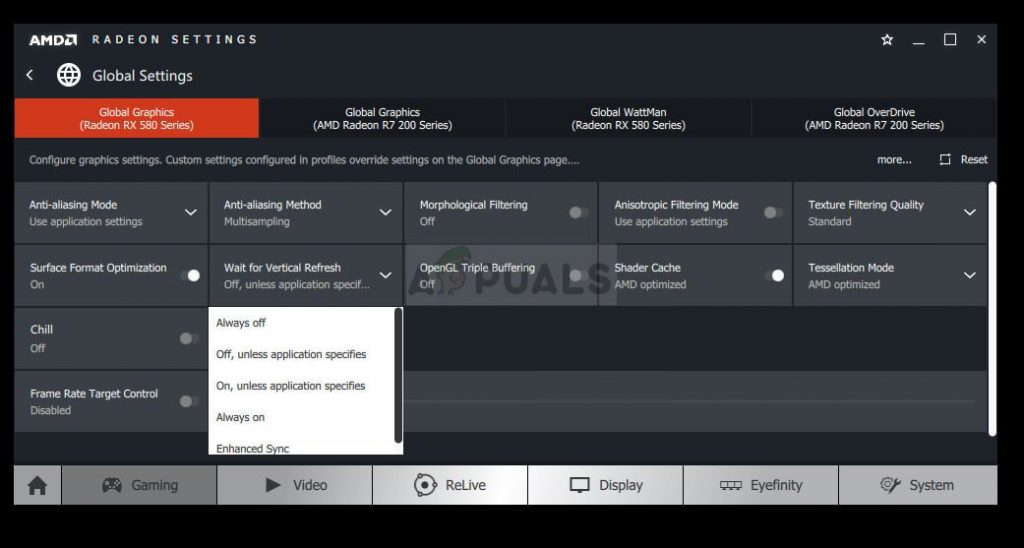
- Select the Profile Graphics option at the top and click the arrow next to the Wait for Vertical Refresh entry on the list.
- Choose the Always on option from the dropdown menu. You can also use the Enhanced Sync option if you are using some of the newer Radeon graphics cards.
- Save the settings for the game and relaunch it to see if the framerate still stutters.
Solution 3: Reinstall the Game
Reinstalling the game should be the last thing on the list but the good thing is everything is saved to your account and you won’t have to start all over again. If you have a good Internet connection or a strong PC, the game should be reinstalled in no time and the error should now cease to appear.
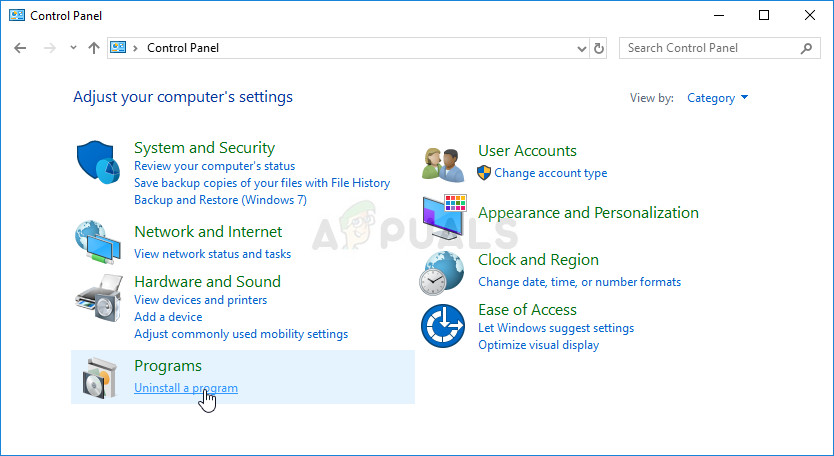
- Click on the Start menu button and open Control Panel by searching for it or by locating it in Start menu (Windows 7 users). Alternatively, you can click on the gear icon in order to open the Settings app if you are using Windows 10 as the operating system on your computer.
- In the Control Panel window, switch to View as: Category at the top right corner and click on Uninstall a Program under the Programs section.
- If you are using the Settings on Windows 10, clicking on Apps section from the Settings window should open the list of all installed programs on your computer.
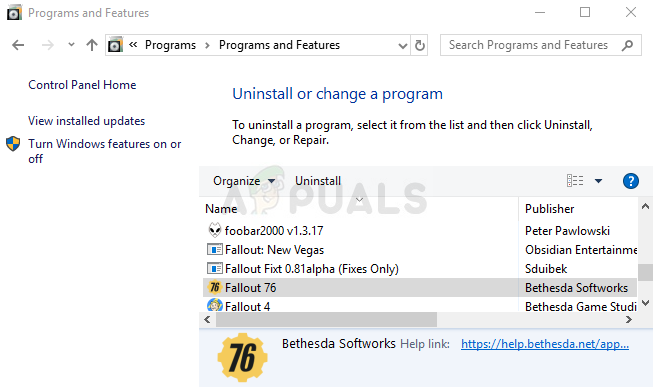
- Locate Fallout 76 in the list either in Settings or Control Panel, click on it once and click the Uninstall button located in the Uninstall a program window. Confirm any dialog choices to uninstall the game, and follow the instructions which will appear on screen.
You will need to download it again from Steam by locating in the Library and choose the Install button after right-clicking on it. If you own a physical copy, insert the disk and install it.