Fix: Error Code 43 on MacOS
Mac OS X has always had a reputation of being a way simpler operating system than Windows and Linux and its user interface is quite user-friendly. There are quite a few error codes that appear on OS X regularly but Apple had to sacrifice certain features Windows possesses in order to achieve this simplicity.
Mac OS X is used by most businessmen and most programmers because of its lightning speed, and the fact that MacBooks are extremely light and easy to carry around. However, users have experienced the -43 error code and they were unable to figure out just what it might mean. Let’s check out more about the error code.
Error Code -43 on Mac OS X
Error code 43 usually appears when users try to delete a file and move it to the trash. The error message it appears along to usually goes like: “The operation can’t be completed because one or more required items can’t be found. (Error code -43)”. Users have reported that this particular error code is sort of characteristic for the Mac OS X El Capitan or OS X 20.2.

This bug check may appear due to a hard disk issue, non-existent share point of file, partial download of a particular file, the needed document is in use, you have no permission to manage certain files, the file is locked, and so on. Luckily, there are a couple of things that you can do to fix Error Code -43 on Mac OS X El Capitan.
Solution 1: Using Disk Utility
Since the Error -43 code is usually related to missing or corrupt files, you may need to check your permission issues or directory corruption. Disk Utility is a built-in tool that may help you deal with similar hard drive-related issues so make sure you run this tool before trying anything else.
- Navigate to the Apple menu (at the top left part of the screen) >> Restart. After your device restarts, press and hold the Command + R key combination until you see the Apple logo. Stop pressing the keys after you see it.

- Click on the Disk Utility option before pressing Continue.
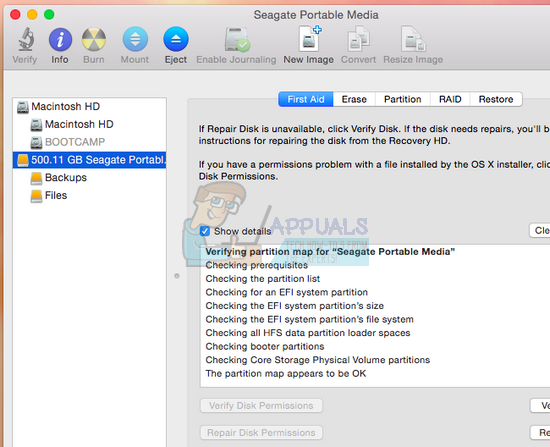
- Locate the sidebar and select the disk you want to repair (the one where the file you wanted to delete is located). Press the First Aid button and proceed with the Disk Utility check.
- There are several different scenarios of what the Disk Utility may report. If the reports suggest that your disk is about to fail, back up everything you can and purchase a new drive because you won’t be able to fix this one.
- Click Run. If the Disk Utility tool reports that there are no issues with your drive or that the issue which existed has been taken care of, you can exit the tool freely. Feel free to click on the Show Details button in order to take a look at the issue which was taken care of.
- The “overlapped extent allocation” error may also appear and it suggests that there are several files occupying the same spot on your drive. One of those files is most likely corrupt and you will have to locate it in the DamagedFiles folder.
- If the file is not of utter importance to you, you can delete it freely. However, if the file is very important, try opening it and check to see if it’s corrupt or not.
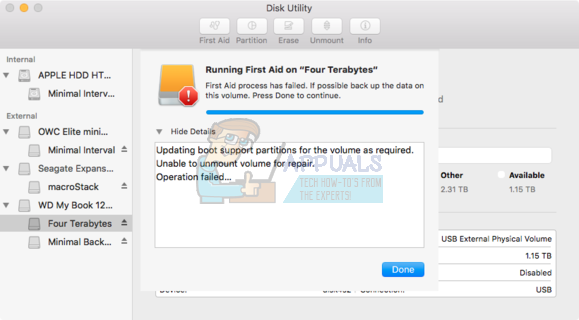
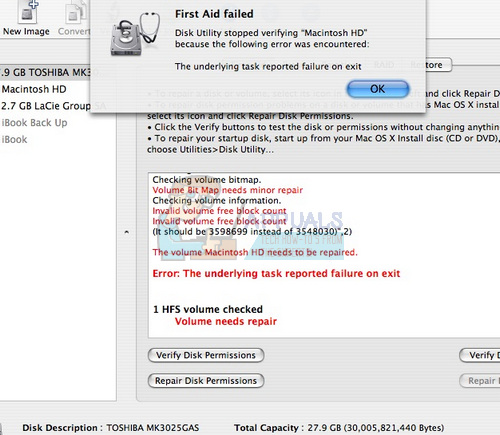
- The last scenario which may play out is that you won’t be able to repair or check your disk at all. If the “The underlying task reported failure” error message appears, try running the First Aid tool again. If the error message keeps on appearing, backup your data and format your disk.
Solution 2: Reset NVRAM (PRAM)
NVRAM (nonvolatile random-access memory) is a small amount of memory that your Mac uses to store certain settings and access them quickly. The settings stored in NVRAM depend on your Mac and the devices you’re using with your Mac.
There are plenty of issues that can be solved by resetting NVRAM and this particular error is definitely one of them. Follow the instructions below in order to proceed with this process.
- Turn off your device and turn it on again. Make sure you execute step 2 as soon as your Mac OS X device starts to boot.
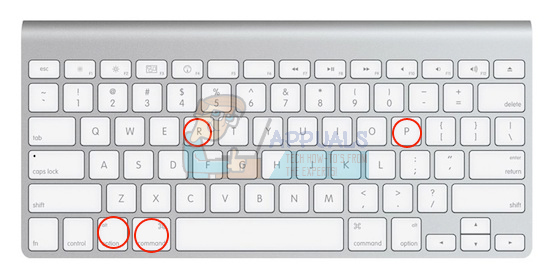
- Hold the following four keys together: Option, Command, P, and R; for about 20 seconds and you should be able to see that your Mac is about to restart.
- Mac will proceed with the startup process. If you notice that some of the settings have been reset, such as the volume, time and date settings, or the resolution of your screen, make sure you adjust them on time.
Optional: Delete Locked Files
- In Terminal, execute the following command:
chflags -R nouchg.
- After that, open your Trash, select all the items (⌘ Cmd-A) and drag everything to the Terminal window, then press Return ⏎.
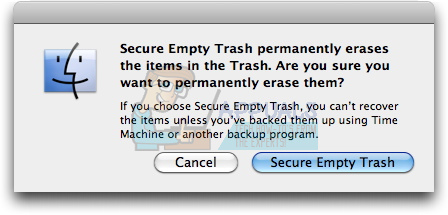
- Empty your Trash
Solution 3: A Helpful Tip
This particular fix was suggested by several Mac users who experienced the same issue once before. Try it out as it appears to be quite simple.
- Locate your session file on your computer, right-click on it, and choose the Show Package Contents option.

- There are usually three folders inside this option: Media, Resources, and Alternatives.
- In the Alternatives and Resources folders, try to locate a file named “DisplayState.plist.”
- Delete all of the files with the same name immediately. If you are afraid something might go wrong, drag these files to your desktop before deleting them in order to create a backup copy.
- If the error has been fixed by now, you can delete the backup copies freely. However, it’s recommended that you keep them for a while until you see that everything has been taken care of.
Solution 4: Force Quit Finder
Force quitting and relaunching the Finder can fix this issue easily. Finder probably encountered a bug that actually prevented it from deleting a file properly but Mac only produced the Error Code -43 without trying to find a solution.
This fix may appear too simple but several users have reported that it was able to fix the issue for them in no time.
- Open the Apple menu located at the top left part of your windows and choose the Force Quit option.
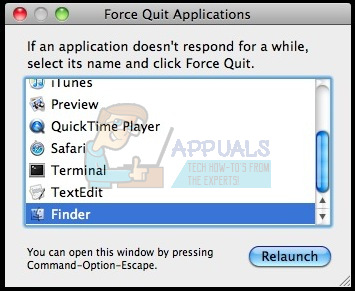
- Locate Finder in the list of applications and choose the Relaunch option which should fix the problem easily.
- Check to see if the issue persists, if it does you can follow the other methods.
Solution 5: Using Terminal Commands
In certain cases, the error can be eradicated by implementing some commands from the terminal and using them to delete certain files. In order to do so, follow the guide below.
- Open your Mac’s Terminal.
- Type in the following command.
rm (space)
- Drag and drop the files which give the error 43
- Press “Enter” and the files will automatically be removed from your system.
- Check to see if the issue persists.
Note: If this doesn’t work, try to reinstall the High Sierra Update from the store and check if that fixes things. Also, make sure that the file that needs to be deleted, doesn’t have any special characters such as “+,*,},{,&,^,%” in its name.